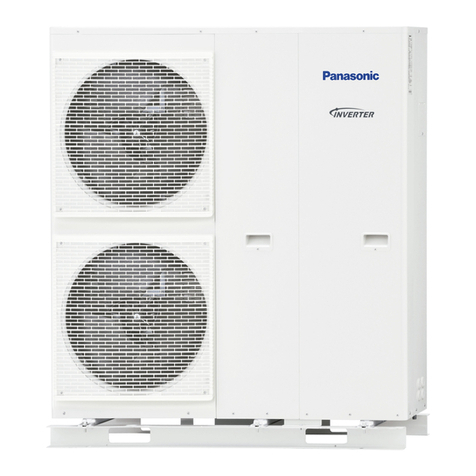
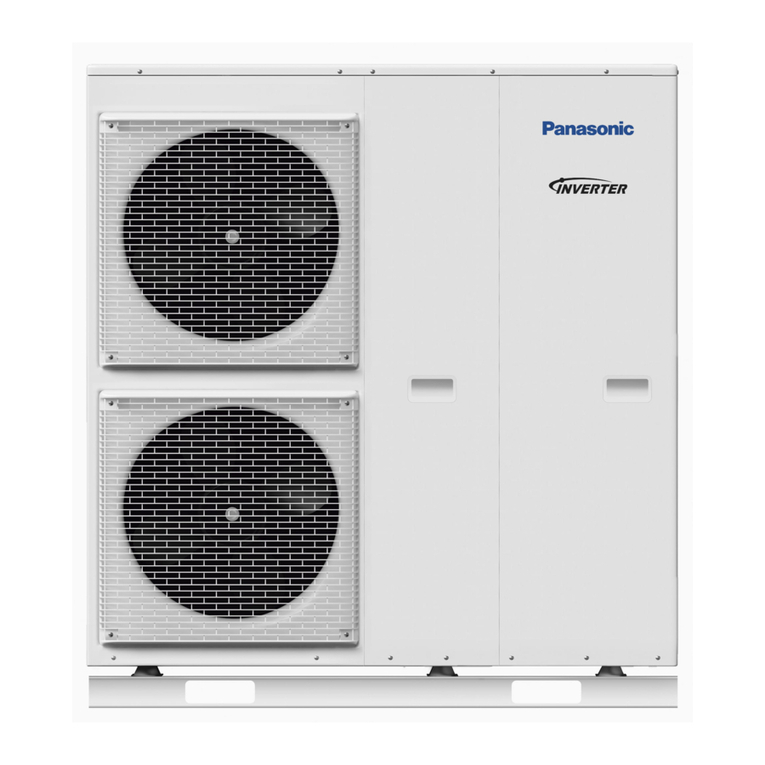
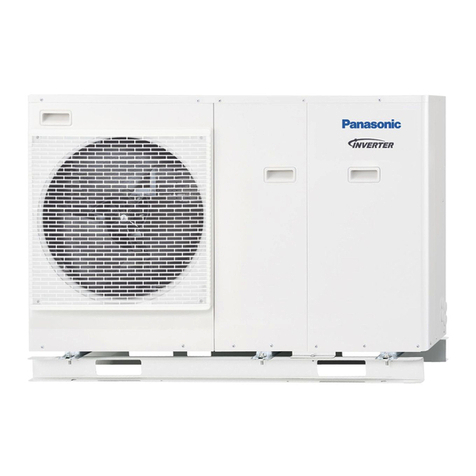
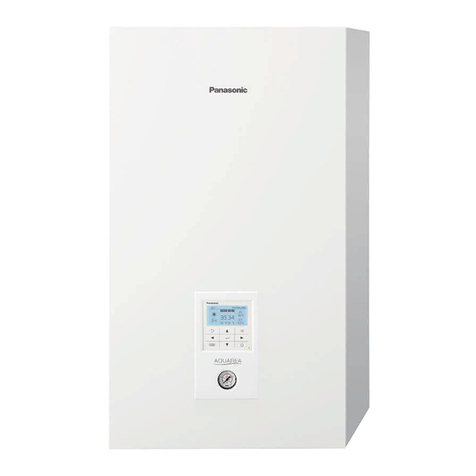
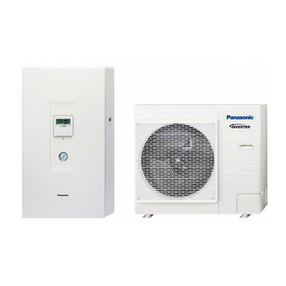
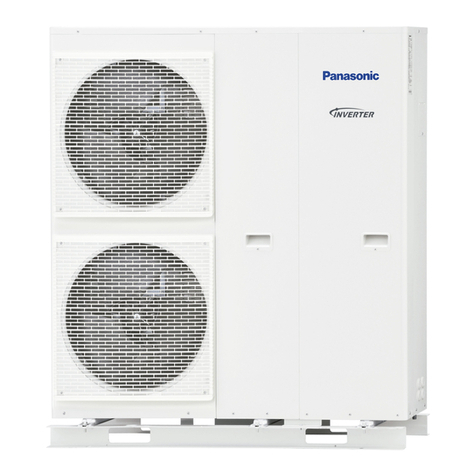
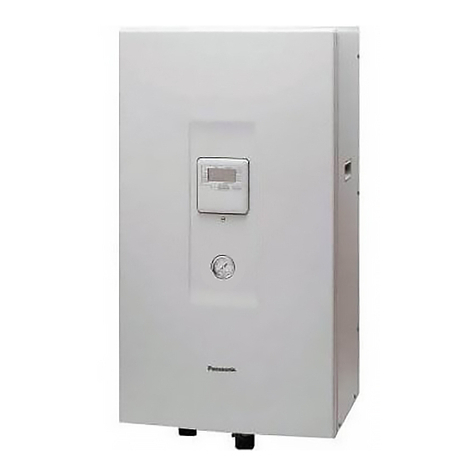
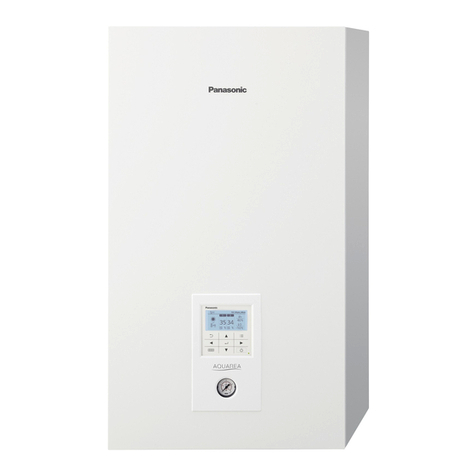
Panasonic WH-SDC03H3E5 User manual

© Panasonic Corporation 2015.
Order No: PAPAMY1509111CE
Indoor Unit Outdoor Unit
WH-SDC03H3E5
WH-SDC05H3E5
WH-UD03HE5
WH-UD05HE5
Destination
Europe
Turkey
PRECAUTION OF LOW TEMPERATURE
In order to avoid frostbite, be assured of no refrigerant leakage during the installation or repairing of refrigerant circuit.
WARNING
This service information is designed for experienced repair technicians only and is not designed for use by the general public.
It does not contain warnings or cautions to advise non-technical individuals of potential dangers in attempting to service a product.
Products powered by electricity should be serviced or repaired only by experienced professional technicians. Any attempt to
service or repair the products dealt with in this service information by anyone else could result in serious injury or death.

2
TABLE OF CONTENTS
PAGE PAGE
1.Safety Precautions ............................................. 4
2.Specifications ..................................................... 7
2.1WH-SDC03H3E5 WH-UD03HE5 ................... 7
2.2WH-SDC05H3E5 WH-UD05HE5 ................. 10
3.Features ............................................................. 13
4.Location of Controls and Components .......... 14
4.1Indoor Unit ................................................... 14
4.2Outdoor Unit ................................................. 37
5.Dimensions ....................................................... 38
5.1Indoor Unit ................................................... 38
5.2Outdoor Unit ................................................. 39
6.Refrigeration and Water Cycle Diagram ........ 40
6.1Standard System (Optional PCB not
connected) ................................................... 41
6.2Advance System (Optional PCB connected) ...
.................................................................... 41
7.Block Diagram .................................................. 42
8.Wiring Connection Diagram ............................ 43
8.1Indoor Unit ................................................... 43
8.2Outdoor Unit ................................................. 44
9.Electronic Circuit Diagram .............................. 45
9.1Indoor Unit ................................................... 45
9.2Outdoor Unit ................................................. 46
10.Printed Circuit Board ....................................... 47
10.1Indoor Unit ................................................... 47
10.2Outdoor Unit ................................................. 49
11.Installation Instruction ..................................... 50
11.1Indoor Unit ................................................... 50
11.2Variation of system ...................................... 56
11.3System Installation ....................................... 67
11.4Outdoor Unit ................................................. 78
12.Operation and Control ..................................... 83
12.1Basic Function ............................................. 83
12.2Water Pump ................................................. 96
12.3Indoor Unit Safety ......................................100
12.4Auto Restart Control ..................................100
12.5Indication Panel .........................................100
12.6Indoor Back-Up Heater Control .................101
12.7Tank Heater Control ...................................103
12.8Base Pan Heater Control (Optional) ..........105
12.9Heater Turn ON/OFF priority Control .........105
12.10Force Heater Mode ....................................106
12.11Powerful Operation ....................................107
12.12Quiet Operation ..........................................107
12.13Sterilization Mode ......................................108
12.14Outdoor Ambient Thermo OFF Control .....109
12.15Alternative Outdoor Ambient Sensor Control ..
..................................................................110
12.16Force DHW mode ......................................110
12.17Anti Freeze Control ................................... 111
12.18Solar Operation (Optional) ........................ 112
12.19Boiler Bivalent Control .............................. 114
12.20External Room Thermostat Control (Optional)
................................................................. 116
12.21Three Ways Valve Control ........................ 117
12.22Two Ways Valve Control........................... 117
12.23External OFF/ON Control ......................... 118
12.24External Compressor Switch (Optional PCB) ..
................................................................. 119
12.25Heat/Cool Switch (Optional PCB) ............. 120
12.26SG Ready Control (Optional PCB) ........... 121
12.27Demand Control (Optional PCB) .............. 123
12.28Holiday Mode ............................................ 124
12.29Dry Concrete ............................................. 124
12.30Flow Sensor .............................................. 124
13.Protection Control ......................................... 125
13.1Protection Control for All Operations ........ 125
13.2Protection Control for Heating Operation.. 127
13.3Protection Control for Cooling Operation .. 128
14.Servicing Mode .............................................. 129
14.1How to Take Out Front Plate .................... 129
14.2Test Run ................................................... 129
14.3Expansion Vessel Pre Pressure Checking 129
14.4Pump Down Procedures ........................... 130
14.5How To Adjust Pump Speed ..................... 131
14.6How To Adjust Pump Speed ..................... 132
14.7How To Unlock Cool Mode ....................... 133
14.8EEPROM Factory Default Data Setup
Procedure ................................................. 134
14.9Dry Concrete Setup .................................. 135
15.Maintenance Guide........................................ 137
15.1Maintenance for Water Filter Set .............. 138
16.Troubleshooting Guide ................................. 140
16.1Refrigeration Cycle System ...................... 140
16.2Relationship between the Condition of the Air-
to-Water Heatpump Indoor and Outdoor Units
and Pressure and Electric Current ............ 141
16.3Breakdown Self Diagnosis Function ......... 142
16.4Error Codes Table ..................................... 144
16.5Self-diagnosis Method .............................. 146
17.Disassembly and Assembly Instructions ... 192
17.1To Remove Front Plate ............................. 192
17.2To Remove Pressure Gauge .................... 192
17.3To Open Control Board Cover .................. 193
17.4To Remove Control Panel ........................ 193
17.5To Remove RCCB .................................... 194
17.6To Remove Transformer and Electronic
Controller Board ........................................ 194
17.7To Open Control Board ............................. 195
17.8To Remove Pressure Relief Valve, Air Purge
Valve and Flow Sensor ............................. 195
17.9To Remove Water Pump and Bottle Complete
................................................................. 196
17.10To Remove Filter ...................................... 197
3
18.Technical Data ................................................ 198
18.1Operation Characteristics .......................... 198
18.2Heating Capacity Table ............................. 210
18.3Cooling Capacity Table ............................. 210
19.Exploded View and Replacement Parts List 211
19.1Indoor Unit ................................................. 211
19.2Outdoor Unit .............................................. 213

4
1. Safety Precautions
Read the following “SAFETY PRECAUTIONS” carefully before installation.
Electrical work must be installed by a licensed electrician. Be sure to use the correct rating and main circuit for
the model to be installed.
The caution items stated here must be followed because these important contents are related to safety. The
meaning of each indication used is as below. Incorrect installation due to ignoring of the instruction will cause
harm or damage, and the seriousness is classified by the following indications.
Please leave this installation manual with the unit after installation.
WARNING This indication shows the possibility of causing death or serious injury.
CAUTION This indication shows the possibility of causing injury or damage to properties only.
The items to be followed are classified by the symbols:
Symbol with white background denotes item that is PROHIBITED from doing.
Symbol with dark background denotes item that must be carried out.
Carry out test run to confirm that no abnormality occurs after the installation. Then, explain to user the operation, care and
maintenance as stated in instructions. Please remind the customer to keep the operating instructions for future reference.
WARNING
1. Do not install outdoor unit near handrail of veranda. When installing outdoor unit at veranda of high rise building, child may climb up to
outdoor unit and cross over the handrail and causing accident.
2. Do not use unspecified cord, modified cord, joint cord or extension cord for power supply cord. Do not share the single outlet with
other electrical appliances. Poor contact, poor insulation or over current will cause electrical shock or fire.
3. Do not tie up the power supply cord into a bundle by band. Abnormal temperature rise on power supply cord may happen.
4. Do not insert your fingers or other objects into the unit, high speed rotating fan may cause injury.
5. Do not sit or step on the unit, you may fall down accidentally.
6. Keep plastic bag (packaging material) away from small children, it may cause suffocation.
7. Do not use pipe wrench to install refrigerant piping. It might deform the piping and cause the unit to malfunction.
8. Do not purchase unauthorized electrical parts for installation, service, maintenance and etc.. They might cause electrical shock or fire.
9. Do not modify the wiring of Indoor Unit for installation of other components (i.e. heater, etc.). Overloaded wiring or wire connection
points may cause electrical shock or fire.
10. Do not add or replace refrigerant other than specified type. It may cause product damage, burst and injury etc.
11. For electrical work, follow local wiring standard, regulation and this installation instruction. An independent circuit and single outlet
must be used. If electrical circuit capacity is not enough or defect found in electrical work, it will cause electrical shock or fire.
12. For water circuit installation work, follow to relevant European and national regulations (including EN61770) and local plumbing and
building regulation codes.
13. Engage dealer or specialist for installation. If installation done by the user is defective, it will cause water leakage, electrical shock or
fire.
14.
This is a R410A model, when connecting the piping, do not use any existing (R22) pipes and flare nuts. Using such same may
cause abnormally high pressure in the refrigeration cycle (piping), and possibly result in explosion and injury. Use only R410A
refrigerant.
Thickness or copper pipes used with R410A must be 0.8 mm or more. Never use copper pipes thinner than 0.8 mm.
It is desirable that the amount of residual oil is less than 40mg/10m.
15.
When install or relocate Indoor / Outdoor Unit, do not let any substance other than the specified refrigerant, e.g. air etc. mix into
refrigerant cycle (piping).
Mixing of air etc. will cause abnormal high pressure in refrigeration cycle and result in explosion, injury etc.
16. Install according to this installation instructions strictly. If installation is defective, it will cause water leakage, electrical shock or fire.
17. Install at a strong and firm location which is able to withstand the set’s weight. If the strength is not enough or installation is not
properly done, the set will drop and cause injury.

5
WARNING
18.
Do not use joint cable for Indoor / Outdoor Unit connection cable. Use specified Indoor / Outdoor Unit connection cable, refer to
instruction CONNECT THE CABLE TO THE INDOOR / OUTDOOR UNIT and connect tightly for Indoor / Outdoor Unit connection.
Clamp the cable so that no external force will be acted on the terminal. If connection or fixing is not perfect, it will cause heat up or fire
at the connection.
19. This equipment is strongly recommended to be installed with Residual Current Device (RCD) on-site according to the respective
national wiring rules or country-specific safety measures in terms of residual current.
20.
During installation, install the refrigerant piping properly before run the compressor. Operation of compressor without fixing
refrigeration piping and valves at opened condition will cause suck-in of air, abnormal high pressure in refrigeration cycle and result in
explosion, injury etc.
21.
During pump down operation, stop the compressor before remove the refrigeration piping. Removal of refrigerant piping while
compressor is operating and valves are opened will cause suck-in of air, abnormal high pressure in refrigerant cycle and result in
explosion, injury etc.
22. Tighten the flare nut with torque wrench according to specified method. If the flare nut is over tightened, after a long period, the flare
may break and cause refrigerant gas leakage.
23. After completion of installation, confirm there is no leakage of refrigerant gas. It may generate toxic gas when the refrigerant contacts
with fire.
24. Ventilate the room if there is refrigerant gas leakage during operation. Extinguish all fire sources if present. It may cause toxic gas
when the refrigerant contacts with fire.
25. Only use the supplied or specified installation parts, else, it may cause unit vibrate loose, water leakage, electrical shock or fire.
26. The unit is only for use in closed water system. Utilization in an open water circuit may lead to excessive corrosion of water piping and
risk of incubating bacteria colonies, particularly Legionella, in water.
27. If there is any doubt about the installation procedure or operation, always contact the authorized dealer for advice and information.
28. Select a location where in case of water leakage, the leakage will not cause damage to other properties.
29. When installing electrical equipment at wooden building of metal lath or wire lath, in accordance with electrical facility standard, no
electrical contact between equipment and building is allowed. Insulator must be installed in between.
30. Any work carried out on the Indoor Unit after removing any panels which is secured by screws, must be carried out under the
supervision of authorized dealer and licensed installation contractor.
31.
This unit must be properly earthed. The electrical earth must not be connected to a gas pipe, water pipe, the earth of lightening rod or
a telephone.
Otherwise there is a danger of electrical shock in the event of an insulation breakdown or electrical earth fault in the outdoor unit.
CAUTION
1. Do not install the Indoor / Outdoor Unit at place where leakage of flammable gas may occur. In case gas leaks and accumulates at
surrounding of the unit, it may cause fire.
2. Do not release refrigerant during piping work for installation, re-installation and during repairing a refrigeration parts. Take care of the
liquid refrigerant, it may cause frostbite.
3. Do not install this appliance in a laundry room or other high humidity location. This condition will cause rust and damage to the unit.
4. Make sure the insulation of power supply cord does not contact hot part (i.e. refrigerant piping) to prevent from insulation failure (melt).
5. Do not touch the sharp aluminium fin, sharp parts may cause injury.
6. Do not apply excessive force to water pipes that may damage the pipes. If water leakage occurs, it will cause flooding and damage to
other properties.
7. Select an installation location which is easy for maintenance.
8. Carry out drainage piping as mentioned in installation instructions. If drainage is not perfect, water may enter the room and damage
the furniture.
9.
Power supply connection to Indoor Unit.
Power supply point should be in easily accessible place for power disconnection in case of emergency.
Must follow local national wiring standard, regulation and this installation instruction.
Strongly recommended to make permanent connection to a circuit breaker.
- Power supply 1: Use approved 15/16A 2-poles circuit breaker with a minimum contact gap of 3.0 mm.
- Power supply 2: Use approved 15/16A 2-poles circuit breaker with a minimum contact gap of 3.0 mm.
10. Ensure the correct polarity is maintained throughout all wiring. Otherwise, it will cause electrical shock or fire.
11. After installation, check the water leakage condition in connection area during test run. If leakage occurs, it will cause damage to other
properties.

6
CAUTION
12.
Installation work.
It may need two or more people to carry out the installation work. The weight of Indoor Unit might cause injury if carried by one
person.

7
2. Specifications
2.1 WH-SDC03H3E5 WH-UD03HE5
Item Unit Outdoor Unit
Performance Test Condition EN 14511
Cooling Capacity
Condition
(Ambient/Water) A35W7
kW 3.20
BTU/h 10900
kcal/h 2750
Cooling EER W/W 3.08
kcal/hW 2.64
Heating Capacity
Condition
(Ambient/Water) A7W35 A2W35
kW 3.20 3.20
BTU/h 10900 10900
kcal/h 2750 2750
Heating COP W/W 5.00 3.56
kcal/hW 4.30 3.06
Noise Level
Condition
(Ambient/Water) A35W7
dB (A) Cooling: 47
Power Level dB Cooling: 65
Heating
ErP
Application Climate Average – Low Temp (W35) Average – Medium Temp (W55)
Pdesign kW 4.0 3.0
Tbivalent °C -10 -10
SCOP (W/W) / % 4.88 / 195 3.25 / 130
Annual Consumption kWh 1693 1908
Class A++ A++
Air Flow m3/min (ft3/min) Cooling: 33.9 (1200)
Heating: 28.9 (1020)
Refrigeration Control Device Expansion Valve
Refrigeration Oil cm3 FV50S (450)
Refrigerant (R410A) kg (oz) 1.20 (42.4)
Dimension
Height mm (inch) 622 (24-1/2)
Width mm (inch) 824 (32-15/32)
Depth mm (inch) 298 (11-24/32)
Net Weight kg (lbs) 39 (86)
Pipe Diameter Liquid mm (inch) 6.35 (1/4)
Gas mm (inch) 12.70 (1/2)
Standard Length m (ft) 7 (23.0)
Pipe Length Range m (ft) 3 (9.8) ~ 15 (49.2)
I/D & O/D Height Difference m (ft) 5 (16.4)
Additional Gas Amount g/m (oz/ft) 20 (0.2)
Refrigeration Charge Less m (ft) 10 (32.8)
Compressor
Type Hermetic Motor (Rotary)
Motor Type Brushless (4-poles)
Rated Output kW 0.90

8
Item Unit Outdoor Unit
Fan
Type Propeller Fan
Material PP
Motor Type DC (8-poles)
Input Power W —
Output Power W 40
Fan Speed rpm Cooling: 950
Heating: 800
Heat Exchanger
Fin material Aluminium (Pre Coat)
Fin Type Corrugated Fin
Row × Stage × FPI 2 × 28 × 17
Size (W × H × L) mm 36.4 × 588 × 827.7 : 856.3
Power Source (Phase, Voltage, Cycle)
ø Single
V 230
Hz 50
Input Power
Condition
(Ambient/Water) A35W7 A7W35 A2W35
kW Cooling: 1.04 Heating: 0.64 Heating: 0.90
Maximum Input Power For Heatpump System kW 2.35
Power Supply 1 : Phase (Ø) / Max. Current (A) / Max. Input Power (W) 1Ø / 11.0 / 2.35k
Power Supply 2 : Phase (Ø) / Max. Current (A) / Max. Input Power (W) 1Ø / 13.0 / 3.00k
Power Supply 3 : Phase (Ø) / Max. Current (A) / Max. Input Power (W) — / — / —
Starting Current A 3.0
Running Current
Condition
(Ambient/Water) A35W7 A7W35 A2W35
A Cooling: 4.8 Heating: 3.0 Heating: 4.2
Maximum Current For Heatpump System A 11.0
Power Factor
Power factor means total figure of compressor and
outdoor fan motor.
% Cooling: 94
Heating: 93
Power Cord Number of core -
Length m (ft) -
Thermostat Electronic Control
Protection Device Electronic Control
Item Unit Indoor Unit
Performance Test Condition EN 14511
Operation Range
Outdoor Ambient °C Cooling: 16 ~ 43
Heating: -20 ~ 35
Water Outlet °C Cooling: 5 ~ 20
Heating: 20 ~ 55
Internal Pressure Differential kPa Cooling: 5.0
Heating: 5.0
Noise Level
Condition
(Ambient/Water) A35W7
dB (A) Cooling: 28
Power Level dB Cooling: 41
Dimension
Height mm (inch) 892 (35-1/8)
Width mm (inch) 500 (19-11/16)
Depth mm (inch) 340 (13-13/32)
Net Weight kg (lbs) 44 (97)
Refrigerant Pipe Diameter Liquid mm (inch) 6.35 (1/4)
Gas mm (inch) 12.70 (1/2)
Water Pipe Diameter Inlet mm (inch) 28 (1-3/32)
Outlet mm (inch) 28 (1-3/32)
Water Drain Hose Inner Diameter mm (inch) 12 (15/32)
Pump Motor Type DC Motor
Input Power W 30

9
Item Unit Indoor Unit
Hot Water Coil
Type Brazed Plate
No. of Plates 48
Size (H × W × L) mm 82 × 93 × 325
Water Flow Rate l/min (m3/h) Cooling: 9.2 (0.6)
Heating: 9.2 (0.6)
Pressure Relief Valve Water Circuit kPa Open: 300, Close: 266 and below
Flow Switch Electronic Sensor
Protection Device A Residual Current Circuit Breaker (30 ~ 40)
Expansion Vessel Volume I 10
MWP bar 3
Capacity of Integrated Electric Heater kW 3.00
Note:
Cooling capacities are based on outdoor air temperature of 35°C Dry Bulb with controlled indoor water inlet
temperature of 12°C and water outlet temperature of 7°C.
Heating capacities are based on outdoor air temperature of 7°C Dry Bulb (44.6°F Dry Bulb), 6°C Wet Bulb
(42.8°F Wet Bulb) with controlled indoor water inlet temperature of 30°C and water outlet temperature of 35°C.
Specification are subjected to change without prior notice for further improvement.

10
2.2 WH-SDC05H3E5 WH-UD05HE5
Item Unit Outdoor Unit
Performance Test Condition EN 14511
Cooling Capacity
Condition
(Ambient/Water) A35W7
kW 4.50
BTU/h 15300
kcal/h 3870
Cooling EER W/W 2.69
kcal/hW 2.32
Heating Capacity
Condition
(Ambient/Water) A7W35 A2W35
kW 5.00 4.20
BTU/h 17100 14300
kcal/h 4300 3610
Heating COP W/W 4.63 3.11
kcal/hW 3.98 2.67
Noise Level
Condition
(Ambient/Water) A35W7
dB (A) Cooling: 48
Power Level dB Cooling: 66
Heating
ErP
Application Climate Average – Low Temp (W35) Average – Medium Temp (W55)
Pdesign kW 5.0 4.0
Tbivalent °C -10 -10
SCOP (W/W) / % 4.88 / 195 3.25 / 130
Annual Consumption kWh 2116 2541
Class A++ A++
Air Flow m3/min (ft3/min) Cooling: 39.6 (1400)
Heating: 31.8 (1120)
Refrigeration Control Device Expansion Valve
Refrigeration Oil cm3 FV50S (450)
Refrigerant (R410A) kg (oz) 1.20 (42.4)
Dimension
Height mm (inch) 622 (24-1/2)
Width mm (inch) 824 (32-15/32)
Depth mm (inch) 298 (11-24/32)
Net Weight kg (lbs) 39 (86)
Pipe Diameter Liquid mm (inch) 6.35 (1/4)
Gas mm (inch) 12.70 (1/2)
Standard Length m (ft) 7 (23.0)
Pipe Length Range m (ft) 3 (9.8) ~ 15 (49.2)
I/D & O/D Height Difference m (ft) 5 (16.4)
Additional Gas Amount g/m (oz/ft) 20 (0.2)
Refrigeration Charge Less m (ft) 10 (32.8)
Compressor
Type Hermetic Motor (Rotary)
Motor Type Brushless (4-poles)
Rated Output kW 0.90
Fan
Type Propeller Fan
Material PP
Motor Type DC (8-poles)
Input Power W —
Output Power W 40
Fan Speed rpm Cooling: 980
Heating: 860

11
Item Unit Outdoor Unit
Heat Exchanger
Fin material Aluminium (Pre Coat)
Fin Type Corrugated Fin
Row × Stage × FPI 2 × 28 × 17
Size (W × H × L) mm 36.4 × 588 × 827.7 : 856.3
Power Source (Phase, Voltage, Cycle)
ø Single
V 230
Hz 50
Input Power
Condition
(Ambient/Water) A35W7 A7W35 A2W35
kW Cooling: 1.67 Heating: 1.08 Heating: 1.35
Maximum Input Power For Heatpump System kW 2.59
Power Supply 1 : Phase (Ø) / Max. Current (A) / Max. Input Power (W) 1Ø / 12.0 / 2.59k
Power Supply 2 : Phase (Ø) / Max. Current (A) / Max. Input Power (W) 1Ø / 13.0 / 3.00k
Power Supply 3 : Phase (Ø) / Max. Current (A) / Max. Input Power (W) — / — / —
Starting Current A 5.0
Running Current
Condition
(Ambient/Water) A35W7 A7W35 A2W35
A Cooling: 7.6 Heating: 5.0 Heating: 6.2
Maximum Current For Heatpump System A 12.0
Power Factor
Power factor means total figure of compressor and
outdoor fan motor.
% A35W7
Cooling: 96
A7W35
Heating: 94
A2W35
Heating: 95
Power Cord Number of core -
Length m (ft) -
Thermostat Electronic Control
Protection Device Electronic Control
Item Unit Indoor Unit
Performance Test Condition EN 14511
Operation Range
Outdoor Ambient °C Cooling: 16 ~ 43
Heating: -20 ~ 35
Water Outlet °C Cooling: 5 ~ 20
Heating: 20 ~ 55
Internal Pressure Differential kPa Cooling: 9.5
Heating: 12.3
Noise Level
Condition
(Ambient/Water) A35W7
dB (A) Cooling: 28
Power Level dB Cooling: 41
Dimension
Height mm (inch) 892 (35-1/8)
Width mm (inch) 500 (19-11/16)
Depth mm (inch) 340 (13-13/32)
Net Weight kg (lbs) 44 (97)
Refrigerant Pipe Diameter Liquid mm (inch) 6.35 (1/4)
Gas mm (inch) 12.70 (1/2)
Water Pipe Diameter Inlet mm (inch) 28 (1-3/32)
Outlet mm (inch) 28 (1-3/32)
Water Drain Hose Inner Diameter mm (inch) 12 (15/32)
Pump Motor Type DC Motor
Input Power W 34
Hot Water Coil
Type Brazed Plate
No. of Plates 48
Size (H × W × L) mm 82 × 93 × 325
Water Flow Rate l/min (m3/h) Cooling: 12.9 (0.8)
Heating: 14.3 (0.9)
Pressure Relief Valve Water Circuit kPa Open: 300, Close: 266 and below
Flow Switch Electronic Sensor

12
Item Unit Indoor Unit
Protection Device A Residual Current Circuit Breaker (30 ~ 40)
Expansion Vessel Volume I 10
MWP bar 3
Capacity of Integrated Electric Heater kW 3.00
Note:
Cooling capacities are based on outdoor air temperature of 35°C Dry Bulb with controlled indoor water inlet
temperature of 12°C and water outlet temperature of 7°C.
Heating capacities are based on outdoor air temperature of 7°C Dry Bulb (44.6°F Dry Bulb), 6°C Wet Bulb
(42.8°F Wet Bulb) with controlled indoor water inlet temperature of 30°C and water outlet temperature of 35°C.
Specification are subjected to change without prior notice for further improvement.

13
3. Features
Inverter Technology
- Energy saving
High Efficiency
Compact Design
Environment Protection
- Non-ozone depletion substances refrigerant (R410A)
Long Installation Piping
- Long piping up to 15 meter with height difference 5 meter
- Flexible 4-way piping for outdoor unit
Easy to use control panel
Weekly Timer setting
Quality Improvement
- Random auto restart after power failure for safety restart operation
- Gas leakage protection
- Prevent compressor reverse cycle
- Inner protector to protect compressor
Serviceability Improvement
- Breakdown Self Diagnosis function
- System Status Check Buttons for servicing purpose
- System Pumpdown Button for servicing purpose
- Front maintenance design for outdoor unit
Operation Condition
Indoor Outdoor
Water outlet temperature (°C) Ambient temperature (°C)
COOLING Maximum 20 43
Minimum 5 16
HEATING Maximum 55 35
Minimum 20 -20
NOTICE : When the outdoor temperature is out of the above temperature range, the heating capacity will drop significantly
and outdoor unit might stop for protection control.

14
4. Location of Controls and Components
4.1 Indoor Unit
4.1.1 Location of Control
Buttons / Indicator
Water pressure gauge
• Do not press or hit the glass cover using hard
and sharp objects. Failure to do so may cause
damage to the unit.
• Ensure that the water pressure is between 0.05
and 0.3 MPa (0.1 MPa = 1 bar).
• In case the water pressure is out of the above
range, consult an authorised dealer.
1
Quick Menu button
(For more details, refer to the separate
Quick Menu Guide.)
2Back button
Returns to the previous screen
3LCD Display
4Main Menu button
For function setup
5ON/OFF button
Starts/Stops operation
6
Operation indicator
Illuminates during operation, blinks during
alarm.
Press centre
No glove
No pen
2
1
4
5
6
3
Cross key buttons
Selects an item.
Enter button
Fixes the selected content.
Up
Down
thgiRtfeL
0.2
0.4
0.30.1
MPa
bar
2
31
4
23
1
44 40
10:34am, Mon
18
˚
c
˚
c
˚
c
˚
c
2

15
Display
1Mode selection
AUTO •Depending on the preset outdoor
temperature, the system selects
HEAT or *
1
COOL operation mode.
Auto Heat Auto Cool
*
1,
*
2
COOL •The fan coil unit is either turned
ON or OFF.
•The outdoor unit provides cooling
to the system.
AUTO
+ TANK
•Depending on the preset outdoor
temperature, the system selects
HEAT + TANK or *
1
COOL + TANK
operation mode.
Auto Heat Auto Cool
*
1,
*
2
COOL
+ TANK
•The outdoor unit provides cooling
to the system.
•The system controls the booster
heater in the water tank.
HEAT •The panel/floor HEAT operation is
either turned ON or OFF.
•The outdoor unit provides heat to
the system.
TANK •The water tank is either turned
ON or OFF.
•The outdoor unit provides heat to
the water tank.
HEAT
+ TANK
•The outdoor unit provides heat to
the water tank and the system.
•This mode can be selected only
when the water tank is installed.
* The direction icons point to the currently
active mode.
•Room operation / Tank operation.
•Deice operation.
2Operation icons
The status of operation is displayed.
Icon will not display (under operation OFF screen) whenever operation is OFF except weekly timer.
Holiday operation status Weekly Timer operation status Quiet operation status
Zone:Room Thermostat
→Internal sensor status Powerful operation status Demand Control or
SG ready or SHP status
Room Heater status Tank Heater status Solar status
Bivalent status
(Boiler)
*1 The system is locked to operate without COOL mode. It can be unlocked only by authorised installers or our authorised service partners.
*2 Only displayed when COOL mode is unlocked (This means when COOL mode is available).
3Temperature of each zone
4Time and day
5Water Tank temperature
6Outdoor temperature
7Sensor type/Set temperature type icons
Water Temperature
→Compensation curve
Water Temperature
→Direct Pool only
Room Thermostat
→External
Room Thermostat
→Internal
2 4
1
5
6
7
23
1
44
40
10:34am, Mon
18
˚
c
˚
c
˚
c
˚
c
2
3

16
4.1.2 Initialization
Before starting to install the various menu settings, please initiate the Remote Controller by selecting the language of
operation and installing the date and time correctly.
It is recommended that the installer conducts the following initialization of the Remote Controller.
Selecting the language
LCD blinking
Press and wait while the display is
initializing.
1Scroll with and to select the language.
2Press to confirm the selection.
Setting the clock
1htiwtceleS or how to display the time,
either 24h or am/pm format (for example, 15:00
or 3 pm).
2Press to confirm the selection.
3Use and to select year, month, day,
hour and minutes. (Press to confirm the
selection each time.)
4Once the time is set, time and day will appear
on the display even if the Remote Controller is
turned OFF.
4.1.3 Quick Menu
A
fter the initial settings have been completed, you can select a quick menu from the following options and edit the setting.
1Press to display the quick menu.
Force DHW Powerful Quiet Force Heater
Timer Force Defrost Error Reset R/C Lock
2Use to select menu.
3Press to turn on/off the select menu.
Select ON/OFF

17
4.1.3.1 How to use the Quick Menu
After the initial settings have been completed, you can select a quick menu from the
following options and edit the setting.
Select each setting and confirm the setting
according to the instructions displayed at the
bottom of the screen. (The icons refer to each
selection key.)
Quick Menu
To return to the Main Screen,
Press or .
Force DHW Powerful Quiet Force
Heater
Weekly
Timer
Force
Defrost Error Reset R/C Lock
■
Note:
• If the system is not
connected to the tank
(Tank Connection is
OFF), the Quick Menu
screen will be displayed
as right. Make sure the
Tank Connection is ON.
1Press . 2Use to select menu.
3Press to turn on/off the select
menu.
Select Change
Select ON/OFF
Select ON/OFF
23
1
44
40
10:34am, Mon
18
˚c
˚c
˚c
˚c
2

18
Notes on operation icon
Example:
• Operation icon indicate with “ ” = OFF
• Operation icon indicate with “ ” = ON
Select this icon to turn the Tank DHW on or off.
Press to confirm your selection.
• Force DHW is turned off.
• Force DHW is turned on.
■
Note:
• Force DHW is disabled when Force Heater is turned on.
• When Force DHW is turned off, operation & mode should change back to
the previous memorized status.
Force DHW
Select this icon to operate the heating/cooling system
powerfully.
Press to confirm your selection.
(The powerful operation starts approximately 1 minute after is
pressed.)
• Powerful mode is set off.
• The Powerful mode operates for 30 minutes.
• The Powerful mode operates for 60 minutes.
• The Powerful mode operates for 90 minutes.
■
Note:
• Powerful is disabled when operation is turned OFF.
Powerful
30
60
90

19
Select this icon to operate quietly.
Press to confirm your selection.
(The quiet operation starts approximately 1 minute after is pressed.)
• Quiet mode is set off.
• The Quiet mode operates at level 1.
• The Quiet mode operates at level 2.
• The Quiet mode operates at level 3.
Level 3 is the most quiet mode.
• Select this to set a timer for the Quiet mode operation.
After 1 sec delay.
Quiet
Select “Yes”.
• Select “Yes” using buttons.
Select pattern “1” ~ “6”.
Select “Edit”.
• If you select “Delete”, the timer setting of
the selected pattern will be deleted.
Set the hour and minutes.
Select the level of Quiet.
■Note:
• If the time overlaps with another pattern,
"Set time is overlapped!" will appear on
the screen.
1
2
3

20
Select to force the Heater on.
Press to confirm your selection.
(The Force Heater mode starts approximately 1 minute after is
pressed.)
• Force Heater is turned off.
• Force Heater is turned on.
■Note:
• Force Heater is disabled whenever
operation is already on and ‘Disabled
due to Operation ON!’ will be
displayed.
Force
Heater
Other manuals for WH-SDC03H3E5
2
This manual suits for next models
3
Table of contents
Other Panasonic Heat Pump System manuals

Panasonic
Panasonic WH-MHF09G3E8 User manual

Panasonic
Panasonic WH-MDC06G3E5 User manual

Panasonic
Panasonic WH-MHF09G3E5 User manual

Panasonic
Panasonic WH-SDH12C6E5 User manual

Panasonic
Panasonic WH-MDC12G6E5 User manual

Panasonic
Panasonic WH-SDC03H3E5 User manual

Panasonic
Panasonic WH-SXC09D3E5 User manual

Panasonic
Panasonic WH-SDC07H3E5 User manual

Panasonic
Panasonic WH-MXC16G9E8 User manual

Panasonic
Panasonic WH-MXC09G3E5 User manual