manuals.online logo
Brands
  1. Home
  2. •
  3. Brands
  4. •
  5. Panasonic
  6. •
  7. Projector
  8. •
  9. Panasonic PTL292U - LCD PROJECTOR User manual

Panasonic PTL292U - LCD PROJECTOR User manual

Operating
Instructions
LCD
Projector
Model
PT-L292U
au
Tang
Panasonic.
Please
read
these
completely
before
operating
this
LCD
Projector.
LSOTO033
(A)
Things
You
Should
Know
Caution:
This
equipment
has
been
tested
and
found
to
comply
with
the
limits
for
a
Class
B
digital
device,
pursuant
to
Part
15
of
the
FCC
Rules.
These
limits
are
designed
to
provide
reasonable
protection
against
harmful
interference
in
a
residential
installation.
This
equipment
generates,
uses,
and
can
radiate
radio
frequency
energy
and,
if
not
installed
and
used
in
accordance
with
the
instructions,
may
cause
harmful
interference
to
radio
communications.
However,
there
is
no
guarantee
that
interference
will
not
occur
in
a
particular
installation.
If
this
equipment
does
cause
harmful
interference
to
radio
or
television
reception,
which
can
be
determined
by
turning
the
equipment
off
and
on,
the
user
is
encouraged
to
try
to
correct
the
interference
by
one
or
more
of
the
following
measures:
-
Reorient
or
relocate
the
receiving
antenna.
-
Increase
the
separation
between
the
equipment
and
receiver.
—
Connect
the
equipment
into
an
outlet
on
a
circuit
different
from
that
to
which
the
receiver
is
connected.
—
Consult
the
dealer
or
an
experienced
radio/TV
technician
for
help.
FCC
Warning:
To
assure
continued
compliance,
use
only
the
provided
grounded
power
supply
cord
and
shielded
interface
cable
with
ferrite
core
when
connecting
this
device
to
a
computer.
Also,
any
unauthorized
changes
or
modifications
to
this
equipment
could
void
the
user's
authority
to
operate
this
device.
Congratulations
on
your
purchase
of
one
of
the
most
sophisticated
and
reliable
products
on
the
market
today.
Used
properly,
we're
sure
it
will
bring
you
and
your
family
years
of
service
enjoyment.
Please
take
time
to
fill
in
the
information
below.
The
serial
number
is
on
the
tag
located
on
the
back
of
your
LCD
Projector.
You'll
want
to
keep
this
manual
handy
as
your
convenient
LCD
Projector
information
source.
For
your
own
protection
and
prolonged
operation
of
your
LCD
Projector,
please
be
sure
to
read
the
“Important
Safeguards”
carefully,
before
use.
Date
of
Purchase
Dealer
Purchased
From
Dealer
Address
Dealer
Phone
No.
Model
No.
PT-L292U
Serial
No.
Table
of
Contents
FhInOS
YOU-
Should
KNOW
tera
teta
RS
o
dune
ol
Pha
pament
seg
1
Important
SalcguardS
esa
oes
shoe
ack
ca
se
ace
sees
boats
degen
antowan
leer
ea
ce
ge
2,3
Contents
oF
LED
Projector
BOX
sim
tara
item
ea
ten
ei
4
LCD
Projector
Patras
cena
cetera
NANA
NUN
LASA
NAA
AA
NAG
AG
5,6
Prodüct
Fionnalt
Anena
NAGANA
NA
APA
a
teta
AA.
7,8
Positioning
the
LCD
Projector
and
Sereen
a
GANAN
NA
NAA
NAGA
NGIGING
9
initial
Set
Up-of
the
LCD-
Projector
AANGAT
SN
LANI
NAGANA
ANAN
10
RE
DE)
#8
LL
LIT)
ENS
RE
ANAN
Tac
ec
Coia
RGE
AN
ANA
kA
11
Video/Computer
Cables
&
Adaptors
...........ccsscscsscssscsscsssrsccsesnecesssececeessnecuesseesescessuanecsesneesenscsteeesees
12
PIN
ASSIONMÉNE
men
ani
sans
eau
nouer
sanes
cinta
een
tn
12
Connecting
the
LCD
Projector
La
nn
ne
inter
Med
re
tes
13,
14,
15,
16
Basic
LED
Projector
Opera
On
maaasahan
17,
18
VIGGO
AYUSIN
Na
KA
pa
ets
AUNG
AGO
NANA
NGA
Dn
Len
ue.
19,
20,
21,22
NIMING:BPECINGANONS
iaia
termes
GAN
AA
AANO
23
Factory
Presa
NINONG
NANA
KAN
GA
NAAN
NAA
GIA
a
24,
25
Maimténanoe
san
AA
AN
AARON
ALA
AA
NA
AA
26,
27,
28
Trouble
STN
OLIN
sees
ce
etc
NG
AA
ANGKAN
AA
AA
29,
30,
31
©
1997
Matsushita
Electric
Industrial
Co.,
Ltd
All
product/brand
names
are
trademarks
or
registered
trademarks
of
the
respective
holders.
Important
Safeguards
Electrical
energy
can
perform
many
useful
functions.
This
LCD
Projector
has
been
engineered
and
manufactured
to
meet
applicable
safety
standards.
But
IMPROPER
USE
CAN
RESULT
IN
POTENTIAL
ELECTRICAL
SHOCK
OR
FIRE
HAZARDS.
In
order
not
to
defeat
the
safeguards
incorporated
into
this
LCD
Projector,
observe
the
following
basic
rules
for
its
installation,
use
and
servicing.
Unplug
the
LCD
Projector
from
the
wall
outlet
before
cleaning.
2
Do
not
use
liquid
cleaners
or
aerosol
cleaners.
Use
a
soft
dry
cloth
to
clean
the
LCD
Projector
unit.
If
the
unit
is
very
dirty,
wet
a
cloth
with
neutral
detergent,
squeeze
it
tight,
wipe
the
unit
with
it,
and
finish
by
wiping
with
a
dry
cloth.
Do
not
use
a
chemical
duster
or
polisher-cleaner
because
it
can
adversely
affect
the
unit
and
peel
the
paint
coat.
3
Do
not
use
attachments
not
recommended
by
Panasonic,
as
they
may
cause
hazards.
Do
not
use
the
LCD
Projector
near
water;
for
example,
near
a
bathtub,
washbowl,
kitchen
sink,
laundry
tub,
in
a
wet
basement,
near
a
swimming
pool,
etc.
Never
spill
liquid
into
the
LCD
Projector.
5
Do
not
place
the
LCD
Projector
on
an
unstable
cart,
stand,
or
table.
The
LCD
Projector
may
fall,
which
may
cause
serious
injury
to
a
child
or
an
adult,
and/or
serious
damage
to
the
unit.
Use
only
with
a
cart
or
stand
recommended
by
its
manufacturer,
as
being
suitable
for
use
with
an
LCD
Projector.
6
Ceiling,
wall
or
shelf
mounting
for
installation
should
use
a
mounting
kit
approved
by
the
manufacturer
for
use
with
an
LCD
Projector
and
should
follow
the
manufacturer's
instructions.
7
LCD
Projector
equipment
and
cart
combinations
should
be
moved
with
care.
Quick
stops,
excessive
force,
and
uneven
surfaces
may
cause
the
equipment
and
cart
combination
to
overturn.
8
Slots
and
openings
in
the
cabinet
back
and
bottom
are
provided
for
ventilation.
To
ensure
reliable
operation
of
the
LCD
Projector
and
to
protect
it
from
overheating,
these
openings
must
not
be
blocked
or
covered.
These
openings
should
never
be
covered
with
cloth
or
other
material.
The
bottom
opening
should
not
be
blocked
by
placing
the
LCD
Projector
on
a
bed,
sofa,
rug,
or
other
similar
surface.
The
LCD
Projector
should
not
be
placed
near
or
over
a
radiator
or
heating
vent.
The
LCD
Projector
should
not
be
placed
in
a
built-in
installation
such
as
a
bookcase
unless
proper
ventilation
is
provided.
9
The
LCD
Projector
should
be
operated
only
from
the
type
of
power
source
indicated
on
the
back
of
the
LCD
Projector
or
in
the
specifications.
If
you
are
not
sure
of
the
type
of
power
supplied
to
your
home,
consult
your
LCD
Projector
dealer
or
local
power
company.
10
Do
not
allow
anything
to
rest
on
the
power
cord.
Do
not
place
the
LCD
Projector
where
the
cord
will
be
walked
on.
11
Follow
aii
warnings
and
instructions
marked
on
the
LCD
Projector.
12
As
a
safety
feature,
this
LCD
Projector
is
equipped
with
a
3-prong
grounded
plug.
The
3-prong
grounded
plug
will
fit
only
into
a
grounding
type
power
outlet.
if
the
plug
does
not
fit,
use
an
adaptor
that
is
properly
grounded
or
have
an
electrician
install
a
grounded
type
outlet.
Do
not
attempt
to
modify
this
AC
plug.
13
For
added
protection
of
the
LCD
Projector
during
a
lightning
storm,
or
when
it
is
left
unattended
or
not
in
use
for
long
periods
of
time,
unplug
it
from
the
wall
outlet
and
disconnect
any
cable
systems.
This
will
prevent
damage
to
the
projector
due
to
lightning
and
power-line
surges.
14
Do
not
overload
wall
outlets
and
extension
cords
with
too
many
products,
because
this
can
result
in
fire
or
electric
shock.
15
16
17
18
19
20
21
22
Never
push
objects
of
any
kind
into
the
LCD
Projector
through
cabinet
slots
as
they
may
touch
dangerous
voltage
points
or
short
out
parts,
which
could
result
in
a
fire
or
electric
shock.
Do
not
attempt
to
service
the
LCD
Projector
yourself.
Opening
or
removing
covers
may
expose
you
to
dangerous
voltage
or
other
hazards.
Refer
all
servicing
to
qualified
service
personnel.
Unplug
the
LCD
Projector
equipment
from
the
wall
outlet
and
refer
servicing
to
qualified
service
personnel
under
the
following
conditions:
.
When
the
power
cord
or
plug
is
damaged
or
frayed.
.
If
liquid
has
been
spilled
into
the
LCD
Projector.
.
If
the
LCD
Projector
has
been
exposed
to
rain
or
water.
.
If
the
LCD
Projector
does
not
operate
normally
when
you
follow
the
operating
instructions.
Adjust
only
those
controls
that
are
covered
by
the
operating
instructions,
improper
adjustment
of
other
controls
may
cause
damage
and
will
often
require
extensive
work
by
a
qualified
technician
to
restore
the
LCD
Projector
to
normal
operation.
E.
If
the
LCD
Projector
has
been
dropped
or
the
cabinet
has
been
damaged.
F.
When
the
LCD
Projector
exhibits
a
distinct
change
in
performance
—
this
indicates
a
need
for
service.
oou»
Upon
completion
of
any
service
or
repairs
to
the
LCD
Projector,
ask
the
service
technician
to
perform
a
routine
safety
check
to
determine
that
the
LCD
Projector
is
in
safe
operating
condition.
When
replacement
parts
are
required,
be
sure
the
service
technician
has
used
replacement
parts
specified
by
the
manufacturer
that
have
the
same
characteristics
as
the
original
parts.
Unauthorized
substitutions
may
result
in
fire,
electric
shock,
or
other
hazards.
Air
filter
must
be
cleaned
every
100
lamp
on
hours.
LCD
Projector
may
become
too
hot
if
filter
is
not
cleaned
when
required.
If
lens
becomes
dirty,
or
smudged,
clean
with
a
clean,
dampened
cloth.
Never
touch
the
lens
with
your
fingers.
Do
not
look
directly
into
the
aperture
and
lens
while
operating
as
this
may
result
in
damage
to
your
eyes.
Contents
of
LCD
Projector
Box
Please
confirm
that
the
following
items
are
packed
in
the
LCD
Projector
box.
They
are
provided
to
help
you
use
or
set
up
your
LCD
Projector.
(1)
LCD
Projector
(2)
Remote
Control
(3)
2
“AA”
Batteries
(4)
9.8
Foot
UL/CSA
Power
Cord
(5)
VGA
Cable
(6)
VGA
MAC13”
Adaptor
(7)
VGA
MAC16"
Adaptor
(8)
PC
Audio
Cable
(9)
Video
RCA
Cable
(10)
RCA
-
BNC
pin
Adaptor
(11)
Audio
RCA
Cable
(12)
Operating
Instructions
(Please
read
completely
before
operating.)
(13)
Warranty
Card
(14)
Service
Center
List
LCD
Projector
Features
High
Brightness
and
Resolution
1,558k-pixel,
300-lumen
(ANSI)
offers
clear
images
even
when
ambient
light
level
is
high.
Compact
and
Lightweight
Completely
portable,
you
can
give
attractive
presentations
at
any
location
by
connecting
the
PT-L292U
to
a
notebook
computer,
etc.
20
to
300
Inch
Screen
Capability
30”
(2.5
feet)
to
650”
(54.2
feet)
throw
distance.
(See
table
on
page
9.)
Compatible
with
Most
Personal
Computers
The
RGB
input
accepts
signals
from
VGA,
SVGA,
XGA
(Compression),
and
MAC
compatible
computers
with
no
additional
hardware.
Other
compatible
computers
require
a
separate
cable.
Accommodates
6
different
video
signal
standards
This
LCD
Projector
accepts
the
input
signal
of
all
major
video
formats,
including
PAL,
SECAM,
NTSC,
PAL-M,
PAL-N,
NTSC4.43,
and
the
higher
quality
S-Video
signals.
Rear
Screen
Projection
The
LCD
Projector
is
equipped
with
a
reverse
scan
function
which
allows
the
image
to
be
reversed
for
rear
projection.
(See
operation
on
page
18.)
(Front
Projection)
(Rear
Projection)
SCREEN
SCREEN
CC
O
444
IR
Remote
Control
Front
and
rear
sensors
allow
you
to
control
the
projector
from
almost
anywhere
in
the
room.
Stereo
Audio
Output
For
external
audio
equipment
connection.
Audio
follows
video
source.
9
Blue
Screen
with
No
Input
Signal
The
LCD
Projector
is
equipped
with
an
internal
Blue
Screen
function
which
turns
the
screen
blue
when
the
video
or
computer
equipment
connected
to
the
input
jack
is
turned
off,
or
when
there
is
nothing
connected
to
the
input
jack.
-
If
the
power
is
turned
on
when
no
input
signal
is
input
to
the
LCD
Projector,
the
screen
will
turn
blue.
The
“FOCUS”
overlay
appears
only
until
the
video
or
computer
equipment
is
connected
to
the
input
jack
and
turned
on.
If
no
input
signal
is
received
(the
screen
is
blue)
for
15
minutes,
the
lamp
will
turn
off
automatically.
nrn
rt
FOCUS
444444
Llet
dd
i
—
Power
is
shut
off.
5
Minutes
before
power
is
shut
off.
-
The
following
display
will
appear
when
the
RGB
input
is
within
the
LCD
Projector's
frequency
range,
but
is
not
one
of
the
LCD
Projector's
programmed
formats.
(As
found
on
pages
24,
25.)
+
Should
an
RGB
signal
be
input
which
is
out
of
the
LCD
Projector’s
frequency
range,
no
indication
will
be
present.
EH
10
Manual
Shutter
Function
Blanks
out
the
screen
and
mutes
the
sound.
Press
the
SHUTTER
button
or
key
to
blank
the
video
to
black
and
mute
the
audio.
Press
the
button
or
key
once
again
to
return
to
the
normal
screen
and
sound.
11
Audio
Mute
Press
the
MUTE
button
or
key
to
instantly
mute
the
sound.
Press
again
to
restore
the
previous
sound
level.
12
On
Screen
Displays
Information
screens
and
menus
make
setting
up
and
operating
the
LCD
Projector
extremely
easy.
13
Automatic
Universal
Power
Supply
with
Automatic
Power
Down
This
unit
has
an
operating
voltage
range
of
AC
100
-
240V.
The
lamp
power
is
automatically
turned
off
if
there
is
no
Input
Signal
for
15
minutes.
Product
Information
ZOOM
Ring
See
pages
10,17.
FOCUS
Ring
|
—a
See
pages
10,
17.
—
Hi
Lens
Cap
|
4)
Lamp
Cover
=
Built
in
Speaker
N
Lens
Cap
Screw
Air
Filter
Ur
Remote
Control
Cord
|
ll:
a
À
See
page
27.
|
See
page
26.
~
ensor
Lamp
Cover
See
page
27.
|
|
|
N
|
|
|
RGB
IN
RGB
OUT
Oro
RGB
Input
Connector
See
pages
14
-
16.
AUDIO
IN
Audio
Output
Connector
See
pages
13
-
16.
S-Video
Input
Connector
See
page
13.
Audio
Input
Video
Input
Connector
Connector
See
pages
14
-16.
See
page
13.
RGB
Output
Audio
Input
Connector
Connector
(L/R)
See
pages
14
-
16.
See
page
13.
Rear
View
A
TyYyYytyhpr
r-r--r--y4QhQhQ-4”r
rnn
ree
eel
Intake
Vent
Remote
Control
Sensor
AC
Socket
(100
-
240
V)
See
page
10.
Main
Power
Switch
See
page
10,
17,
26.
POWER
Button
|
L
See
pages
10,
17.
en
|
STAND
BY(R)
ON(G)
Indicator
See
pages
10,
17,
26,
27.
rh
FX
STAND
BY
(A)
LAMP
Indicator
Ge
See
page
28.
@
pagano
WARNING
TEMPERATURE
(Contro!
Panel)
Re
Indicator
>
See
pages
26,
28.
REPLACE
LAMP
Er
Indicator
See
page
28.
LAMP
TIMER
INPUT
Button
RES
ET
Buron
na
hada
If:
VOLUME
+/-
Buttons
See
page
27.
MODE
Button
See
page
17.
See
pages
19
-
20,
22.
MENU
Button
See
pages
18
-
20,
22.
Adjust
</>
Buttons
See
pages
18
-
20,
22.
Adjust
v
Button
|
MP
See
pages
18
-
20,
22.
LED
Indicators
Description
STAND
BY(R)
RED
=
Power
On
Flashing
RED
=
Cooling
Fan
ON(G)
GREEN
=Lamp
On
Flashing
GREEN
=
Warming
Up
RED
=
Ero
WARNING
TEMP]
RED
Flashing
=
Temperature
Error
REPLACE
LAMP]
RED
Flashing
>
1,000
hrs
RED
21,100
hrs
REMOTE
CONTROL
Load
the
2
“AA”
batteries
in
the
Remote
Control
POWER
Key
SHUTTER
Key
See
pages
See
page
6.
10,
17.
Slide
the
lid
in
the
MUTE
Key
VOLUME
+/-
Key
|
LL.
direction
of
the
See
page
6.
See
page
17.
ANON,
MODE
Key
INPUT
Key
“A
A
See
pages
See
page
17.
a
oe
2
AA
19
-
20,
22.
atteries
as
Bi
aia
indicated
inside
.
jus
eys
the
Battery
Adjust
a/v
See
pages
18
-
20
Keys
Sa
pag
Compartment.
See
pages
18
-
20,
22.
MENU
Key
See
pages
18
-
20,
Replace
the
lid
and
22.
3
snap
into
place.
Battery
replacement
caution
*
Do
not
mix
old
and
new
batteries.
(Also
never
mix
alkaline
with
manganese
batteries.)
(Maximum
Remote
Control
range
=
23
feet.)
Positioning
the
LCD
Projector
and
Screen
The
screen
shoutd
be
positioned
so
that
it
is
not
directly
touched
by
sunlight
or
room
light
as
this
will
wash
out
the
colors
of
the
picture
making
it
hard
to
see.
When
possible,
close
all
blinds,
curtains,
etc.
and
dim
the
lights.
Also,
the
LCD
Projector
should
be
at
a
90°
angle
to
the
screen
for
the
best
picture
results.
To
determine
the
distance
for
the
desired
size,
please
refer
to
the
LCD
Projector/Screen
Relationship
Chart
below.
+
Your
LCD
Projector
is
equipped
with
an
image
reverse
feature.
So,
in
addition
to
front
projection,
you
can
also
reverse
the
image
for
rear
projection.
(See
page
18.)
LCD
Projector
/Screen
Relative
Position
Chart
The
picture
can
be
adjusted
to
the
desired
size
within
the
range
of
the
zoom
lens.
(This
chart
is
based
on
SVGA
input
signal.
Screen
sizes
will
be
smaller
when
VGA
signal
is
used.)
ease)
069027
my
[
81m.
Gem
a0incnes
|
490-720
(15-22
m)
286i
(ost
m)|2008(081
m
|
Teon
055m)
|
2361n
(60m)
so
inches
|
155
1089.
23233m)
[aoe
n(1.2m)]
2508
(091
m)
|
260K
082m]
3.54
n.
em
12h
(120m
sain.
(Sam
18.11
in.
(46
cm)
+
If
the
LCD
Projector
and
the
screen
are
not
properly
placed,
the
picture
will
be
distorted
producing
a
keystoned
image
as
shown
at
right.
q
Keystoned
Image
Caution:
When
you
set
up
the
LCD
Projector
-
Do
not
place
it
in
humid
or
dusty
places,
or
places
where
the
air
is
sooty
or
full
of
cigarette
smoke.
If
the
lens,
mirror,
or
other
optical
components
become
dirty,
the
picture
will
blur
or
darken,
making
viewing
difficult.
-
Do
not
expose
to
extreme
heat
or
cold.
Operating
temperature:
5°C
-
40°C
(41°F
-
104°F)
9
Initial
Set
Up
of
the
LCD
Projector
Place
the
LCD
Projector
on
a
stable,
flat
surface
according
to
the
LCD
Projector/
Screen
Relative
Position
Chart
on
page
9.
-
Remove
the
lens cap.
1
Insert
Power
Cord
into
LCD
Projector
AC
socket
and
connect
to
properly
grounded
wall
outlet.
Set
the
Main
Power
Switch
to
ON.
-
The
STAND
BY(R)
ON(G)
indicator
lights
red.
(It
takes
about
45
seconds
for
image
to
appear
clearly.)
Press
POWER
on
the
LCD
Projector
or
remote
control
ON.
-
The
STAND
BY(R)
ON(G)
indicator
changes
to
green.
Use
the
FOCUS
and
ZOOM
Rings
to
adjust
the
focus
and
size
of
the
image.
Use
the
Height/
Level
Adjusters
to
adjust
the
vertical
angle
of
the
projector
as
specified
on
page
9.
(See
illustration
below.)
Use
the
FOCUS
and
ZOOM
Rings
to
readjust
the
focus
and
size
of
the
image.
Dm
Où
R
SC
bo
FOCUS
RING
To
Raise:
turn
adjusters
in
direction
of
arrows.
Adjusters
Center
the
projected
image
on
the
screen.
Center
To
Lower:
turn
adjusters
in
direction
of
arrows.
Projected
image
Screen
Notes:
*
When
adjustments
are
made
improperly,
the
picture
may
become
distorted,
depending
on
the
relative
positions
of
the
LCD
Projector
and
the
screen.
*
To
prevent
the
LCD
Projector
from
wobbling,
adjust
both
adjusters
so
that
they
firmly
contact
the
mounting
surface.
Moving
the
LCD
Projector
First,
turn
Main
Power
Switch
OFF
and
disconnect
Power
Cord.
Second,
disconnect
CA
i
all
other
cables.
=
Press
in
on
handle
to
release
or
store
handle.
SR
UO
G
-
Make
sure
the
lens
cap
is
in
place
to
prevent
damage
to
the
lens.
Press
in
on
handle.
Specifications
1.3”
Poly
silicon
LCD
panel
X3,
LCD
panels
RGB
shutter
method,
using
Translucent
TN
crystal
panels
Drive
method
Active
Matrix
4:3
Aspect
Ratio
panels,
TFT
(Thin
Film
Transistor)
No.
of
pixels
1,557,504
stripe
pixels
(832
X
624
X
3)
CE
it
16,777,216
20”
-
300”
(measured
diagonally)
[Projection
(row
distance
[esse
OOOO
,
PAL/SECAM/NTSC/PAL-M/PAL-N
Composite
video,
Video
input
signal
1
Vp-p,
sync
negative,
7522
terminated
S-Video
input
signal
C
(chrominance
signal)
:
burst
0.286
Vp-p,
75Q
terminated
a
RGB
Analog
(0.7
Vp-p,
1.0
Vp-p
with
sync
on
green,
7522)
Unlimited
Y
(luminance
signal)
:
1
Vp-p,
sync
negative,
75Q
terminated
Video
signal
numers
of
colors
RGB
input
signal
Sync
signal
H/V
separate,
H/V
combined,
or
Sync-on-Green
H-Frequency
24.83
-
56.48
KHz
(TTL
Level)
—
Refer
to
pages
24,
25.
PAL/SECAM/NTSC/PAL-M/PAL-N
Video
Input
:
One
RCA
jack
S-Video
Input
:
One
4-pin
mini
DIN
connector
Computer
Display
Input:
One
15
pin
mini
D-Sub
Terminals
Computer
Display
Output:
One
15
pin
mini
D-Sub
Video
Audio
Input
:
2
RCA
jacks
(L
+
R)
Through
Audio
output
:
M3
stereo
jack
Cabinet
Buttons/
|
Main
Power
ON/OFF,
Power
ON/OFF,
Volume
+/-
Switches
Controls
`
Buttons
under
Mode,
Input,
Menu,
V,
4
»,
Lamp
Timer Reset
the
cover
Remote
Control
Power
ON/OFF,
Volume
+/-,
Shutter,
Mute,
Mode,
Input
Keys
Menu,
4,
V,
4,
>
Operating
Temperature
41°F
to
104°F
(5°C
to
40°C)
Operating
Humidity
10%
-
80
%
(non-condensation)
Storage
Temperature
-13°F
to
140°F
(-25°C
to
60°C)
Storage
Humidity
5%
-
85%
(non-condensation)
Power
Consumption
aaow
o
Dimensions
WXHXD
11
-
7/16”
X
6
-
7/8”
X
19”
(290
X
175
X
483
mm)
Approvals
FCC,
UL,
C-UL,
CE
Note:
Specifications
and
design
subject
to
change
without
notice.
V-Frequency
56.25
-
85.1
Hz
(TTL
Level)
<—Refer
to
pages
24,
25
Computer
Audio
input
:
M3
stereo
jack
Audio
output
EE
cae
TE
Power
Supply
100
-
240
V
AC
(50
or
60
Hz)
Automatic
Video/
Computer
Cables
8g
Adaptors
These
accessories
are
supplied
in
order
to
connect
the
LCD
Projector
to
Computer/
AV
equipment.
The
numbers
in
the
left
column
correspond
with
the
numbers
in
the
connection
diagrams
on
pages
13-16.
pod
LENGTH
CABLE/ADAPTOR
Projector
side
Computer/AV
products
side
1
|
VGA
Cable
D-Sub
M
TLC
D-Sub
M
NG
6.56
ft
15P
(male)
we
15P
(male)
oe
o
(2.0m)
(LSJA0133)
D-sub
M
MAC
=
VGA
MAC13”
Adaptor
15P
(female)
15P
(male)
D-sub
M
j
MAC
15P
(female)
15P
(male)
PC
Audio
Cable
M3
stereo
M3
stereo
6.56
ft
5
|
Video
RCA
Cable
RCA
pin
RCA
pin
4.92
ft
RCA-BNC
pin
Adaptor
|
RCA
pin
BNC
pin
7
|
Audio
RCA
Cable
RCA
pin
CI
RCA
pin
as)
>
4.92
ft
(male)
X
2
eC
(tm
(male)
X
2
N_P
(1.5
m)
Pin
Assignment
Follow
the
instructions
below
when
connecting
to
a
computer.
A.
Signal
connector:
15-pin
mini
D-sub
(PC/AT
compatible
model)
Connect
the
signal
cable
to
the
15-pin
mini
D-sub
connector
on
the
LCD
Projector
unit.
B.
Signal
connector:
15-pin
D-sub
(MAC)
To
convert
a
MAC
15-pin
D-sub
connector
to
a
15-pin
mini
D-sub
connector,
use
a
VGA-MAC
adaptor
(included)
and
connect
it
to
the
15-pin
mini
D-sub
connector
on
the
LCD
Projector
unit.
"MAC
(13
or
16”
‘VGA
10
5
1
6
Display,
Separate
Sync
only)
3
|
VGA
MAC16”
Adaptor
1
EA
Red
video
signal
3
3
101
a
Green
video
signal
Ground
for
green
video
signal
EN
Red
video
signal
Green
video
signat
3
Blue
video
signal
Unused
Unused
(Through
out)
Ground
for
red
video
signal
7
|
Ground
for
green
video
signal
Ground
for
blue
video
signal
a
Co
Ground
Vertical
synchronizing
signal
Ground
for
blue
video
signal
Hali
Emy
Ground
|
15
|
Horizontal
synchronizing
signal
“1
-
- -
For
13”
adaptor
only
Vertical
synchronizing
signal
*2
= © =
For
16”
adaptor
only
Note:
When
using
a
Composite
Sync
Output
type
Macintosh,
please
use
a
Composite
Sync
type
VGA
MAC
Adaptor
(pin
3
and
pin
13
connected).
12
15
11
IN
—
—b
—b
—
—b
—
KA
Unused
(ID2)
|
8.
Unused
KO
=
©
O
Q3
p|%
TA
|
Connecting
the
LCD
Projector
Connecting
to
audio/video
output
equipment
(Video
signal)
+
Always
tum
off
the
Main
Power
Switch
of
the
LCD
Projector
while
connecting
to
video
equipment,
in
order
to
protect
both
the
LCD
Projector
and
the
equipment
being
connected.
1.
PAL/SECAM/NTSC/PAL-M/PAL-N
Video
(Diagram
numbers
correspond
Audio
in
(UR
À
with
numbers
on
page
12.)
AUDIO
IN
W:
White
Audio
cable
R:
Red
Audio
cable
not
included
Audio
Out
(L/R)
INFROM
ANT.
VHFUHF
JAN
EA
oron
YÈ
ET
OD
VCR
or
Laser
Disc
2.
S-Video
(Diagram
numbers
correspond
with
numbers
on
page
12.)
AGB
IN
mel
o
RGB
OUT
ep)
0
Ep
VV:
White
Audio
cable
R:
Red
Audio
cable
not
included
NY
INFROM
Es
VHF/UHF
EN
AR
A
©".
al
4
)
OQ
3
CH.
4
NE
NUNG
m
"00.0.
VCR
or
Laser
Disc
Stereo
System
or
Receiver
13
Connecting
to
a
computer
(RGB
signal)
+
Always
turn
off
the
Main
Power
Switch
on
the
LCD
Projector
while
connecting
to
computer
equipment,
in
order
to
protect
both
the
LCD
Projector
and
the
equipment
being
connected.
-
The
RGB
input
accepts
signals
from
VGA,
SVGA,
XGA
(Compression),
and
MAC
compatible
computers
without
the
need
for
any
additional
hardware.
-
Plug
the
VGA
signal
cable
(supplied)
correctly
into
the
RGB
IN
terminal
on
the
LCD
Projector
and
into
the
RGB
signal
output
terminal
on
the
computer,
and
secure
the
plugs
by
tightening
the
thumb
screws.
+
Connect
the
MAC/VGA
adaptor
to
the
RGB-signal
output
or
input
terminal
on
your
Macintosh
Series
computer.
Then,
firmly
plug
the
VGA
signal
cable
into
both
the
RGB
IN
or
RGB
OUT
terminal
on
the
LCD
projector
and
the
MAC/VGA
adaptor
on
the
computer,
and
secure
the
plugs
by
tightening
the
thumb
screws.
-
To
view
images
simultaneously
on
the
monitor
and
projection
screen,
connect
your
computer
monitor
to
the
LCD
Projector's
RGB
OUT
terminal.
+
When
connecting
the
LCD
Projector
to
a
compatible
computer
other
than
a
VGA,
SVGA,
XGA
(Compression),
or
Macintosh
series,
a
separate
cable
is
needed.
1.
PC
(Desktop)
(Diagram
numbers
correspond
with
numbers
on
page
12.)
AUDIO
L-IN-R
S-
VIDEO VIDEO
IN
not
included
computer
monitor
cable
Stereo
AMP
or
Receiver
14
2.
PC
(Lap
Top)
(Diagram
numbers
correspond
with
numbers
on
page
12.)
not
included
Stereo
AMP
or
Receiver
3.
Macintosh
(Desktop)
(Diagram
numbers
correspond
with
numbers
on
page
12.)
not
not
included
computer
monitor
Stereo
AMP
or
Receiver
CLITECEN
D)
COTE
LL
LES
è
.
Tmaunansoore
va
mabunmanosaisos
Dg
o
vens
co
ne
e
ves
vuaname"
15
4.
Macintosh
(Power
Book)
(Diagram
numbers
correspond
with
numbers
on
page
12.)
Audio
Out
not
included
Stereo
AMP
or
Receiver
5.
Macintosh
(Power
Mac)
(Diagram
numbers
correspond
with
numbers
on
page
12.)
not
included
computer
monitor
Stereo
AMP
or
Receive
CUTTER,
“IFTTT
ED
H
é
PPP
tira)
or
ree,
Wir
16
Basic
LCD
Projector
Operation
Before
you
begin,
make
sure...
+
All
connections
are
made.
(See
pages
10
and
13
to
16.)
+
LCD
Projector
is
positioned
properly.
(See
page
9.)
-
LCD
Projector
is
plugged
in.
-
Lens
cap
is
removed.
-
You
have
read
Important
Safeguards.
(See
pages
2,
3.)
1
17
Press
the
Main
Power
Switch
ON.
The
STAND
BY(R)
ON(G)
indicator
lights
red
on
the
top
panel.
-
The
first
time
you
turn
on
the
power,
or
whenever
the
STAND
BY(R)
ON(G)
indicator
is
not
lit,
press
the
Main
Power
Switch
(ON/OFF)
to
turn
on
the
power.
Press
POWER
on
the
LCD
Projector
or
remote
control
ON.
When
POWER
is
turned
on,
the red
STAND
BY(R)
ON(G)
indicator
changes
to
green.
When
POWER
is
turned
off,
the
green
STAND
BY(R)
ON(G)
indicator
changes
to
flashing
red
while
the
LCD
Projector
cools
down
and
then
to
solid
red
when
fan
stops.
When
the
power
is
on,
the
STAND
BY(R)
ON(G)
indicator
indicates
the
operating
condition
of
the
lamp.
Red:
Main
Power
On
(Lamp
Off)
Green:
Lamp
is
ready
Flashing
green:
Warming
up
Flashing
red:
Cooling
Fan
operating
See
page
28,
“Maintenance
Indicators”,
for
details.
Open
control
panel
door
and
press
INPUT,
or
press
INPUT
on
the
remote
control
to
select
the
desired
input
mode.
Continue
to
press
INPUT
to
set
the
desired
input
mode.
Each
press
will
change
the
display
as
shown
below:
LARO]
TO)
AUTO
SECAM
"
If
unit
is
connected
with
both
VIDEO
and
S-VIDEO
cables,
the
S-VIDEO
mode
has
priority.
Turn
on
your
computer
(RGB)
or
start
video
playback
(Video
or
S-Video).
+
Adjust
FOCUS
and
ZOOM
Rings
if
necessary.
Press
VOLUME
+/-
on
the
LCD
Projector
or
remote
control
to
adjust
the
volume
level
of
the
built-in
speaker.
The
number
of
segments
(0
-
63)
increases
or
decreases
as
the
volume
is
adjusted.
Press
POWER
on
the
LCD
Projector
or
remote
control
OFF.
*
Do
not
turn
off
the
Main
Power
Switch
until
the
LCD
Projector
cooling
fan
has
stopped
and
STAND
BY(R)
ON(G)
indicator
turn
lid
red.
cs
Main
Power
Switch
OFF
MAN
ON
Located
on
rear
of
the
LCD
|
Projector.
See
page
7.
|
|
ZOOM
Ring
FOCUS
|
/
Button
MENU
Adjust
</>
Button
Buttons
Adjust
v
Button
STAND
N
INPUT
Button
POWER
BY(R)
ON(G)
\
VOLUME
+/-
Buttons
VOLUME
+/-
Keys
INPUT
Key
Adjust
</>
Keys
MENU
Key
You
may
use
keys
on
the
remote
control
or
buttons
on
the
LCD
Projector
for
the
following
operations.
@
Selecting
the
Video
System
Format
The
LCD
Projector
is
equipped
with
full
NTSC,
PAL
and
SECAM
video
support.
Usually
set
to
AUTO,
the
broadcast
format
is
automatically
switched
according
to
the
tape
inserted.
If
you
experience
poor
color
however,
you
may
have
to
set
to
NTSC,
PAL,
or
SECAM
as
described
below.
S-Video/
Video
input
is
selected
(page
17).
1
Press
MENU
to
display
the
menu.
2
Press
A
or
Y
to
select
VIDEO
SYSTEM,
VIDEO
ADJUST
a
<
and
then
d
or
P.
to
display
the
screen.
3
Press
A
or
Y
to
select
the
desired
video
|
system.
SELECT
:
PUSH
sory
$
ob
END
:
PUSH
MENU
4
Press
MENU
twice
to
exit.
@
Rear
Screen
Mode
Projection
The
image
can
be
flipped
to
a
mirror
image
of
the
input
video
signal
for
rear
screen
projection.
See
page
5
for
illustration.
1
Press
MENU
to
display
the
menu.
GB
ADJUST
2
Press
A
or
Y
to
select
SET
UP
PROJECTOR,
and
then
4
or
B
to
display
the
screen.
3
Press
q
or
b
to
select
"ON"
or
"OFF".
*
Select
OFF
to
return
to
the
standard
projection
format.
>REVERSE
OFF
SELECT
:
PUSH AorY
SET
:
PUSH
«or
b>
:
PUSH
MENU
-
Select
ON
to
flip
to
a
mirror
image
of
the
input
signal.
4
Press
MENU
twice
to
exit.
SET
:
PUSH
tor
b
END
:
PUSH
MENU
VIDEO
SYSTEM
>AUTO
PAL
SELECT
:
PUSH
aor¥
END
:
PUSH
MENU
ROTIILORY
JU
T32
NO
EEES
TEA
40>
H2U9
:
T32
UM3M
HƏVA
:
an3
18
Projected
Image
Adjustment
This
LCD
projector's
picture
is
set
to
standard
specifications
at
the
factory.
However,
you
can
adjust
the
image
to
suit
your
own
preferences
by
using
the
VIDEO
or
RGB
ADJUST
feature.
Three
memory
modes
allow
you
to
adjust
and
save
up
to
three
sets
of
settings
for
each
input
signal
(S-VIDEO/
VIDEO
and
RGB).
For
video
signal
input,
five
items
can
be
adjusted:
"COLOR",
“TINT”,
“BRIGHTNESS”,
“PICTURE”,
and
“SHARPNESS”.
For
RGB
signal
input,
six
items
can
be
adjusted:
“BRIGHTNESS”,
“PICTURE”,
“V
POST”,
“H
POST”,
“H
SIZE”,
and
“PHASE”.
Video
Input
Image
Adjustment
S-VIDEO
or
VIDEO
input
is
selected
(page
17).
Use
buttons
on
the
remote
control
or
LCD
Projector.
J
Press
MENU
©
fu
mew
display
the
menu.
SRO
CTOR
VIDEO
SYSTEM
9
Press
A
or
Y
to
select
SELECT
:
PUSH
áo
Y
VIDEO
ADJUST,
and
SET:
BUSH
dor
b
d
Or
P
to
display
the
screen.
+
3
different
sets
of
control
adjustments
can
be
memorized
for
different
projection
situations.
3
Press
MODE
repeatedly
to
choose
one
of
the
three
memory
modes
for
adjustment
(page
22).
=
j
4
Press
A
Or
Y
to
select,
and
4
Or
P
to
display
the
item
to
be
adjusted.
Press
d
or
P
to
adjust
as
described
below.
>COLOR
MENU
Adjustw
Adjust
</>
MODE
Adjustments
For
S-Video/
Video
Input
Button
Button
Buttons
Button
COLOR
Control
(Adjust
color
intensity
level.)
Press
>
to
deepen
the
color.
Press
<
to
make
the
color
paler.
TINT
Control
(Adjust
hue
for
realistic
tones.)
Press
for
more
green.
Press
4
for
more
purple.
-
Tint
will
not
adjust
when
LCD
Projector
is
set
to
PAL,
or
SECAM
video
formats.
BRIGHTNESS
Control
(Adjust
black
level
to
room
brightness.)
Press
b
to
brighten
the
image.
Press
4
to
darken
the
background.
MODE
Key
PICTURE
Control
(Adjust
overall
picture
intensity.)
Press
for
a
stronger
picture.
Press
q
for
a
fainter
picture.
SHARPNESS
Control
(Adjust
picture
sharpness.)
Press
to
sharpen
the
edges
of
the
image.
Press
4
to
soften
the
edges
of
the
image.
Recall
Standard
Settings
Press
4
and
together.
If
the
menu
showing
all
items
is
displayed,
all
items
will
be
reset.
If
a
single
item
is
displayed,
only
that
item
will
be
reset.
Adjust
A/Y
Keys
6
Press
MENU
once
to
display
the
video
adjust
menu,
Or
tWiCe
to
exit.

Other manuals for PTL292U - LCD PROJECTOR

1

Other Panasonic Projector manuals

Panasonic PTFW300NTU - LCD PROJECTOR User manual

Panasonic

Panasonic PTFW300NTU - LCD PROJECTOR User manual

Panasonic PTLC76U - LCD PROJECTOR User manual

Panasonic

Panasonic PTLC76U - LCD PROJECTOR User manual

Panasonic PT-MZ670L User manual

Panasonic

Panasonic PT-MZ670L User manual

Panasonic PT-FX400U User manual

Panasonic

Panasonic PT-FX400U User manual

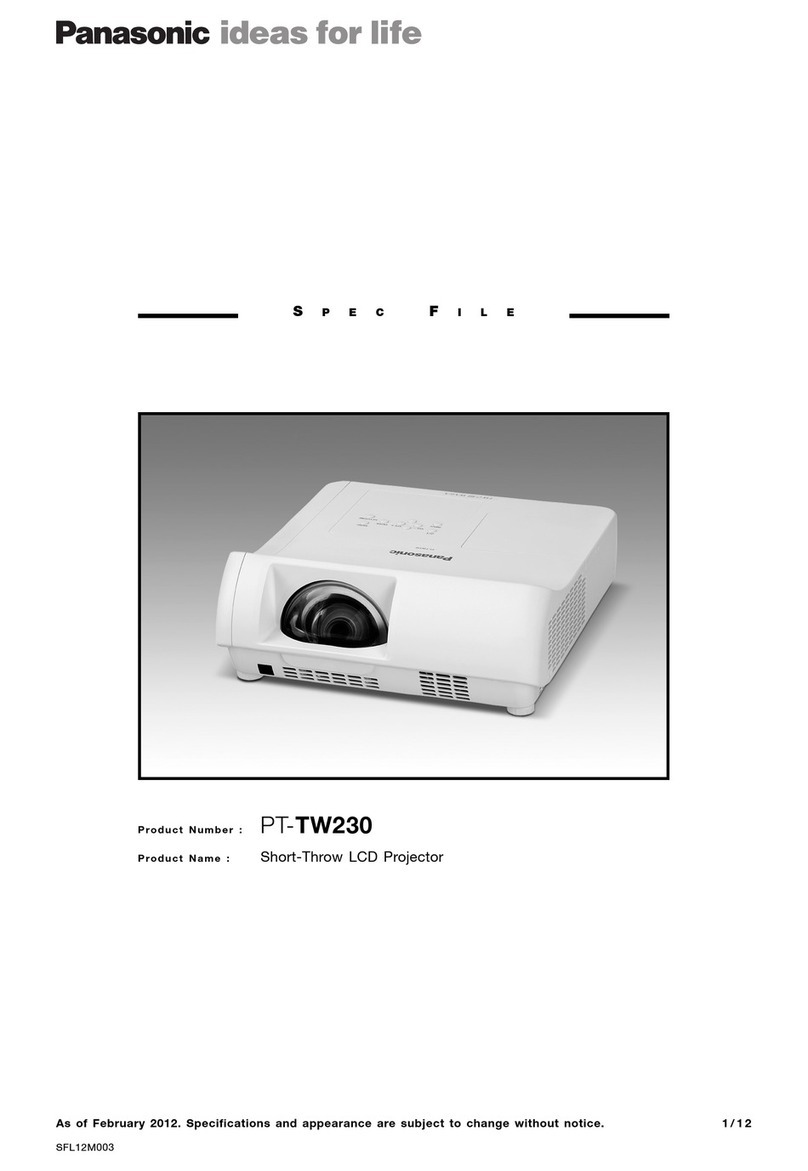
Panasonic PT-TW230 Guide

Panasonic

Panasonic PT-TW230 Guide

Panasonic PT-LB20V System manual

Panasonic

Panasonic PT-LB20V System manual

Panasonic PT-F300EA User manual

Panasonic

Panasonic PT-F300EA User manual

Panasonic PT-VX400NT Guide

Panasonic

Panasonic PT-VX400NT Guide

Panasonic PT-AR100 User manual

Panasonic

Panasonic PT-AR100 User manual

Panasonic PT-D7700E User manual

Panasonic

Panasonic PT-D7700E User manual

Panasonic DLP PT-D6000 User manual

Panasonic

Panasonic DLP PT-D6000 User manual

Panasonic PT-DW17KU User manual

Panasonic

Panasonic PT-DW17KU User manual

Panasonic PTL557U - LCD PROJECTOR User manual

Panasonic

Panasonic PTL557U - LCD PROJECTOR User manual

Panasonic PT-DZ21K Series User manual

Panasonic

Panasonic PT-DZ21K Series User manual

Panasonic PT-DX800UK User manual

Panasonic

Panasonic PT-DX800UK User manual

Panasonic PT-LB55NT User manual

Panasonic

Panasonic PT-LB55NT User manual

Panasonic PT-VX400NTE User manual

Panasonic

Panasonic PT-VX400NTE User manual

Panasonic PT-TW341 User manual

Panasonic

Panasonic PT-TW341 User manual

Panasonic PT-LB75VE User manual

Panasonic

Panasonic PT-LB75VE User manual

Panasonic PT-CW230E User manual

Panasonic

Panasonic PT-CW230E User manual

Panasonic PT-RZ475 series User manual

Panasonic

Panasonic PT-RZ475 series User manual

Panasonic PT-AE1000 User manual

Panasonic

Panasonic PT-AE1000 User manual

Panasonic PT-LX300 User manual

Panasonic

Panasonic PT-LX300 User manual

Panasonic PT-LB10NTU - Mobile Proj XGA 2000 Lumens 4.9LBS Cross Platform... User manual

Panasonic

Panasonic PT-LB10NTU - Mobile Proj XGA 2000 Lumens 4.9LBS Cross Platform... User manual

Popular Projector manuals by other brands

Asus A1 E-manual

Asus

Asus A1 E-manual

Hitachi CP-WUX645N Brochure & specs

Hitachi

Hitachi CP-WUX645N Brochure & specs

InFocus LitePro 610 overview

InFocus

InFocus LitePro 610 overview

Mitsubishi Electric XL5980LU user manual

Mitsubishi Electric

Mitsubishi Electric XL5980LU user manual

Sanyo PLC-XU106 - 4500 lm owner's manual

Sanyo

Sanyo PLC-XU106 - 4500 lm owner's manual

BenQ PB2120 - SVGA DLP Projector user guide

BenQ

BenQ PB2120 - SVGA DLP Projector user guide

Eiki LC-XB33N owner's manual

Eiki

Eiki LC-XB33N owner's manual

Toshiba TDP-S9 owner's manual

Toshiba

Toshiba TDP-S9 owner's manual

BenQ PX9210 user manual

BenQ

BenQ PX9210 user manual

LG HX301 owner's manual

LG

LG HX301 owner's manual

BenQ SH963 Specifications

BenQ

BenQ SH963 Specifications

JVC DLA-X95R instructions

JVC

JVC DLA-X95R instructions

Optoma ZU500USTe user manual

Optoma

Optoma ZU500USTe user manual

Mitsubishi Electric DLP XD550U Specifications

Mitsubishi Electric

Mitsubishi Electric DLP XD550U Specifications

Mitsubishi XD280U Control guide

Mitsubishi

Mitsubishi XD280U Control guide

BenQ CinePrime W2700 installation guide

BenQ

BenQ CinePrime W2700 installation guide

Sanyo XF20 - PLC XGA LCD Projector Specifications

Sanyo

Sanyo XF20 - PLC XGA LCD Projector Specifications

Optoma EH501 user manual

Optoma

Optoma EH501 user manual

manuals.online logo
manuals.online logoBrands
  • About & Mission
  • Contact us
  • Privacy Policy
  • Terms and Conditions

Copyright 2025 Manuals.Online. All Rights Reserved.