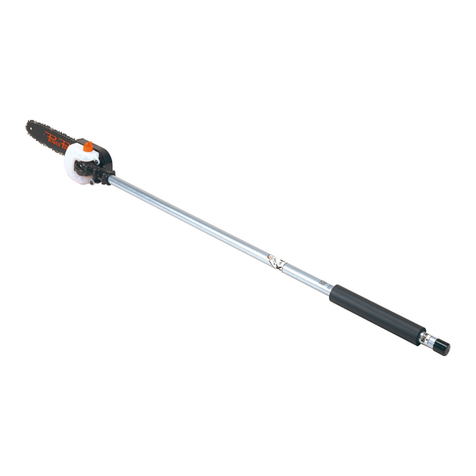
Parklands FYG-450 User manual


Always inspect your machine for loose parts or fuel leakage. Repair all damage by a competent mechanic before
operating the machine.
Always ensure the cutting attachments are properly installed and fastened correctly.
Check the condition of the working area to avoid accidents caused by hitting hidden obstacles such as stumps, beer
cans or glass bottles. Always look out for power cables laid on the ground near your operating area to avoid the risk of
electric shock.
Keep bystanders at least 15 meters away from the machine. If approached, immediately stop the machine.
When starting the machine, never start at high speed with the head of the machine in the air.
After starting the machine, keep all your body parts away from the machine. Never touch the muffler, spark plug, or other
metallic parts of the engine whilst running or when the engine is hot. Doing so will likely result in serious burns and
electric shock.
Never attempt any repairs to the machine whilst in operation. The machine must be fully switched off before attempting
any repairs.
Never refill the petrol tank in the vicinity of a fire, boiler, stove, electric sparks or any other source of heat or fire that may
cause the petrol to become ignited.
When refilling the tank, always turn of the engine first and allow it to cool down for 20 minutes.
When finished using the machine always drain off the remaining fuel, and protect sharp parts of the machine such as the
cutting head with a cover to prevent damage.
Never operate the chain saw by standing directly beneath the tree that is being worked on. Always operate the machine
from an angle so that falling branches do not land on yours or other people’s heads.
Always ensure the correct mixture of petrol to 2 stroke oil have been mixed ( 25:1 )to prevent damage to your machine.


ASSEMBLY
The carry handle and orange driveshaft section of pole is supplied pre-attached to the Engine & Gearbox mountings.
The Black extension part of the driveshaft slides inside the end of the orange driveshaft section as shown. Ensure the
correct end of the black extension shaft is inserted into the orange driveshaft.
To ensure the black drive shaft pole is correctly positioned, attach the chainsaw head to the other end of the black
extension drive shaft ensuring the locating screw screws into the hole at the end of the pole.
With the engine sitting upright on a flat surface locate the black extension pole inside the orange driveshaft lining up the
inside cable rod so that it slides inside the black extension pole. It may be necessary to twist the black extension pole to
the left and right to locate the cable rod. Slide the black extension pole inside the orange driveshaft approximately half a
meter.
Locate the plastic locking section around the orange driveshaft and around the black extension pole and secure using the
supplied Securing Bolts and Nuts. Adjust the desired length of the pole and lock into position with the plastic locking
Handle.

Connecting the Chain Saw Head
1) Insert the end of the long drive shaft into the end of the branch
cutter ( ensuring the locking screw locates into the locating hole
to ensure the correct cutting position ) and tighten the screw
securely. Fill up the chain oil reservoir with chainsaw oil.
2) Fit the Chain if not already pre-fitted by loosening off the
Locking Bolt ( found on the outside of the side plastic cover of
the head ), then loosening off the Chain Tensioner Screw ( turn
anticlockwise ). Locate the chain over the sprocket in the head
and around the chain blade holder. Adjust the tightness of the
blade by tightening up the Tensioner Screw. The chain must
turn freely, but must not be too loose as this would cause the
chain to slip off. If the chain is too tight it will wear out the chain
prematurely. Once adjusted tighten the Locking Bolt securely.
3) Apply a little chain oil to the chain prior to use.
Chain Oil Reservoir
Locking Bolt
Ensure the reservoir is fully filled with proper chain oil. Do not use
engine oil as this will damage the chain and will generate
excessive heat and smoke.
Locate Chain here
Chain Tensioner Screw
S
p
rocket located here
Chain Blade
Holder

Operating Instructions
Starting the engine
(1) Ensuring the fuel to oil mixture is 25:1, fill up the tank and securely close the lid.
(2) Lay the machine flat on the floor for starting.
(3) Check there are no objects obstructing the head of the machine.
(4) Push the clear rubber fuel window behind the air filter a few times until it is full of
fuel. You should also see the fuel through the clear plastic fuel pipe.
(5) Put the choke into the “on” position ( only for cold engines otherwise leave choke
open )
(6) Half open the throttle.
(7) Push the “On/Off” Switch located on the carry handle of the unit forwards to the
“On” position ( push in the direction of the cutting head ).
(8) Pull the starter handle slowly a few times, and then pull quickly.
(9) If the engine is flooded with fuel, remove spark plug, pull the starter handle
several times, dry plug with a cloth, reinsert and tighten plug, connect spark plug
lead and try again this time turning off the choke.
(10)Run the engine at a slow speed for the first 3 – 5 minutes to allow the engine to
warm up. The engine may begin to splutter, gradually turn off the choke and the
engine will run smoothly.
Notes
- Don’t accelerate the engine quickly until the engine has warmed up as this will
cause premature wear on the engine.
- Avoid over-revving the engine as this will damage the engine.
- Always check the air filter is not dirty or clogged as this will use more fuel and
will reduce the engine performance.
Stopping the engine
Slow the engine to idle speed.
(1) Press the STOP switch on the handle ( push the switch backwards towards the engine ). This will immediately
stop the engine.
(2) Place the engine away from combustible materials as the engine will still be hot.
(3) If not using the machine for some time, drain all the fuel out of the tank and replace cap.
Maintenance of the engine
Daily Checks :
- Check all screws for looseness
- Check for oil and fuel leakages
Checks after every 10 hours :
- Clean the air filter
- Clean the fuel filter ( if fitted )
Checks every 50 hours :
- Check the tension of the nuts on the cylinder head
- Decoke the cylinder head and the exhaust
- Replace Spark Plug
- Replace Air and Fuel Filters
- Check all wires for damage or looseness
Storage
If the engine is not to be used for some time,
proceed as follows :
Clean the machine and lubricate all moving parts,
nuts, bolts and screws.
Drain all fuel from the tank.
Remove spark plug and pour a little oil into the
cylinder. Turn engine over slowly a few times and
replace spark plug.
Store the machine is a dry place.

Trouble Shooting
Engine Fails to Start
Check Fuel is in the tank
Check Fuel is visible in the fuel pipe
Check Spark Plug is not saturated with fuel or clogged with carbon
Check Spark Plug Lead is well connected to the Spark Plug
Check operation of Choke. Engine may require more choke or less choke
Engine may be flooded. Remove spark plug, turn engine over several times, dry
plug, replace plug, ensure choke is turned off and attempt to start again.
Check no wires have become loose or damaged, especially the wires from the
engine to the on and off switch. Repair if necessary.
Engine Starts but will not run at
full speed
Check the choke is turned off
Check the oil to fuel ratio is correct ( 25:1)
Check for water in the fuel
Check the spark plug is not clogged up with carbon
Check the air filter is not clogged
Engine Starts and runs at full
speed, but has insufficient power
Check the choke is turned off
Check the oil to fuel ratio is correct ( 25:1)
Check for water in the fuel
Check the spark plug is not clogged up with carbon
Check the air filter is not clogged
Decoke the engine
The engine may be worn out and require a new cylinder, piston and rings
( this is usually associated with a loud rattling from the engine during use )
Engine stops suddenly during
use
Fuel has run out
Fuel Blockage ( remove fuel pipe and check for a blockage )
The spark plug is clogged with carbon
Check for water in the fuel
Check the choke is turned off
Check the air filter is not clogged
The Air Hole in the tank may be blocked, quick test – release fuel tank cap and
listen for sucking sound. If so, clear hole in cap.
Loud noise coming from Chain
Saw Head
Head has not been fitted properly. Loosen head, reposition and retighten.
Chain may be loose. Retighten but do not over tighten.
Reservoir may be empty. Refill.
Sprocket bearings may be worn out. Replace with new bearings.
Chain Saw does not cut easily
Chain is worn out – replace with new chain
Chain requires sharpening

Specification Sheet
Engine Air cooling single cylinder ( 25:1 petrol : oil mixture )
Type 1E34FL
Power 25.4cc
Rotating speed 0 – 7500 r/min
Maximum torque 1N.M
Fuel consumption 380g/kwh
Total displacement 25.4CM3
Fuel 90# gasoline
Mixture 25 parts fuel to 1 part oil ( 25:1 )
Size 4.0m ( long ) max extension ( 2.5m min Extension )
Weight 7kg Dry Weight
Item Branch saw
The length and quantity of blade 280mm / 1 pc
Lubricating oil No15 engine oil
Rotating speed 3000r/min
The length of blade
Engine Parts List ( refer to previous page for exploded drawing )
Part
No Part Name Qty Part
No Part Name Qty
1 Screw 1 21 Clutch Spring 1 40 Recoil Spring 1
2 Cleaner Cover 1 22 Nut M8 x 1 1 41 Starter Rope Reel 1
3 Cleaner Filter 1 23 Washer 8 1 42 Recoil Starter Body 1
4 Screw M5 x 55 2 24 Stop Cord Comp 1 43 Rope Guide 1
5 Cleaner Inside Cover 1 25 Primary Cord Comp 1 44 Rope 1
6 Screw 1 26 Magneto Stator 1 45 Starter Handle 1
7 Choke 1 26A Magneto Rotor 1 46 Gasket 1
8 Choke Handle 1 27 Screw M5 x 25 4 47 Screw M5 x 14 1
9 Carburetor 1 28 Front Half Crank case 1 48 Cover 1
10 Sealing Washer 1 29 Guide Plate 1 49 Cover 1
11 Screw M5 x 20 6 30 Crank Case Gasket 1 50 Screw M4 x 12 1
12 Inlet Manifold 1 31 Oil Seal 2 51 Plug Cap 1
13 Cylinder Washer 1 32 Ball Bearing 6001/P5 2 52 Click Spring 1
14 Annul B3 x 10 4 33 Key 1 53 Plug Cover 1
15 Screw M4 x 16 9 34 Crank Shaft Comp 1 54 Plug 1
16 Fan Cover 1 35 Rear Half Crank Case 1 55 Screw M5 x 20 4
17 Clutch Step Screw 2 36 Starter Pulley Assembly 1 56 Washer 5 4
18 Washer 2 37 Starter Pull Spring 1 57 Washer 5 4
19 Clutch Shoe Comp. 2 38 Starter Pull 1 58 Sealing Washer 1
20 Washer 2 39 Screw M5 x 10 1 59 Muffler Comp 1
60 Bolt 2 68 Piston Ring 2 76 Inlet Fuel Pipe 1
61 Washer 5 3 69 Needle Bearing 1 77 Primary Cord Grommet 1
62 Nut M5 2 70 Piston Pin Circlet 2 78 Cleaner 1
63 Cylinder Washer 1 71 Fuel Tank Lid 1 79 Fuel Tank 1
64 Cylinder 1 72 Air Inlet Mouth 1 80 Screw M5 x 16 1
65 Piston Ring 2 73 Frame 1 81 Screw M5 x 16 2
66 Piston 1 74 Sealing Washer 1 82 Starter 1
67 Stop Ring 2 75 Outlet Fuel Pipe 1 83

Exploded Parts List of Pole with Chainsaw


GUIDELINES FOR THE USE OF A CHAINSAW
So you now own a power chain saw! When you bought it, you not only acquired a very useful tool, but you also acquired
the safety hazard that accompanies its operation. Here are some suggestions for safely using the chain saw at home as
well as in the woods. Although the suggestions concern the power chain saw, other cutting tools, such as axes and
splitting mauls, are needed to harvest timber, and they, too, must be used with caution.
Do not be afraid of the tools; just learn to master them and use them with caution and common sense. And please
remember that these suggestions are no substitute for experience. You may want to practice with your new saw, felling
and bucking (crosscutting) or pruning only smaller trees until you get some experience. It is safer to use both hands to
operate the chain saw -even if yours is light enough to use with one hand.
PREPARATION
Be sure to check with the landowner as to which trees may be cut and what stump heights are required. If you plan to cut
on private property, especially in the city, check the local ordinances regarding the felling of trees.
Ensure if you are cutting trees in a protected area ( such an conservation area ) that you have first consulted with the local
council to establish if planning permission is required. Failure to do so will inevitably result in a nosey neighbor reporting
you to the council and within just a few short hours a local enforcement office will be on your doorstep.
If you plan to cut trees down in a conservation area and you are 100% certain that the works you are about to do fall
within the local councils regulations ( i.e. the tree was already dead ), then it is best to do all works on a Saturday, or over
a Bank Holiday. That way, you can ensure the job is done and the timber removed before the next working day.
2. Read the instruction manual that came with your saw. Your manual describes how to mount the guide bar and chain,
how to mix the fuel and lubricate the saw, and how to start it. Most chain saws are designed to operate the throttle with
the right index finger; the left-handed person who tries to control the throttle with the left index finger will have a limited
amount of the front handlebar to grasp comfortably and safely, and the chain will be running closer to the body. This is a
more hazardous position for inexperienced operators.
PRECAUTIONS
Protective Clothing
A hard hat is recommended, and goggles will protect your eyes against flying splinters
and chips. Because a power saw is noisy, you should wear hearing protectors. L
gloves, hard-toe shoes, and timber chaps would help protect limbs that might come into
contact with the chain. Do not wear slippery shoes or baggy clothing that could catch
the brush and cause you to fall; always watch your footing while working in the woods.
R
eather
in
efueling
Taking the same precautions that you would with your gasoline-powered lawnmower,
Carrying the Saw
Shut off the saw when carrying it from one tree to the next if working conditions are hazardous - heavy brush, slippery
First Aid
Even if you do not need an assistant, someone should be with you in case of an accident. Have the telephone number f
stop the engine and do not smoke when refueling your chain saw. Do not spill petrol on
a hot engine. Use a filtering funnel or a fuel can with a flexible hose to fill the fuel tank.
Do not start the saw where you refuel it, and be extra cautious of fire during dry
weather.
ground surface, or steep slopes. Carry the saw with the guide bar pointing to the rear, or point the bar to the front if you
are going downhill.
and address of the nearest hospital or emergency doctor, and always carry a first-aid kit when you work in the woods. I

someone is cut, cover the wound with a clean cloth and press hard to stop the flow of blood. Get the injured person to a
doctor or hospital immediately.
HOW TO FELL A TREE
Preparation and Positioning
1. You can fell large trees with the small, lightweight saws that homeowners usually buy, but it is a risky job for
inexperienced, nonprofessional workers and demands extra caution. First, remove any wire or nails that are in the wood
you plan to cut. Determine where you want the tree to fall. Look at the top. Is it unbalanced with heavy limbs on one side?
How much wind is blowing? What about other trees, buildings, or power lines in the area? If these hazards exist, perhaps
you should hire an experienced worker to do the felling while you limit your work to limbing and bucking the down tree.
Examine the top to see whether there are any "widow makers" (dead limbs or branches) that may fall while you are cutting
the tree.
2. Clear all brush, snow, and rocks from around the tree that might interfere with the use of the saw, or that might block
your way to a safe retreat when the tree starts to fall.
3. Pick a safe place where you plan to stand when the tree falls. Remember that a gust of wind or a rotten place in the
trunk may cause the tree to fall in the wrong direction. The tree may bounce, kick backwards, or roll when it hits the
ground. You usually are safe standing behind a larger tree off to the side and away from the tree you are cutting. When
trees are cut on a hillside, the saw operator must stand on the uphill side of the tree. (The same recommendation also
applies to limbing the down tree or bucking the trunk into firewood or logs.)
Method
1. Assuming that the tree stands straight and has a balanced top, and that there is little or no wind, oil the chain, fully open
the throttle, and undercut (notch) the tree on the side in the direction of fall (Figure 1). Cut the notch to a depth of about
one-fourth to one-third the diameter of the tree.
2. Stand beside the tree with your feet well braced and comfortably spread for good balance. Put in the "back cut"
opposite the notch (Figure 2). The back cut should be an inch or so higher than the
bottom of the notch, square with the trunk, and parallel to the bottom of the notch.
Then place the bumper spikes near the engine firmly against the trunk, and start
cutting. Pivot the saw about the bumper spikes and into the trunk, using a fanlike
motion and moderate pressure to feed the chain into the wood. It is not necessary to
move the saw in a sawing motion: the powered chain provides the cutting action. Pivot
the saw, then move the bumper spikes to a new
location and continue feeding the chain into the cut.
Draw the saw out of the cut slowly and with the
chain running. If you must cut without the bumper
spikes in contact with the tree, or if the saw does n
have spikes, be careful that the saw does not jerk
and throw you off-balance when the chain conta
the bark or wood.
ot
cts
On trees 16 inches or larger in diameter, you should make two extra side cuts to
prevent splitting of the butt log (Figure 3).
3. Do not cut through to the under cut; be sure to leave a hinge (Figures 2 and 4). As
the saw approaches the notch, slow down and carefully control the rate of cut. You
should have your wedges and maul handy because you may need to drive a wedge
behind the saw to prevent pinching of the cutter bar. Wood or plastic wedges should
be used if there is danger that the wedge tip may hit the chain. Wedges also may be
needed to adjust the direction of fall by "swinging" the falling tree to one side or the
other. Leave some "holding wood" (hinge) that is thicker at one side of the back cut
than the other (Figure 4).

4. If the tree is small enough (6 to 8 inches) that an assistant can push it, you will not need a wedge. Both persons must
be alert, however, and plan to leave the area without stumbling over each other as the tree starts to fall.
Caution: Always make a last-minute check to see that other persons are out of danger before completing the back cut.
Yell "Timber!" when the tree starts to fall. Then stop the saw, quickly set it on the ground away from the stump, and retreat
to your preselected place of safety behind a larger tree. Be alert to the possibility of kickbacks or bounces when the trunk
hits the ground. Watch for failing limbs!
Lodged Tree
If the tree lodges in a nearby standing tree, its removal is a dangerous job. Proceed with extreme caution! First, consider
the hazards involved. Has the lodged tree been cut free from the stump? If not, then free it with the saw or an axe. A pry
pole, bar, cant hook, or peavey can be used to roll the tree off the stump and out of the standing tree. Sometimes the tree
can be pulled free with a long cable or chain and a tractor. Be sure that no harm will come to the tractor driver or the
equipment as the tree comes free. Be careful that the cable does not snap as it is pulled and hit the driver or a nearby
worker.
As a last resort, a third tree may be fallen across the lodged tree, or the tree supporting the lodged tree may be cut. The
latter alternative is a very dangerous job that requires experience; you probably should get professional help.
TRIMMING AND BUCKING
Positioning
1. Do not work too close to your helpers.
2. Do not hold the saw higher than your waist.
3. Trim the limbs from the fallen trunk while standing on the opposite side of the trunk. If the down tree is on a hillside, or if
the trunk is likely to roll when some of the limbs are cut, stand on the "uphill" side.
Method
1. Start cutting the limbs from the down tree at the butt end and work towards the top. Limbs that are bent over and
supporting the down tree should be Cut first on the under (compression) side, then on the top side; otherwise they may
split lengthwise as the tension is released and spring back to injure you. If you are cutting the tree into firewood1, start at
the tips of the branches and move towards the trunk, cutting the limbs into lengths of 16 to 18 inches. The branches will
be flexible - be careful that they do not whip about as the chain comes into contact with them.
2. When the branches have been removed, start bucking the trunk into firewood or logs. Be alert to the possibility that the
saw may pinch and kick back to throw you off- balance. To help prevent pinching, start sawing partway through the trunk
(or limb) from the bottom, then finish the cut from the top side, or use a wedge. See that you have a safe place to stand
while bucking the trunk and limbs, particularly when they are likely to roll or shift position.
3. Do not run the saw into the soil! It dulls the chain. Keeping your tools sharp and in good working order is part of your
safety program.
PRUNING
Caution
We recommend that you do not stand on a rickety ladder to prune a standing tree with any kind of saw. Pruning a
standing tree from a ladder is very dangerous. Use a pole saw and stand on the ground to reach high branches. (If you
must use a ladder, see that it is stable and well braced. Work without overreaching to the side. Use a hand saw for cutting
smaller limbs, and use the other hand to maintain your balance on the ladder.) Hire an experienced worker to prune any
larger limbs that may require a power saw.

Other Parklands Pole Saw manuals
Popular Pole Saw manuals by other brands

GreenWorks Pro
GreenWorks Pro GLPS80000 owner's manual

Poulan Pro
Poulan Pro PP5000P instruction manual

Poulan Pro
Poulan Pro 115244926 instruction manual

Kraftixx
Kraftixx KX-AHE 1820 Li Kit Original operating instructions

Toro
Toro Flex-Force Power System 60V manual

GreenWorks
GreenWorks 1400102 owner's manual