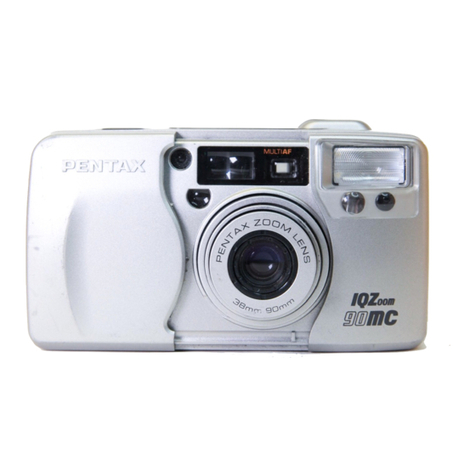
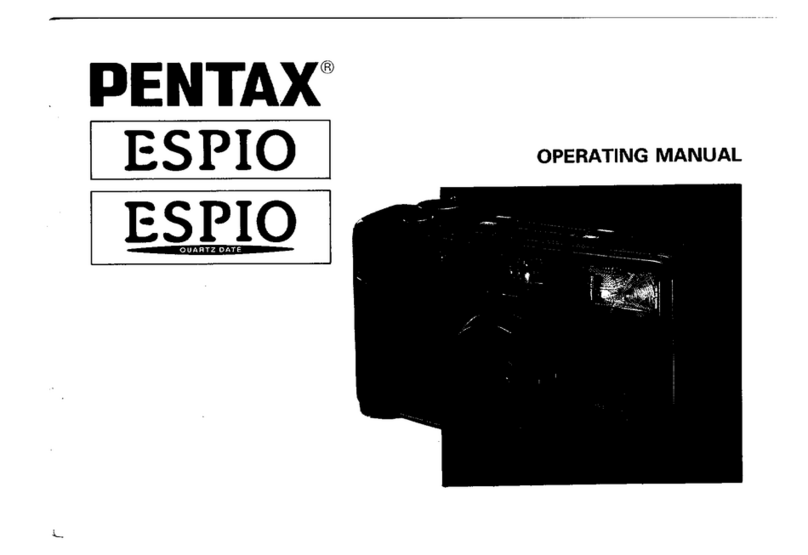
Pentax ESPIO 928 QUARTZ DATE User manual

OPERATING MANUAL
Congratulations on yo
ur
pu
rchas c of th c
PE
NT A X
ESPIO
928 and wcl
comc
to
thc
world of Pentax
zoom
com
pa
ct pho rog
rap
hy!
Your compact, li
ght
wcigh t ca
me
ra is a great
cornpauion tu prese rve
your
favorite mcrnories.
Its
bui
lt-in 28-90
mm
zoom
lens givcs yo u the
fre
ed
om
to f
rame
cvcry rh ing
from
br ca th tak ing
l
and
scapcs to fam ily
portra
its,
even
d
erai
led clo-
se-ups.
Th
e buil
t-in
auto nash helps you captu re
s
ubje
cts in d im ly-lit
pla
ces or p ho
tograp
b
ind oor scenes with clarity and brilli
anc
e. Also
inclu
ded
ar
c panorama / standard format
mid-
roll switehing ca
pa
bility
and
a wi rc lcss rem e re
con tro l lca t urc. Silice
I110St
of the op erat ions-
inclu d ing film loa d ing , film s
pc
cd setting, wind-
ing/ rewind ing, Iocus and exp osurc
contro
l-
ar
c
automatic,
you
can Lakc
great
pictur cs ef-
fortlessly. T he
DA
T E modcl rna kes il casv to
re
mc
mb
er th e dat es whe n you took pictures.
• P lease rcad t his manual carefully
bef
ore
ope-
rating the ca mera to help you
lake
cons i
sten
ly
su
pe
rior pictures.
• Pay special attention to th e
cau
tions and notes
in this
Op
cra tin g M a
nua
l, Pi
ctur
es and illus-
tration, shown herein may difl cr from the
carnera 's actua l a
pp
ea ran cc.
Icon
lnd lc
ator
s used in
this
rnanual
Operation direction
......
Automatic operation
......
Attention "
-,
1
'
...
_
....
Lamp lighted ' ..1, '
-,-':
':-
..-
Lamp blinking
..
:..:.
.-:-.
Correct 0
Incorrect X
T he
namc
s
of
the c
am
er
a's
working
part
s
are
listed on the front and back flaps of th is manual,
K eep th e flap s unfo
lded
for
quick
re fere
nce
w
hile
readi
ng th e
manu
a!.

NAMES OF WORKING PARTS
o Strap lug ( p.S)
e S
hutt
er rclease burton (p
.19)
e Drive butten (p.23)
o Land sc
ap
c/ Easy Pic. mode
burton ( p .23)
o Le D p
anel
(p.;>;,)
Ci)
Mo
ùe
butron (p.22)
8 Red-eve red ue tion flash
bu rton (p.22)
Cl)
Auto focus wi ndow
Ci)
Bu ilt- in flash
G!)
Lens
li)
Viewfinder wi ndo w
Œ)
Self-rimer lu
mp
(p.n )
Œl
Light scnsor w ind ow
œRemote COI1l
ro
1 receiver
(p.28)
OUTLINE OF BASIC OPE TIONS
I
cnl
\
O pen the haek covcr Load the film am i close
Th
e film will a u to
mat
i-
Pu
sh t he M a in Sw itc h
(sec p age 12). the back cave r
(see
ea lly ad va nee to
th
e bu
tto
n
ta
switc h on
page 13) . f
ir
st fra me (sec pa ge pow er ( sec p age 7) .
13) .
,1 _ _ , ,
rf"
8
t---
- - - -
I
~
I
J
1
COd
1
Frame y" ur subjec t and FllCUS 01 1 you r su bjcc t Dc p ress the shu rter re- W h en t h c fi lm is fin -
ope
ra
tc the w om ing (sec page 18). lease
but
ton, In dark ishcd, the camera will
lever III compose th e cond itions, the flash will au toma tically rewind
shot (sec
pa
ge 10) .
di
schar gc autornatically it
(sec
page 2U) .
(sec
page 19) .

TABLE OF CONTENTS
•
Names
of working
pa
ns
Fl
ap
s
• Irur
odu
ctiou ..
...
.....•. .... .. ..•...Fr
ont
Iold
out
•
Ou
tline of basic
opcra
tions ... ."
'l
nsi
de
co
vcr
•
Cautions
···
·
····
·····
········· ···· ·
····
···
······
····
·2
• Practical shoo ring guide ········ ···
····
···· ·· ····4
PREPARATIONS
BEFORE
TAKING
PHOTOGRAPHS
1. Strap a
tta
chrnent ··
········
····· ·
···
··6
2. M ain switch ···· ······················· ·········· ··7
3. Ba
tlery
check 8
4. How 10 hold the camera ···.. ·· .. ··9
5. O p cra ring th e 28-9
0mm
zoom lens .... .. .·· 10
TAKING PHOTOGRAPHS
1. Usable lilm ' 11
2. Film lo
adin
g ' 12
3. V icwfind er d isplays and shoo ting ra nge s" · 14
4. L
arnp
indications ········ · · · ·15
5. O rdin
ary
pho tog rap hy · · · 16
6. Di
opt
er ad
jus
trne ru
lï
7.
Taki
ng picturcs 18
8. U nlo
adin
g the lilm 20
TAKING
BETTER
PHOTOGRAPHS
How
to se lec t
modes
/ Red-eye r
edu
ction nash mod e .. ···
···
·.. ···22
Dayli
ght
-syn chro shoo ti ng ·.. · · ·24
T ak ing pic tu rcs al slow sh uttc r specd s 25
Slow-shu tt cr -spccd -syn ch ph orogr
aph
y ······ ·25
Bulh shooting ···
···
···· ·· ····
···
·· ···· ·· ··
···
··· .. · ·26
B
ulb
-synch ro shoo ring 26
Self-
rimer
shooting ··.. ·· ·····.. ·· · ··· 27
Using
a wi rcless
rumot
e
contro
l ········ ·28
M ult i-
cxpo
surc shooting
···
······ ··
···
····
····
·..·32
Inlinit
y-Iandscapc shoo tin g ········.. ·.. ·· .. ·· ·.. ·33
Spot
AF
sho oting .. ·· ··· ···· ··.. ·· · ·· · 34
Easy
pic. shoo ting " 35
Focus-Iock shooting ·.. ···.. ····· ···· ·.. ··36
Ex
posur
e
comp
ensa
tion ·.. ·· ·.. ·· ······· ······· .. ·38
Panorami c format pict ure .. · ··.. ·· ·· .. ·· ·39
DAT
E
MO
D
EL
·········· · ·42
MAINTENANCE
CONSIDERA
TIONS
Batie ry ex ha ustion w
arn
ing ,, 44
Insral ling
/R
cplacing th e bat rcry ,45
T
akin
g
care
of you r ca
mera
46
Tro
ub le shooting ·.. · 48
Specificat ions ·· ·· .. ·· .. ·· .. ··.. ···.. ·50
W
arrant
y policy · ·· ·· ··.. ·· · 52
L
eD
pa
nel '55

2
CAUTIONS
• T he electric circ uitry insid e th e camcra
conta
in
s high voltage working pa rts.
N over attcm pt to disussernbl e the ca mera .
• Be carcful not 10 d rop or su bjcct the
ca m
era
ta
srrang vibr
ati
ons, sho ck o r
pres
-
sure.
• Do oot app ly force la
the
zoom lens ; do
not plac e t he cam era with t he lens facin g
dow
nward.
•
Neve
r au em pt Iq, man
ually
ope
n th e lens
covcr : it will
aut
o ma tically
ope
n and
close as the
ma
in switch is lurned on and
on;
• M ake sure not
ta
ob str uer the autofocus
window, lens, light scnsor
wind
ow, or the
bu ilt-in flash with your fingers, h
air
, or
oth
er abject.
•
Avoid
lcav
ing the camera for extendcd
pcr iods in places whcre te
mp
eratur e and
hurn
id iry ar c hi gh such as in a ca r.
• D irt ,
mud
, sand, rn
oisture
, tax ie gas,
wat cr , salt wat er, erc., p
enetrat
ing
the
insid e of th e ca
me
ra may cause
dama
ge or
render it inoper
abl
e. Da
mag
e of an y kind
will not be r
cpair
ed unde r rhe ter ms of th e
wa rraru y, T he refore, h
andlc
th e
camer
a
w
ith
gr
eat
ca rc.
• Nover use solvcnts such as p
aint
t
hinncr,
alcohol or benz ine la c1ean
the
cam
era .
PRECAUTIONS
FOR
BATTERY
•
Th
e rnisusc of a b
art
ery
ean
cause
hazards
such as leakage , ov
erh
cat ing, exp losions,
etc ,
Th
e h
att
ery should be
inserted
with
the
~
+,.
and"
-
~
sides fa
eing
correcrly.
•
Nev
cr
try
10 disassernble, short or re-
c
ha
rge the
batt
er y. Also, do not dispose
of
the h
all
cry in a lire, as il
may
exp
Iode.
• B
alt
ery p
erf
orm
ance m ay be l
emporarily
hind
ered in low t
emp
er
atur
es,
but
will
recov er in
norm
al
temp
eratur
es.
• K eep a spa re
batt
er y On
hand
for r
epla
ce-
m
ent
convcnience wh en
shootlng
outdoors
or
whil
e tr avel ing.
• Keep the ba
llery
OU I
of
th c reach of ch il-
dr
en,
• Wh en the ca me ra is in a bag, ensure
the
m
ain
switch is oIT :
othe
rwise, b
atr
ery
pow
er may be wast cd if th e shutrer re-
leas e but ton is
accid
entall
y
push
ed .
3
4
PRACTICAL
SHOOTING
GUIDE
Focusing --------
---
----
---
- -
--,
Focu
sin g on a p
articul
ar spot of the subject p.34
T
aking
a
pictur
e of dist ant lan dscape sc
ene
ry . p.33
T
aki
ng a pi
ctur
e of a subiect
thr
ough
a window .. p.33
Flash
photcg
raphy
-----
---
-
-------
Tak ing a pi
cture
in low light sit
uat
ions .. p
.l6
Minimizing the pic
tur
e of red-eve effect . p.22
Taking a pict
ur
e of people whose face is
cast
in s
hado
w
Tak ing a picture of people
with
n
ight
scenery in backgrou nd ............
~
:
~~
Zooming
-------------------1'
Compose the subjec t lal'gel' or srnaller .. p.lO
Taking a
pieture
of people in various situations ,
p,24
T
akin
g a pi
ctur
e of people whose face is c
ast
in s
hado
w
Taking a p
ictur
e of peo ple with
sun
set scenery in bac
kgro
und
p.25
Ta king a pi
ctur
e of p
eop
le with ni
ght
scenery in backgrou nd p.26
Putt ing yourself into a pi
ctur
e . p.27
Landscape
photography
-
----------
- -
--
Taking a pict ure of di
st
ant
land
s
cap
e scen er y .. p.33
Tak
ing a pi
ctur
e of
dista
nt land sc
ap
e
thr
ough a
wind
ow .. p.33
Others 1
Tak ing mor e
than
2 pictu
res
on the sarne (rame p.32
Taking a pic
tur
e or zoorning a lens at a distant place from the
cam
era -« p.28
Irnprinting da te on a pi
ctur
e pA2
5

6
STRAPATTACHMENT
PREPARATIONS BEFORE
TA
KING
PHOTOGRAPHS
For optimum
performance
you should
ramiliarize
yourself
with
certain
rundamentals
befor
e taking any
photographs.
Remote Control Holdcr (Option)
.
~
"'
~
-..
~
Fit th e st ra p on th e ca
me
ra as illustrar ed. \<\'hen
attac
hing
th e R em
ere
Co
n
tr
ol H
el
der ta the
stra p, first
rernove
th e W irele
s.s
R
emot
e C
ont
rol
fro m th e R em ot c
Co
ntro l H
eld
er , rhen pass th e
str ap
thro
ugh th e
Remote
Cont
rol B old er as
illuvt
rat
ed . Use th e rab on th e cl
amp
(see
illus-
tra
tion) 10 d
epr
ess th e
ADJ
US
T
burt
on and la
open the b
att
ery chamber caver.
•
Ta
pr
ev
ent
th e
camc
ra fr
om
s
wayi
ng a lot
while walking, a dj ust th e
strap
sa th e
cam
era
rides above
you
r waist.
MAINSWITCH
Main
Switch
T o swi tch on,
pus
h th e M
ain
Swit
ch
burton
.
Th
e lens extends
sligh
tly la th e
wid
e-an gle 28
mm sett ing and th e
LC
D p
anel
is on.
To
swi tch
otf,
pu
sh th e m ain swi tch b u
uon
aga
in.
Wh
cn
not in use, cnsure tb at th e ca mera is switc hed
o
iT.
•
Use
one 3V
lithi
um
ba
ttery , t
ype
CR
123A or
th e eq uiva lent. Do no l re rnove the b
atter
y
hefor e il is ex
haus
ted, sincc it is
used
by th e
d
ale
fun crion on th e
DA
TE
model 10 keep
cons
ta nt track of
lim
e.
• T he lens cave r autornatica lly
opens
an d closes
wh
en th e ma in swirch is tu
rned
on
and
off.
Ne
ver
at r
crnp
t ID oJlen the lens co
ver
rnanua
-
lIy.
7

8
HOWTO HOLD THE
CAMERA
BATTERYCHECK
•
-
-
Batt
ery check
Af
ter you turn the Main
Swit
ch O N, th e lens
sfightly extends and the lens coyer
open
s. You
are now
rca
dy to shoot. Sce page 44 when
the
ba trery exha ustion sym hol (
c>o
) ap
pca
rs on th e
L
eD
pa ne l.
• If the camera is on
and
left
unu
sed for over 3
m
inut
es, the Jens
au
torna
tica
lly
retr
acts and
the power swirches off to save h
atterv
power.
•
If
th e Main
Swit
ch is
turn
ed on w
ith
in 60
minut
es of auto-power off, the prcvious selting
will a
uto
ma
tica
lly
return.
Wh
en shooriug,
hold
th e camera sccu rcly w
ith
hoth
h
and
s. Keep th e
came
ra as srill as possible,
and gently depr ess th e shutter rclcasc bu tt on. (I f
too much force is applied, the ca me ra is likely to
s
ha
ke, and th e pi
ctur
e will be
hlurred
.)
Try
to
br ace your clbows aga inst y
our
b
ody,
or
support
yourself and the c
ame
ra
against
a st
able,
st
ati
on-
ary object, such as a wall.
Wh
en using the flash
wirh
the camera posit i
oned
v
erti
cally, hoId the
cam
era
50
th at
the
flash is
above the lens.
Caution:
Do not hoId th e zoom lens because il rnoves ba ck
and
forth wh ite in ope ra tion.
Note:
• M
ake
sure not to obstruer th e autofocus
window
, lens, light sensor
window
or
the
bu
i-
Ir-in flash
with
your
fingcrs, h
air
or
other
ob
je
ct,
9

10
OPERATING 28-90mm
ZOOM
LENS USABLEFILM
6,
6,
..
DX FILM Perforations Film cartridge
TAKING PHOTOGRAPHS
• Aller rcading this in
struction
manual
you
-should be familiar with the functions available
on the camera, and you're ready to in
sert
the
-film.
v No
tes
:
•
Wh
en
huying
DX
-cod
ed films , ensure
that
th e Aut
omatic
fil m spee d se
ttin
g
V package be
ar
s the "DX " m
ark.
Th
is
came
ra is dcsigncd
ta
use
DX
c
cod
cd films
•
Non
-DX
coucd film ca
nne
t he used. with
ISO
rar ings from 25 to 3200.
Wh
en any of
• Use high-speed film wi th an ISO
rat
ing of 800 rhese films
ar
e load ed , the
pr
op
er
film s
pce
dis
or highcr maini)' for shoot ing ind
oors
in dirn- auto
rnat
ica lly set for th e ca me ra.
lv-lit co ndi tions.
• A film
with
IS
0400
film speed is recornme-
ndcd
to l'et less image h
lur
and to c
aver
mor
e
pho to
grap
hie
si
tua
tiuns.
Wh
en you move th e zoorning lever to th e right
( .
),
the lem ruoves
towards
the
90m
m s
eu
ing
and
fr
am
es the subjec t mo re closc ly,
When
you
move th e zoom ing lever
ta
th e left (
...
) , the
lens moves tow
ard
s the wide
-ang
le 2
8mm
sel-
ling
. When th e lens zooms to th e dcsired setting,
releas e th e zoorning lever and depress the
shut
-
ter release bu rton fully io t ake pic
tur
cs, 11

FILM LOADING (Ensure the power is off before insertlng the film.)
Ch
I!
5
Wh
en .. 1..
app
ears in the exposure countcr
on th e LCD pa nel,
th
e film aut
ornar
ieally
Il
s
top
s w
indin
g.
Th
e indi ca tion
ap
pea rs as
shawn above,
If
( 1) does nol appea r on
the
LeD
p
an
el, il
indi
car
es th a t the film is nol
prop
erl
y Ioad cd.
If
th is oc
curs
, reload th e
film .
Slid
c
th
e
hack
cov
cr
release lever
down
in th e
If
( E)
blink
s on th e LCD
pa
nel, it m éans th e
dire
cti
on
of
th e
arrow
la
ope n th e ba ck ca ver film is nol
prop
erly lo
ad
cd.
as illu
strat
ed. •
Th
e exposure countcr ind ica tion will rernain
2 Pl ace th e film ca rrridgc in th e film cha mber on even if th e m ain switch is
lurn
ed off
by
fitting
ils Ilat
sid
e on
top
of th e r
ewind
• If the ca mera is placcd in a condition where
sha fi firsl and th cn slidc
the
top
end
into
th e
camera. sta tie eleetriciry may be dischargcd on or nc
ar
3
Pull
th e film le
ader
am
far enough from the
the
ca m
era
, th e L
eD
lilm
courue r ma y cha nge
c
artrid
ge
ta
rea
ch th e
ta
k
e-up
spool
O,
Al
ign la num ber one, hut you can continue LO use ail
the tip of
the
film
with
th e film le
ader
end ot
her
Iunc
tion
s of th e ca
me
ra norm ally.
mark 8 • Enm re th e film is ra ut as illustratcd on th c p
rcv
ious page.
Tak
e
up
any slac k in the film by p ush ing
it ba ck into the
ca
rtri
dge.
•
If
the end of th e film lead er is
ext
rcrnely b
eru
, srraig hren il
or
eut air t he
ben
t por ti
on
,
x Slack NO! o n« YES!
12 13
Notes:
•
Ens
ure
the film is
pla
ced p
rop
erl y be
twc
cn
th
e gu ide rails
f)
.
• If ther e is di rt on
th
e film
det
ect
er
0 ,
film
ca nna t be w
ound
prop
erl y.
4
Afier
th e back ca ver is closed, th e film a uto-
rnari c
all
y a
dv
ances
ta
th e first fr
am
e.
• Even if no film is lo
ad
ed, th e m
otor
operai
es
for a seco nd or IwO
aft
er th e back ca ve r is
closcd.

14
LAMP INDICATIONS
VIEWFINDER DISPLAYS AND SHOOTING RANGES
Ordinary
photography
First,
switch
on
power
by
depressing
the
Main
Notes
:
8 •
If
th
e sub
jec
t is too close, th e g
ree
n
lamp
Ordinary
photography
(
standard
Iorrnat
)
Swit
ch
button.
hlinks.
Adju
st th e
ca
rnera -to-su bject di st an ce
~
~
oAutofocus frame so th at th e gree n l
amp
li
ght
s
continuously,
Focus on tb e su
bjec
t
with
thi
s fr
am
e. then rclcase th e
shuu
er
,
e C lose disLan ce c
omp
en
sati
on fr
ame
. •
If
th e s
ubject
is
eve
n closer, th e gr een l
amp
Wh
en th e
carne
ra-
to-sub
jcc
t di stan ce is
bet
wccn 0.58 may li
ght
conrin uously, eve n th ou gh
proper
C
o]
focu s can na t he oh ta ined.
th is fr
am
e.
Pic
tur
c area
Wh
en ta king a norm al pi
ctur
e, co mpose the scene
with in this
fram
e.
m ( 1.9fL) and 1
III
(s.
sm,
com pose th e sccne wi t
hin
Panoramic
Iormat
pi
cture
Wh
en yo u
de
press t
he
s
hu
u cr relcase
hull
on
Panoramic
rormat
pi
cture
o
Aut
of
ocus
frame
halfway
down
, the l
amp
s 0 an
d/
or e l
ight
up
Focu s on th e su b
ject
with
thi
s f
ram
e. or blink as shawn ahove.
e Picturc area O Grcen lump :
Wh
en the su
hjeet
is in focus, it
Wh
en ta king pan or
ami
c format pi
ctur
es, co
mpo
se th e
will
li
ght
up to ind ica te
that
scene wirhi n th is frame.
you
c
an
t
ak
e th e p
ictur
e ;
wh en the subject is not in
Au tofocus is referred to as "A F" . focus, il w ill bl ink ,
indic
ating
Shooting
ranges
(efIe
ctive
camera- to-subj ect dis- t
hal
yo u ca nno t Lake the pi c-
tance
)
tur
c bec
au
se th e ca mer a-ta -
•
Th
e ord i
nary
s
ctt
ing
and
pan or
amic
mod e allow a subjc ct dista
nce
is roo close.
shoo ring range from
00
(infmi
ty)
to 0.58m (i.sn). e Red la
mp
Wh
en th e fl
ash
is re
ady
to d is-
• Su hj ecLs closer than 0.58m ( 1.9ft) ca nne t be fo
cus
ed c
harg
e, it will li
ght
up.
Wh
en
pr
op
erly
. t he flash is b
cin
g cha
rge
d, il
will blink. 15

DIOPTER
AD.JUSTMENT
ORDINARY
PHOTOGRAPHY
[Ch
L-.
1
Wh
en th e power is switchcd on hy d
epre
ssing
the
mai
n switc h b
uu
on, the camera
autorn
ati-
ea lly selec ts the Aut o and Single-F r
am
e Shoot-
ing modes and the cx
posur
c counrcr indicat ion
remains on as shawn ahove. T hese modes ar e
uscd for taking
orùin
ary pi
ctur
ϥ.
Th
e bu ilt- in
flash will discha rge a
uto
ma
tieally
whe
n th e sub-
je
ct is poorly iIluminateù or in a backl igh t situ -
ation.
•
Wh
en the L
eD
panel display is differ
ent
from
the one shown a hove (which ind ica tes th ar
ether m
od
es are set) , swircbing power O FF
and then ON re
stor
es the
Aut
o and Single-
Fr am e Sbooting modes.
16
ON
•
Wh
en the built-in flash auto
rna
rica lly dis- Aim the camera tow ard a bri
ght
suhj
ect,
Wh
ilc
cha rges, th e ca mera uses a
shutr
er speed in looking through the viewfi
nder
, adj ust the diop-
the r
ang
e f
rom
a
~ p
ro
x
.
1/ 301h (28mm) 10 1/ te r by
turni
ng the diopr cr aùjustment d ial unril
451h sec. (90
mm)
when
IS01
00 IiIm is used, th e AF fram e ap
pea
rs clea rcst.
17

18
11 TAKING PICTURES
Shooting
distance:
O.58m (1.9
rt)
.cx
'(i
nfinity)
1
Composing
the
scene
After zoo ming the lens and cornposing YO
Uf
scenc, fo
cu
s on the subject with the
autofo
cus
f
rame
in the center of th e viewfinde r.
•
Th
is camera uses
rnulri-b
earn
AF
ta focus th e
lens on the
subj
cct . E
ven
if
th e sub
jcct
is
slig htly olT th c AF fra me , th e
subj
ect will
cas ily be
bro
u
ght
inta foeus.
• T a Iocus on a p
art
i
cul
ar
spot in
the
AF
fr
am
e,
sele ct th e
AF
spot
mod
e. (See page 34.)
ilili •
Wh
en th e po we r is
turncd
on, the
multib
ea rn
AF
mod
e is a utorna ti
cally
sel.
2
Checking
the
lamp
indication
DClJreSS th e sh uu er rclcase
hut
ten
halfw
ay
do wn . Wh en th e s
ubj
cct is in focu s, th e green
l
arnp
will li
ght
up. If th e subje c t is clo ser
than
0.58 rneter ( 1.9
ft)
, th e gree n l
amp
will
blink
lU
warn
you . In th is case, extend th e ca mer
a-to-
su b
jc
ct distan ce until
the
green larnp is lit con-
tinuou
sly.
•
Wh
en the
red
la
mp
lights
up
, it indi cat es chat
the
built-in
flash will di s
ch
arge.
En
sur
e
th
ar
yo u ar e wit hin th c Ilash e ffec
tive
range b
ef
ore
shooting.
(Se
c page 19.)
3
Shooting
D
epres
s
th
e shu
rtc
r relcasc
buu
on fully,
and
th e
shutt
cr
will be reJ
eas
ed.
Th
en,
the
film auto rnat-
i
call
y ad
van
ces ta th e ncxt fra
me
.
Notes :
• Wh en t.he
shut
tcr is relcased, the self-r
ime
r
lamp
mum
en
taril
y li
ght
s up ta indi ca te th al a
pictur
e has bccn taken.
• If
you
wish to focus on another su
bjcc
r,
lif
t
your
linger from
the
sh u
tte
r rel ease
hutt
on
and d
epre
ss th e
shutt
er re1case
burt
on haIf-
way
dow
n
aga
in.
•
Th
e shut ter can not be rele ased whi 1c th e lens
is
zooming
.
Automatic
Fla
sh Emission
Wh
cn t
akin
g pict u rcs in low ligh t or in a
ba
ck-
li
ght
situ
ation, rh c flash will
au
tomatieally
dis-
cha rge.
Wh
en th e sh utte r relcasc bu
tton
is de-
pre
sscd h
alfw
ay down in low light,
the
red
la
ml'
will li
ght
up
, ind iea ting th e flash is r
eady
t.o
disch
ar
ge.
If
the red
lamp
hlinks,
this
indi ca tes
thai
th e
bu
ilt -in llash is b eing cha
rged
and
the
shutt
er cal mol be released . T herefore, c
nsure
that
th e red lamp is lit eo
ntinuous
ly befo re
iak ing pi ct
ur
es.
Red-oye
Shooting p
ortr
aits wit h the flash
ma
y
resu
lt in
"red-eve", th e red dot in
you
r
subje
cr's
eye. T his
came ra in
clud
es a red -eye re
du
ct ion flash fune-
tion,
whi
eh reduces the red-oye
phenomenon
by
using
pre
-flash. See page 22 an d 47 for
detai
ls.
Flash
effective
ranges (Nega-color film
used)
lens ISO 100 20U 400
2
8mm
(U .) O.58- 5.0m O.58- 7.0m O.68
-9
.9m
90mm (4 ) 0.58- 2Am O.58- 3.3m 0.58-
4.7m
19

(Removethe film from the camera in the shade
or
use your body to
UNLOADING FILM
shade
the
camera
.)
...
~
.
.
-:
...
~
,..
.
"
cëtrJ
...
~
~
..
:
'1
1 Rew
ind
ing
the
film 2 Unlo
ading
the
fil m
Aft
er
you
ha
ve
expo
sed
the
last f
ram
e
orth
e roll ,
Ta
un lo
ad
th e film, o
pe
n th e
bac
k caver, and
1 the lens r
etr
acts
and
th e film re
win
ds au to
ma
ti- rcm ove th e c
ar
tri dge fro m th e cham her by
pu
ll-
ca
lly. T he n, the
motor
stops, a
nd
(
0)
hl inks as ing the top o ut first with yom fingcr,
s
ha
wn ta i
ndica
te th at th e film has hecn r e-
wound.
Note
s :
• T he shu tter
may
be released a
frame
or two
• A 24-ex
po
sure roll
of
film takes about 20 even a û er
th
e
spe
cificd number of f
ram
es have
second s ta he rewo und . be cn uscd up as ind ica red hy the nu rnb cr of
111
1111
• D
ur
ing rew in
din
g, the cxposure c
ount
er shots
shawn
0 11 th e film canistc r, If this occ urs ,
counts f
ram
e nu rnbcrs in rever se. these extr a frames
may
he lost in th e
proce
ss-
•
The
ent ire ro ll of film in
cluding
the film ing.
lead
er
is always r
ewound
into the carr
ridg
e ta • Nevcr open the ba ck cov cr unt il the whole
prevent
an
y pa rt of th e film being e
xpose
d LO film roll is rcwound.
light.
l 20
~
~
g
,..
~
~~
,
~
.
~
...
Rewind
ing
a film in mid
-roll
If
you wish ta unload a film be fore exposing a Il 2
Whi
le deprcssing the d rive mod e bur ton , de-
press the shutrer releas e bu
tton
. Film re
win
d-
the fr
am
es.
helow, follow the
pro
ced
ur
es des
cr
ihcd ing st
arts
. W hcn a ro ll of film is rc
wou
nd ta its
end, th e mo to r sto ps an d (
0)
blinks, ind ica t-
ing thar the hack cover may be ope ned safely.
Tur
n th e main switch O N and h
old
d
own
the
drive
bu
rton for
more
th an 3 seconds.
(
~
)
app
ear
s and ( ) st
art
s b link ing on th e
Le D panel, ind ica ting t
ha
r the m id-roll film
rewindi ng mod e has been set.
21

(HOW TO SELECT MODESIRED-EYE
TA
KING
BETTER PHOTOGRAPHS REI)UCTION FLASH MODE)
To
set
various
exposure
modes,
deprcss
the
Mode
Butto
n O. To
set
various
shooting
modes,
depress
the
Drive
Button
e.
Auto Daylight- Slow-Shuuer
••
Slow-spccd- Bulb Bulb-sync 1
Syne speed syne
(l'lash-OFF) photography
l
QIT]-
1
~
r
CIJ
-1
~
r
[il
~
LD
--
0 -
B-
Œ]-1
1
Si ng le
-l'
rame Self-Timer Remere control Mul ti-Exposure
shooting shooting shooting Shooting
• In any cxpos
ure
and
/o
r s
hoot
ing mode, ir the
burto
n 0 and e ar c d
cpr
cssed a ûer the
shutt
er
is
L I . T 0.l.et va riou s req uired modes,
depr
ess
the
b
urton
0 ,e
and
/ released, the A
uto
and Single
-Fr
ame modes will r
etu
rn resp e
ctiv
ely.
or U . • H
oldin
g
down
the
Driv
e
Butt
on e for m
ore
than
thr
ee seconds sets th e m id- roll rewinding
mod
e
• For
normal
use, set the Au to and Single
-Fr
am
e modes as shawn (See
pa
ge 21.) .
on the lcfi.
Wh
en the
power
is
switched
on, the
Auto
and •
Hold
ing
down
th e R ed- eve red u
ction
Oash
burto
ne for
mor
e
th
an two s
econds
sets
the
Exp
osur
e
Single-Frame Shooting modes are au
toma
tically sel. compe
nsati
on mode (See pa ge 38) .
To
set
various
focusing modes.
depress
the
Landseape/Eas
y Pic. Mode
Button
e.
Red-Eye Reduction
Flash
Function
To
r
educ
e
the
red -eve ph
eno
rnenon in th e pi
ctu
rc, dep ress the red- eve r
edu
ction Oash
burton
(
<1»
With
tbi
s m
ode
, the flash disch arges
two
consecutive times, reducing the ap pea rance or
the
red- eve
effecr, T o can cel the
mo
de,
depr
ess th e red-eve r
edu
cti on
butt
en again,
~
L
D-
0 -
B-
0 J
1
Autofocus lnfinlty- Spot A I'" Easy Pic. shooting
shooling landscape shooung
shooti ng 23
22
I
II
~

DAYLIGHT-SYNCHRO SHOOTING
Depress th e
Mode
Butt
on
unt
il the
(
~
)
sym hol ap p-
ears on the L
CD
pa
nel. T he flash
a
~
~
will d isch ar ge in
= both d
ark
and
bri
ght
conditions.
Wh
cn a p
ortr
ait
is t
aken
w
ith
the subject in a backli
ght
sit
uat
ion, th e fron t of
the subjeet
ma
y be
cast
in sha do w. In sue h a
case , use th e Dayli
ght-Syn
ch ro Sh o
otin
g mo de
( Flash-O N
mod
e)
within
the flash-effective
range to take pict
ur
es.
This
will e
nsure
th
at a
picture is weil ex
pose
d with
out
an y
sha
dow,
When
you wish to
disc
ha
rge the flash , use this
mode. In
thi
s
mod
e, th e flash will always dis-
cha rge.
Notes :
•
Ensur
e th at the red larn p on the lef
t-h
and
side
of th e vicwfinder is lit wh cn th e sh uu er re-
l
ease
burton
is d
epre
ssed
halfw
ay d
own
before
s
hoo
ting. A red la
mp
b linking indi cat es th at
the flash is being eharged.
•
Ensur
e y
ou'r
e wit hin th e flash effec tive range
even wh en you use th e bu ilt-in flash as a lill-in
flash in
davli
ghr
, (S ee
pag
e 19
).
24
Wi thout Daylight-Sync
TAKING PICTURES
AT
A SLOW SHUTTER SPEED
~
i~
n[[
t=
1:J
J
Slow-Speed-
Synchro
Shoot-
ing'
(Flash-ON)
D
cpr
ess th e
M od e B
utt
on to
set th e Slo w-
Spc
ed-
Synchro
mod e
until
the
(
~
!,J) sym bol app cars on th e
LCD panel. IL is possible to ph otog
raph
sub
jec
ts
and
bac
kground in a
ba
lan
ced
way (as shown in
the pho
to)
by using tbe buili-in flash 10 prop
erly
expose th e foreground s
ubje
ci and a Slow-
Shuuer-S pccd l O
expose
the luw light back-
gro und.
~
[
t
t=I:
J
1
Note:
• Wh en shoo ting in low li
ght,
the shut
tcr
spec
d
gets slower, and
cam
era
s
ha
ke is likcly to
hlur
you r picru re. Use of a tr ipod is recomrn errded .
25

Il 1 BULB, BULB·SYNCHRO SHOOTING SELF-TIMER PHOTOGRAPHY
o
Sclf·Timer
1
Bulb
mode(ci)8)
D Use the S
elf
.
1 Dcp ress
the
IJ
Timer
if you
Mode Burt on • wish ta get in th e
unt
il ( ci) 8 ) • . J. piet ure. Use of a
syrn
bol
app
cars ." ""..
Il
i
tripod
is recorn -
on the L
CD
mend
ed. De
pr
ess
panel. T he sh uttcr romains op en up to 10 min-
the
Dri
ve Burton
until
the
(
<::»
sy
mbo
l ap
pea
rs
ut es as long as the shutrer release burton is he ld on th e L
CD
panel.
_._
',
:
."
'
.
'
:
;.
~
..
:.
/
,'
;.
:
<
1
1~
1
duwn
.
Thi
s mode is useful fur long exposures
.
~
1"
.
"
;....;J~_.~
~
i
~~
~.
~
,
~,J
.::..1
,
~
r
~~
r
~
~
~
~
-
rcqui rcd fur shooring Iircwor ks
and
ni
ght
sccnes,
~
.i
lo
'.. ••
•.
•
"
-;
",,,
"
~j.
.
~:'
•.
,. ..:-.
for insta nce .
Wh
en using ibis mode, the ca mera
should be mounted on a t ripod so that the
came ra will he
steady.
Bulb
mode,
approx.
5 sec. (ISO 100)
1 Focus on the sub
je
cts first by d
epr
essing th e
sh
uu
er releasc burton halfway down , and rhen
1 r depress th e shu trer release burton fully.
Th
e
s
huu
cr will be rclcased in
abuut
10 seconds.
Wh
en th e Self.T imer is work ing, the Self.Ti mer
1
~
Bulb-synchrn
symbol (
<::»
blinks on the
LCD
panel, and the
<§)
1
:
.
~
.
r
l
.
Î
~
mode
(
~
B ) S
elf
-
Ti
rner l
amp
l
ight
s up. T he l
amp
st
ar
ts bli.
••,_ _ 1J "' . Depress th e
Il
nkin g 3 seconds before the shutte r is relcased,
ij
:
i~
Mod e Button l
ett
ing you knuw
when
ta smile.
unt il
(
~
8
)
syrnbol ap
pea
rs
(
1 on the LC D panel, this lets you use the flash in
ad di
tion
tu
the
Bul b
mode
, so you can takc a
port
rai
t photogra ph wit h a night sccnc in th e
backg
rou nd, for cxar nple.
26 27
-
~'
(
-~
1
,.,._....
/ __1
~
/
'D I
<, 1 1 / 1 1
'" '.( !
~
- -
.-:::
-
~
.-----:=:-:::.
<
,o
r' "

Notes on
the
Self-Timer
shoot
ing
• K eep in mi nd th
at
when
sta
rt
ing th e
Self-
Tim
er wh iIc s
tan
ding in front
of
th
e
ca
mera
, the
came
ra
ma
y
not
focus th e
subject .
• T o ca
ncel
the
Sel
f-
Ti
m
er
at any
time
afrer ir's
bee
n ac tivated , p ush the m ain
s
wite
h. In
th
is
instance
, t
he
po we r will
not be
turn
ed oIT.
•
Wh
en
you
wan
t to use th e flash w ith the
Self- T im
er,
ens ure tha t the re d l
am
p is
lit
indi
cat ing the flash has be cn eh a
rge
d
before opcr at ing the Self-T im er.
•
Wh
en
the
Bu lb
mo
de is used in eomb i
na-
tian wir h
the
Sclf- T
ime
r, a s
hu
tte r
spcc
d
of
approx
, 1/ 2 sec. is auto
rnat
ica
lly selec-
red.
USING THE WIRELESS
REMOTE CONTROL (OPTION)
If
you
have
pur
ch ascd th e
op
tional
wir
eless
rcmo
te control,
read
this se
ction.
Th
e Wi rclcss
Rernotc
Con
tro
l allows you
ta
a
djus
t
th
e focal
lengt h in steps
of
28, 90, 50, 28 a nd tr ip t
he
shu u er a t a dist
an
ce.
• Us e a tripod whe n shooting wit h the
Wir
cless
Rcrnotc
Control.
•
Wh
en
the
Remot
e
Con
tro l is uscd ta tak e
p
ictu
res, th e Sing le
-Fram
e
mod
e ca n he usc d
in
cornh
i
nat
ion w ith
any
of
th e ex posure
m
od
es. T he Sel f-
Ti
me r shooting a
nd
the
Mul-
ti-Ex po
surc
mod es
canne
t be used in thi s case.
•
Us
e the Reme re
Co
nt rol ta
ta
ke pi
ctur
es in
the Bulb
mod
e ta
avo
id ca mera shak e.
Wh
iIc
th
e R
emo
te C
ont
ro l's s
hurre
r
re
lease
burt
on is
hel
d d
own
, th e
shutrc
r rernains
ope
n.
Remote Control
Shooting
mode
D
epr
ess the camera 's
Dr
ive Bu
tt
on unt il th e
(m:I.
J1)
syrnb ol ap
pears
on th e L
CD
p
an
el.
Removing
the
Wireless Remote Control
R
em
ove the
Wir
d ess R emote
Contro
l l'rom
the
R emot e
Con
tro l H
old
er in
th
e di re
cti
on
of
th e
arrow.
Name of
parts
Sh u tte r rel ease bu
tton
28 29
R e
mer
e c
ontr
ol tr ansm
in
er

~
,
=
L
Blinking
Lamp
Wh
en the R
em
ote
Co
ntro l
Sh
o
orin
g
mod
e is sel
on
th
e camera,
th
e S
elf
-Tim
er la
mp
on th e
front
of
th e ca m era
blinks
slow ly, i
ndi
car ing t hat you
can take pi
ctur
cs w
ith
th e a id
of
a R e
mer
e
Control.
Wh
en
th e eam era is sel in the R em otc C on tro l
Shou
ring mo d e a nd left unu s
ed
for 10 m in
ut
es.
th e ca
me
ra aut
om
at i
ca
lly switches itself off to
sav
e batte ry p
ow
er.
Pus
h th e cam era's
Ma
in
Swirch ag a in to t
ur
n it On.
Taking
Pietures
Com
pose th e sc cne and frame the subjcc t with the
AF frame. Aim the Rcrnotc Com rol
Tr
an
sm
iu
cr
low
ard
s the R crno re Control R eceivcr on th e
camera, and then d
ep
rcss t he R ernot c
Con
tro l's sh ur-
ter
rclc
ase burton fully tu re le ase th e sh uu er ,
• T he Sclf-T imer lamp blinks rapidly for 3 seconds
and then t
he
s
huu
er is rcleascd ,
If
the shuttcr is
released by the ca
rncra
's rclcase b
uuu
n, pic
tur
es
will be Laken in the ordina ry s
hoc
ring mo de.
• Foeus cannet he lockcd when the Rernotc Control
is in use.
• T he subjcct framed in the AF frame will be in
focu s whcn the R eme re
Co
ru ru l's sh u ttcr rclease
bu rto n is d
epr
esscd.
Operating
Distance
of
the
Wireless
Remote Control
From
the
camera
's
front:
within
approx.
5
m straight in
front
of
the
camera
•
Th
e R
emot
e Co
nt
ro l
ma
y n
ot
wo rk in a back-
li
ght
sit
ua
tion.
In
Ibis
ca
se, use
the
carne
ra'
s
shu
tte
r release bu rton in
th
e Self-
Tim
er mo
de
to r
ak
e pict
ur
es,
•
Th
eRemere
Co
nt ro l docs not w
ork
whi le
th
e
b
uil
t-in fl
ash
is being e
ha
rged.
Zooming
using
the
Remote Control
Wh
en th e R cmor c
Co
nt ro l T ra usm it ter is airn ed
tuw a rd s th e ca rner
a'
s R
em
ote
Cont
ro l R eeei v
er
,
ea
ch
tim e y
ou
dcp rcss thc zoum ing burton loc-
ared on
th
e R em ot e
Co
nt ro l, th e lens zo om s a nd
stops at srcps
of
28,90,50 and 28mm fo
cal
lcn
gth
se
tri
ngs conrinuc uslv.
• Befure using the R emote Cont rol to
zoom
the
l
en
s, fr
am
e th e sub
je
ci rhrough
th
e
view
lind-
er, using th e
90mm
sctting.
Oth
crwise, the
s
ubj
e
ct
may be ou t of
th
e pie
tu
re a rea
wh
en
the
lens is zourned.
Batter
y Iife on
the
Remote Control
Ab
out
30,000 c
om
manda ea n be issued usi ng th e
R ernot e
Co
ntro
l
with
a b
au
cry installcd,
Hav
e
ex
ha
usted b
att
cry rcp la ced at yo
ur
local P
enr
ax
S
er
vice center
if
the b a tt ery is cx
ha
uste d ( rhe re
is a charge f
or
th is se rvice) .
30 31

32
MULTI-EXPOSURE
SHOOTING
Multi
-Expos
ur
e mo de will di senga ge th e f
ilm
adv
an
ce, leu ing you
super
i
mp
ose images on a
single frame for f
ant
ast ic illusions.
Y
our
im
agin
ation
can
pr
odu
ee striking c
rea
tive
cflects,
l
ifJ
~
Procedure
1. Depr css th e
Dr
ive
Butten
until
the syrnbo l
(
~
)
a
ppea
rs on th e L
CD
panel.
2. Dep ress the shutter rclcase burton 1O shoot an
initi
al exposure. T
he
film
will
not adva
nce
,
th e f
ram
e COUmer
indi
c
ation
and
(
~)
hlinks
on
th
e LC D
pa
nel to in
dic
ate rhat you are in
the M ult i-ex
posu
re mod e.
S. R ec
ompos
e th e fr
am
e, and
de
press the s
hutt
cr
release b
urt
on ta
shoo
t th e
seco
nd e
xpos
ure
.
After the sec ond shot , ih e fil m will
ad
va
nec
and th e Single-Fra me shooring
mod
e w ill be
resto red.
Notes:
• Ta expos e or
ma
rc, d
epr
css th c
dr
ive hut ten
unt
ill th e
(
~
)
rerna ins lit afre r th e srcp 2
ab
ove, and the n d cp ress th e shu t rer rc lea se
buu on ,
•
Th
e d at e will be ex
pose
d in step 3 above on
th e D at e
mod
el.
• R
ep
cat ed mul t
iple
exposures lend ta over ex-
pose a frame, sa it is rccornrn
cnd
ed th ar
you
expose a frame
ju
st tw ice or 3
tim
es al most.
•
Wh
en using M
ult
i-Exposur e m od e, you usual-
ly get th e bes t resu hs
with
dim ly-lit back-
ground
, such as ni
ght
scenes.
INFINITY-LANDSCAPE SHOOTING
I~
~~
~
(O ·
.
~
jl
'
~
;&
1- 1 ',_,
1---
11-,
-..:
~
When
you wish ta rak e a sh
arp
pi
ctur
e
of
a
dist
ant
l
and
sc
ap
c or a dist
ant
subj
ect
rhr ough a
window
, th e infini ty-l
and
sc
ap
e
mo
de allows
you
ta
captur
e di st
an
t scc ncry w
ith
clarity.
Depr
ess th e
Land
s
cap
c
/E
asy
PIC
. Mod e
Burton
until th e
(
~)
syrnbo l a p
pea
rs on th e L
CD
p
an
el. • Aft er th e pict ure is taken by fully d
epr
essing
the
shutt
er rclcasc but
ton
,
thi
s mod e is eance-
led .
•
Th
e nash will
not
disch
ar
ge in i he
Au
to
expo-
sure mod e.
33

34
SPOT AF
SHOOTING
~
[
C
45!
F
~
IA
\
'--
.
'-
,"-
~
IY
1~
Sele
ct
the
AF
spot
mode ta fo
cu
s on a
part
i
eular
spot
in
the
fram
e.
Switch to Spot AF mode
Depres
s
the
Lands
cape/Easy
Pic.
modc
button
sa
that
the
(SPOT
AF)
appears
on
the
LeD
panel
imli
cating
rhat
Vou arc in th e
spot
AI-'
mode
. Focus on the
subject
F
ocus
on the s
ubje
ct w
ith
the
Spot
AF
frame
(
(J
) in th e c
enter
of th e vi
ewfind
er.
•
When
the main subj ect is
out
of
the
AF
fr
ame
in
th
e cent
er
of
the
viewfind
er
wh en co m
po
s-
ing your
picture,
use
the
focus-lock
technique
(Sec
page
36.) .
•
Th
e l
amp
indi
cations
and pi
cture
-taking
pro-
ced ure are sim ilar as
expl
a
ined
for
mult
i-
bearn
AF
.
EASY PIC. SHOOTING
~
[
O
)
~
~
~
'.-
i~
1--
)...:C-
W
ith
the
"E
asy Pi c." shooting
mode
, foeus is
fixed at 2.9
meler
(9.5ft)
and
th e
focall
ength
of
the
Jens is also Iixcd a t th e 28m m
wid
e-angle
posit
ion.
Thi
s
pr
ov
ide
s greater d
cpt
h of field ,
and no necd to
worr
y
ahout
g
ettin
g
out
of
focus
pi
cturcs,
Please use th is
mod
e
wh
en
you
ask
someone ta
tak
e yo ur pi ct
urc,
wh
en
shoot
ing
quickly
, or wh en close-d istanc e shooting t
hr
-
ou gh a
wind
ow,
1, D
epres
s th e
Landscap
e 1 Easv Pi c.
Mode
Button
un til th e
(
~
)
syrnbol
appe
ar
s in
the
I.CD
pan
el.
ln
thi s
mod
e the 28rnm
wide-ang
le foc
allcngth
of
th e Jens is se lec ted
autom
at ic
allv
.
Vou
arc
not
able
ta change focal l
cngt
h
with
th e
zooming
lever.
If
Vou
rnov
e th e zo
oming
lever wh ile in
thi s
mod
e,
the
(
~)
syrnhol srarts blink ing ta
warn you .
2,
Tak
e a
pict
ore by
dcpr
essing the shutter
release
butten
.
This
mode
sels
the
lens fo
cu
s ta caver a
wide
range
of
approx
. 1.2
meter
(3.9ft) to
infinity
under
.bright
sun
light,
Even w
ith
a
dark
suhje
ct
vou
can still
obt
ain
proper
focus if
the
sub
ject
di
stan
ce is
between
approx,
l.8meter
(5 .9ft ) to 8
met
er
(26.
2ft).
If
you
take
a p
icrure
with
flash
please
make
sure
the subject is
with
in
the
flash effective
shooting
distan
ce.
(Se
c
page
19)
Th
e flash eff
ective
range
of
thi s
mode
w
ith
ISO
100 to 400 film is
betwe
en
l.8m
(5
.9ft)
to 4
.6m
( is
.in
).
The
lens fo
cal
length
cannot
he
changed
w
ith
th e
zooming
buuon
on
the
Rernote
Control
when
vou
are in this
mode.
Ta
caneel
this
mod e
depr
ess
Easy Pic. M od e
Butt
en aga in.
th
e
Lands
cape
/
35
Table of contents
Other Pentax Film Camera manuals

Pentax
Pentax K1000 - K1000 User manual

Pentax
Pentax IQZoom 150SL / IQZoom 170SL User manual

Pentax
Pentax ESPIO 115V User manual

Pentax
Pentax 70 User manual

Pentax
Pentax Bracket 645 User manual

Pentax
Pentax H1 User manual

Pentax
Pentax Zoom 70-R User manual

Pentax
Pentax IQZoom 28-W User manual

Pentax
Pentax K1000 - K1000 User manual

Pentax
Pentax IQZoom 115-S User manual

Pentax
Pentax efina AF50 User manual

Pentax
Pentax 67II User manual

Pentax
Pentax 67 Magnifier User manual

Pentax
Pentax IQZoom 928 User manual

Pentax
Pentax ES User manual

Pentax
Pentax Date User manual

Pentax
Pentax IQZoom 105WR Date User manual

Pentax
Pentax H1a User manual

Pentax
Pentax Zoom 60-X User manual

Pentax
Pentax Data LX Operator's manual