Table of content
Important Information 2
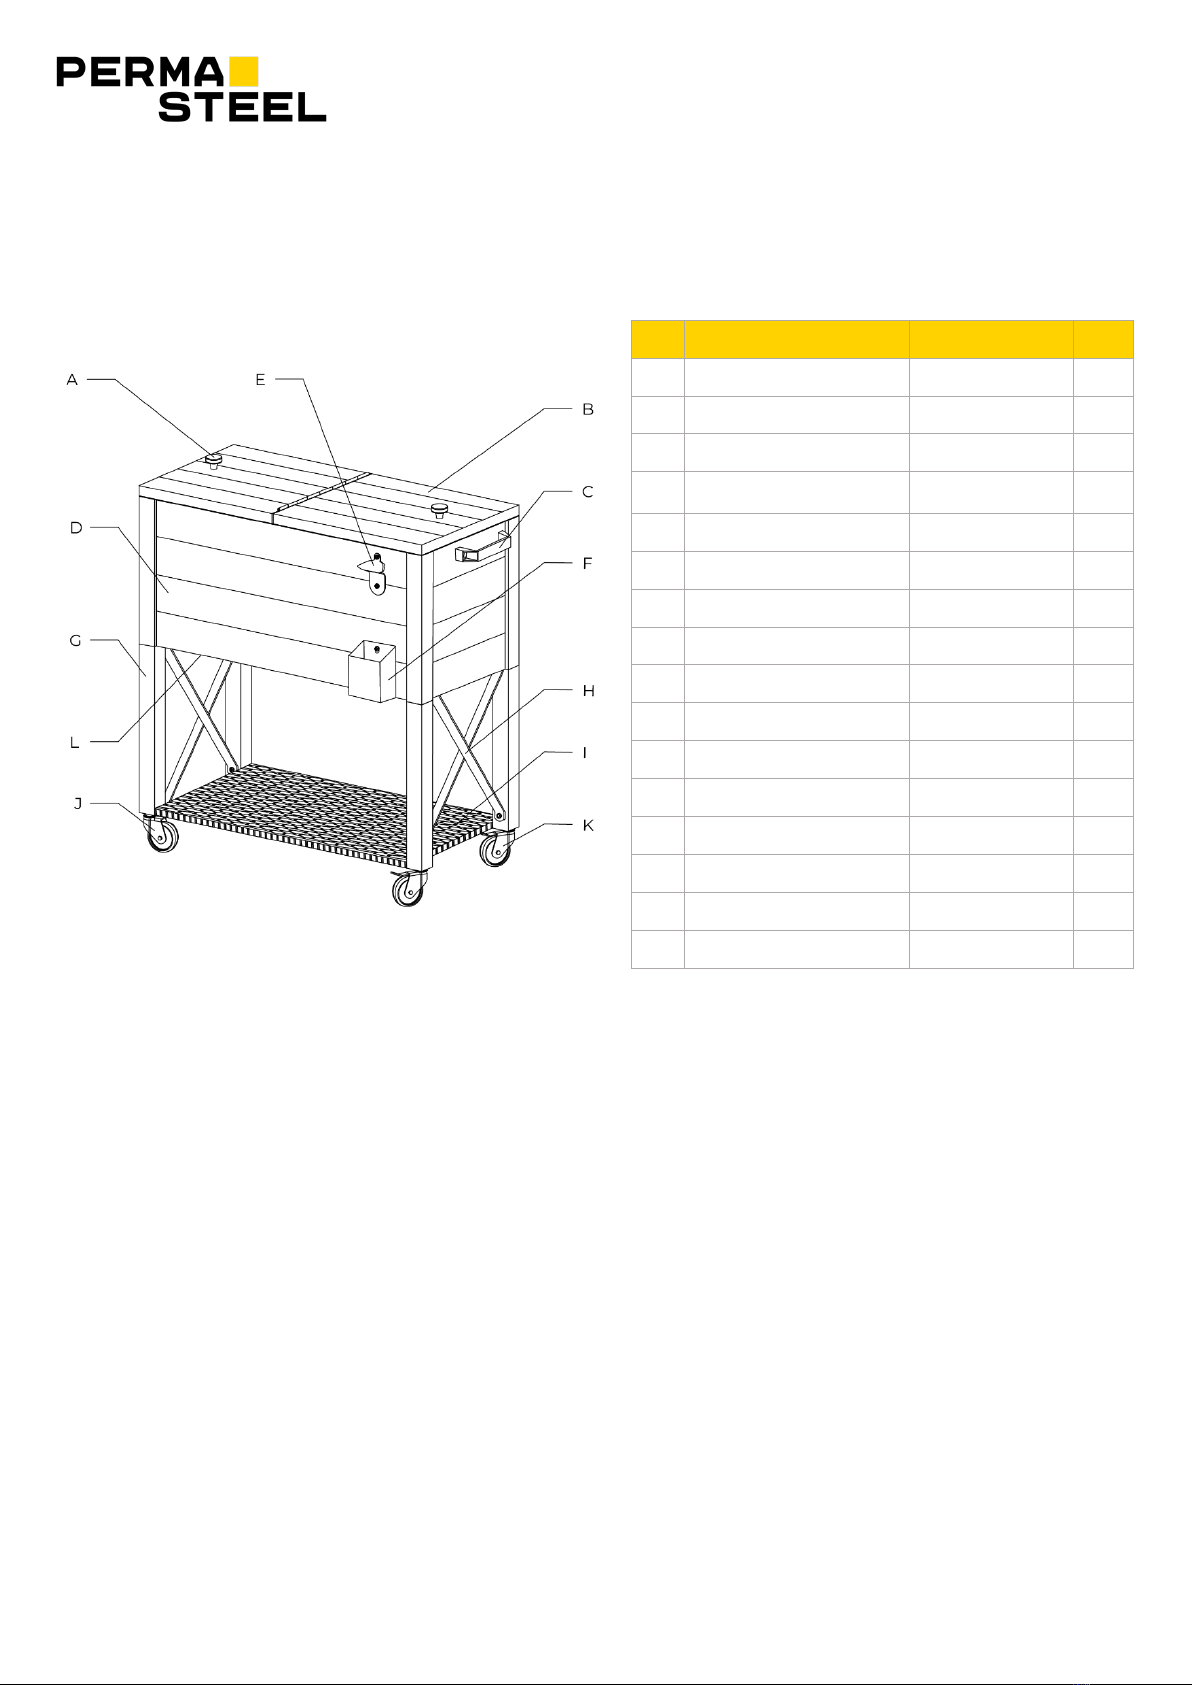
Parts List 3
Hardware 4
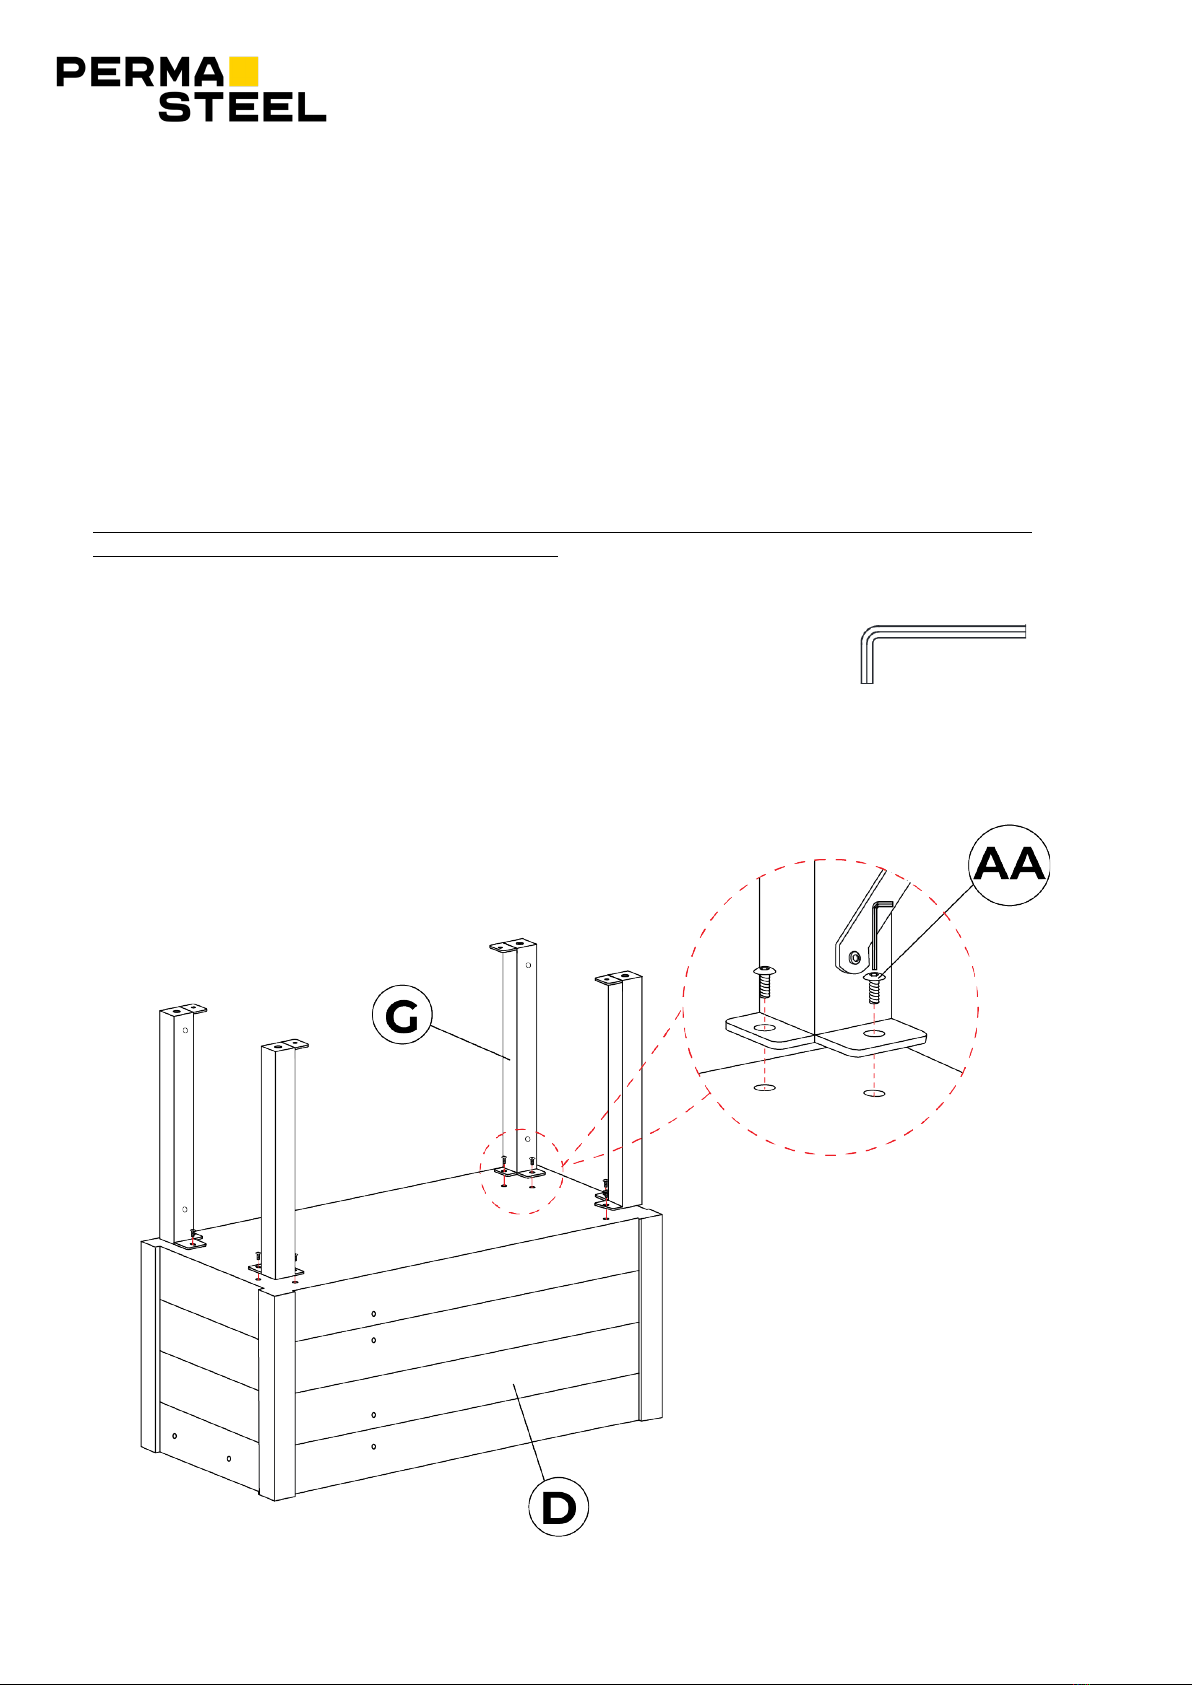
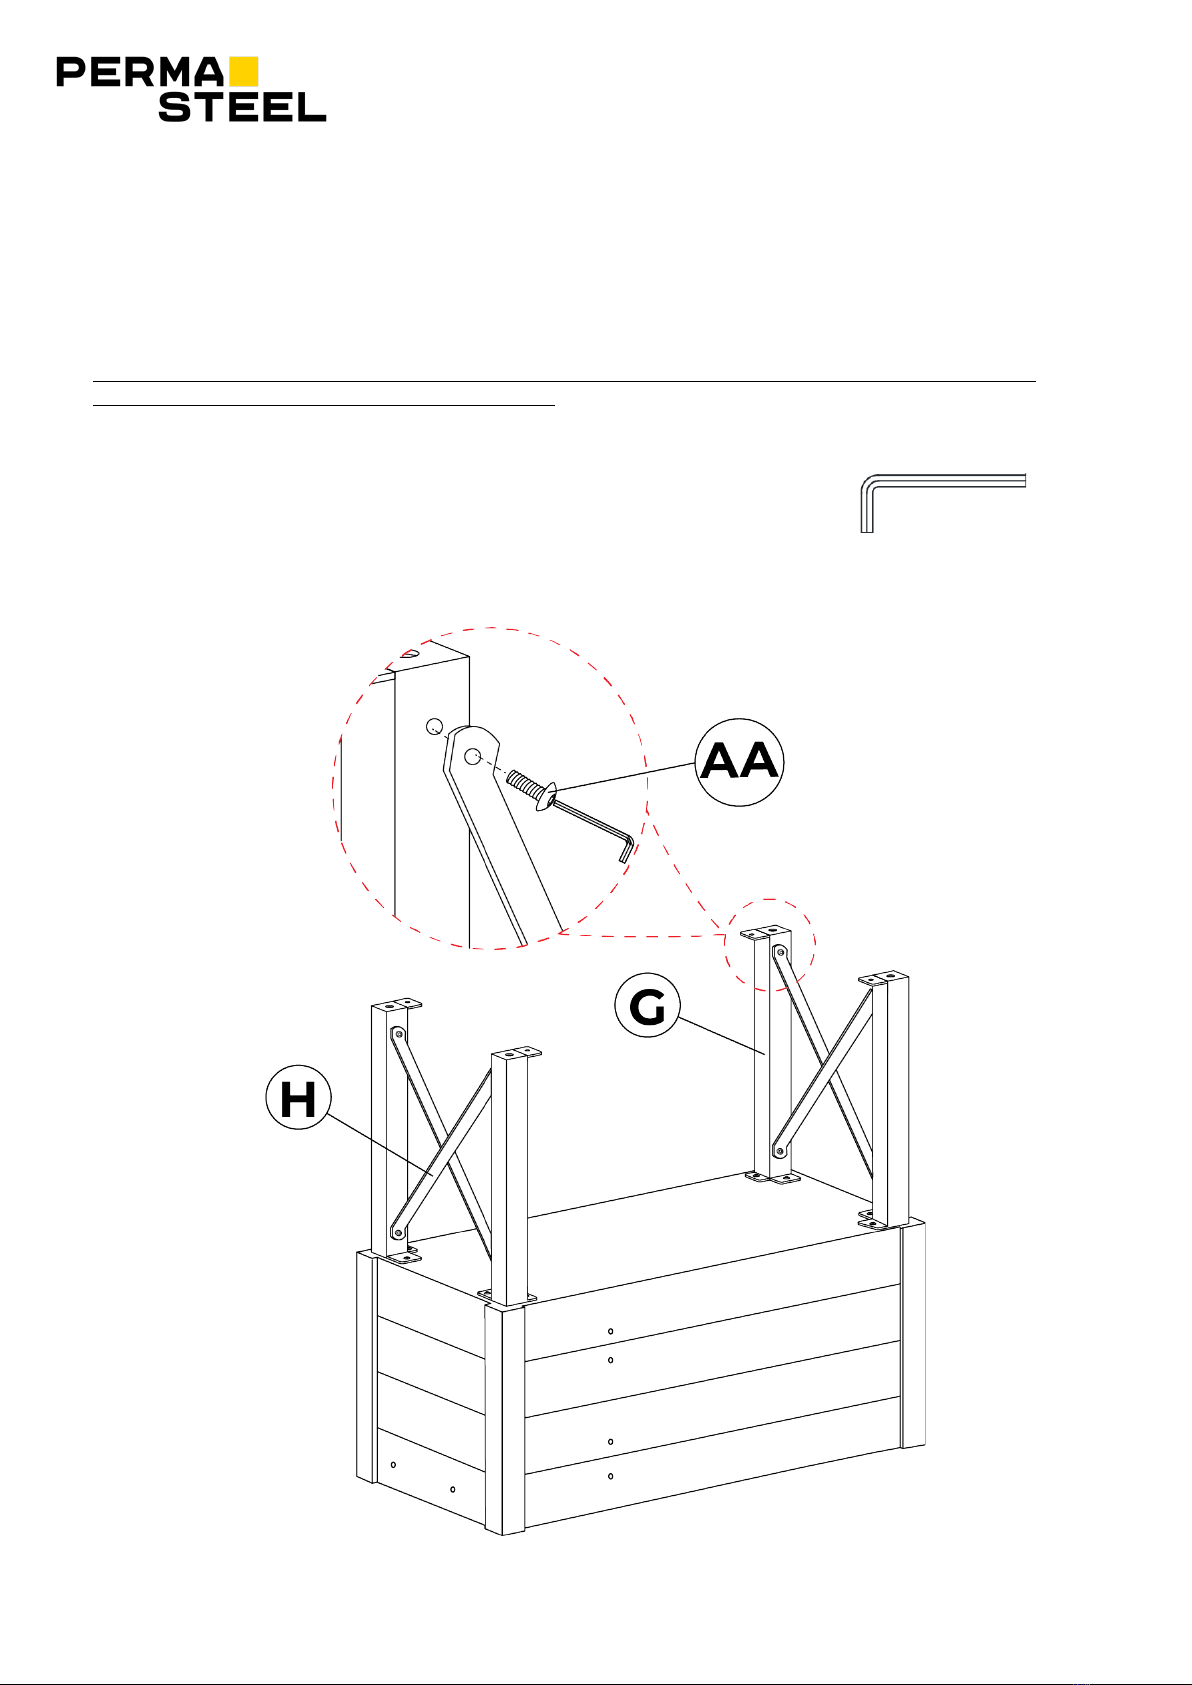
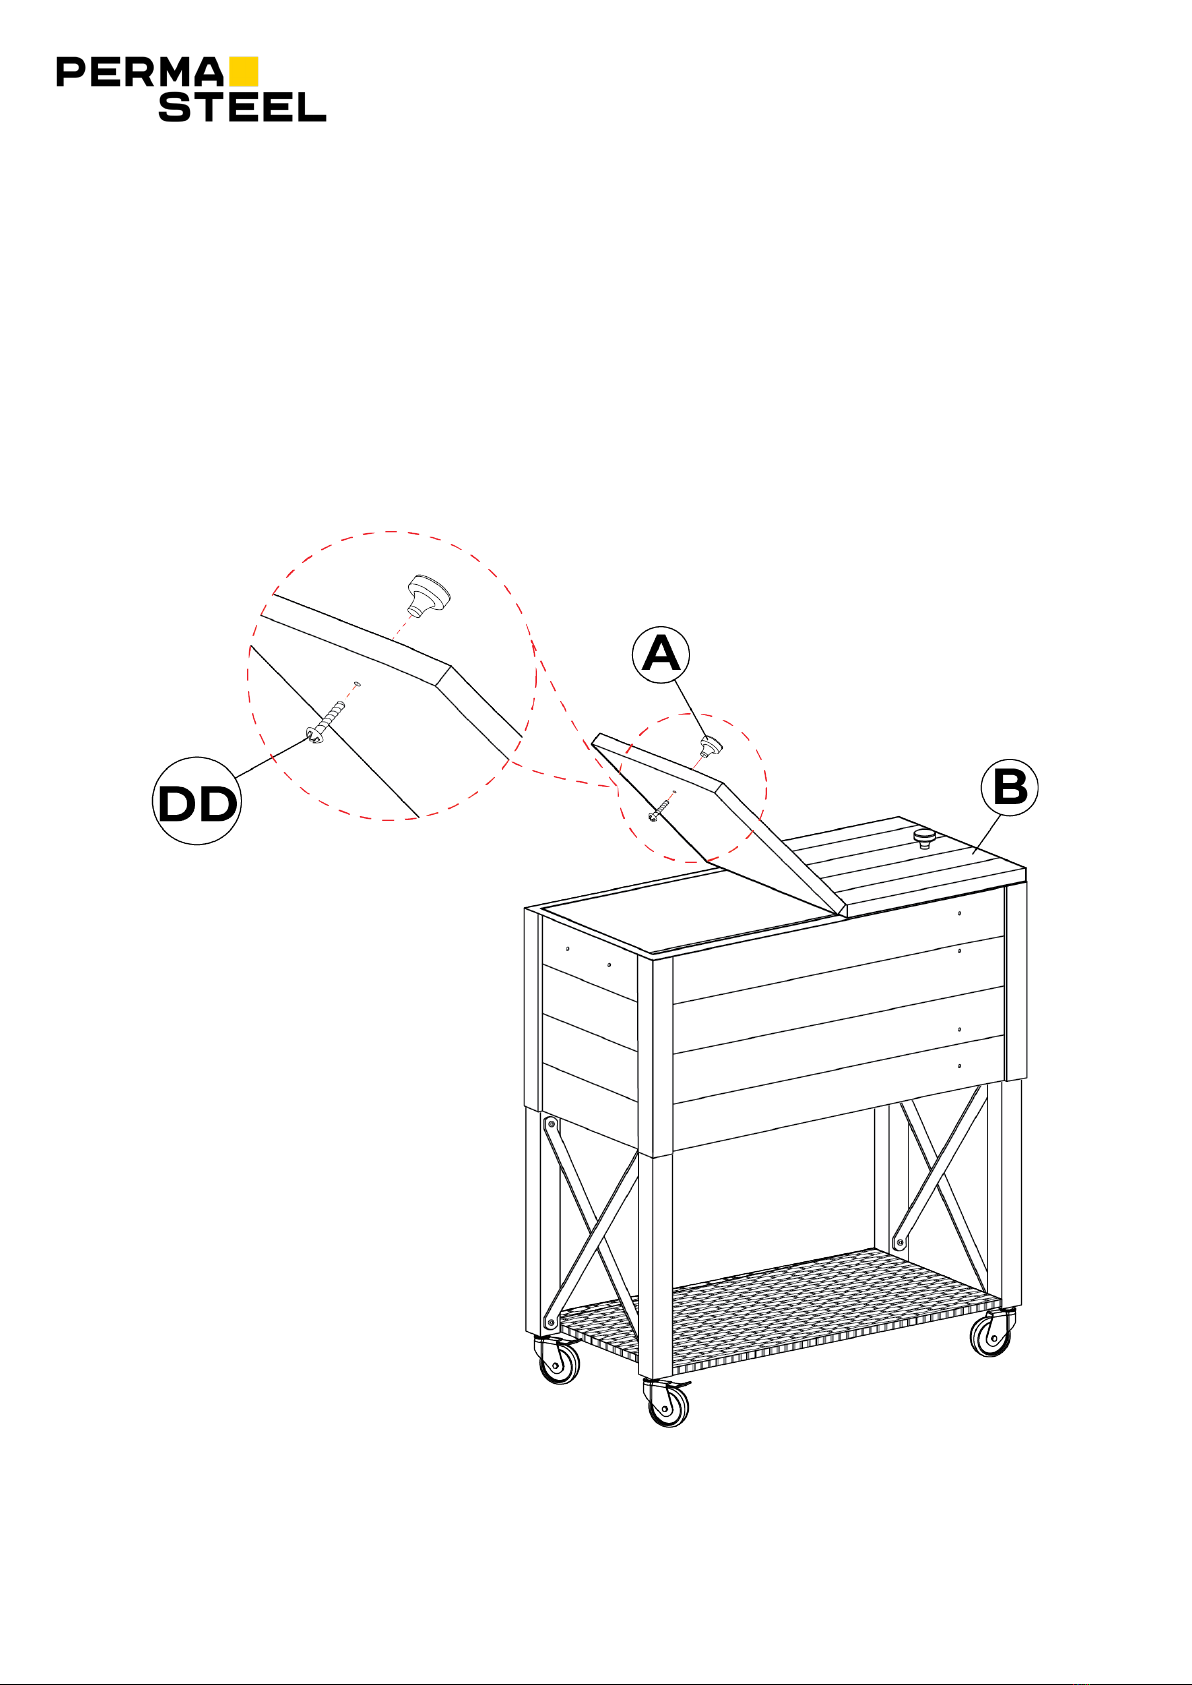
Assembly Steps 5
Care & Maintenance 13
Limited Warranty Information 13
Important
Information
Thank you for your purchase of our Patio Cooler.
We sincerely hope you will enjoy using our fine
products.
•Please take your time to read the instructions
thoroughly and follow each step carefully for a
safe and easy assembly.
•Please contact our customer service at
1-888-287-0735 if you have any questions.
•Please keep this manual for future reference.
CAUTION
1. Hand tools only, use of power tools could
damage the product.
2. Remove all components, hardware and tools
from the box before assembly. Please separate
all the hardware and be sure they match with
pg 4 of this manual.
3. Please consider recycling all applicable
packaging material.