INSTALLATION
SITING
THE
PLA
\'ER
Stand the player
on
a firm level surface, eiasuring
1h11
die
venlilalion
slotso•
lbe lop and sides
oflhe
playerare nol obsanided,
Do
not Mand
a monilor directly on
top
of
the player
if
thisobstructs these ventilation
slols;
in
thi~ case. a properly designed rack should be used lo support
the
monitor.
Never
stand
the
player directly
on
any
electronic
equipment that gives off a suhs1an1ial
amount
of
heal.
or
near
10
any
heat
source.
Avoid any position
where
the
player is
subjected
to
direct
sunlight for long periods.
CONNl-:CTING THE PI.A
\'F:RTOTHE
MAINS
The VP415
is
designed
to
operate
from a
SU/61)
Hz a.c. main~ supply
with any voltage between 220
and
240
V.
If
your local mains supply
docs not fall into this category. contact your nearesl Philips
Organisation
If necessary.
fit
a mains plug
to
the
mains lead as described below.
l,,,parr,..1no1t/f)t'(!.K. ...,...
WARNIN6i:
THIS
APPARATUS
MUST
BE
EARTHED
The
wires
in
the
mains
lead
arccoloun;d
in
accordance
wnh
1he
following
code
Grccn·and·ycllnw:Earth
llluc:Ncutral
Brown:l.ivc
These,
colours
may
nOI
corrc,pond "'ilh
the
colour marking, idcmifying
1hc
terminals
in
your
plug.
'"
proceed ;1, follow,: Connccl lhe Grcen·and·~cllnw
wore
10 lhe terminal marked Eor
-½
.orcolnurcd Green orGrccn-and·)·clluw:
Connecl
the
Brown
wire
10
1he
terminal marked
L.
orcoloured Red: Connect
the
Blue
wire
w
the
terminal
mukcd
N.or
e<.>lourcd
lllack
lnscrtthemain,plugin1nawaLl,ockot.lf1hcpla)·cri,n<>1tohcuscdforalong
period of lime.
rcmu~e
the
mains
plug
frol'II
the
,.,.11
socket
CONNt:CTING
THE
PI.AYER
TO
A
MONITOR
The VP415 has
outputs
suitable for
both
RGB
monitors
and
CVBS
monitors.
Vanous
connection possibilities
arc
described below. Also
refer
to
Fig. 2 • ·Connection and
adaptor
cables·.
Nott:Some
moniton. have a ·time•constant'~witch for
u,c
with a VCR;
this should be set
to
the
·normal' (i.e. non-VCR) position for
LaserVisionusc.
This
is
a direct connection. ensuring
the
highest quality picture
and.
if
the monitor
is
equipped for it. stereo sound.
It
is
also possible
10
use a
TV
receiver ifit
is
fitted with a Euroconneclor
socket.
Connect the cable supplied between
the
AIV
EUROCONNECTOR
wcket
on
the
rear
of
the
player
and
the corrc~ponding sockel on the
monitor.
This connection carries both
ROB
and
CVBS signals. Optimum
picture quality
is
ohtained
if
the
ROB
signals arc used. Therefore
if
the
monitoraccepts
both
RGB
and
CVBSsignals. ensure that
it
is
switched
to
ROB
input.
If"°
Eumr:ann«forsodcdisavallablr:
I. &roconn«tor-to-DIN
A.
V (audio/vhko) -CVBSonly
If
the monitor
is
fitted with a 6-pole DIN
AV
(Audio-Video)socket.
lhe Euroconncc!Or·to-DIN
AV
adaptor
cable
SBC
1012
(4822
321
20485, length 1.5 m) mus!
be
used. Connect the Euroconncctor plug
to
the
AN
EUROCONNECTOR
socket
of
the
player
and
the
DIN
AV
plug
to
the monitor.
2.
lrthc
monitor
is
fitted with a coaxial BNC-typc video input socket.
there
arc two possihilitics·
a.
Euroa,nn«tor-to-BNC -CVBSonly
Using Euroconncctor-to-BNC
adaptor
cahte
SBC
JUI)
(-1822
321
204K4.
length 1.5 m). connCl't
the
Euroconnector
plug to the A/V
EUROCONNECTOR
sockel
or
the
player and one coaxial BNC
plug lo lhe video
inpu1
of
1he
monitor. Connect
the
5-polc DIN
Audio
plug
of
this
adaptor
cahlc
to
the
Audio
injiut socket of your
monitor
or
to
an audio amplifier
b.
BNC-to-BNC
(waxlal).
CVBSonly
Using BNC-to·BNC connection cahlc
SBC
I0\5
(.tll22
32fl
J
lOO),
length 1.5 m).
connl.>ct
ti,ctwecn
the
CVBS
OUT
socket
of
the
player
and
the
video input
of
the monilor.
The
Audio
signal must he taken
from the
AUDIO
OUT
socket~
of
the
player using a connection
cable SBC044
(41122
321
20344. lcngth
IO
m)
CONNE<.TION
TO
PERIPHERAL
AUDIO
EQUIPMENT
The
AUDIO
OUT
socke1s on
the
rear
of
the player can he connected
through connection cable
SBC
043 (4822
321
203(18,
length 2.5 m)
or
SBC
(144
(4822
321
20344.
length
HJ
m) to a linear input
of
the
peripheral
equipment.
Either
or
both
sound channels may he swi1chcd
on
or
off by
means
of
the
AUDIO
I
and
AUDIO
2 buttons on the
remote control handset.
If a disc con1ains stereosound, this will be reproducedstereophonically
when
bo1h
channels arc
in
operation.
Noll!:
If
either
audio channel
is
switchetl off. then
the
remaining audio
signal
is
rooted
to
both
output
channels. This avoids ·one-sided'
sound
from a dual-language disc
REMOTE CONTROL HANDSET (Fi,:s. l
and3)
Normally.
the
VP415
operates
by
remote
control from the infra-red
remote control handset ~upplicd.
The
control hullon~ on lhis hand~cl
have been grouped into logically-related sections.
The
remote control handset controls all play functions, audio
and
memorycontrols
and
also accesses specified program
pans.
The
handset can he used
in
conjunction with
the
infra-red
detector
on
the
VP415 itself.
or.
when a
Euroconnccmr
connection
is
used. with
the
infra-red detector on
the
monitor
(dependent
on
ac1oal
monitor
model).
In
the latter case.
the
RC
IR/EURO
switch on the
rear
of
the
VP415(!>CcFig.
l)mustbe~etloEURO.
When using
the
handset. point
it
directly
at
the infra-red detcclor on
the
front
of
the player
(or
monitor). If 1his
is
not pos.~ihlc.
or
not
convenient,
the
remote control cable supplied can be connected
between
the
handset and
the
player (sec ·Wired remotecon1ror earlier
in
this section).
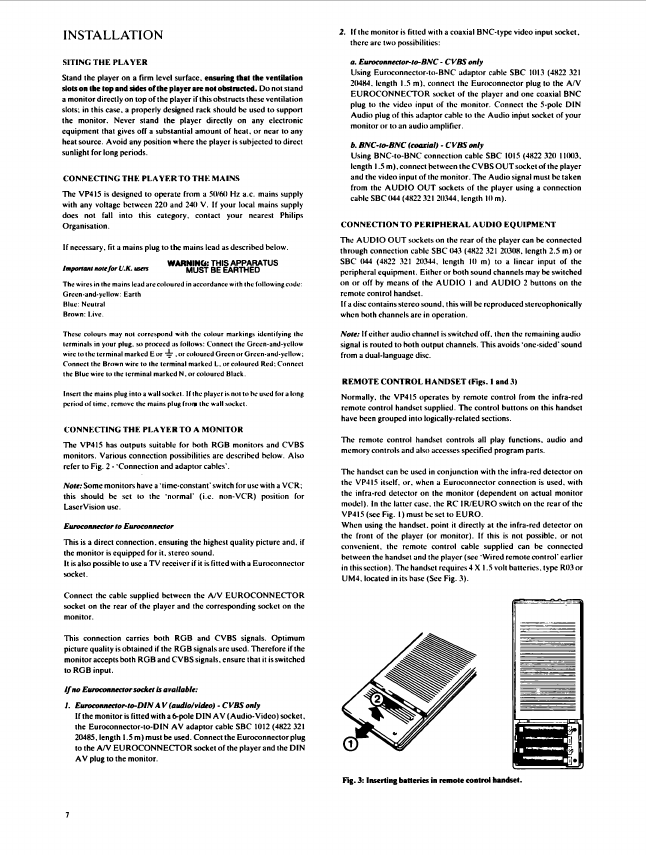
The
handset require~ 4X 1.5 volt
haucncs.
type
ROJ
or
UM4. located
in
its base (Sec Fig. 3).
Fig.
J:
Inserting baneriesin remote conlrol handsel.