Technical Descriptions:
Movement: Ronda Cal. 5040.D
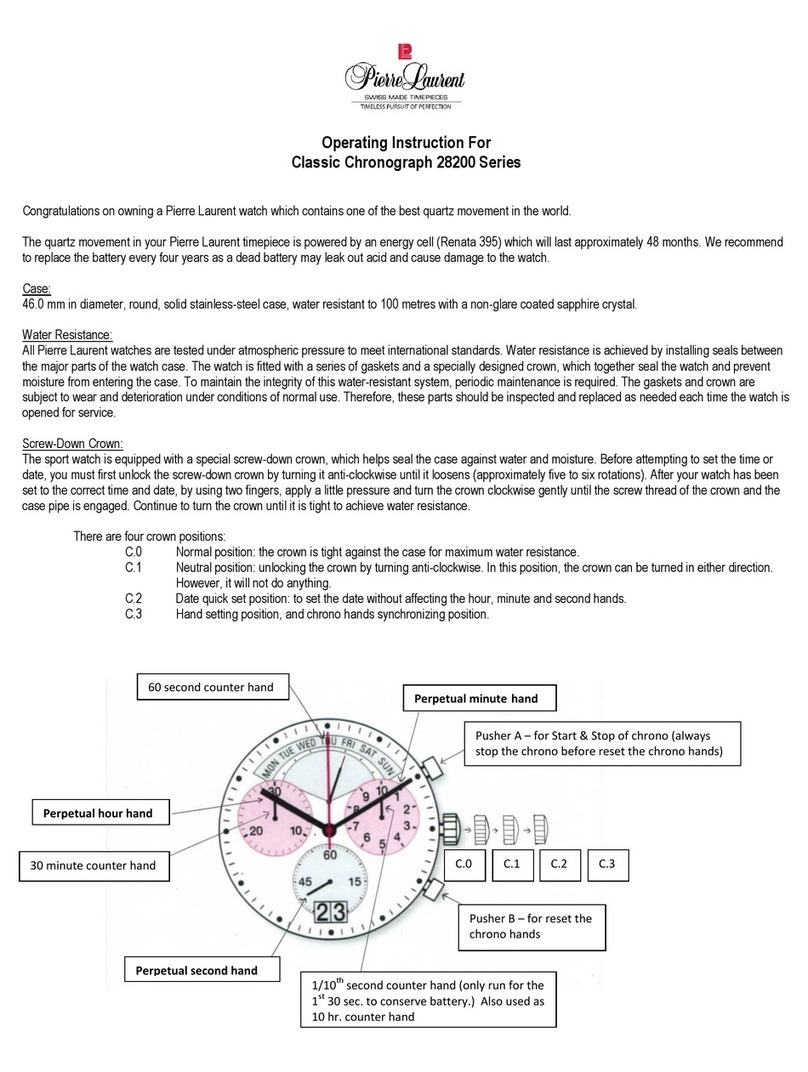
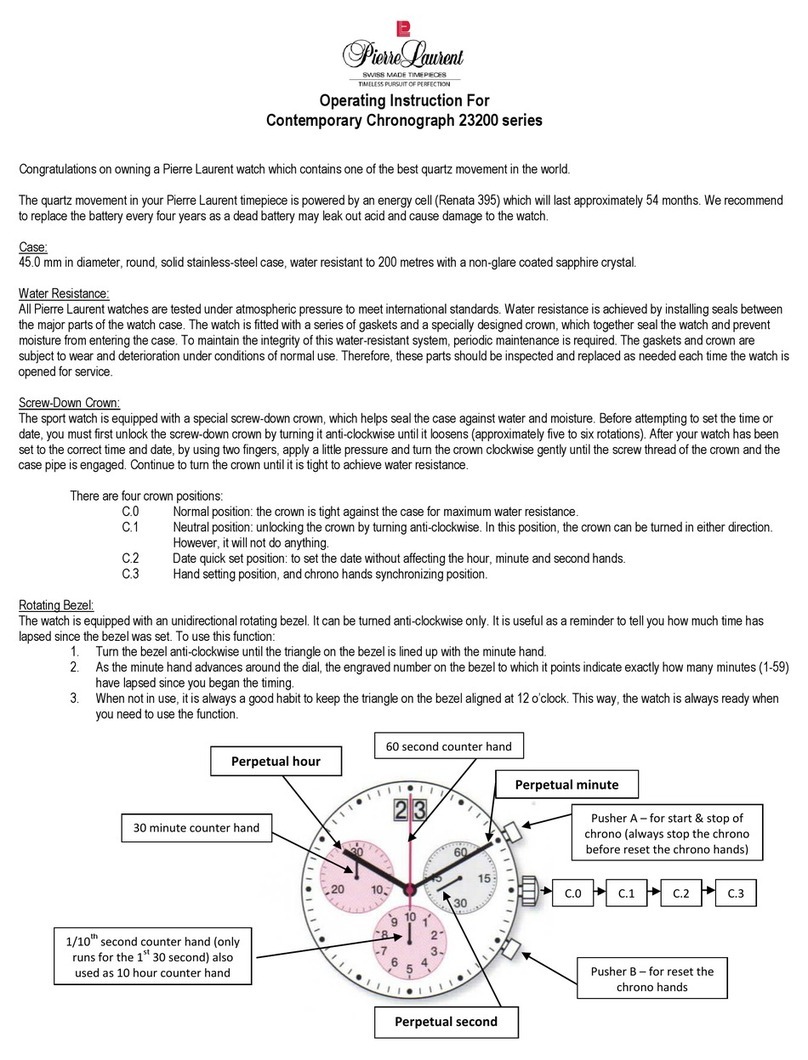
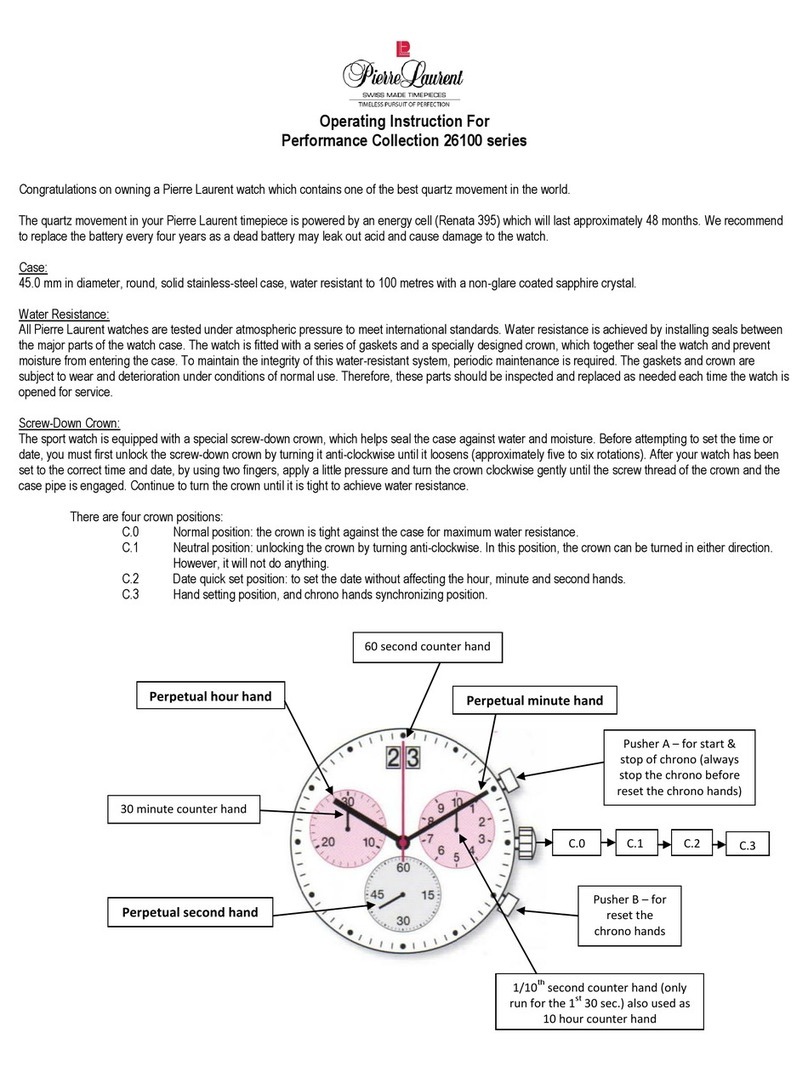
A. The following parts are for normal time functions:
1. Perpetual hour hand
2. Perpetual minute hand
3. Perpetual second hand (it always moves when the watch is working)
B. The following parts are for stop-watch (chronograph) functions:
1. At 6 o’clock: 1/10th of a second counter hand (only runs for the first 30 seconds), also used as 10 hour counter hand.
2. At 9 o’clock: 30 minutes counter hand
3. At centre: 60 second counter hand
C. Setting the date and time.
1. Pull the crown out to position C.1 and turn clockwise until yesterday’s date appears.
2. Pull out the crown to position C.2 and turn the crown until the correct date appears. The time on the watch now is approximately
midnight. Continue to turn the crown until the correct time appears (make sure to achieve the am/pm clock rhythm).
3. Push the crown back into position C.0.
D. Chronograph basic functions:
Start / Stop / Reset
1. To start: press pusher A once
2. To stop: press pusher A once again
3. To reset: press pusher B once
E. Chronograph advanced functions:
For more information about the chronograph advanced functions, please visit www.ronda.ch.
F. Adjusting (synchronizing) the chrono hands to zero position
One or several chrono hands are not in their correct zero position and have to be adjusted (e.g. after a change of a battery or gone through
an area with strong magnetic field).
1. Pull out the crown to position C.2.
2. Press down the pusher A and B simultaneously until the centre second counter hand rotates. The corrective mode is now activated.
3. Press down the pusher A repeatedly until the center second counter hand is at zero. Then press down pusher B once. Now the 1/10th
second counter is ready to be adjusted.
4. Press down the pusher A repeatedly until the 1/10th second counter hand is at zero. Then press down pusher B once again, now the
minute counter is ready to be adjusted.
5. Press down the pusher A repeatedly until the minute counter hand is at zero. This will complete the synchronization process.
6. Now push back the crown to position C.0.
G. Enjoy your Pierre Laurent Swiss Made timepiece!


