manuals.online logo
Brands
  1. Home
  2. •
  3. Brands
  4. •
  5. Pioneer
  6. •
  7. CD Player
  8. •
  9. Pioneer PD-S801 User manual

Pioneer PD-S801 User manual

Other manuals for PD-S801

1

This manual suits for next models

1

Other Pioneer CD Player manuals

Pioneer CDX-FM1277 User manual

Pioneer

Pioneer CDX-FM1277 User manual

Pioneer P47DH - DEH Radio / CD Player User manual

Pioneer

Pioneer P47DH - DEH Radio / CD Player User manual

Pioneer PD-M406 User manual

Pioneer

Pioneer PD-M406 User manual

Pioneer PD-202 User manual

Pioneer

Pioneer PD-202 User manual

Pioneer DEH-P5100R User manual

Pioneer

Pioneer DEH-P5100R User manual

Pioneer DEH-P410 User manual

Pioneer

Pioneer DEH-P410 User manual

Pioneer PD-30-K/-S User manual

Pioneer

Pioneer PD-30-K/-S User manual

Pioneer LaserDisc CLD-2590K User manual

Pioneer

Pioneer LaserDisc CLD-2590K User manual

Pioneer CDX-P1270 Setup guide

Pioneer

Pioneer CDX-P1270 Setup guide

Pioneer CDJ-800MK2 User manual

Pioneer

Pioneer CDJ-800MK2 User manual

Pioneer LaserDisc CLD-D604 User manual

Pioneer

Pioneer LaserDisc CLD-D604 User manual

Pioneer CDJ-500II User manual

Pioneer

Pioneer CDJ-500II User manual

Pioneer CDX-P616 User manual

Pioneer

Pioneer CDX-P616 User manual

Pioneer PD-S904 User manual

Pioneer

Pioneer PD-S904 User manual

Pioneer CDJ-400 - Cd/Media Player User manual
Pioneer

Pioneer CDJ-400 - Cd/Media Player User manual
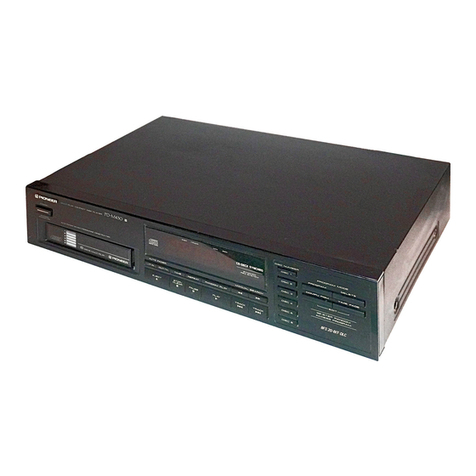
Pioneer PD-M601 User manual

Pioneer

Pioneer PD-M601 User manual

Pioneer X-HM36D User manual

Pioneer

Pioneer X-HM36D User manual

Pioneer CDX-M50 User manual

Pioneer

Pioneer CDX-M50 User manual

Pioneer X-CM56 User manual

Pioneer

Pioneer X-CM56 User manual

Pioneer DEH-4 User manual

Pioneer

Pioneer DEH-4 User manual

Pioneer PD-S507 User manual

Pioneer

Pioneer PD-S507 User manual

Pioneer YPM-2136ZF User manual

Pioneer

Pioneer YPM-2136ZF User manual

Pioneer PD-7500 User manual

Pioneer

Pioneer PD-7500 User manual

Pioneer CLD-1500 HEM User manual

Pioneer

Pioneer CLD-1500 HEM User manual

Popular CD Player manuals by other brands

Arcam CD23 Handbook

Arcam

Arcam CD23 Handbook

Sanyo MCD-Z1F Service manual

Sanyo

Sanyo MCD-Z1F Service manual

JVC RC-ST3SL instructions

JVC

JVC RC-ST3SL instructions

Technics SL-P9066 operating instructions

Technics

Technics SL-P9066 operating instructions

Marantz HD-CD1 quick start guide

Marantz

Marantz HD-CD1 quick start guide

Sony DVP-FX850 Service manual

Sony

Sony DVP-FX850 Service manual

Philips AZ1140 Instrukcja obs?ugi

Philips

Philips AZ1140 Instrukcja obs?ugi

Alpine 7909 owner's manual

Alpine

Alpine 7909 owner's manual

JVC CH-X350 instructions

JVC

JVC CH-X350 instructions

RCA RP-7923 instruction manual

RCA

RCA RP-7923 instruction manual

Philips Shockproof AX2102 brochure

Philips

Philips Shockproof AX2102 brochure

Philips CD582 user manual

Philips

Philips CD582 user manual

Philips AZ 6821 operating manual

Philips

Philips AZ 6821 operating manual

Lasonic MSU-2020 user manual

Lasonic

Lasonic MSU-2020 user manual

Denon DCD-1420 Service manual

Denon

Denon DCD-1420 Service manual

Panasonic SJ-MR100 operating instructions

Panasonic

Panasonic SJ-MR100 operating instructions

Onkyo DX-7210 instruction manual

Onkyo

Onkyo DX-7210 instruction manual

Cambridge Audio SONATA CD30 manual 

Cambridge Audio

Cambridge Audio SONATA CD30 manual 

manuals.online logo
manuals.online logoBrands
  • About & Mission
  • Contact us
  • Privacy Policy
  • Terms and Conditions

Copyright 2025 Manuals.Online. All Rights Reserved.

Operating
Instructions
POWER
<
IAS
7
Ee
i
eee
COMPACT
DISC
PLAYER
P60)
Poo
/O1
COMPACT
DIGITAL
AUDIO
POWER
ol
DEMO
MODE
@
Demo
mode
allows
you
to
see
variation
of
the
display
To
enter
the
demo
mode,
press
POWER
and
then
Ke
within
1
second
without
inserting
the
disc.
To
exit
the
demo
mode,
press
any
buttons
on
the
front
panel.
Thank
you
for
buying
this
Pioneer
product.
Please
read
through
these
operating
instructions
so
you
will
know
how
to
operate
your
model
properly.
After
you
have
finished
reading
the
instructions,
put
them
away
in
a
safe
place
for
future
reference.
In
some
countries
or
regions,
the
shape
of
the
power
plug
and
power
outlet
may
sometimes
differ
from
that
shown
in
the
explanatory
drawings.
However,
the
method
of
connecting
and
operating
the
unit
is
the
same.
WARNING:
7o
PREVENT
FIRE
OR
SHOCK
HAZARD,
DO
NOT
EXPOSE
THIS
APPLIANCE
TO
RAIN
OR
MOISTURE.
IMPORTANT
NOTICE
{For
U.S.
and
Canadian
models]
The
serial
number
for
this
equipment
is
located
on
the
rear
panel.
Please
write
this
serial
number
on
your
enclosed
warranty
card
and
keep
it
in
a
secure
area.
This
is
for
your
security.
[For
Canadian
model]
CAUTION:
To
PREVENT
ELECTRIC
SHOCK
DO
NOT
USE
THIS
(POLARIZED)
PLUG
WITH
AN
EXTENSION
CORD,
RECEPTACLE
OR
OTHER
OUTLET
UNLESS
THE
BLADES
CAN
BE
FULLY
INSERTED
TO
PREVENT
SLADE
EXPOSURE.
ATTENTION:
pour
PREVENIR
LES
CHOCS
ELECTRIQUES
NE
PAS
UTILISER
CETTE
FICHE
POLARISEE
AVEC
UN
PROLONGATEUR,
UNE
PRISE
DE
COURANT
OU
UNE
AUTRE
SORTIE
DE
COURANT,
SAUF
SI
LES
LAMES
PEUVENT
ETRE
INSEREES
A
FOND
SANS
EN
LAISSER
AUCUNE
PARTIE
A
DECOUVERT.
TWO
VOLTAGE
SELECTOR
SWITCHES
Only
multi-voitage
models
are
provided
with
these
switches.
U.S.,
Canadian,
European,
U.K.,
and
Australian
models
are
not
provided
with
these
switches.
Mains
voltages
in
Saudi
Arabia
are
127V
and
220V
only.
Never
use
this
model
with
a
110V
setting
in
Saudi
Arabia.
The
line
voltage
selector
switches
are
on
the
reat
panel.
Be-
fore
your
model
is
shipped
from
the
factory,
these
switches
are
set
to
the
power
requirements
of
the
destination,
Check
that
they
are
set
properly
before
plugging
the
power
cord
into
the
household
wali
socket.
If
the
voltage
is
not
proper-
ly
set
or
if
you
move
to
an
area
where
the
voltage
require-
ments
differ,
adjust
the
selector
switches
as
follows.
1.
Use
a
medium-size
screwdriver.
2.
First,
insert
a
screwdriver
in
the
groove
of
the
voltage
selector
at
the
right,
and
adjust
so
that
the
arrow
points
to
the
voltage
value
of
your
area.
3.
Next,
insert
a
screwdriver
in
the
groove
of
the
voltage
selector
at
the
left
and
adjust
until
the
voltage
is
the
same
as
at
the
right.
VOLTAGE
SELECTOR
VOLTAGE
SELECTOR
“This
product
complies
with
the
Radio
Interference
require-
ments
of
the
EC
(European
Community)
Directive
87/308/EEC,"
dQ
PIONEER’
The
Art
of
Entertainment
IMPORTANT
1
The
lightning
fiash
with
arrowhead,
within
an
equileteral
triangle.
is
intended
to
alert
the
user
to
the
presence
of
uninsulated
‘dangerous
voltage”
within
the
product's
CAUTION
RISK
OF
ELECTRIC
SHOCK
*
DO
NOT
OPEN
CAUTION:
TO
PREVENT
THE
RISK
OF
ELECTRIC
SHOCK,
DO
NOT
REMOVE
COVER
(OR
BACK).
NO
USER-SERVICEABLE
The
exciamation
point
within
an
equilateral
triangle
is
intended
to
alert
the
user
to
the
presence
of
imporant
operating
and
maintenance
(servicing)
instructionsin
the
enclosure
that
may
be
of
sufficient
magnitude
to
PARTS
INSIDE.
REFER
SERVICING
TO
QUALIFIED
literature
accompanying
the
appliance.
constitute
a
risk
of
electric
shock
to
persons.
SERVICE
PERSONNEL,
]
M
PORT,
ANT
2
The
wire
which
is
cofoured
blue
must
be
connected
to
FOR
USE
IN
THE
UNITED
the
terminal
which
is
marked
with
the
letter
N
or
col
oured
black.
KINGDOM
The
wire
which
is
coloured
brown
must
be
connected
to
{f
the
apparatus
is
fitted
with
AC
mains
power
outiet(s),
s@e
REAR
PANEL
FACILITIES
for
convenient
connection
of
additionat
Hi-Fi
component(s}.
Make
all
connections
tothe
AC
outlet(s}
and
the
signal
terminals
first.
Connect
the
plug
to
the
wall
socket
last
(make
sure
that
the
power
switch
is
off.)
The
wires
in
this
mains
iead
are
coloured
in
accordance
with
the
following
code:
Blue;
Neutral
Brown:
Live
As
the
colours
of
the
wires
in
the
mains
lead
of
this
apparatus
may
not
correspond
with
the
coloured
making
identifying
the
terminals
in
your
plug
proceed
as
follows:
the
terminal
whichis
marked
with
the
letter
|
or
coloured
ted.
Do
not
connect
either
wire
to
the
earth
terminal
of
a
three
pin
plug.
Equipment
sold
in
the
U.K.
is
not
supplied
with
a
power
plug.
READ
INSTRUCTIONS
~
Ail
the
safety
and
operating
instructions
should
be
read
before
the
appliance
is
operated,
RETAIN
INSTRUCTIONS
~
The
safety
and
operating
instructions
should
be
retained
for
future
teference,
HEED
WARNING
-
Ail
warnings
on
the
appliance
and
in
the
operating
instructions
should
be
adhered
to.
FOLLOW
INSTRUCTIONS
-
Ail
operating
and
use
in-
structions
should
be
followed.
WATER
AND
MOISTURE
-
The
appliance
should
not
be
used
near
water
-
for
example,
near
a
bathtub,
washbow,,
kitchen
sink,
laundry
tub,
in
@
wet
base-
ment,
or
near
a
swimming
pool,
etc.
LOCATION
~
The
appliance
should
be
instatied
in
a
stable
focation.
WALL
OR
CEILING
MOUNTING
~
The
appliance
should
not
be
mounted
to
a
wall
oF
ceiling.
VENTILATION
~
The
appliance
should
be
situated
so
that
its
location
or
position
does
not
interfere
with
its
proper
ventilation.
For
exampie,
the
appliance
should
not
be
situated
on
a
bed,
sofa,
rug,
of
simiiar
surface
that
may
block
the
ventilation
openings;
or,
placed
in
a
built-in
installation,
such
as
a
bookcase
or
cabinet
that
may
impede
the
flow
of
air
through
the
ventilation
openings.
HEAT
-
The
appliance
should
be
situated
away
from
heat
sources
such
a5
radiators,
heat
registers,
stoves,
or
other
appliances
{including
amplifiers)
that
produce
heat.
POWER
SOURCES
~
The
appliance
should
be
con-
nected
to
a
power
supply
only
of
the
type
de-
scribed
in
the
operating
instructions
or
as
marked
on
the
appliance.
POWER-CORD
PROTECTION
-
Power-supply
cords
should
be
routed
so
that
they
are
not
likely
to
be
walked
on
or
pinched
by
items
placed
upon
or
against
thern.
Pay
particular
attention
to
cords
at
plugs,
convenience
receptacies,
and
the
point
where
they
exit
from
the
appliance.
POLARIZATION
~
if
your
purchased
product
is
pro-
vided
with
a
polarized
power
plug,
please
read
the
following
instructions.
This
product
is
equipped
with
a
polarized
alternating
current
line
plug
(e
plug
having
one
blade
wider
than
the
other}.
This
plug
will
fit
into
the
power
outiet
only
one
way.
This
is
a
safety
feature.
If
you
are
unable
to
insert
the
plug
fully
into
the
outlet,
try
reversing
the
plug.
if
the
plug
should
still
fail
to
fit,
contact
your
electrician
to
replace
your
obsolete
outlet.
De
not
defeat
the
safety
purpose
of
the
polarized
piug.
CLEANING
~
The
appliance
should
be
cleaned
only
with
a
polishing
cloth
of
a
soft
dry
cloth.
Never
clean
with
furniture
wax,
benzine,
insecticides
or
other
volatile
liquids
since
they
may
corrode
the
cabinet.
SAFETY
INSTRUCTIONS
POWER
LINES
-
An
outdoor
antenna
should
be
located
away
from
power
lines.
NONUSE
PERIODS
-
The
power
cord
of
the
appliance
should
be
unplugged
from
the
outlet
when
left
un-
used
for
a
long
period
of
time.
OBJECT
AND
LIQUID
ENTRY
~
Care
should
be
taken
so
that
objects
do
not
fail
and
fiquids
are
not
spilled
into
the
enclosure
through
openings:
DAMAGE
REQUIRING
SERVICE
-
The
applisnce
should
be
serviced
by
a
Pioneer
authorized
service
center
or
qualified
service
personnel
when:
The
power-supply
cord
or
the
plug
has
been
dam-
aged.
Objects
have
fallen,
or
liquid
has
been
spilled
into
the
appliance.
The
appliance
has
been
exposed
to
rain
The
appliance
does
not
appear
to
operate
normally
of
exhibits
a
marked
change
in
performance.
The
appliance
has
been
dropped
or
the
enclosure
damaged.
SERVICING
-
The
user
should
not
attempt
to
service
the
appliance
beyond
that
described
in
the
operating
instructions.
All
other
servicing
should
be
referred
to
qualified
service
personnel.
")
GROUND.
ab
CLAMP
ELECTRIC
SERVICE
EQUIPMENT.
OUTDOOR
ANTENNA
GROUNDING
~
if
an
outside
antenna
is
connected
to
the
antenna
terminal,
be
sure
the
antenna
system
is
grounded
so
es
to
provide
some
protection
against voltage
surges
and
built-up
static
charges.
in
the
U.S.A.
section
810
of
the
National
Electrical
Code,
ANSI/NFPA
70,
provides
-information
with
sespect
to
proper
grounding
of
the
mast
and
supporting
structure,
grounding
of
the
lead-in
wire
to
an
antenna
discharge
unit,
size
of
grounding
conductors,
location
of
antenna
discharge
unit,
connection
to
grounding
electrodes,
and
requirements
for
the
grounding
electrode.
See
Fig,
A
CART
-
An
appliance
and
cart
combination
should
be
moved
with
care.
Quick
stops,
excessive
force,
and
uneven
surfaces
may
cause
the
appliance
and
cart
combination
to
overturn,
NEC
~
NATIONAL
ELECTRIC
CODE
ANTENNA
LEAD
IN
WIRE
ANTENNA
DISCHARGE
UNIT
(NEC
SECTION
816
-
20)
GROUNDING
CONDUCTORS
{NEC
SECTION
810
~
21)
GROUND
CLAMPS.
POWER
SERVICE
GROUNDING
ELECTRODE
SYSTEM
{NEC
ART
250,
PART
H}
Z
<PRB1171>
En
CAUTION
of
the
product.
[
[FOR
EUROPEAN
AND
U.K.
MODELS]
This
product
contains
a
laser
diode
of
higher
class
than
1.
To
ensure
continued
safety,
do
not
remove
any
covers
or
attempt
to
gain
access
to
the
inside
Refer
all
servicing
to
qualified
personnel.
The
following
caution
label
appears
on
your
player.
Location:
rear
of
the
player
CLASS
1
LASER
PRODUCT
VRW-328
[FOR
U.S.
MODEL]
CAUTION
radiation
exposure.
@
The
use
of
optical
instruments
with
this
product
will
increase
eye
hazard.
@
Use
of
controls
or
adjustments
or
performance
of
procedures
other
than
those
specified
herein
may
result
in
hazardous
This
equipment
generates
and
uses
radio
frequency
energy
and
if
not
installed
and
used
properly,
that
is,
in
strict
accordance
with
the
manufacturer's
instructions,
may
cause
interference
to
radio
and
television
reception
It
has
been
type
tested
and
found
to
comply
with
the
firnits
for
a
Class
8
computing
device
in
accordance
with
the
specifications
in
Subpart
J
of
Part
15
of
FCC
Rules,
which
are
designed
to
provide
reasonable
protection
against
such
interference
in
a
residential
installation.
However,
there
is
no
guarantee
that
interterence
will
not
occur
in
a
particular
installation.
INFORMATION
TO
USER
[FOR
U.S.
MODEL]
If
this
equipment
does
cause
interference
to
radio
or
television
reception,
which
can
be
determined
by
turning
the
equipment
off
and
on,
the
user
is
encouraged
to
try
to
correct
the
interference
by
ane
or
more
of
the
foliow-
ing
measures:
®
reorient
the
receiving
antenna
@
relocate
this
equipmentwith
respectto
the
receiver
©
move
this
equipment
away
from
the
receiver
@
plug
this
equipment
into
a
different
outlet
so
that
equipment
and
receiver
are
on
different
branch
circuits.
if
necessary,
the
user
should
consult
the
dealer
or
an
experienced
radio/television
technician
for
additionat
suggestions.
The
user
may
find
the
foliowing
booklet
prepared
by
the
Federal
Communications
Commis
sion
helpful:
"How
to
Identify
and
Resolve
Radio-TV
interference
Problems”
This
booklet
is
available
from
the
US
Government
Printing
Office,
Washington,
D.C.,
20402,
Stock
No.
004-000-00345-4.
The
above
instructions
apply
only
to
units
which
will
be
operated
in
the
United
States.
Dear
Customer:
Selecting
fine
audio
equipment
such
as
the
unit
you've
just
purchased
is
only
the
start
of
your
musical
enjoyment.
Now
it’s
time
to
consider
how
you
can
maximize
the
fun
and
excitement
your
equipment
offers.
This
manufacturer
and
the
Electronic
Industries
Association’
s
Consumer
Electronics
Group
want
you
to
get
the
most
out
of
your
equipment
by
playing
it
at
a
safe
level.
One
that
lets
the
sound
come
through
loud
and
clear
without
annoying
blaring
or
distortion-and,
most
importantly,
without
affecting
your
sensitive
hearing.
Sound
can
be
deceiving.
Over
time
your
hearing
“comfort
level”
adapts
to
higher
volumes
of
sound.
So
what
sounds
“normal”
can
actually
be
loud
and
harmful
to
your
hearing.
Guard
against
this
by
setting
your
equipment
at
a
safe
level
BEFORE
your
hearing
adapts.
To
establish
a
safe
level:
@
Start
your
volume
control
at
a
low
setting.
@.
Slowly
increase
the
sound
until
you
can
hear
it
comfortably
and
clearly,
and
without
distortion.
Once
you
have
established
a
comfortable
sound
level:
@
Set
the
dial
and
leave
it
there.
Taking
a
minute
to
do
this
now
will
help
to
prevent
hearing
damage
or
loss
in
the
future.
After
all,
we
want
you
listening
for
a
lifetime.
We
Want
You
Listening
For
A
Lifetime
Used
wisely,
your
new
sound
equipment
will
provide
a
lifetime
of
fun
and
enjoyment.
Since
hearing
damage
from
loud
noise
is
often
undetectable
until
it
is
too
late,
this
manufacturer
and
the
Electronic
Industries
Association’s
Consumer
Electronics
Group
recommend
you
avoid
prolonged
exposure
to
excessive
noise.
This
list
of
sound
levels
is
included
for
your
protection.
Decibel
Level
Example
30
Quiet
library,
soft
whispers
40
Living
room,
refrigerator,
bedroom
away
from
traffic
50
Light
traffic,
normal
conversation,
quiet
office
60
Air
conditioner
at
20
feet,
sewing
machine
70
Vacuum
cleaner,
hair
dryer,
noisy
restaurant
80
Average
city
traffic,
garbage
disposals,
alarm
clock
at
two
feet.
THE
FOLLOWING
NOISES
CAN
BE
DANGEROUS
UNDER
CONSTANT
EXPOSURE
90
Subway,
motorcycle,
truck
traffic,
lawn
mower
100
Garbage
truck,
chain
saw,
pneumatic
drill
120
Rock
band
concert
in
front
of
speakers,
thunderclap
140
—
Gunshot
blast,
jet
plane
180
Rocket
launching
pad
information
courtesy
of
the
Deafness Research
Foundation.
[For
Canadian
model]
This
digital
apparatus
does
not
exceed
the
Class
B
limits
for
radio
noise
emissions
from
digital
apparatus
set
out
in
the
Radio
interference
Regulations
of
the
Canadian
Department
of
Cormmunications.
THE
POWER
SWITCH
IS
SECONDARY
CONNECTED
AND
THEREFORE
DOES
NOT
SEPARATE
THE
UNIT
FROM
MAINS
POWER
IN
STANDBY
POSITION.
POWER-CORD
CAUTION
Handle
the
power
cord
by
the
plug.
Do
not
pull
out
the
plug
by
tugging
the
cord
and
never
touch
the
power
cord
when
your
hands
are
wet
as
this
could
cause
a
short
circuit
or
electric
shock.
Do
not
place
the
unit,
a
piece
of
furniture,
etc.,
on
the
power
cord,
or
pinch
the
cord.
Never
make
a
knot
in
the
cord
or
tie
it
with
other
cords.
The
power
cords
should
be
routed
such
that
they
are
not
likely
to
be
stepped
on.
A
damaged
power
cord
can
cause
fire
or
give
you
an
electrical
shock.
Check
the
power
cord
once
ina
while.
When
you
find
it
damaged,
ask
your
nearest
PIONEER
authorized
service
center
or
your
dealer
for
a
replacement.
3
<PRB1171>
En
CONTENTS
ABOUT
THESE
OPERATING
INSTRUCTIONS
.
CAUTIONS
REGARDING
HANDLING
CONNECTIONS
.,
CONFIRM
SUPPLIED
ACCESSORIES
.
PUT
BATTERIES
INTO
THE
REMOTE
CONTROL
UNIT..
REMOTE
CONTROL
OPERATION
NAMES
AND
FUNCTIONS
OF
PARTS
BASIC
OPERATION
..
chester
teas
VARIOUS
OPERATIONS...
alsin
TO
PLAY
ONLY
DESIRED
TRACK’
CONVENIENT
OPERATION
FOR
RECORDING
TROUBLESHOOTING
SPECIFICATIONS
..
ABOUT
THESE
OPERATING
INSTRUCTIONS
The
location
of
the
buttons
and
some
functions
differ
between
the
PD-S801
and
the
PD-S701.
Be
sure
to
read
the
explanation
which
corresponds
to
your
unit.
AC
power
cord
connection
and
functions
Some
functions
cannot
be
carried
out
depending
on
the
connection
of
AC
power
cord,
Function
WhentheAC
power
}|
When
the
AC
power
cordisconnectedto
|
cord
is
connected
to
the
unswitched
|
the
switched
outlet
of
outletofanamplifier
|
an
amplifier
or
audio
or
wail
outlet.
timer.
Timer
playback
No
Yes
Program
mernory
Yes
No
Output
level
memory
|
Yes
No
{PD-S701
only)
CAUTIONS
REGARDING
HANDLING
Location
Install
the
player
in
a
well-ventilated
location
where
it
will
not
be
exposed
to
high
temperature
or
humidity.
Do
not
install
the
player
in
a
location
which
is
exposed
to
direct
tays
of
the
sun,
or
near
stoves
or
radiators.
Excessive
heat
can
adversely
affect
the
cabinet
and
interna!
components.
Also,
installation
of
the
player
in
a
damp
or
dusty
environment
may
result
in
malfunction
or
accident.
Precautions
regarding
installation
|
@
Avoid
placing
the
player
on
heat-generating
sources
such
es
amplifiers.
@
install
this
compact
disc
player
as
far
as
possible
from
tuners
and
TV
sets.
Noise
may
be
particularly
noticeable
when
an
indoor
antenna
is
used.
in
such
cases,
make
use
of
an
outdoor
antenna,
or
turn
off
power
to
the
compact
disc
player.
@
Please
place
this
unit
on
a
level
surface.
4
<PRB1171>
En
|
Cleaning
the
player
To
clean
the
PLAYER,
wipe
with
a
soft,
dry
cloth.
For
stubborn
dirt,
wet
a
soft
cloth
with
a
mild
detergent
solution
made
by
diluting
one
part
detergent
to
5
or
6
parts
water,
wring
well,
then
wipe
off
the
dirt.
Use
a
dry
cloth
to
wipe
the
surface
dry.
Do
not
use
volatile
liquids
such
as
benzene
and
thinner
which
are
harmful
to
the
unit.
|
Storing
discs
Be
careful
not
to
allow
discs
to
warp;
always
store
discs
in
their
cases
vertically,
avoiding
locations
with
high
heat
or
humidity,
or
extremely
low
temperatures.
CD
lens
cleaner
The
player's
pickup
lens
should
not
become
dirty
in
normal
use,
but
if
for
some
reason
it
should
malfunction
due
to
soiling,
consult
your
nearest
PIONEER
authorized
service
center.
Lens
cleaners
for
CD
players
are
commercially
available,
but
special
care
should
be
exercised
in
their
use
since
some
may
cause
damage
to
the
jens,
[
Condensation
When
this
unit
is
brought
into
a
warm
room
from
previously
cold
surroundings
or
when
the
room
temperature
rises
sharply,
condensation
may
form
inside,
and
the
unit
may
not
be
able
to
attain
its
full
performance.
In
cases
like
this,
allow
the
unit
to
stand
for
about
an
hour
or
raise
the
room
temperature
gradually.
|
Cleaning
and
handling
compact
discs
@
Always
keep
your
discs
clean
by
wiping
them
gently
with
a
soft
cloth
from
the
inner
edge
toward
the
outer
periphery.
©
Ifa
disc
becomes
very
dirty,
dip
a
soft
cloth
in
water,
and
after
wringing
it
out
well,
wipe
the
dirt
away
gently,
and
then
remove
any
water
drops
with
another
soft,
dry
cloth.
@
Do
not
use
record
cleaning
sprays
or
antistatic
agents
on
discs.
Also,
never
clean
discs
with
benzene,
thinner,
or
other
volatile
solvents,
since
damage
to
the
disc
surface
may
result.
®
With
this
player,
use
discs
which
display
the
mark
shown
below.
{Optical
audio
digital
discs.)
@
When
holding
discs,
do
not
touch
their
signal
surfaces
(the
side
reflecting
a
‘rainbow’
pattern,
opposite
the
label
side).
Hold
by
the
edges,
or
by
one
edge
and
the
center
hole.
e@
Do
not
affix
gummed
labels
or
tape
to
the
label
surfaces.
Also,
do
not
scratch
or
damage
the
label.
@
Discs
rotate
at
high
speed
inside
the
player.
Do
not
use
damaged
{cracked
or
warped)
discs.
E/E
SE
@
When
setting
an
8
cm
(3-inch)
CD
single,
do
not
use
the
8
cm
{3-inch)
CD
single
adaptor.
e
Never
attempt
to
load
both
8
cm
(3-inch)
and
12
cm
(5-inch}
discs
together,
since
disc
damage
or
other
malfunctions
may
result.
Always
load
only
one
disc
at
a
time.
CONNECTIONS
Output
cabie
$761
aa
PD-S
Rod
TAO
R
Power
cord
CD-DECK
SYNCHRO
cord
Ls
Optical
fiber
cable
Control
cord
DIGITAL
INEUT
XQ
(Contre
Our
©
=a
OPTICAL
0000
cD
re)
L
Stereo
amplifier
Cassette
deck
r=
CD-DECK
SYNCHRO.
@
Make
sure
that
all
of
the
components
are
turned
off
before
making
connections.
CONNECTING
THE
OUTPUT
CABLE:
[PD-S$801}
Connect
the
LINE
OUT
jacks
of
this
unit
to
the
input
jacks
(CD
or
AUX)
of
the
amplifier.
Make
sure
that
the
white
plugs
are
connected
to
the
left
(L)
jacks
and
the
red
plugs
to
the
right
(R}
jacks.
@
Be
sure
not
to
connect
this
unit
to
the
amplifier’s
PHONO
jacks,
as
sound
will
be
distorted
and
normal
playback
will
not
be
possible.
[PD-S701]
The
unit
is
equipped
with
two
sets
of
output
connectors
in
order
to
provide
VARIABLE
and
FIXED
output
levels.
Connect
the
appropriate
set
of
connectors
to
your
amplifier's
INPUT
connectors.
The
two
sets
of
connectors
can
also
be
used
to
connect
the
player
simultaneously
to
two
stereo
amplifiers.
@
When
the
VARIABLE
jacks
are
used:
The
sound
outputlevel
can
be
adjusted
using
the
PHONES/LINE
LEVEL
control
or
the
QUTPUT
LEVEL
buttons
on
the
remote
control
unit.
@
When
the
FIXED
jacks
are
used:
The
sound
output
level
remains
fixed;
the
PHONES/LINE
LEVEL
control
and
the
OUTPUT
LEVEL
buttons
on
the
remote
control
unit
have
no
effect.
CONNECTING
THE
OPTICAL
FIBER
CABLE
This
unit
can
be
connected
to
an
amplifier
equipped
with
an
optical
digita!
jack.
1.
Remove
the
protective
dust
cap
from
this
unit's
OPTICAL
DIGITAL
OUT
jack.
2,
Use
an
optical
fiber
cable
to
connect
the
OPTICAL
DIGITAL
OUT
jack
of
this
unit
to
the
optical
digital
input
jack
of
the
amplifier.
e@
Align
the
plug
of
the
optical
fiber
cable
with
the
optical
digital
jack
and
fully
insert
the
plug
to
make
a
secure
connection.
Use
a
separately
sold
optical
fiber
cable
for
the
optical
digital
jack
connections.
However,
when
making
optical
digital
connections,
this
player
can
only
be
connected
to
an
amplifier
which
uses
the
same
type
of
optical
transmission/reception
module.
Precautions
concerning
use
of
optical
fiber
cables
@
Fully
insert
the
optical
fiber
cable
plugs
all
the
way
into
the
jacks.
@
Be
careful
not
to
fold
or
crimp
the
cable.
When
coiling
an
optical
fiber
cable
for
storage,
make
sure
the
diameter
of
the
coilis
15cm
{6
in)
or
larger.
e
Use
an
optical
fiber
cable
with
a
length
of
3
m
(9
ft)
or
less.
Protect
the
optical
fiber
cable
plugs
from
scratches
and
dust.
@
When
the
unitis
not
connected
using
an
optical
fiber
cable,
be
sure
to
keep
the
protective
dust
cap
plugged
into
the
optical
digital
output
jack
at
ail
times.
CD-Deck
synchro
function
If
you
have
a
Pioneer
cassette
deck
provided
with
the
CD-Deck
synchro
function,
connect
the
CDeDECK
SYNCHRO
jacks
of
the
CD
player
and
cassette
deck.
With
this
function,
synchro
recording
can
be
carried
out
between
player
and
deck.
@
For
details
on
connections
and
operation,
refer
to
the
Operating
Instructions
supplied
with
the
cassette
deck.
e@
The
CD-DECK
SYNCHRO
cord
is
not
supplied
with
the
CD
player.
NOTE:
In
order
to
enable
the
CD-DECK
SYNCHRO
recording
function,
the
normal
output
cable
must
be
connected
to
the
stereo
amplifier.
System
remote
control
with
a
Pioneer
stereo
amplifier
that
has the
i
mark
{PD-S701:
Australian
model
only,
PD-S801:
Multi-voltage
model
only)
When
a
Pioneer
stereo
amplifier
bearing
the
fi]
mark
is
used,
connect
the
CONTROL
IN
jack
on
the
rear
panel
of
the
CD
player
to
the
CONTROL
OUT
jack
of
the
amplifier.
This
will
enable
the
CD
player
tobe
controlled
using
the
remote
control
unit
supplied
with
the
stereo
amplifier.
If
you
do
not
plan
to
use
this
feature,
it
is
not
necessary
to
connect
CONTROL
IN/OUT
jacks.
@
The
contro!
cord
is
supplied
with
the
CD
player.
@
The
remote
control
unit
supplied
with
the
amplifier
can
be
used
to
control
Play,
Stop,
Pause
and
Track
Search.
@
For
instructions
regarding
connections
and
operation,
refer
to
the
Operating
Instructions
provided
with
your
stereo
amplifier.
NOTES:
@
When
a
control
cord
is
connected
to
the
player's
CONTROL
IN
jack,
direct
control
of
the
player
with
the
remote
control
unit
is
not
possible.
Operate
the
player
with
the
remote
control
unit
by
aiming
it
at
the
amplifier.
@
Be
sure
to
connect
both
of
the
control
cord’s
plugs
securely
to
the
CONTROL
IN
and
CONTROL
OUT
terminals.
Do
not
connect
only
one
end
of
the
cable.
@
8e
sure
to
turn
off
the
power
of
the
amplifier
when
connecting
the
power
cord
and
output
cord.
@
When
only
the
digital
output
is
connected,
the
remote
sensor
of
the
amplifier
does
not
function.
To
operate
it,
connect
the
output
cable
to
the
stereo
amplifier
as
well
as
connecting
the
digital
output.
CONNECTING
THE
POWER
CORD
Connect
the
power
cord
to
a
household
AC
wall
outlet
or
an
AC
outlet
on
your
amplifier.
(See
the
section
“AC
power
cord
connection
and
functions”
on
page
4.)
@
Make
sure
plugs
are
inserted
fully
into
the
jacks
and
wall
outlet.
5
<PRB1171>
En
CONFIRM
SUPPLIED
ACCESSORIES
PUT
BATTERIES
INTO
THE
REMOTE
CONTROL
UNIT
0)
®
®
Output
cable
x
7
®
Control
cord
x
1
(PD-S701:
Australian
model
only,
PD-S801:
Multi-voltage
model
only)
@®
Remote
control
unit
x
1
@®
AAARO3
dry
cell
batteries
x
2
6
<PRB1171>
En
Open
the
lid
of
the
battery
compartment
on
the
rear
of
the
remote
control
unit,
and
insert
the
batteries,
taking
care
to
align
the
(+)
and
(—}
polarities
correctly.
NOTES:
@
inorder
to
prevent
battery
Jeakage,
remove
the
batteries
when
not
using
the
remote
control
unit
for
an
extended
period
(one
month
or
more).
If
leakage
occurs,
carefully
wipe
away
any
battery
fluid
inside
the
compartment
before
inserting
new
batteries.
®
Do
not
allow
books
or
other
objects
to
rest
on
top
of
the
re-
mote
control
unit,
since
the
buttons
may
be
depressed,
causing
faster
exhaustion
of
the
batteries.
Incorrect
use
of
batteries
may
cause
leakage
or
rupture.
Always
be
sure
to
follow
these
guidelines:
A.
Always
insert
batteries
into
the
battery
compartment
correctly
matching
the
positive
and
negative
iS)
polarities,
as
shown
by
the
display
inside
the
compartment.
B.
Never
mix
new
and
used
batteries.
C.
Batteries
of
the
same
size
may
have
different
voltages,
depending
on
brand.
Do
not
mix
different
brands
of
batteries.
REMOTE
CONTROL
OPERATIONS
When
operating
the
remote
control
unit,
point
the
unit's
infrared
signai
transmitter
at
the
remote
contro!
receiver
(REMOTE
SENSOR)
on
the
front
panel
of
the
player.
The
remote
contro!
unit
can
be
used
within
a
range
of
about
7
meters
(23
feet)
from
the
remote
sensor,
and
within
angies
of
up
to
about
30
degrees.
NOTE:
If
the
remote
control
sensor
window
is
in
a
position
where
it
receives
strong
light
such
as
sunlight
or
fluorescent
light,
controf
may
not
be
possible.
NAMES
AND
FUNCTIONS
OF
PARTS
PD-S801
FRONT
PANEL
@
POWER
STANDBY/ON
switch
and
STANDBY
indicator
@
DISPLAY
OFF
button
©
Remote
sensor
Receives
the
signal
from
the
remote
control
unit.
®
Dise
tray
©
TIME
button
©
OPEN/CLOSE
button
(
4
)
®
Manual
search
buttons
(<</»>>)}
Stop
button
(m)
©)
Pause
button
(11)
@
Play
button
(>
)
@)
Track
search
buttons
(4</>>)
@
OUTPUT
SELECTOR
button
(PD-$801
only)
@
DIGITAL/ANALOG
output
indicators
(PD-S801
only)
@
Headphones
jack
(PHONES)
(PD-S701
only)
®
Headphones
line/volume
control
(PHONES/
LINE
LEVEL)
(PD-S701
only}
@
PEAK
SEARCH
button
(PD-S701
only)
@
AUTO
SPACE
button
(PD-S701
only)
*COMPU/**AUTO
EDIT
button
(PD-S701
only)
TIME
FADE
EDIT
button
(PD-S701
only)
@®
Track
number/Digit
buttons
(1
-
20,
>20)
(PD-S701
only)
@
PGM
button
(PD-S701
only)
@)
CHECK
button
(PD-S701
only)
@)
CLEAR
button
(PD-S701
only)
@)
DELETE
button
(PD-S701
only)
@
RESERVE
button
(PD-S701
only)
@)
REPEAT
button
(PD-S701
only)
@
RANDOM
button
(PD-S701
only)
PD-S801
REMOTE
CONTROL
UNIT
Remote
control
buttons
with
the
same
names
or
marks
as
buttons
on
the
front
panel
of
the
player
control
the
same
operations
as
the
corresponding
front
pane!
buttons.
@
OPEN/CLOSE
button
@
POWER
button
©
CHECK
button
(PD-S801
only)
@
Program
button
(PROGRAM/PGM)
©
COMPU/AUTO
EDIT
button
(PD-S801
only)
©
TIME
FADE
EDIT
button
(PD-S801
only)
@
PEAK
SEARCH
button
(PD-S801
only)
STOP
button
(
m)
@
MANUAL
search
buttons
(<<
/
me
}
REPEAT
button
(PD-S801
only)
@
RANDOM
PLAY
button
Track
number/Digit
buttons
PD-S801:
(1
-
16,
>16)
PD-S701:
(1
-
20,
>20)
@®
CLEAR
button
(PD-S801
only)
INDEX
buttons
(~—-/—)
(PD-S801
only)
@®
PLAY
button
(>)
PAUSE
button
{
It)
@
TRACK
search
buttons
(we
/
pr}
HI-LITE
SCAN
button
(PD-S701
only)
RESERVE
button
(PD-S701
only)
@
OUTPUT
LEVEL
buttons
(-/+)
(PD-S701
only}
7
<PRB117i>
En
BASIC
OPERATION
~~
Go)
*:
PD-S801
only
een
J
The
illustration
shows
PD-S801.
au
3
*
1
STANDBY
°
POWER
Se
STANDBY/ON
Label
surface
Signal
surface
lt
PAUSE:
Operations
indicated
by
the
|
the
remote
control
unit.
8
<PRBI171>
En
iret)
]
mark
are
performed
with
To
play
a
compact
disc
1
Press
POWER
to
turn
on
the
power
to
the
player.
2
Press
OPEN/CLOSE
and
load
a
disc.
Place
the
disc
with
the
label
surface
facing
DOWN.
3
Press
»
to
start
playback.
To
pause
playback
temporarily:
Press
U.
The
If
indicator
lights
and
playback
is
paused
at
that
point.
Pressing
UW
again
or
®
resumes
playback
from
the
position
where
pause
mode
was
entered.
To
stop
playback:
Press
To
stop
playback
and
take
out
the
disc:
Press
OPEN/CLOSE
and
remove
the
disc.
Press
OPEN/CLOSE
again
to
close
the
disc
tray
and
then
press
POWER
to
turn
off
the
power.
Timer
playback
By
using
a
commercially
available
audio
timer,
it
is
possible
to
initiate
playback
at
any
time
automatically.
1.
Turn
on
the
power
to
the
player,
load
a
disc
into
the
disc
tray
and
close
the
disc
tray
with
OPEN/CLOSE,
2.
Set
the
time
at
which
you
wish
playback
to
begin.
The
timer
will
supply
power
to
both
the
amplifier
and
the
player
at
the
preset
time,
turning
all
the
components
on
and
initiating
the
playback
mode.
Playback
starts
from
the
first
track.
NOTES:
e
ifnodisc
has
been
loaded
in
the
player,
the
player
will
enter
the
standby
mode
when
the
audio
timer
turns
the
player's
power
on.
@
Pressing
any
function
buttons
before
commencement
of
timer
start
cancels
the
timer
start
function.
[To
turn
off
the
display
DISPLAY
OFF
Pressing
the
DISPLAY
OFF
button
selects
the
Display
Off
mode.
In
this
mode,
ail
displays
are
turned
off
during
playback.
This
function
eliminates
the
use
of
unnecessary
circuits,
thus
preventing
any
adverse
effect
on
playback
sound
quality.
@
The
indicators
in
the
display
window
will
light
while
the
player
is in
stop
mode
even
when
the
Display
Off
function
is
activated,
When
»
is
pressed
to
begin
playback,
all
indicators
on
the
display
will
disappear.
e
During
playback,
the
indicators
will
light
for
several
seconds
if
any
of
the
player's
controls
are
operated.
@
Tocancel
the
Display
Off
mode,
press
the
DISPLAY
OFF
button
once
again.
BASIC
OPERATION
To
select
the
DIGITAL
OUT
jacks
or
analog
LINE
OUT
jacks
(PD-S801
only)
DIGITAL,
Q—-————-
DIGITAL
indicator
ANALOG
@-——-——
ANALOG
indicator
OUTPUT
SELECTOR
©
/?
Each
time
the
OUTPUT
SELECTOR
button
is
pressed,
the
signal
output
jacks
are
switched
in
the
following
order.
DIGITAL
OUT
jacks
Analog
LINE
OUT
jacks
:|
ON
ON
(Both
of
the
DIGITAL
and
ANALOG
indicators
light.)
4
ON
(The
ANALOG
indicator
lights.)
4
ON
OFF
(The
DIGITAL
indicator
lights.)
To
adjust
the
headphones
sound
volume
(PD-S701
only)
PHONES/LINE
LEVEL
Turn
the
PHONES/LINE
LEVEL
control
in
the
MAX
direction
to
increase
the
headphones
sound
volume
and
in
the
MIN
direction
to
decrease
it,
The
OUTPUT
LEVEL
buttons
on
the
remote
control
unit
can
also
be
used
to
adjust
the
headphones
sound
volume.
OUTPUT
LEVEL
When
the
LINE
OUT
VARIABLE
jacks
on
the
rear
panel
are
used
to
connect
the
player
to
your
stereo
amplifier,
the
motor-driven
PHONES/LINE
LEVEL
control
can
be
adjusted
with
the
OUTPUT
LEVEL
buttons
at
your
listening
position,
even
when
the
volume
control
of
the
stereo
amplifier
is
left
unchanged.
|
Time
display
|
ime]
®
(fog:
Ge4er
(I
x)
5
OPf2”
Yesa~
Co]
K
BQe8oe
ow
took)
During
playback,
pressing
the
TIME
button
changes
the
time
display
in
the
following
sequence:
®
Time
(elapsed
playback
time
of
the
track
being
played)
-+
®
Remain
(remaining
playback
time
of
the
track
being
played)
->
©
AL
Remain
(remaining
playback
time
from
the
playing
point
to
the
end
of
the
disc)
--
©
Total
{total
playback
time
of
the
disc).
e@
With
track
No.
30
or
more,
the
Remain
time
®
cannot
be
displayed.
®
During
random
playback,
AL
Remain
time
©
cannot
be
displayed.
@
During
Program
playback,
the
remaining
playback
time
of
the
programmed
tracks
can
be
displayed
with
the
AL
Remain
setting
©.
The
number
of
program
steps
and
total
time
of
program
can
be
displayed
with
the
Total
setting
O.
To
display
the
playing
time
of
each
track
During
stop
mode
ono
cS
Va
(C2)
»
male
a7]
During
stop
mode,
pressing
m1
displays
the
playing
time
of
each
track
starting
from
track
No.1.
@
This
function
cannot
be
carried
out
with
track
No.30
or
above.
9
<PRB1171>
En
VARIOUS
OPERATIONS
Direct
play
-
To
play
a
particular
track
by
specifying
the
track
number
PD-S801
re.
[=
PD-S701
ooeaos
Oooog
oaaacd
oOoedssa
When
the
track
No.
is
specified
with
the
digit
buttons,
playback
starts
automatically
from
the
beginning
of
the
specified
track.
For
PD-S801:
To
specify
track
No.
from
1
to
16,
simply
press
the
corresponding
digit
buttons
(
[i]
-
ff).
To
specify
track
No.
17
or
above,
use
[S16].
Example;
To
enter
track
No.
26:
6
]
To
enter
track
No.
30:
10
@
When
entering
17
or
above,
fo]
functions
as
0.
©
When
|
216}
is
pressed,
the
digit
button
to
be
next
entered
should
be
pressed
within
5
seconds.
For
PD-S701:
To
specify
track
No,
from
1
to
20,
simply
press
the
corresponding
digit
buttons
(
[1]
~
23).
To
specify
track
No.
21
or
above,
use
[520].
Example:
To
enter
track
No.
26:
[>20
25,16
]
To
enter
track
No.
30:
[>20},
3
_},
[10
@
When
entering
21
or
above,
[10
|
functions
as
0.
@
When
[220
jis
pressed,
the
digit
button
to
be
next
entered
should
be
pressed
within
5
seconds.
10
<PRB1171>
En
|
Track
search
-
To
search
for
a
particular
track
When
mt
is
pressed
once
or
a
number
of
times,
playback
is
advanced
to
the
beginning
of
a
track
located
after
the
track
being
played.
The
position
of
the
located
treck
corresponds
to
the
number
of
times
the
button
is
pressed,
When
this
button
is
kept
pressed,
playback
advances
to
successive
tracks
on
the
disc.
When
ee
is
pressed
once,
playback
returns
to
the
beginning
of
the
track
being
played.
When
this
buttor
is
pressed
more
than
once,
playback
is
returned
to
a
track
located
before
the
track
being
played.
When
this
button
is
kept
pressed,
playback
returns
to
earlier
tracks
on
the
disc.
@
When
>I
or
Wis
operated
in
pause
mode
or
stop
mode,
press
>
to
start
playback.
NOTE:
During
program
playback,
the
Ke
or
mR
button
can
be
used
to
select
the
programmed
track.
Manual
search
-
To
search
for
a
particular
passage
During
playback
or
pause
mode
MANUAL
While
m&
is
kept
pressed,
playback
rapidly
advances
toward
the
end
of
the
disc.
When
playback
reaches
the
end
of
the
disc,
the
player
enters
pause
mode
and
“END”
is
displayed.
While
<#¢
is
kept
pressed,
playback
rapidly
reverses
toward
the
beginning
of
the
disc.
When
the
desired
passage
is
reached,
release
me
or
<4,
The
player
enters
original
mode
(playback
or
pause)
where
mS
or
<t¢
is
released.
NOTE:
During
program
playback,
Manual
Search
can
be
carried
out
in
one
program
step
only.