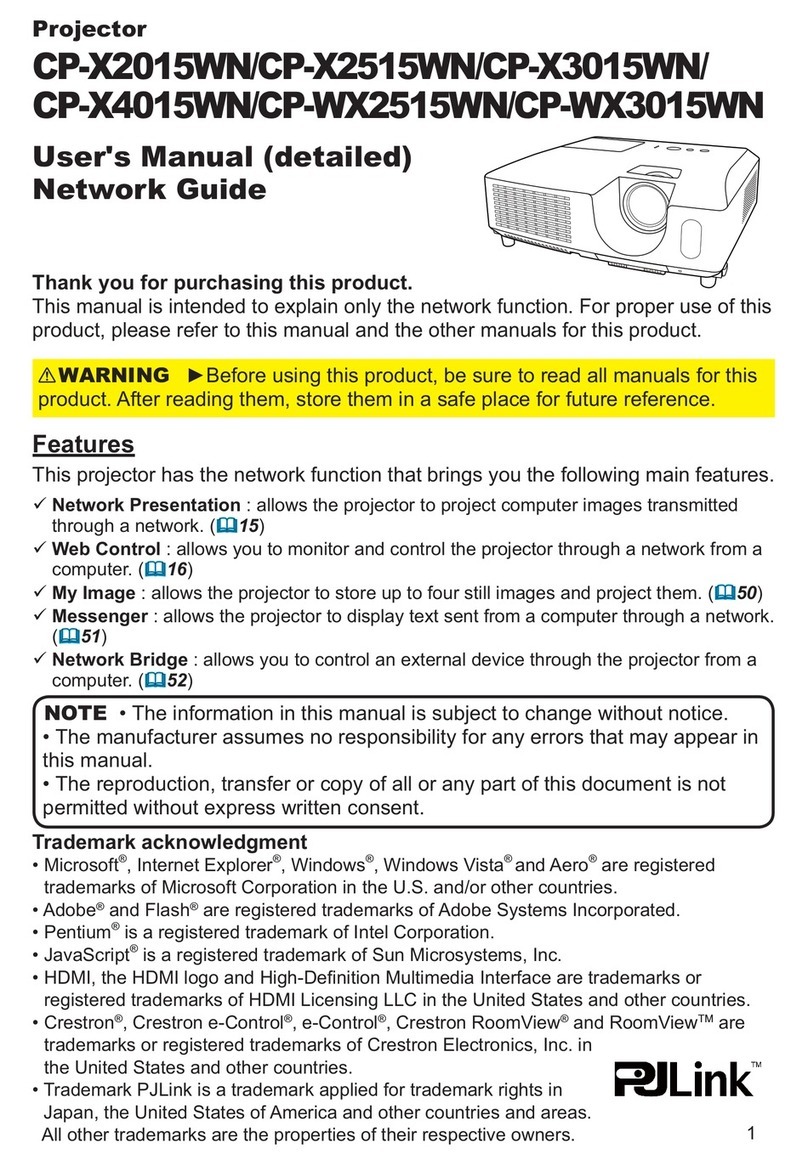
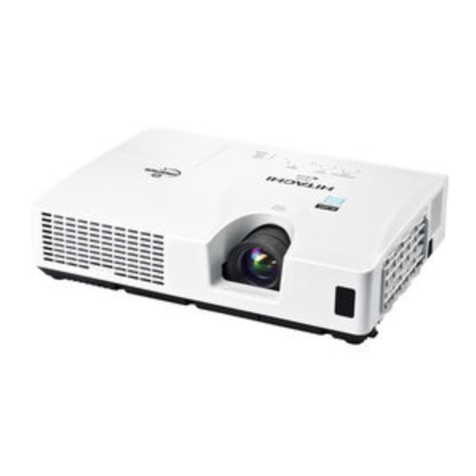
PJLink CP-EW300N User manual

1
Projector
User's Manual (detailed)
Network Guide
Thank you for purchasing this product.
This manual is intended to explain only the network function. For proper use of this
product, please refer to this manual and the other manuals for this product.
Features
This projector has the network function that brings you the following main features.
Ź%HIRUHXVLQJWKLVSURGXFWEHVXUHWRUHDGDOOPDQXDOVIRUWKLV
product. After reading them, store them in a safe place for future reference.
WARNING
7KHLQIRUPDWLRQLQWKLVPDQXDOLVVXEMHFWWRFKDQJHZLWKRXWQRWLFH
7KHLOOXVWUDWLRQVLQWKLVPDQXDODUHIRULOOXVWUDWLYHSXUSRVHV7KH\PD\GLIIHU
slightly from your projector.
7KHPDQXIDFWXUHUDVVXPHVQRUHVSRQVLELOLW\IRUDQ\HUURUVWKDWPD\DSSHDULQ
this manual.
7KHUHSURGXFWLRQWUDQVIHURUFRS\RIDOORUDQ\SDUWRIWKLVGRFXPHQWLVQRW
permitted without express written consent.
NOTE
Trademark acknowledgment
9Web Control : allows you to monitor and control the projector through a network from a
computer. (9)
9Network Bridge DOORZV\RXWRFRQWURODQH[WHUQDOGHYLFHWKURXJKWKHSURMHFWRUIURPD
computer. (40)
Microsoft
®
, Internet Explorer
®
, Windows
®
, Windows Vista
®
, Windows 7
®
, Windows 8
®
and
Aero
®
are registered trademarks of Microsoft Corporation in the U.S. and/or other countries.
$GREH®and Flash®are registered trademarks of Adobe Systems Incorporated.
3HQWLXP®is a registered trademark of Intel Corporation.
-DYD6FULSW®is a registered trademark of Sun Microsystems, Inc.
+'0,WKH+'0,ORJRDQG+LJK'H¿QLWLRQ0XOWLPHGLD,QWHUIDFHDUHWUDGHPDUNVRU
UHJLVWHUHGWUDGHPDUNVRI+'0,/LFHQVLQJ//&LQWKH8QLWHG6WDWHVDQGRWKHUFRXQWULHV
&UHVWURQ®&UHVWURQH&RQWURO®H&RQWURO®, Crestron RoomView®and RoomViewTM are
trademarks or registered trademarks of Crestron Electronics, Inc. in
the United States and other countries.
7UDGHPDUN3-/LQNLVDWUDGHPDUNDSSOLHGIRUWUDGHPDUNULJKWVLQ
-DSDQWKH8QLWHG6WDWHVRI$PHULFDDQGRWKHUFRXQWULHVDQGDUHDV
$OORWKHUWUDGHPDUNVDUHWKHSURSHUWLHVRIWKHLUUHVSHFWLYHRZQHUV
CP-EX250N/CP-EX300N
CP-EW250N/CP-EW300N

2
Contents
Contents
1. Connection to the network ...................................................... 4
1.1 System requirements ................................................................................. 4
1.1.1 Required equipment preparation ..................................................................................... 4
+DUGZDUHDQGVRIWZDUHUHTXLUHPHQWIRUFRPSXWHU .......................................................... 4
0DQXDOQHWZRUNFRQQHFWLRQVHWWLQJ:LUHG/$1 ..................................... 5
1.2.1 Equipments connection .................................................................................................... 5
1HWZRUNVHWWLQJV .............................................................................................................. 5
1.2.3 “Internet Option” setting ................................................................................................... 8
2. Web Control .............................................................................. 9
3URMHFWRU:HE&RQWURO ...............................................................................10
/RJRQ ............................................................................................................................. 10
1HWZRUN,QIRUPDWLRQ....................................................................................................... 11
1HWZRUN6HWWLQJV............................................................................................................ 12
3RUW6HWWLQJV .................................................................................................................. 14
2.1.5 Mail Settings .................................................................................................................. 16
2.1.6 Alert Settings .................................................................................................................. 17
2.1.7 Schedule Settings .......................................................................................................... 19
'DWH7LPH6HWWLQJV......................................................................................................... 21
2.1.9 Security Settings ............................................................................................................ 23
3URMHFWRU&RQWURO .......................................................................................................... 24
2.1.11 Remote Control ............................................................................................................ 29
3URMHFWRU6WDWXV ........................................................................................................... 30
1HWZRUN5HVWDUW ........................................................................................................... 31
&UHVWURQH&RQWURO®.................................................................................. 32
2.2.1 Main window .................................................................................................................... 33
2.2.2 Tools window ................................................................................................................... 35
2.2.3 Info window ..................................................................................................................... 37
+HOS'HVNZLQGRZ........................................................................................................... 38
2.2.5 Emergency Alert .............................................................................................................. 39
3. Network Bridge Function ....................................................... 40
&RQQHFWLQJGHYLFHV .................................................................................. 40
3.2 Communication setup ............................................................................... 41
3.3 Communication port ................................................................................. 41
3.4 Transmission method ............................................................................... 42
+$/)'83/(; .............................................................................................................. 42
)8//'83/(;............................................................................................................... 43

3
Contents
4. Other Functions ...................................................................... 44
(PDLO$OHUWV ............................................................................................. 44
(YHQW6FKHGXOLQJ ..................................................................................... 46
&RPPDQG&RQWUROYLDWKH1HWZRUN .......................................................... 49
4.4 Crestron RoomView®.................................................................................54
5. Troubleshooting ..................................................................... 55
6. Warranty and after-sales service .......................................... 56

4
1. Connection to the network
1.1 System requirements
1. Connection to the network
The following equipments are required to connect the projector to your computer
through the network.
Ŷ&RPPRQ The projector: 1 unit, Computer : minimum 1 set
Ŷ'HSHQGLQJRQKRZ\RXZDQWWRFRQQHFW
/$1FDEOH&$7RUJUHDWHUSLHFH*1
1.1.1 Required equipment preparation
*1: The system for using the network function of the projector requires
FRPPXQLFDWLRQHQYLURQPHQWFRQIRUPLQJ%DVH7;RU%DVH7
7KHQHWZRUNFRPPXQLFDWLRQFRQWUROLVGLVDEOHGZKLOHWKHSURMHFWRULV
LQVWDQGE\PRGHLIWKH67$1'%<02'(LWHPLVVHWWR6$9,1*3OHDVHFRQQHFW
WKHQHWZRUNFRPPXQLFDWLRQWRWKHSURMHFWRUDIWHUVHWWLQJWKH67$1'%<02'(
WR1250$/SETUP menu in the Operating Guide)
NOTE
To connect your computer to the projector and use the network function of the
projector, your computer needs to meet the following requirements.
1.1.2 Hardware and software requirement for computer
9OS: One of the following.
Windows ®;3+RPH(GLWLRQ3URIHVVLRQDO(GLWLRQ
Windows Vista ®+RPH%DVLF+RPH3UHPLXP%XVLQHVV8OWLPDWH(QWHUSULVH
(6HUYLFH3DFNRUODWHU)
Windows ®6WDUWHU+RPH%DVLF+RPH3UHPLXP3URIHVVLRQDO8OWLPDWH
Enterprise
Windows ®8
Windows ®3UR(QWHUSULVH
9CPU3HQWLXP*+]RUKLJKHU
9Graphic cardELW;*$RUKLJKHU
9Memory0%RUKLJKHU
9Hard disk space0%RUKLJKHU
9Web browser: Internet Explorer ®6.0 or higher

5
1. Connection to the network
1.2 Manual network connection setting - Wired LAN -
This section explains how to set it up manually.
1.2.1 Equipments connection
&RQQHFWWKHSURMHFWRUDQGDFRPSXWHUZLWKD/$1FDEOH
%HIRUHFRQQHFWLQJZLWKDQH[LVWLQJQHWZRUNFRQWDFWWKHQHWZRUNDGPLQLVWUDWRU
1H[WFKHFNWKHIROORZLQJFRPSXWHUVHWWLQJV
1.2.2 Network settings
This is an explanation of network connection settings for Windows®7.
/RJRQWR:LQGRZV®7 as administrator authority. Administrator authority is the
account, which can access to all functions.
2SHQ³&RQWURO3DQHO´IURP³6WDUW´PHQX
2SHQ³9LHZQHWZRUNVWDWXVDQGWDVNV´LQ³1HWZRUNDQG,QWHUQHW´
:LWKWKHLFRQVLQWKH&RQWURO3DQHOZLQGRZGLVSOD\HGFOLFN1HWZRUNDQG
Sharing Center".
4) Click "Change adapter settings" in the menu
RQWKHOHIWVLGHRIWKH1HWZRUNDQG6KDULQJ
Center" window.
(continued on next page)

6
1. Connection to the network
1.2 Manual network connection setting - Wired LAN - (continued)
6HOHFW8VHWKHIROORZLQJ,3DGGUHVVDQGFRQ¿JXUHWKH,3
DGGUHVV6XEQHWPDVNDQG'HIDXOWJDWHZD\IRUWKHFRPSXWHU
DFFRUGLQJO\,ID'+&3VHUYHUH[LVWVLQWKHQHWZRUN\RX
FDQVHOHFW2EWDLQDQ,3DGGUHVVDXWRPDWLFDOO\DQGWKH,3
address will be assigned automatically.
After setting is complete, click [OK] to close the window.
5LJKWFOLFN/RFDO$UHD&RQQHFWLRQWRRSHQWKHPHQX
DQGVHOHFW3URSHUWLHV
6HOHFW,QWHUQHW3URWRFRO9HUVLRQ7&3,3YDQGFOLFN
>3URSHUWLHV@
(continued on next page)

7
1. Connection to the network
1.2 Manual network connection setting - Wired LAN - (continued)
[About IP address]
Ŷ6HWWLQJPDQXDOO\
7KH1HWZRUNDGGUHVVSRUWLRQRIWKH,3DGGUHVVVHWWLQJRQ\RXUFRPSXWHUPXVW
EHWKHVDPHDVWKHVHWWLQJRQWKHSURMHFWRU$OVRWKHHQWLUH,3DGGUHVVRQWKH
FRPSXWHUPXVWQRWRYHUODSZLWKWKDWRIWKHRWKHUGHYLFHVRQWKHVDPHQHWZRUN
including the projector.
The projector’s settings are as follows.
,3DGGUHVV
Subnet mask: 255.255.255.0
1HWZRUNDGGUHVVLQWKLVFDVH
7KHUHIRUHVSHFLI\WKHFRPSXWHU¶V,3DGGUHVVDVIROORZV
,3DGGUHVV[[[[[[VKRZVGHFLPDOQXPEHU
Subnet mask: 255.255.255.0
1HWZRUNDGGUHVVLQWKLVFDVH
For example
Select from 1 to 254 for “xxx” not duplicating with any other equipments.
,QWKLVFDVHVLQFHWKH,3DGGUHVVRIWKHSURMHFWRULV³´VSHFLI\D
setting between 1 to 253 for the computer.
³´FDQQRWEHVHWWRWKH,3DGGUHVV
7KHSURMHFWRU¶V,3DGGUHVVFDQEHFKDQJHGE\XVLQJWKHFRQ¿JXUDWLRQXWLOLW\
YLDDZHEEURZVHU12)
,IWKHSURMHFWRUDQGWKHFRPSXWHUH[LVWLQWKHVDPHQHWZRUNLHVDPH
QHWZRUNDGGUHVV\RXFDQOHDYHWKHGHIDXOWJDWHZD\¿HOGEODQN
:KHQWKHSURMHFWRUDQGWKHFRPSXWHUH[LVWLQGLIIHUHQWQHWZRUNVWKHGHIDXOW
gateway must be set. Consult to the network administrator in detail.
NOTE
Ŷ6HWWLQJDXWRPDWLFDOO\
:KHQD'+&3VHUYHUH[LVWVLQWKHFRQQHFWHGQHWZRUNLWLVSRVVLEOHWRDVVLJQDQ
,3DGGUHVVWRWKHSURMHFWRUDQGFRPSXWHUDXWRPDWLFDOO\
'+&3LVDEEUHYLDWLRQIRU³'\QDPLF+RVW&RQ¿JXUDWLRQ3URWRFRO´DQGKDV
the function to provide necessary setting for network like IP address from
VHUYHUWRFOLHQW$VHUYHUWKDWKDV'+&3IXQFWLRQLVFDOOHG'+&3VHUYHU
(continued on next page)

8
1. Connection to the network
1.2 Manual network connection setting - Wired LAN - (continued)
&OLFN³&RQQHFWLRQV´WDEDQGWKHQFOLFN>/$1VHWWLQJV@EXWWRQ
WRRSHQ³/RFDO$UHD1HWZRUN/$16HWWLQJV´
1.2.3 “Internet Option” setting
&OLFN³,QWHUQHW2SWLRQV´LQ³1HWZRUNDQG
Sharing Center” window to open “Internet
3URSHUWLHV´ZLQGRZ
8QFKHFNDOOER[HVLQ³/RFDO$UHD1HWZRUN/$16HWWLQJV´
window.
After setting is complete, click [OK] to close the window.

9
<RXFDQDGMXVWRUFRQWUROWKHSURMHFWRUYLDDQHWZRUNIURPDZHEEURZVHURQD
computer that is connected to the same network.
,QWHUQHW([SORUHU®6.0 or later is required.
,I-DYD6FULSW®LVGLVDEOHGLQ\RXUZHEEURZVHUFRQ¿JXUDWLRQ\RXPXVWHQDEOH
-DYD6FULSW®LQRUGHUWRXVHWKHSURMHFWRUZHESDJHVSURSHUO\6HHWKH+HOS¿OHV
IRU\RXUZHEEURZVHUIRUGHWDLOVRQKRZWRHQDEOH-DYD6FULSW®.
,WLVUHFRPPHQGHGWKDWDOOZHEEURZVHUXSGDWHVDUHLQVWDOOHG
NOTE
2. Web Control
2. Web Control
5HIHUWRWKHIROORZLQJIRUFRQ¿JXULQJRUFRQWUROOLQJWKHSURMHFWRUYLDDZHEEURZVHU
0DNHVXUHWKDW\RXUFRPSXWHUDQGWKHSURMHFWRULVFRQQHFWHGYLDQHWZRUNDQG
then start Web browser.
(QWHUWKHSURMHFWRUV,3DGGUHVVLQWR85/LQSXWER[RIWKH:HEEURZVHUDVWKH
example below, and then press the Enter key or button.
Example,IWKH,3DGGUHVVRIWKHSURMHFWRULVVHWWR192.168.1.10:
Enter “http://192.168.1.10/” into the address bar of the web browser
and press the Enter key or click button.
,IDFRUUHFW85/LVLQSXWDQGWKH
projector and your computer are
connected to the same network
correctly, the selection window as
shown on the right will be displayed.
<RXFDQFKRRVHWRXVH3URMHFWRU:HE
&RQWURORU&UHVWURQH&RQWURO®as a tool
for controlling the projector. Click one of
them.
For more details, refer to 2.1 Projector
Web Control (10) or 2.2 Crestron
e-Control®(32).
,ICrestron e-Control in the Network Settings (12) is set to
'LVDEOHWKHVHOHFWLRQZLQGRZDERYHGRHVQRWDSSHDUEXWWKH/RJRQZLQGRZRI
WKH3URMHFWRU:HE&RQWUROLVGLVSOD\HG
&UHVWURQH&RQWURO®is created using Flash®<RXQHHGWRLQVWDOO$GREH®Flash®
3OD\HURQ\RXUFRPSXWHUWRXVH&UHVWURQH&RQWURO®.
NOTE

10
2. Web Control
2.1.1 Logon
7RXVHWKH3URMHFWRU:HE&RQWUROIXQFWLRQ\RXQHHG
to logon with your user name and password.
7KHODQJXDJHXVHGRQWKH3URMHFWRU:HE&RQWUROVFUHHQLVWKH
VDPHDVWKDWRIWKH26'RQWKHSURMHFWRU,I\RXZDQWWRFKDQJHLW\RXQHHG
WRFKDQJHWKH26'ODQJXDJHRQWKHSURMHFWRUSCREEN menu in the
Operating Guide)
NOTE
%HORZDUHWKHIDFWRU\GHIDXOWVHWWLQJVIRUXVHU
name and password.
User name Administrator
Password <blank>
Enter your user name and password, and then click the [OK].
If you logon successfully, the screen below will be displayed.
Main menu
&OLFNWKHGHVLUHGRSHUDWLRQRUFRQ¿JXUDWLRQLWHPRQWKHPDLQPHQX
2.1 Projector Web Control
/RJRQZLQGRZ

11
2.1.2 Network Information
'LVSOD\VWKHSURMHFWRU¶VFXUUHQWQHWZRUN
FRQ¿JXUDWLRQVHWWLQJV
Item 'HVFULSWLRQ
Projector Name 'LVSOD\VWKHSURMHFWRUQDPHVHWWLQJV
'+&3 'LVSOD\VWKH'+&3VHWWLQJ
IP Address 'LVSOD\VWKH,3DGGUHVV
Subnet Mask 'LVSOD\VWKHVXEQHWPDVN
'HIDXOW*DWHZD\ 'LVSOD\VWKHGHIDXOWJDWHZD\
'166HUYHU$GGUHVV 'LVSOD\VWKH'16VHUYHUDGGUHVV
MAC Address 'LVSOD\VWKH0$&DGGUHVV
2. Web Control
2.1 Projector Web Control (continued)

12
2.1.3 Network Settings
'LVSOD\VDQGFRQ¿JXUHVQHWZRUNVHWWLQJV
Item 'HVFULSWLRQ
Projector Name
&RQ¿JXUHVWKHQDPHRIWKHSURMHFWRU
7KHOHQJWKRIWKH3URMHFWRU1DPHFDQEHXSWRDOSKDQXPHULF
characters. Only alphabets, numbers and following symbols can
be used.
!"#>?@ABC^_`aDQGVSDFH
3DUWLFXODUSURMHFWRUQDPHLVSUHDVVLJQHGE\GHIDXOW
,3&RQ¿JXUDWLRQ &RQ¿JXUHVQHWZRUNVHWWLQJV
'+&321 (QDEOHV'+&3
'+&32)) 'LVDEOHV'+&3
IP Address &RQ¿JXUHVWKH,3DGGUHVVZKHQ'+&3LVGLVDEOHG
Subnet Mask &RQ¿JXUHVWKHVXEQHWPDVNZKHQ'+&3LVGLVDEOHG
'HIDXOW*DWHZD\ &RQ¿JXUHVWKHGHIDXOWJDWHZD\ZKHQ'+&3LVGLVDEOHG
'166HUYHU$GGUHVV &RQ¿JXUHVWKH'16VHUYHUDGGUHVV
$0;''
$0;'HYLFH
'LVFRYHU\
&RQ¿JXUHVWKH$0;'HYLFH'LVFRYHU\VHWWLQJWRGHWHFWWKH
SURMHFWRUIURPWKHFRQWUROOHUVRI$0;FRQQHFWHGWRWKHVDPH
QHWZRUN)RUWKHGHWDLOVRI$0;'HYLFH'LVFRYHU\YLVLWWKH$0;
web site.
85/KWWSZZZDP[FRP
Crestron e-Control
6HWZKHWKHUWRRUQRWWRXVH&UHVWURQH&RQWURO®.
,I\RXFKRRVH'LVDEOHWKH/RJRQZLQGRZRI3URMHFWRU:HE
&RQWUROZLOOEHGLVSOD\HGDW¿UVWEXWWKHVHOHFWLRQZLQGRZZLOO
not appear.
2. Web Control
2.1 Projector Web Control (continued)
Click the [Apply]EXWWRQWRVDYHWKHVHWWLQJV

13
7KHQHZFRQ¿JXUDWLRQVHWWLQJVDUHDFWLYDWHGDIWHUUHVWDUWLQJWKH
QHWZRUNFRQQHFWLRQ:KHQWKHFRQ¿JXUDWLRQVHWWLQJVDUHFKDQJHG\RXPXVW
UHVWDUWWKHQHWZRUNFRQQHFWLRQ<RXFDQUHVWDUWWKHQHWZRUNFRQQHFWLRQE\
clicking [Network Restart] on the main menu (31).
,I\RXFRQQHFWWKHSURMHFWRUWRDQH[LVWLQJQHWZRUNFRQVXOWDQHWZRUN
DGPLQLVWUDWRUEHIRUHVHWWLQJVHUYHUDGGUHVVHV
NOTE
2.1 Projector Web Control (continued)
2. Web Control

14
2.1.4 Port Settings
'LVSOD\VDQGFRQ¿JXUHVFRPPXQLFDWLRQSRUW
settings.
Item 'HVFULSWLRQ
Network Control Port1
3RUW &RQ¿JXUHVFRPPDQGFRQWUROSRUW3RUW
Port open Click the [Enable] check box to use port 23.
Authentication Click the [Enable] check box when authentication is required
for this port.
Network Control Port2
3RUW &RQ¿JXUHVFRPPDQGFRQWUROSRUW3RUW
Port open Click the [Enable] check box to use port 9715.
Authentication Click the [Enable] check box when authentication is required
for this port.
PJLink TM Port
3RUW &RQ¿JXUHVWKH3-/LQN TMSRUW3RUW
Port open Click the [Enable] check box to use port 4352.
Authentication Click the [Enable] check box when authentication is required
for this port.
(continued on next page)
2. Web Control
2.1 Projector Web Control (continued)

15
Item 'HVFULSWLRQ
Network Bridge Port &RQ¿JXUHVWKH%ULGJHSRUWQXPEHU
Port number
Input the port number.
Except for 41794, 9715, 9716, 9719, 9720, 5900, 5500, 4352
between 1024 and 65535 can be set up. It is set to 9717 as
the default setting.
Click the [Apply]EXWWRQWRVDYHWKHVHWWLQJV
2.1 Projector Web Control - Port Settings (continued)
7KHQHZFRQ¿JXUDWLRQVHWWLQJVDUHDFWLYDWHGDIWHUUHVWDUWLQJWKH
QHWZRUNFRQQHFWLRQ:KHQWKHFRQ¿JXUDWLRQVHWWLQJVDUHFKDQJHG\RXPXVW
UHVWDUWWKHQHWZRUNFRQQHFWLRQ<RXFDQUHVWDUWWKHQHWZRUNFRQQHFWLRQE\
clicking the [Network Restart] on the main menu(31).
NOTE
2. Web Control

16
2.1.5 Mail Settings
'LVSOD\VDQGFRQ¿JXUHVHPDLODGGUHVVLQJ
settings.
Item 'HVFULSWLRQ
Send Mail Click the [Enable]FKHFNER[WRXVHWKHHPDLOIXQFWLRQ
&RQ¿JXUHWKHFRQGLWLRQVIRUVHQGLQJHPDLOXQGHUWKHAlert
Settings.
SMTP Server Address
&RQ¿JXUHVWKHDGGUHVVRIWKHPDLOVHUYHULQ,3IRUPDW
7KHDGGUHVVDOORZVQRWRQO\,3DGGUHVVEXWDOVRGRPDLQ
QDPHLIWKHYDOLG'16VHUYHULVVHWXSLQWKHNetwork
Settings. The maximum length of host or domain name is up
to 255 characters.
Sender E-mail address &RQ¿JXUHVWKHVHQGHUHPDLODGGUHVV
7KHOHQJWKRIWKHVHQGHUHPDLODGGUHVVFDQEHXSWR
alphanumeric characters.
Recipient E-mail address
&RQ¿JXUHVWKHHPDLODGGUHVVRIXSWR¿YHUHFLSLHQWV<RX
can also specify the [to] or [cc] for each address. The
OHQJWKRIWKHUHFLSLHQWHPDLODGGUHVVFDQEHXSWR
alphanumeric characters.
Click the [Apply]EXWWRQWRVDYHWKHVHWWLQJV
<RXFDQFRQ¿UPZKHWKHUWKHPDLOVHWWLQJVZRUNFRUUHFWO\XVLQJWKH
[Send Test Mail]EXWWRQ3OHDVHHQDEOH6HQGPDLOVHWWLQJEHIRUHFOLFNLQJWKH
[Send Test Mail].
,I\RXFRQQHFWWKHSURMHFWRUWRDQH[LVWLQJQHWZRUNFRQVXOWDQHWZRUN
DGPLQLVWUDWRUEHIRUHVHWWLQJVHUYHUDGGUHVVHV
NOTE
2. Web Control
2.1 Projector Web Control (continued)

17
2.1.6 Alert Settings
'LVSOD\VDQGFRQ¿JXUHVIDLOXUHDOHUWVHWWLQJV
Item 'HVFULSWLRQ
Cover Error 7KHODPSFRYHUKDVQRWEHHQSURSHUO\¿[HG
Fan Error The cooling fan is not operating.
Lamp Error The lamp does not light, and there is a possibility that interior
portion has become heated.
Temp Error There is a possibility that the interior portion has become
heated.
Air Flow Error The internal temperature is rising.
Cold Error There is a possibility that the interior portion has become
RYHUFRROHG
Filter Error )LOWHUWLPHRYHU
Other Error Other error.
If displaying this error, please contact your dealer.
Schedule Execution
Error Schedule Execution error. (19)
Lamp Time Alarm /DPSWLPHRYHU$ODUP7LPHVHWWLQJ
Filter Time Alarm )LOWHUWLPHRYHU$ODUP7LPHVHWWLQJ
Refer to Troubleshooting in the Operating Guide for further detailed
explanation of Error except Other Error and Schedule Execution Error.
2. Web Control
2.1 Projector Web Control (continued)

18
The Alert Items are shown below.
Item 'HVFULSWLRQ
Alarm Time &RQ¿JXUHVWKHWLPHWRDOHUW
(Only Lamp Time Alarm and Filter Time Alarm.)
Send Mail Click the [Enable]FKHFNER[WRHQDEOHHPDLODOHUWV
Mail Subject
&RQ¿JXUHVWKHVXEMHFWOLQHRIWKHHPDLOWREHVHQW
The length of the subject line is up to 100 alphanumeric
characters. Using any other character may shorten the
subject line.
Mail Text &RQ¿JXUHVWKHWH[WRIWKHHPDLOWREHVHQW
The length of the text is up to 1024 alphanumeric characters.
Using any other character may shorten the text.
Click the [Apply]EXWWRQWRVDYHWKHVHWWLQJV
7KHWULJJHURIFilter ErrorHPDLOLVGHSHQGLQJRQWKH),/7(5
0(66$*(VHWWLQJLQWKH6(59,&(LWHPRIWKH237,21PHQXZKLFKGH¿QHV
WKHSHULRGXQWLOWKH¿OWHUPHVVDJHLVGLVSOD\HGRQWKHSURMHFWRUVFUHHQ$Q
HPDLOZLOOEHVHQWZKHQWKHXVDJHWLPHRIWKH¿OWHUH[FHHGVWKHWLPHOLPLWWKDWLV
VHW1RQRWL¿FDWLRQHPDLOZLOOEHVHQWLIWKH),/7(50(66$*(LVVHWWR7851
OFF. (OPTION menu in the Operating Guide)
Lamp Time AlarmLVGH¿QHGDVDWKUHVKROGIRUHPDLOQRWL¿FDWLRQUHPLQGHU
RIWKHODPSWLPH:KHQWKHODPSKRXUH[FHHGVWKLVWKUHVKROGWKDWLVFRQ¿JXUHG
LQWKH:HESDJHWKHHPDLOZLOOEHVHQWRXW
Filter Time AlarmLVGH¿QHGDVDWKUHVKROGIRUHPDLOQRWL¿FDWLRQUHPLQGHU
RIWKH¿OWHUWLPH:KHQWKH¿OWHUKRXUH[FHHGVWKLVWKUHVKROGWKDWLVFRQ¿JXUHG
LQWKH:HESDJHWKHHPDLOZLOOEHVHQWRXW
NOTE
2.1 Projector Web Control - Alert Settings (continued)
2. Web Control

19
2.1.7 Schedule Settings
'LVSOD\VDQGFRQ¿JXUHVVFKHGXOHVHWWLQJV
Item 'HVFULSWLRQ
'DLO\ &RQ¿JXUHVWKHGDLO\VFKHGXOH
Sunday &RQ¿JXUHVWKH6XQGD\VFKHGXOH
Monday &RQ¿JXUHVWKH0RQGD\VFKHGXOH
Tuesday &RQ¿JXUHVWKH7XHVGD\VFKHGXOH
Wednesday &RQ¿JXUHVWKH:HGQHVGD\VFKHGXOH
Thursday &RQ¿JXUHVWKH7KXUVGD\VFKHGXOH
Friday &RQ¿JXUHVWKH)ULGD\VFKHGXOH
Saturday &RQ¿JXUHVWKH6DWXUGD\VFKHGXOH
6SHFL¿FGDWH1R &RQ¿JXUHVWKHVSHFL¿FGDWH1RVFKHGXOH
2. Web Control
2.1 Projector Web Control (continued)

20
2.1 Projector Web Control - Schedule Settings (continued)
The schedule settings are shown below.
Item 'HVFULSWLRQ
Schedule Click the [Enable] check box to enable the schedule.
'DWH0RQWK'D\
&RQ¿JXUHVWKHPRQWKDQGGDWH
7KLVLWHPDSSHDUVRQO\ZKHQ6SHFL¿FGDWH1RLV
selected.
Click the [Apply]EXWWRQWRVDYHWKHVHWWLQJV
7KHFXUUHQWHYHQWVHWWLQJVDUHGLVSOD\HGRQWKHVFKHGXOHOLVW7RDGGDGGLWLRQDO
IXQFWLRQVDQGHYHQWVVHWWKHIROORZLQJLWHPV
Item 'HVFULSWLRQ
Time &RQ¿JXUHVWKHWLPHWRH[HFXWHFRPPDQGV
Command
[Parameter] &RQ¿JXUHVWKHFRPPDQGVWREHH[HFXWHG
Power &RQ¿JXUHVWKHSDUDPHWHUVIRUSRZHUFRQWURO
Input Source &RQ¿JXUHVWKHSDUDPHWHUVIRULQSXWVZLWFKLQJ
Click the [Register] button to add new commands to the schedule list.
Click the >'HOHWH@ button to delete commands from the schedule list.
Click the [Reset] button to delete all commands and reset the schedule settings
from the schedule list.
2. Web Control
$IWHUWKHSURMHFWRULVPRYHGFKHFNWKHGDWHDQGWLPHVHWIRUWKH
SURMHFWRUEHIRUHFRQ¿JXULQJWKHVFKHGXOHV
7KHLQWHUQDOFORFN¶VWLPHPD\QRWUHPDLQDFFXUDWH8VLQJ6173LV
recommended to maintain accurate time.
(YHQW³Input Source” will not be executed if security feature is enabled and
the projector is locked due to the feature.
&HUWDLQHUURUVWDWHLQWKHSURMHFWRUVXFKDVWHPSHUDWXUHHUURUODPSHUURUZLOO
SUHYHQWWKHSURMHFWRUIURPDSSURSULDWHH[HFXWLRQRIVFKHGXOHGIXQFWLRQVHYHQWV
3OHDVHUHIHUWRTroubleshooting in the Operating Guide in case
VFKHGXOHGIXQFWLRQVHYHQWVDUHQRWH[HFXWHGDSSURSULDWHO\DV\RXYHVHW
NOTE
This manual suits for next models
3
Table of contents
Other PJLink Projector manuals

PJLink
PJLink CP-X2015WN User manual

PJLink
PJLink TEQ-Z782WN User manual

PJLink
PJLink CP-CX300WN User manual

PJLink
PJLink CP-X4022WN User manual

PJLink
PJLink CP-X4022WN User manual

PJLink
PJLink CP-WU8461 User manual

PJLink
PJLink MP-JU4001 User manual

PJLink
PJLink CP-D27WN User manual

PJLink
PJLink CP-WX3530WN User manual

PJLink
PJLink CP-WX3011N User manual

PJLink
PJLink CP-DW10N User manual

PJLink
PJLink CP-X2021WN User manual

PJLink
PJLink IN5132 Installation and maintenance instructions

PJLink
PJLink MAX-WU55S User manual

PJLink
PJLink CPX10WN User manual

PJLink
PJLink MC-WU8701W Technical Document

PJLink
PJLink DLP MP-WU9101B User manual

PJLink
PJLink CP-X9110 User manual