Planet WGSW-28040 User manual

28-Port 10/100/1000Mbps + 4-Port Shared SFP
Managed Gigabit Switch
WGSW-28040
Quick Installation Guide

Table of Contents
1. Package Contents ....................................................................................... 3
2. Requirements ............................................................................................. 4
3. Terminal Setup ........................................................................................... 5
4. Logon to the Console .................................................................................. 6
5. ConguringIPAddressviatheConsole ........................................................ 7
6. SavingtheCongurationviatheConsole...................................................... 9
7. Starting Web Management .........................................................................10
8. SavingCongurationviatheWeb ...............................................................12
9. RecoveringBacktoDefaultConguration.....................................................13
10. Customer Support .....................................................................................14

3
1. Package Contents
Thank you for purchasing PLANET 28-Port 10/100/1000Mbps + 4-Port Shared SFP
Managed Gigabit Switch, WGSW-28040. “Managed Switch” mentioned in this
GuidereferstotheWGSW-28040.
Open the box of the Managed Switch and carefully unpack it. The box should
containthefollowingitems:
TheManagedSwitchx1
QuickInstallationGuidex1
RS-232toRJ-45Cablex1
RubberFeetx4
TwoRack-mountingBracketswithAttachmentScrewsx1
PowerCordx1
SFPDustCapx4
If any item is found missing or damaged, please contact your local reseller for
replacement.

4
2. Requirements
zWorkstations running Windows XP/2003/Vista/7/8/2008, MAC OS X or later,
Linux,UNIX,orotherplatformsarecompatiblewithTCP/IPprotocols.
zWorkstationsareinstalledwithEthernetNIC(NetworkInterfaceCard)
zSerialPortConnection(Terminal)
The above Workstations come with COM Port (DB9) or USB-to-RS-232
converter.
The above Workstations have been installed with terminal emulator, such as
HyperTerminalincludedinWindowsXP/2003.
Serial cable -- one end is attached to the RS-232 serial port, while the other
endtotheconsoleportoftheManagedSwitch.
zEthernetPortConnection
Networkcables--Usestandardnetwork(UTP)cableswithRJ-45connectors.
The above PC is installed with Web Browser and JAVA runtime environment
plug-in.
Note
It is recommended to use Internet Explore 8.0 or above to access
the Managed Switch. If the Web interface of the Managed Switch
is not accessible, please turn off the anti-virus software or firewall
andthentryitagain.

5
3. Terminal Setup
Tocongure the system,connect aserialcable toa COM porton aPCor notebook
computerandtoRJ-45typeofconsoleportoftheManagedSwitch.
Managed Switch
PC / Workstation
with
Terminal emulation software
Serial Port Serial Port
115200,8,n,1
RS-232 to RJ-45 Cable
Figure 3-1: Managed Switch Console Connectivity
A terminal program is required to make the software connection to the Managed
Switch.
1. Run terminal program on the OS.
2.When the following screen appears, make sure that the COM port should be
conguredas:
zBaud :115200
zDatabits :8
zParity :None
zStopbits :1
zFlowcontrol :None
Figure 3-2: COM Port Conguration
6
4. Logon to the Console
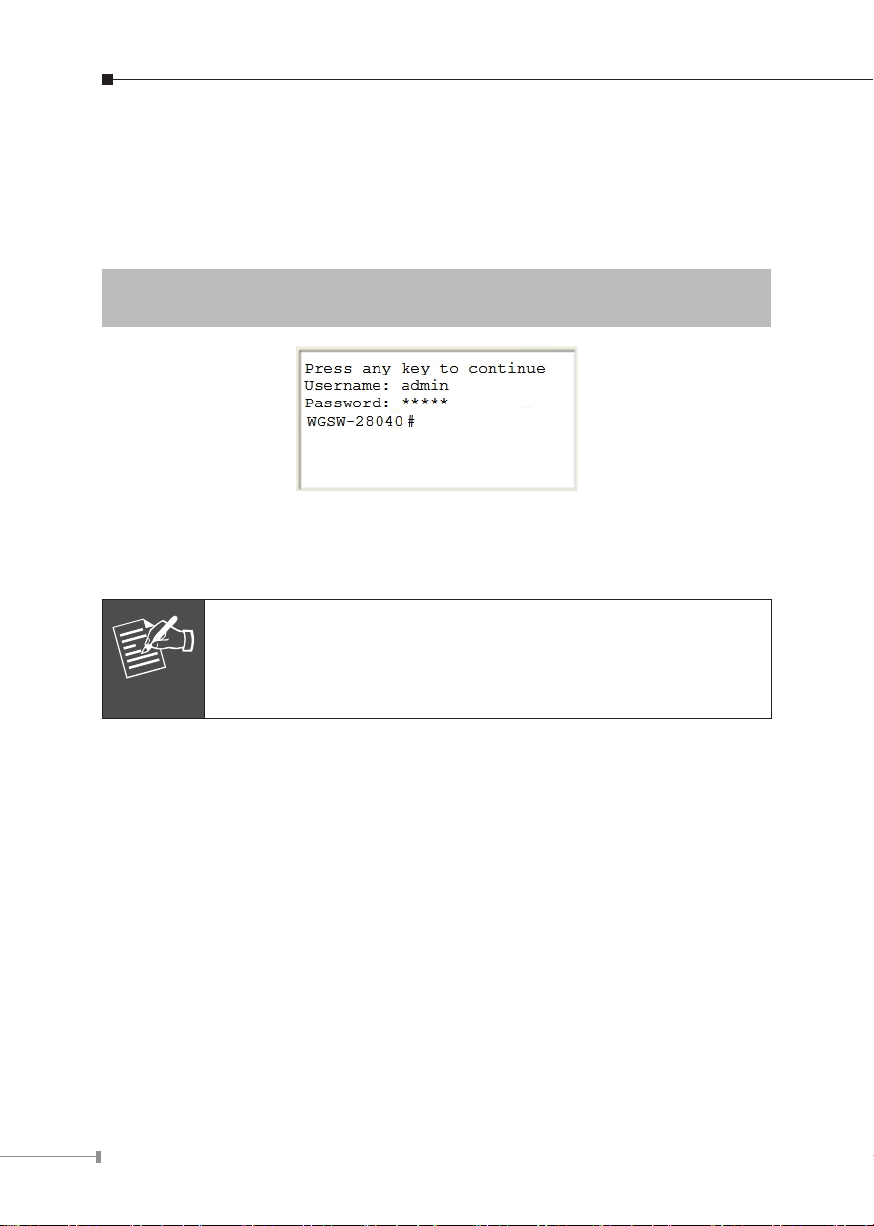
Once the terminal is connected to the device, power on the Managed Switch and
the terminal will display “running testing procedures”. Then, the following message
asks to log-in user name and password. The factory default user name and
passwordareshownasfollowsandtheloginscreeninFigure4-1appears.
Username:admin
Password:admin
Figure 4-1: Managed Switch Console Login Screen
The user can now enter commands to manage the Managed Switch. For a detailed
descriptionofthecommands,pleaserefertothefollowingchapters.
Note
1.For security reason, please change and memorize the new pass-
wordafterthisfirstsetup.
2.Only accept command in lowercase letter under console inter-
face.

7
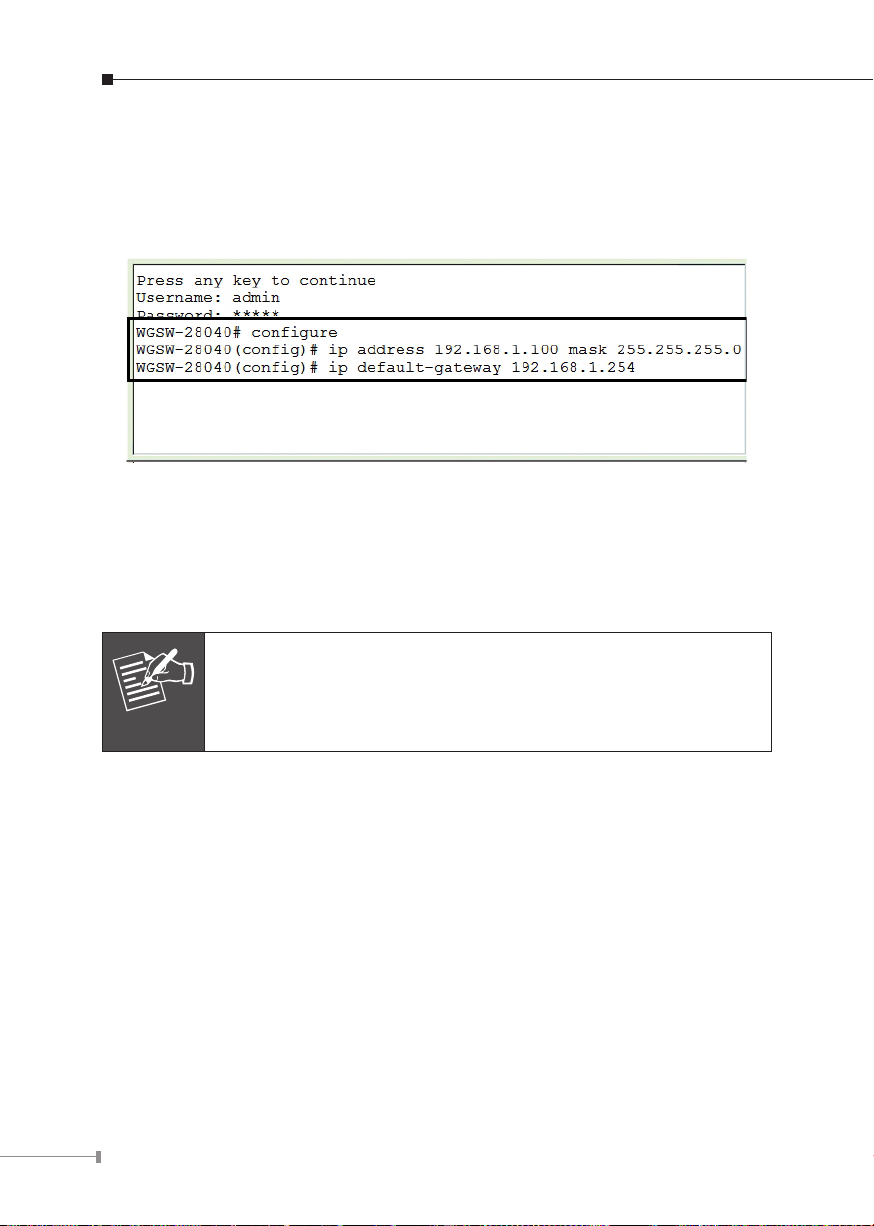
5.ConguringIPAddressviatheConsole
TheWGSWManagedSwitchisshippedwithdefaultIPaddressasfollows:
IPAddress:192.168.0.100
SubnetMask:255.255.255.0
To check the current IP address or modify a new IP address for the Switch, please
usetheproceduresasfollows:
Display of the current IP address
1. On “WGSW-28040#”prompt,enter“show ip”.
2. The screen displays the current IP address, Subnet Mask and Gateway shown in
Figure5-1.
Figure 5-1: IP Information Screen
Conguration of the IP address
1. On “WGSW-28040#”prompt,enter“congure”.
2. On “WGSW-28040(cong)#” prompt,enter thefollowing command andpress
<Enter>asshowninFigure5-2.
WGSW-28040(cong)# ip address 192.168.1.100 mask 255.255.255.0
WGSW-28040(cong)# ip default-gateway 192.168.1.254
8
ThepreviouscommandwouldapplythefollowingsettingsfortheSwitch.
IP Address: 192.168.1.100
Subnet Mask: 255.255.255.0
Gateway: 192.168.1.254
Figure 5-2: Setting IP Address Screen
5.RepeatStep1tocheckiftheIPaddressischanged.
If the IP is successfully congured, the WGSW Managed Switch will apply the
new IP address setting immediately. You can access the Web interface of WGSW
ManagedSwitchthroughthenewIPaddress.
Note
Ifyouarenotfamiliarwithconsolecommandortherelatedparam-
eter,enter“?”anytimeinconsoletogetthehelpdescription.

9
6.SavingtheCongurationviatheConsole
In switch, the running conguration le stores in the RAM. In the current version,
the running conguration sequence running-cong can be saved from the RAM to
FLASH by write command or copy running-cong startup-cong command, so that
the running conguration sequence becomes the start up conguration le, which
iscalledcongurationsave.
1. On “WGSW-28040#” prompt, enter “copy running-cong startup-cong”
asshowninFigure6-1.
Figure 6-1: Saving the Conguration Screen
10
7. Starting Web Management
Thefollowing showshow tostart up theWebManagement ofthe ManagedSwitch.
Note the Managed Switch is congured through an Ethernet connection. Please
makesurethemanagerPCmustbesetonthesameIPsubnetaddress.
For example, the default IP address of the Managed Switch is 192.168.0.100;
then the manager PC should be set at 192.168.0.x (where x is a number
between1and254,except100)andthedefaultsubnetmaskis255.255.255.0.
PC / Workstation
with Web Browser
192.168.0.x
Managed Switch
RJ-45/UTP Cable
IP Address:
192.168.0.100
Figure 7-1: IP Management Diagram
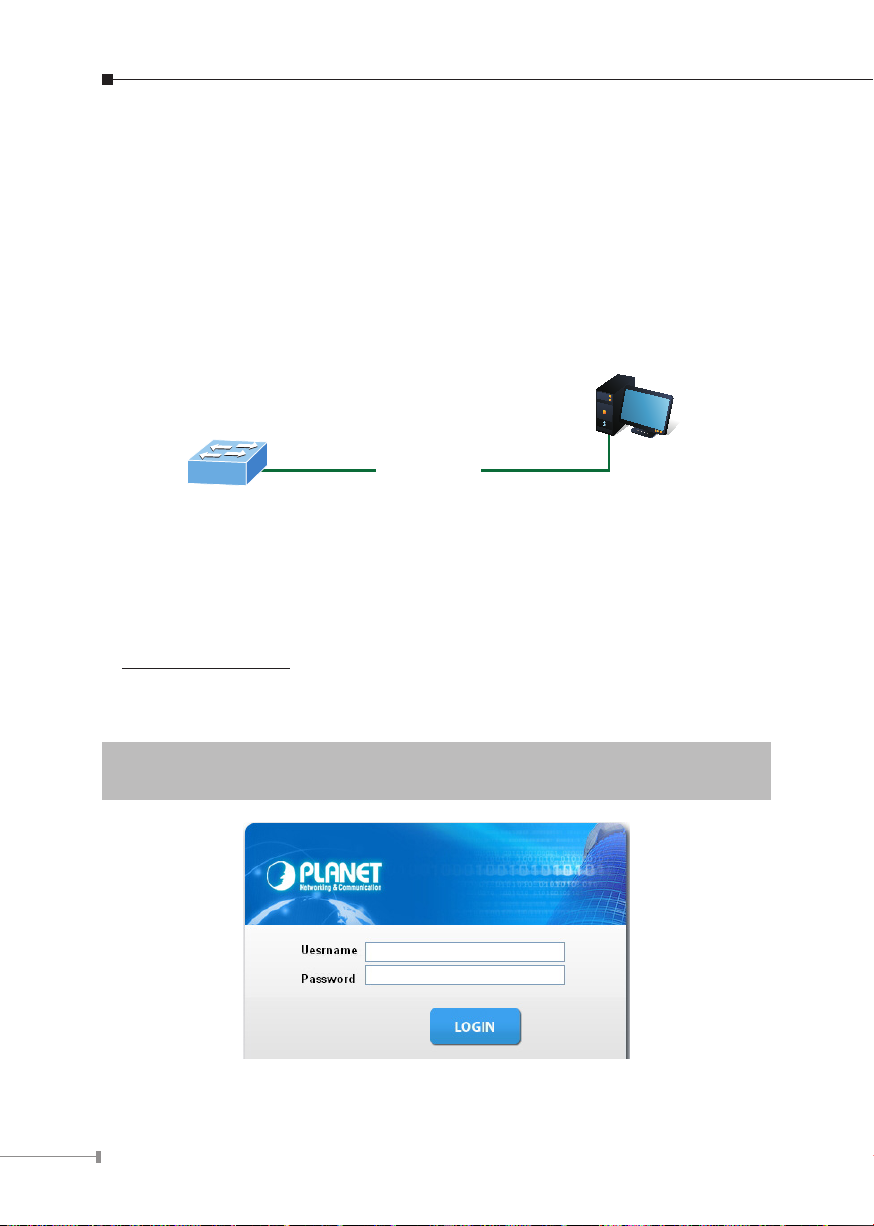
Logging in the Managed Switch
1.Use Internet Explorer 8.0 or above Web browser and enter IP address
http://192.168.0.100toaccesstheWebinterface.
2.When the following dialog box appears, please enter the default user name and
password“admin”.TheloginscreeninFigure3-2appears.
DefaultUsername:admin
DefaultPassword:admin
Figure 7-2: Login Screen
Other manuals for WGSW-28040
3
Table of contents


