Plustek NVR Product information sheet

NVR&HVR Easy guide v1.0
1
W
Wi
ir
re
el
le
es
ss
s
N
Ne
et
tw
wo
or
rk
k
C
Ca
am
me
er
ra
a
N
NV
VR
R&
&H
HV
VR
R
Easy guide
Thanks for choosing our products, please read this manual carefully before use!

NVR&HVR Easy guide v1.0
2
1. NVR connect to IPCAM
1)Search IPCAM
Click CAMERA icon, popup CHANNEL CONFIG sub menu.
FAB IDCAM
Onvif IPCAM
FAB IPCAM
Analog cam

NVR&HVR Easy guide v1.0
3
Click SEARCH button, after 20 seconds,all IPCAM ID number or IP address
in local network will be displayed in menu, and auto assign to deferent
channel,click SAVE, exit menu, All IPCAM image will display.
2)Manual add in IPCAM
Click MENU button.
Select deferent channel, use mouse wheel to change CAM IP/ID, you can
input IP address or ID number.
V0000110—Onvif IPCAM, IP address is 110

NVR&HVR Easy guide v1.0
4
00000111---FAB IPCAM, IP address is 111
001CD23A--- FAB IDCAM, ID number is 001CD23A
00000BNC---Analog camera input
Please note the following instructions
BACKLIGHT---If set ON, camera shine on outdoor, it will be
overexposure; camera shine on indoor, it can enhance the
brightness of the backlight;
DAY CDS---More low more easy to start day mode, on day mode,
image is color and ir turn off;
Note---For analog video input, DAY CDS need set to 230-255, then
image can be move to the middle.
NIGHT CDS—More high more easy to start night mode, on night
mode, image is black white and ir turn on;
SUB STREAM---This function only for FAB protocol IPCAM, if set CIF,
split image resolution only 320*240, but image very fluid. Internet
also become fluid。
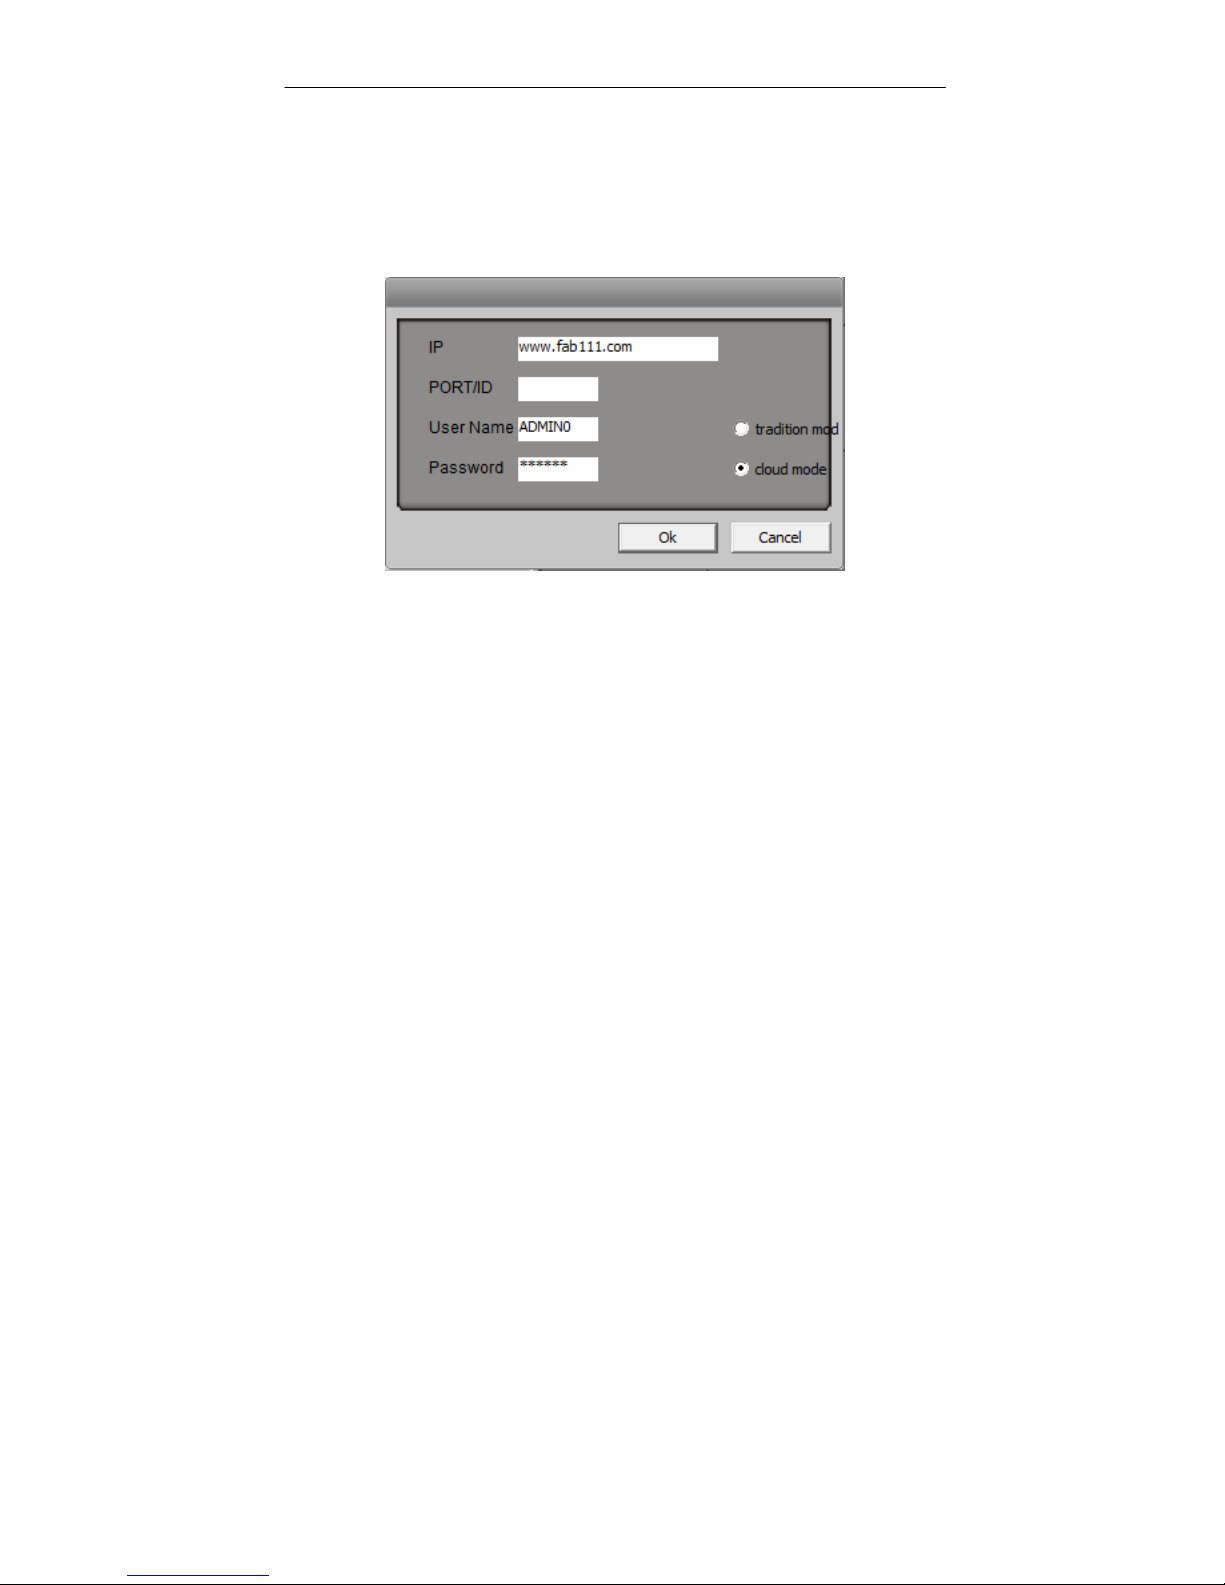
2. NVR connect to cloud
Nvr connect to cloud, then mobile APP and client software can connect to
NVR over internet.
Click NETWORK icon.

NVR&HVR Easy guide v1.0
5
Enable DDNS and CLOUD, Click DHCP button, NVR will get IP address from
router, click SAVE.
Click INFO icon, popup INFORMATION submenu.

NVR&HVR Easy guide v1.0
6
In DDNS line, domain name and machine number display, if you see @
symbol, mean NVR already connect to cloud server。
3. Mobile APP connect to NVR
If you are using this software for the first time, please download the
software of “HVR cloud”, setup the software, then open.
Click Device manage button in login interface,

NVR&HVR Easy guide v1.0
7
Click SEARCH button, search all NVR in local network.

NVR&HVR Easy guide v1.0
8
Select NVR number what you want to view, return login interface, select
CLOUD, click LOGIN, APP will connect NVR.
4. CMS connect to NVR
Copy CMS software to PC from disk, this CMS software is green software, no
need setup, double click start.exe in folder to run the software. Note:
windows firewall may be popup tips, ask whether to allow network access,
you must select “allow”, if you're not careful to select “forbid”, please copy
the folder to other disk, run software again.
1) Auto search

NVR&HVR Easy guide v1.0
9
After run the software, device list window will display all NVR in local
network, right click NVR/CMS, click “turn off NVR auto search”, will stop auto
search NVR function; Select NVR device, right click, click “Connect”, if NVR
and PC is same network segment, CMS will display NVR image.

NVR&HVR Easy guide v1.0
10
Select NVR, right click, click “property”, enable “cloud mode”, show
name can be modified into easy remember name.
2) Manual add in
Right click NVR/CMS ,select “new IP ”,input login machine
information,enable cloud mode,click OK to exit menu,right click new
device, select “connect”
3) After input machine information in CMS,you can zip the folder,send
email to yourself or your customer. Then download to use on other
place。

NVR&HVR Easy guide v1.0
11
3. FCC Statement
This equipment has been tested and found to comply with the limits for
a Class B digital device, pursuant to Part 15 of the FCC Rules. These
limits are designed to provide reasonable protection against harmful
interference in a residential installation. This equipment generates uses
and can radiate radio frequency energy and, if not installed and used in
accordance with the instructions, may cause harmful interference to
radio communications. However, there is no guarantee that interference
will not occur in a particular installation. If this equipment does cause
harmful interference to radio or television reception, which can be
determined by turning the equipment off and on, the user is encouraged
to try to correct the interference by one or more of the following
measures:
-- Reorient or relocate the receiving antenna.
-- Increase the separation between the equipment and receiver.
-- Connect the equipment into an outlet on a circuit different from that
to which the receiver is connected.
-- Consult the dealer or an experienced radio/TV technician for help.
This device complies with part 15 of the FCC Rules. Operation is subject
to the following two conditions:(1) This device may not cause harmful
interference, and (2) this device must accept any interference received,
including interference that may cause undesired operation.
Changes or modifications not expressly approved by the party
responsible for compliance could void the user's authority to operate the
equipment.
This equipment complies with FCC radiation exposure limits set forth for
an uncontrolled environment. This equipment should be installed and
operated with minimum distance 20cm between the radiator & your
body.
This manual suits for next models
1
Table of contents
Other Plustek IP Camera manuals