5
8
9
10
11
12
APPLE
Aprite “Settings” sul vostro dispositivo iOS, selezionate “Wi-Fi” e attendete la ricerca di una rete.
La rete si chiamerà “Wi-Fi-cam-p2p”. Collegatevi a “Wi-Fi-cam-p2p”.
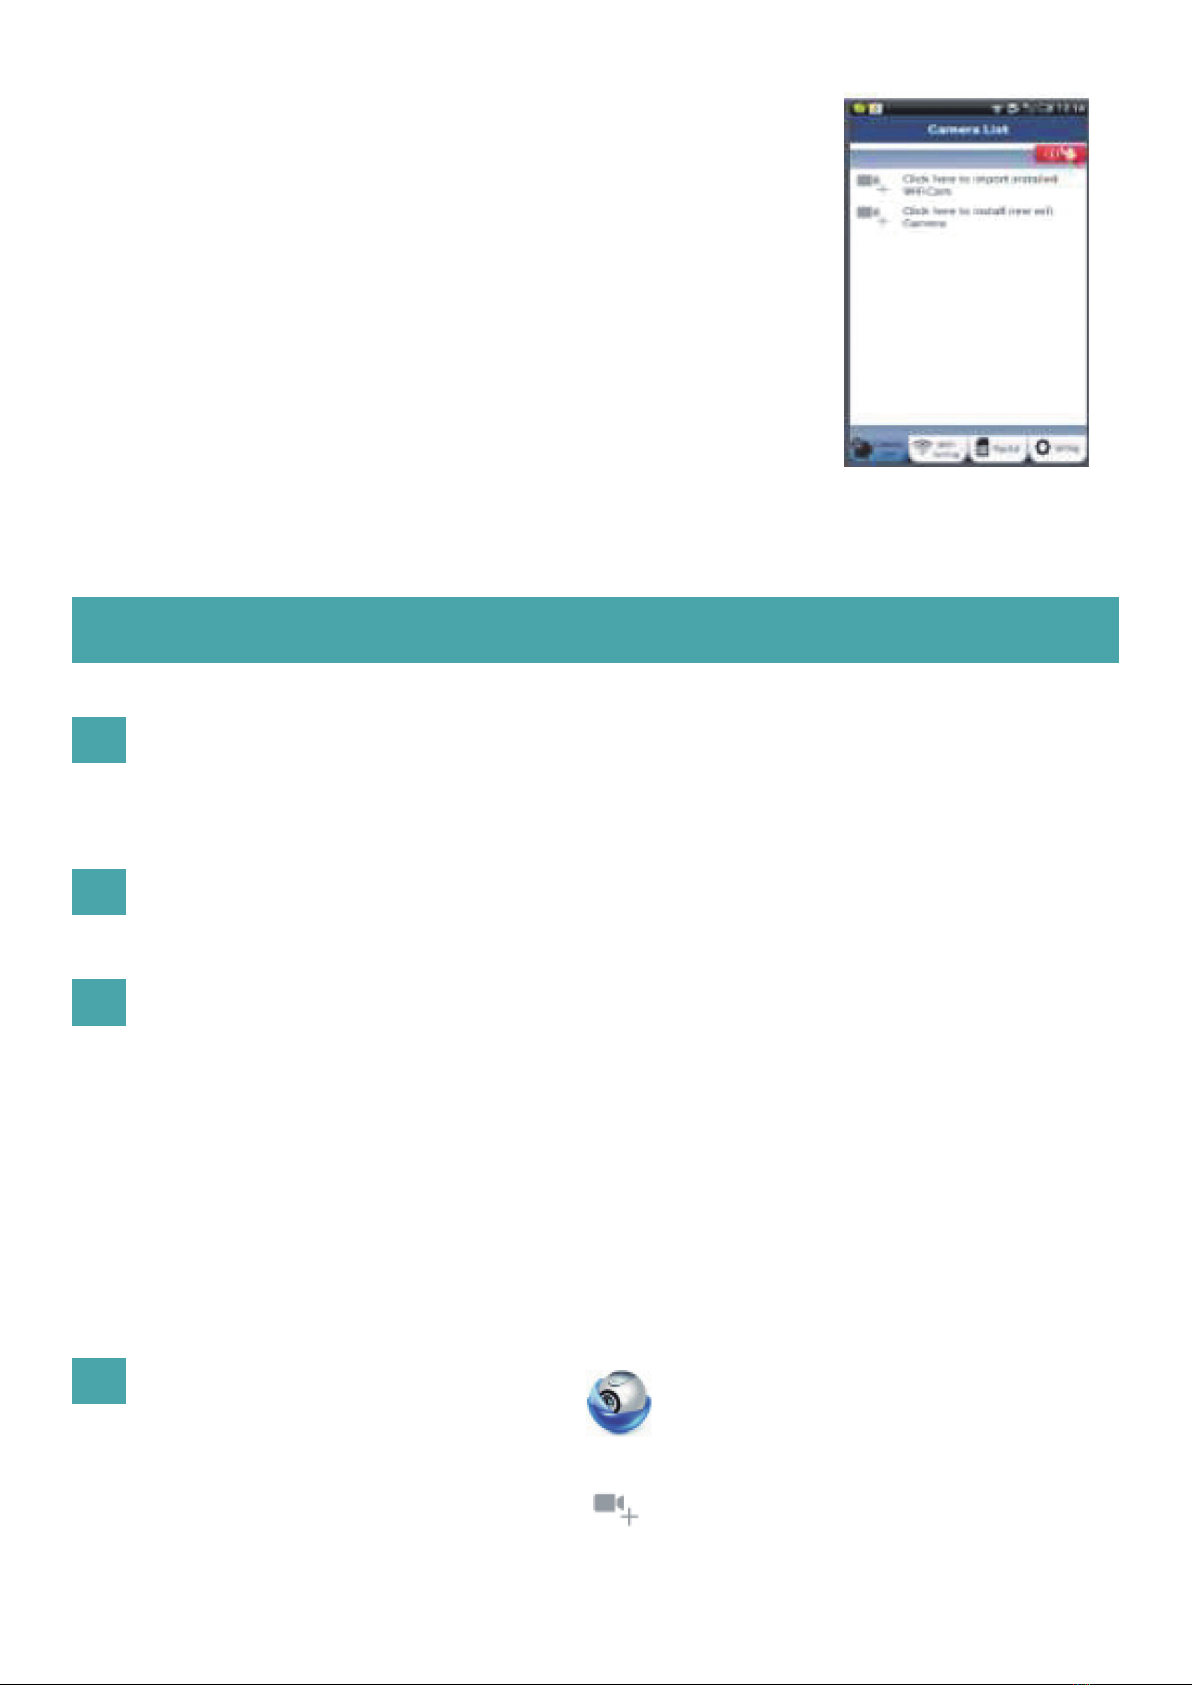
A questo punto, aprite l’app “uCare Cam” e selezionate la scheda “Wi-Fi Connect” che si trova
nella parte bassa dello schermo.
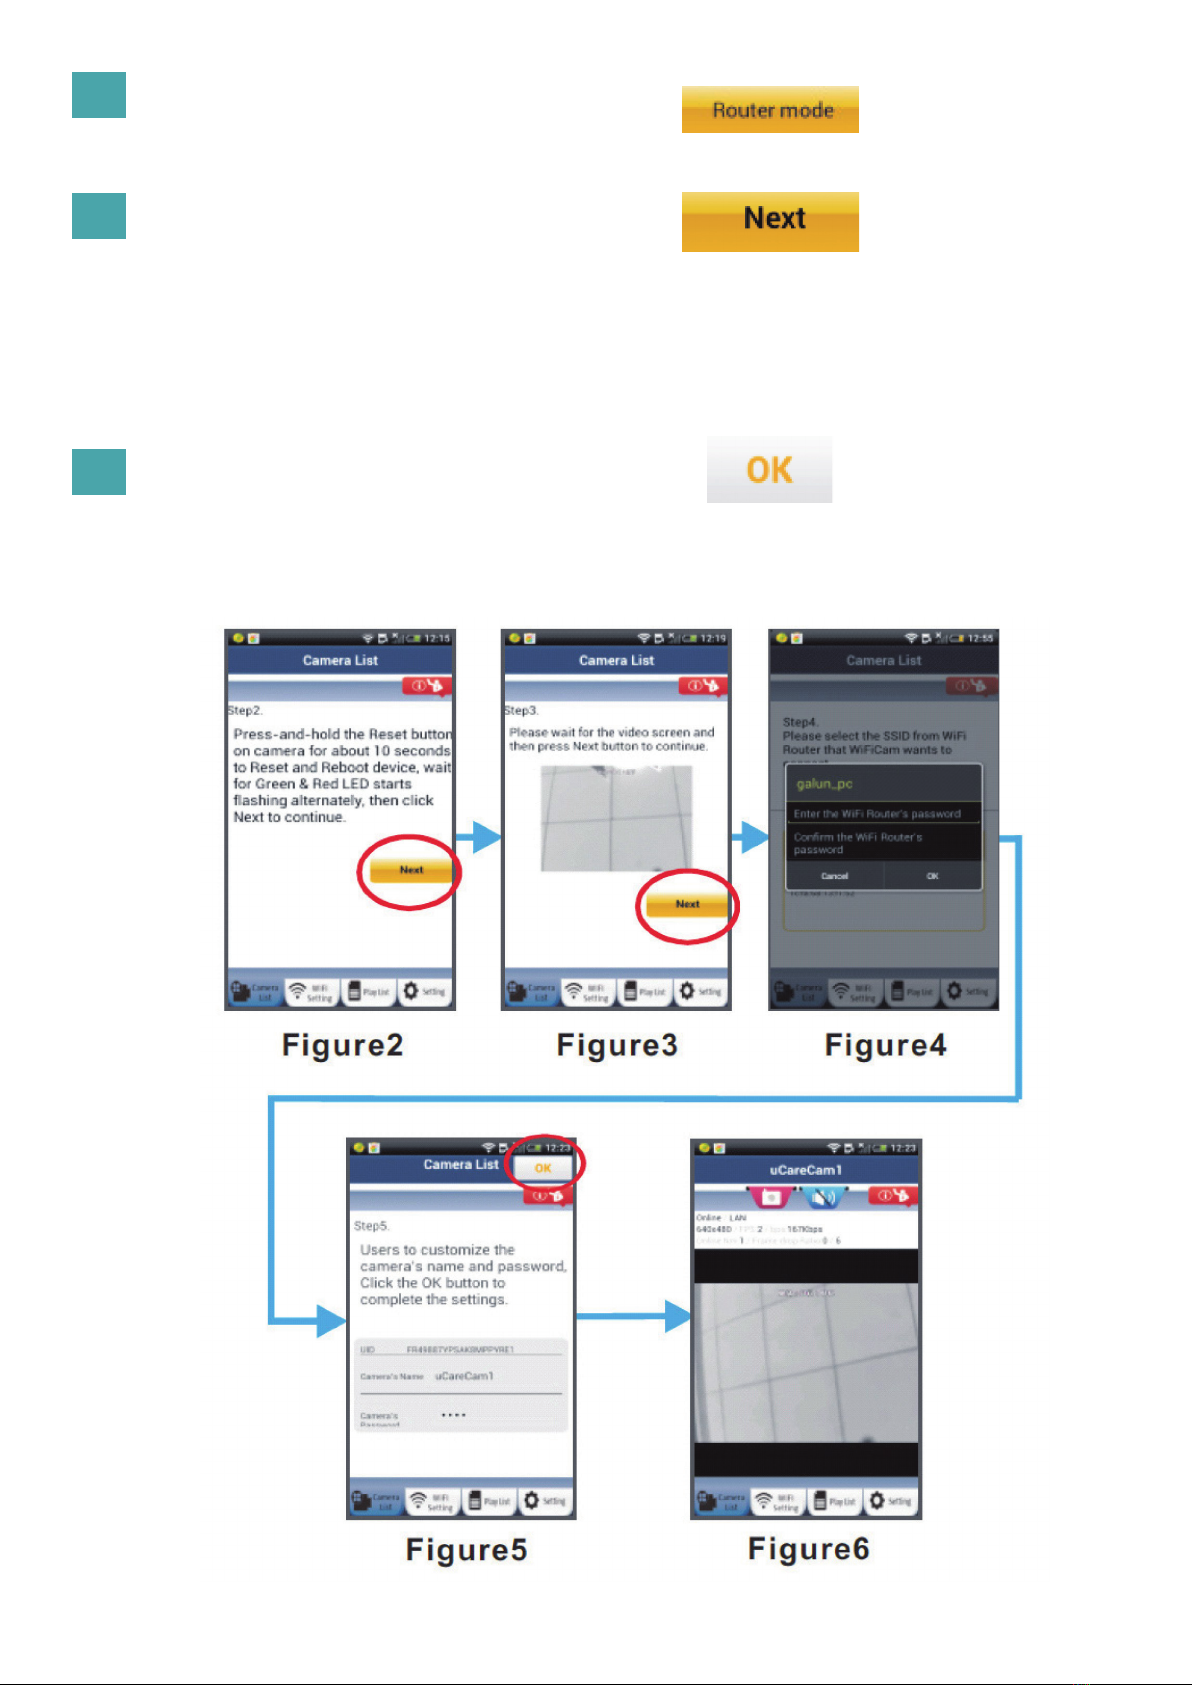
Selezionate “Router mode”, poi “Next”. Inserisca qui il nome della rete WiFi (SSID) e la password
del suo router domestico.
Una volta ricevute queste informazioni, la telecamera IP si riavvierà. Attendete che riparta e colle-
gatevi al router Wi-Fi. Una volta stabilito il collegamento in modo corretto, il LED di stato diventerà
arancione. L’operazione potrebbe richiedere no a 5 minuti.
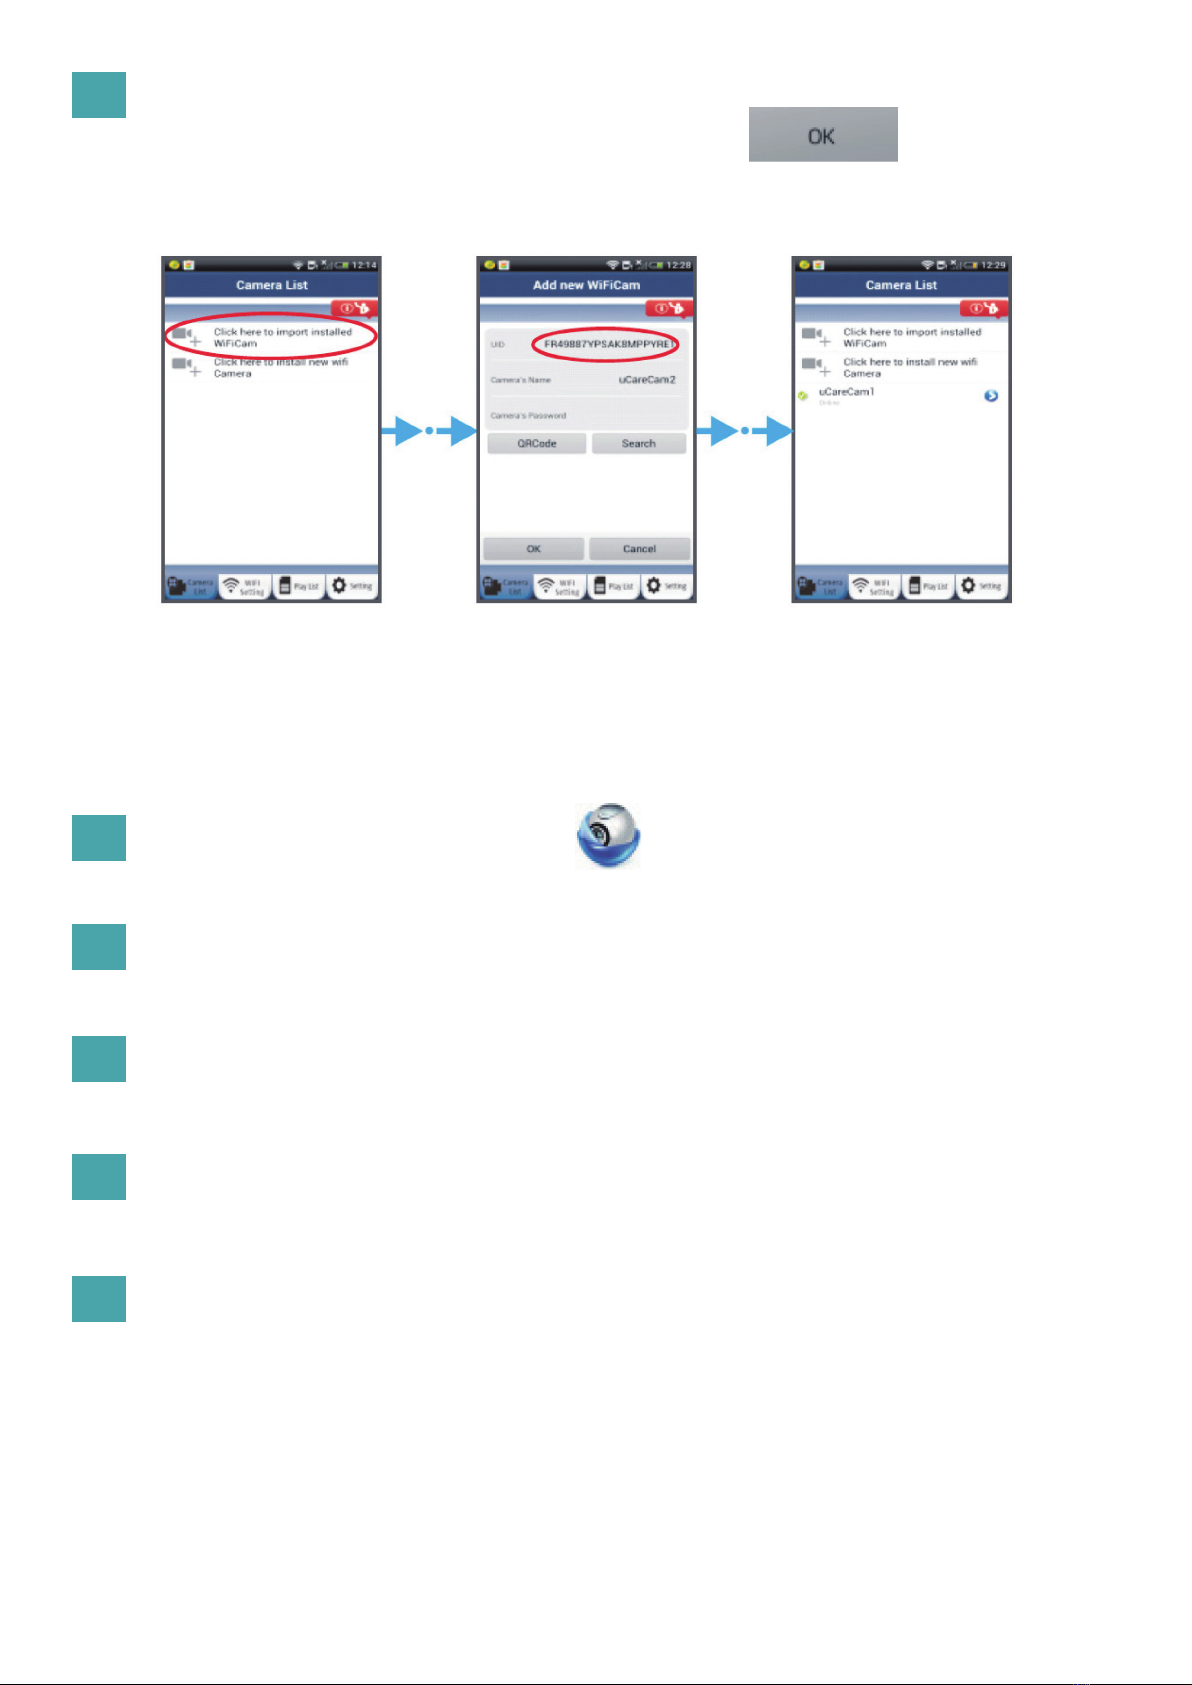
A questo punto, selezionate il nome della telecamera nell’app “uCare Cam” per collegarvi.
Nota: Se il LED di stato non diventa arancione, controllate il vostro router Wi-Fi e assicuratevi che
la telecamera IP si trovi nel raggio del segnale. Dopodiché, riprovate la procedura di impostazione.
Impostate la telecamera IP afnché si colleghi al router Wi-Fi
1
2
3
Impostazione modalità Wi-Fi - WPS
Entrare in modalità WPS
Caricamento del programma
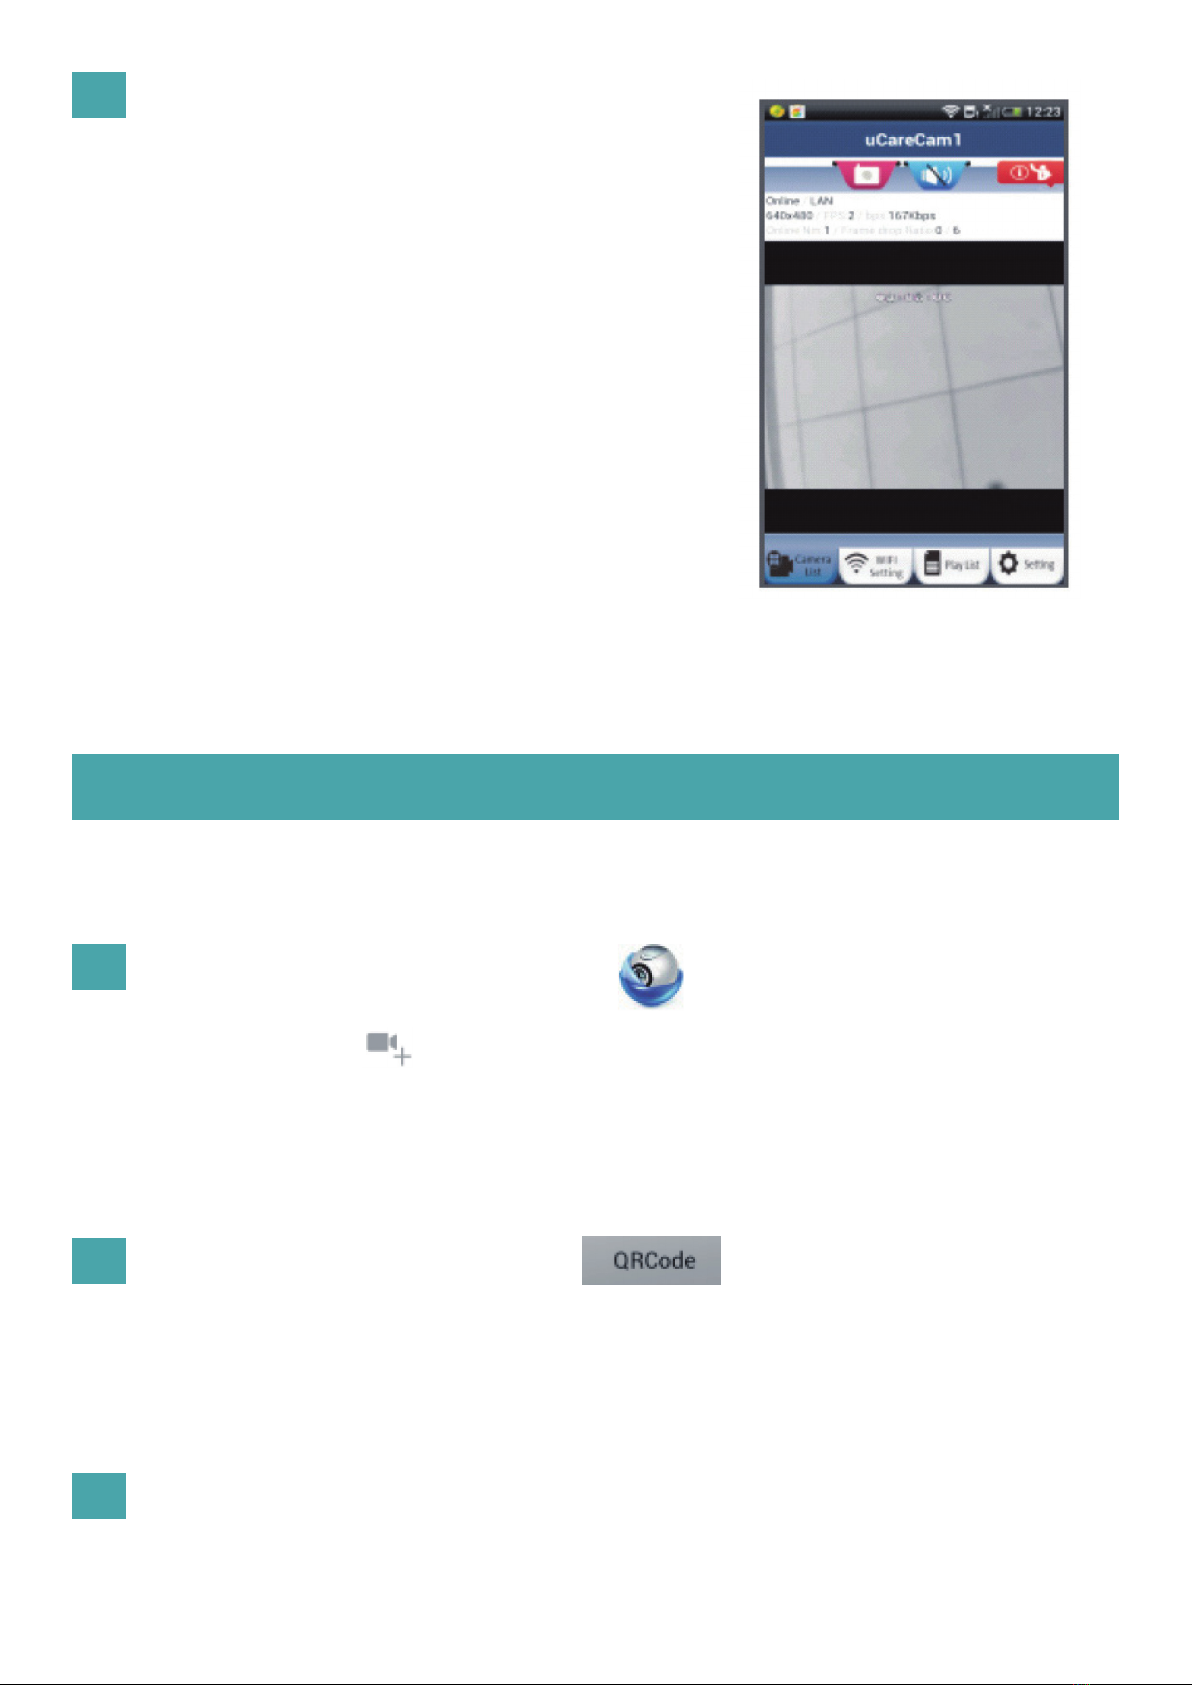
Aprite l’app “uCare Cam”
Accendete la telecamera IP.
Il LED di stato sulla telecamera IP diventerà verde per circa 15 secondi.
Il LED di stato diventerà rosso e lampeggerà per circa 15 secondi.
Toccate il pulsante:
poi toccate il pulsante:
per passare al punto 2 (vedi gura 8).
e selezionate “Wi-Fi Setting” o “Wi-Fi Connect” nella parte bassa dello schermo.
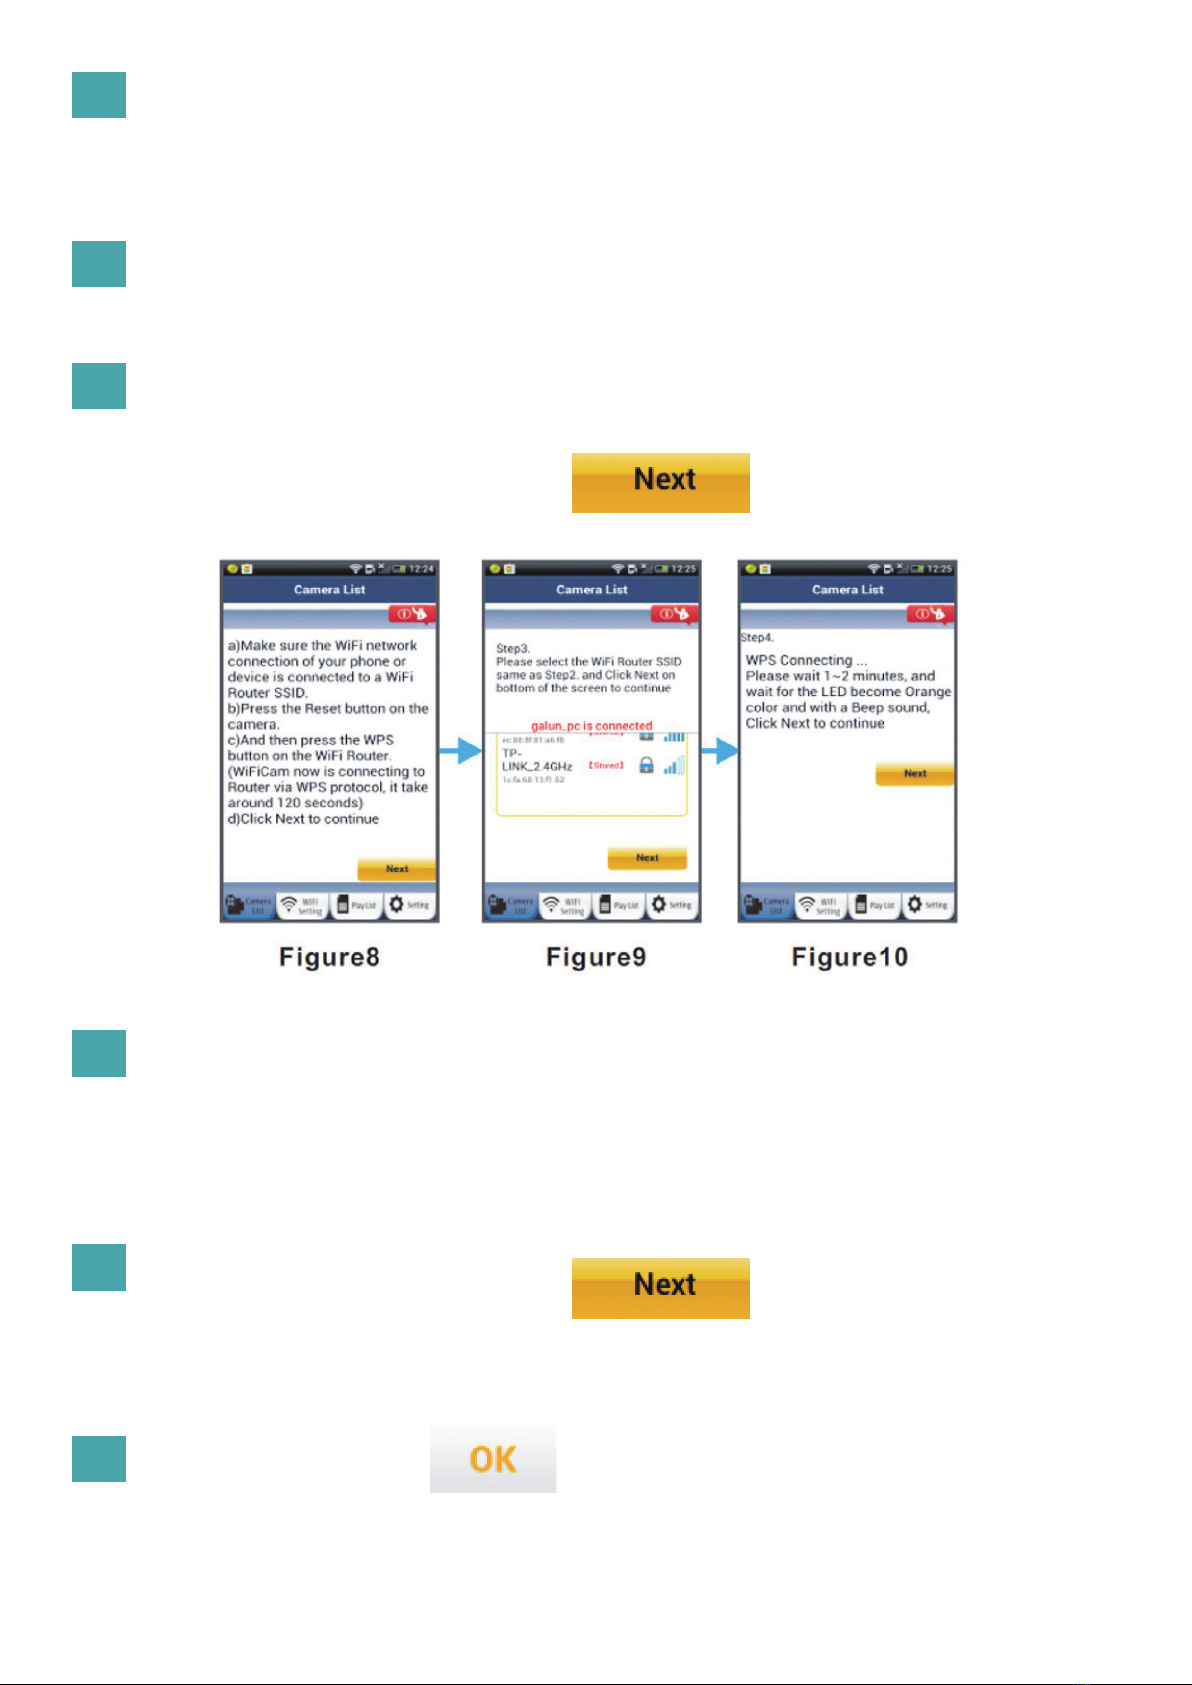
Se il vostro router Wi-Fi ha un pulsante WPS (Wi-Fi Protected Setup), potete utilizzarlo per impostare la
telecamera IP. (Dovete attivare la cifratura WPA/WPA2 sul router).
Sul router Wi-Fi vedrete un pulsante con scritto “WPS”. Potrebbe esserci scritto anche “QSS” o “AOSS”.
Installare la telecamera IP tramite la modalità di collegamento WPS