User manual 6
English
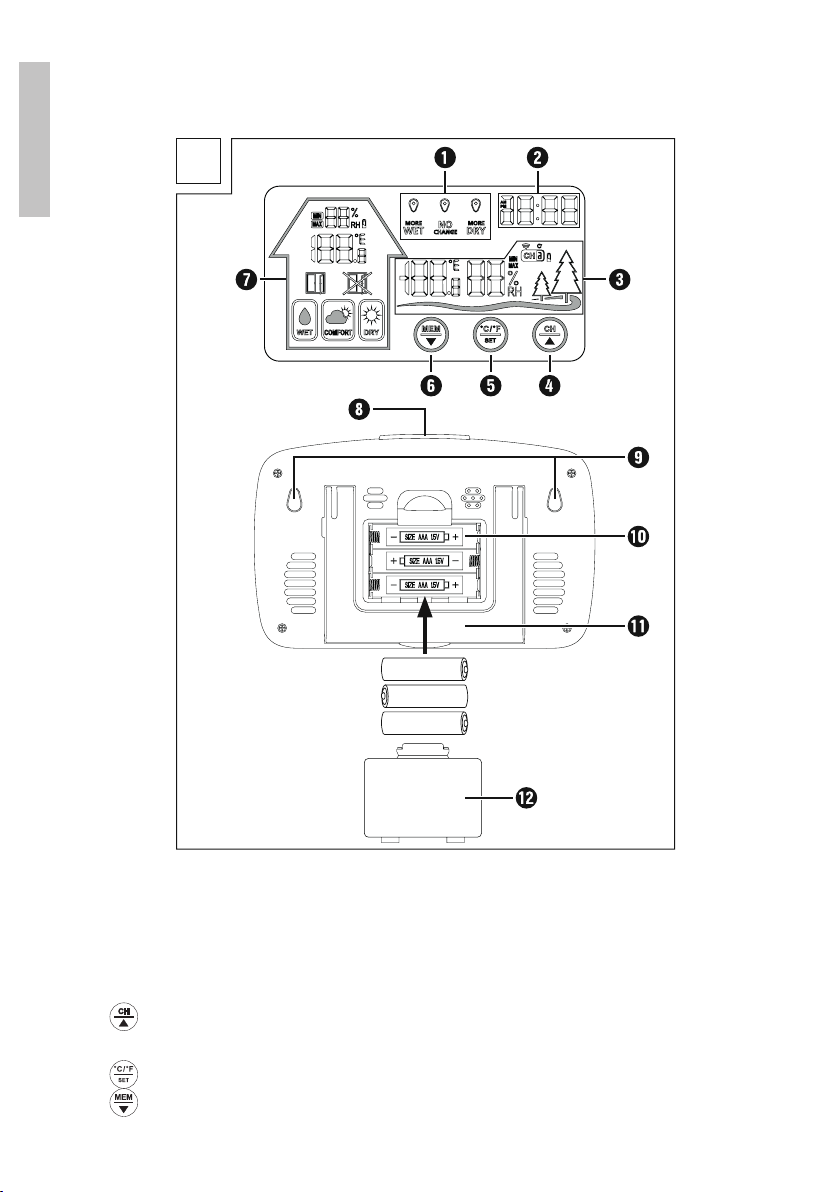
16. TX button
17. °C/°F button
18. Channel selector (1/2/3)
19. Battery compartment
20. Battery compartment cover
Choosing the installation location
»When choosing the location, make sure that the device is not exposed to
sunlight, dust, moisture, heat or excessive cold.
»Do not place the device near heat sources.
»Install the outdoor sensor no more then 50 meters away from the weather
station. Make sure that there are no obstacles between the two devices
that could aect communication (for example, concrete walls).
Instructions for using the outdoor sensor
1. Insert 2 AAA batteries into the battery compartment.
2. The indicator light will flash briefly and the temperature, humidity and
radio communication channel (e.g. CH 1) will be displayed on the screen.
3. Next, the LED will flash once a minute to confirm the communication
with the weather station (indoor unit).
Instructions for using the weather station
1. Insert 3 AAA batteries into the battery compartment.
2. The screen will light up and it will display the weather information for
short time.
3. The weather station will look to communicate with the outdoor sensor.
4. The icons and will confirm the communication with the sensor.
If the outdoor temperature and humidity do not appear on the screen for 3
minutes, the weather station will stop searching for the radio signal from the
sensor.Theicon willdisappearfromthescreen,andinstead oftemperature
and humidity the symbols si will appear.
Lack of signal from the sensor can be caused by obstacles or too long distance