Power House Force 1800 User manual

Dear Valued Customer,
Thank you so much for your order. We are a family-owned
business in Lincoln, NE and customer service is our priority.
If you have any quesons about your product, please feel
free to email me at nepowerhouse@gmail.com or call or
text my personal cell number at 402-890-6306. We also
have a tutorial and assembly video on YouTube. Please
search The Force 1800 assembly tutorial or you can nd it
on our website (www.powerhouse-intl.com). We are fairly
new to selling online and posive feedback and 5-star prod-
uct reviews are very important to our family business. If you
are happy with our customer service and/or our product,
would you please leave us posive seller feedback and a
posive product review? It would mean A LOT to us! If you
have ANY quesons or concerns please do not hesitate to
contact me. We want you to be happy with your purchase.
Thanks again!
Nichole Ernst
CEO Powerhouse Internaonal


SET UP & OPERATING MANUAL
WARNING: Do not use the appliance without reading this manual rst.

1 Year Warranty
All Powerhouse Internaonal products come with a 1 Year Warranty
valid only in the 48 connental United States. If you purchase this
product and ship it to a desnaon outside the 48 connental United
States, this warranty becomes null and void!
The rst 30 days are covered from the date of receipt of the product.
If your product becomes damaged in shipment or is found to be de-
fecve in any way during this period, we will replace it or issue a com-
plete refund for your product, and we will pay all shipping involved,
to and from, within this rst 30-day period.
If you have “buyer’s remorse” and decide that you do not want the
product, it must be returned new and unused in the original box and
you must pay the return shipping. PLEASE NOTE: There will be a 10%
restocking fee and original shipping costs will not be refunded. Used
product cannot be returned!
The remainder of the rst year (aer the rst 30 days) is covered by a
“Free Repair” warranty (parts and labor included). If anything be-
comes defecve during this period, we will x it and give a full service
inspecon to your product, but shipping (to and from) may be paid by
buyer. Please email us at [email protected] for a service au-
thorizaon number and tell us what is wrong with your unit.
Please keep this page and write the rst and last name of who or-
dered and the date you received the product in case you ever need to
use this warranty. This informaon WILL BE REQUIRED for any type of
service/repair or return/refund!
First and last name on order _________________________________
Date received_________________
KEEP THIS WARRANTY for your records. DO NOT send it back to us. Your
purchase has been recorded in our database.

Parts Overview 2
Technical Data 2
General Safety Instrucons 3
Servicing a Double-Insulated Appliance
Extension Cords
Operang Precauons for the Force 1800
Assembly & Connecons 6
Aach the Wheels
Connect the High-Pressure Hose
Aach the Trigger Gun
Aach the Lance
Aach a Nozzle
Connect the Garden Hose
Plug-in the Power Cord
Operang the Pressure Washer 10
Safety Devices
Starng the Washer
Stopping the Washer
Cleaning Aachments
Aer Use Instrucons
Maintenance 13
Clean the Inlet Filter
Clean the Air Vents
Grease the Couplings
Unclog Nozzles
Troubleshoong 14
1
Contents
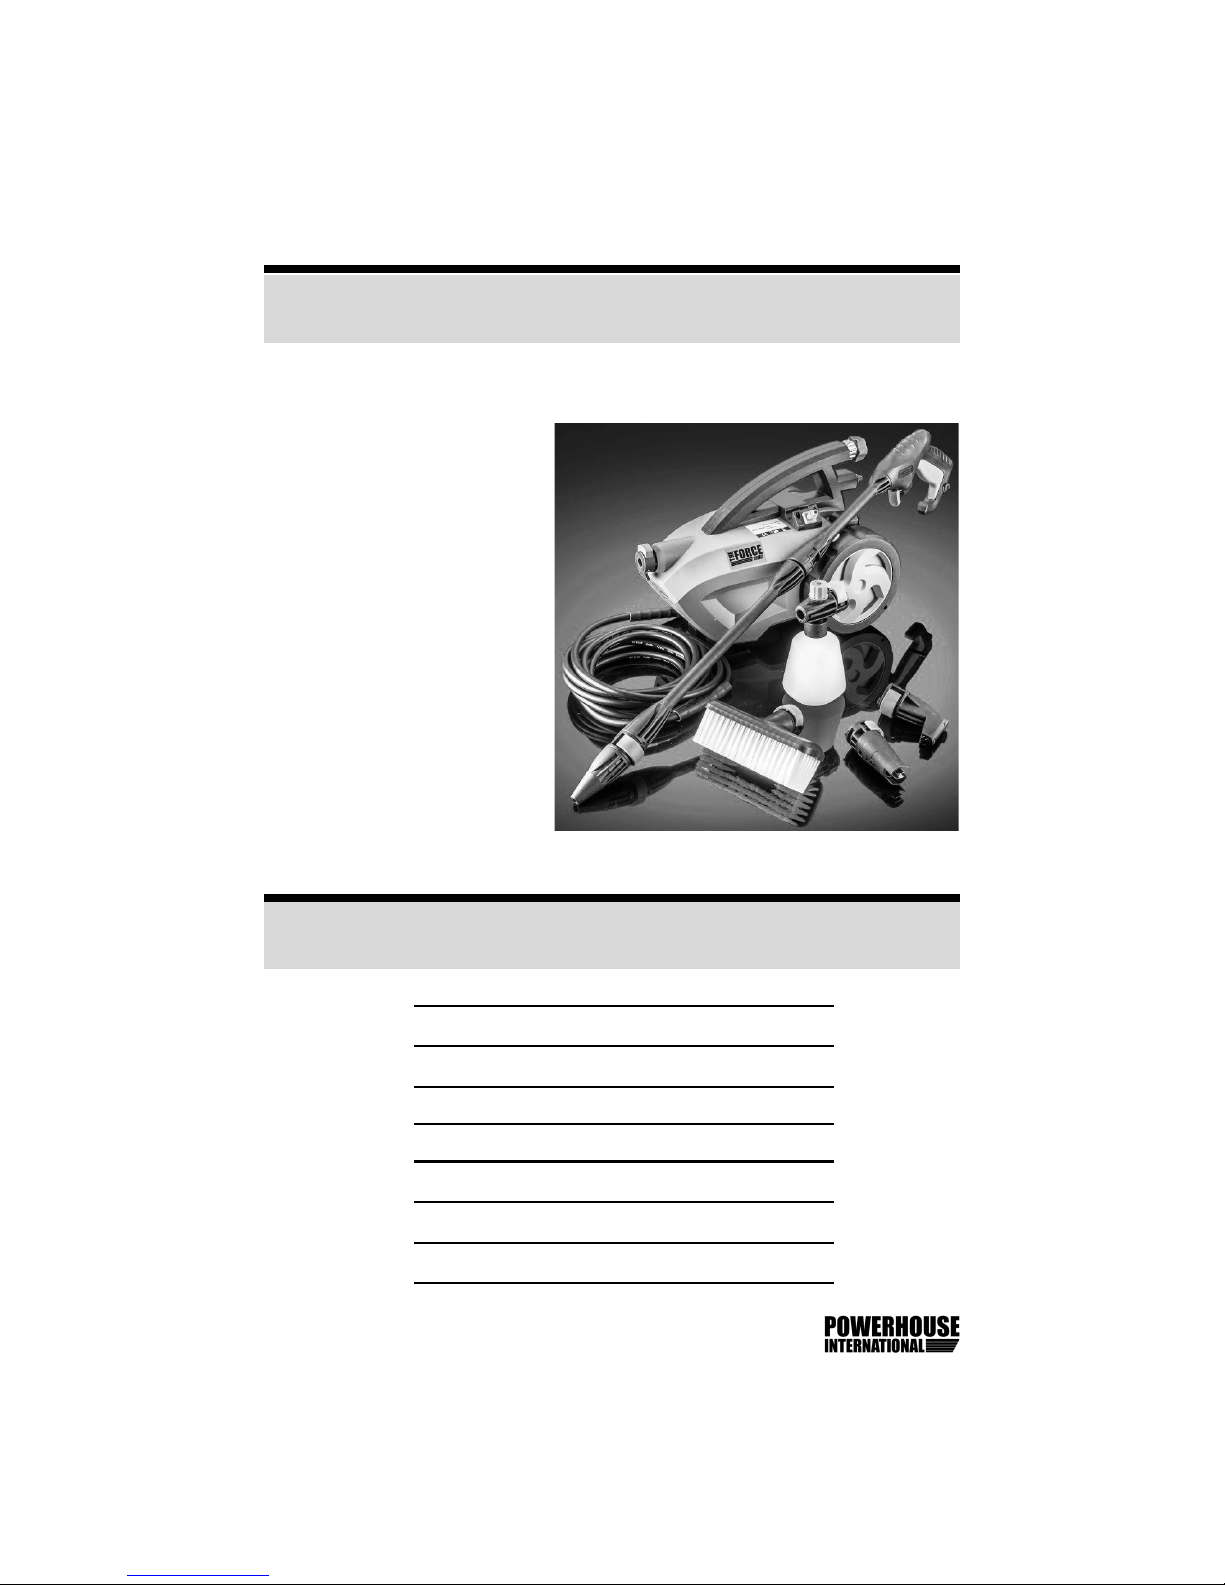
Unpack the carton and check that you have all the parts listed here:
The Force 1800 pressure
washer
High-pressure hose
Trigger gun and lance
Soap foam sprayer
Brush aachment
Three nozzles
Two wheels
One wrench
A bag containing this
manual, a cleaning nee-
dle, and an extra washer
2
Parts Overview
Rated Pressure 1600 psi
Max. pressure 1800 psi
Rated Flow 1.35 GPM
Max. Flow 1.60 GPM
Current 13A
Voltage 120V/60Hz
Inlet (max) 80 psi
Protecon class II
Water temperature (max) 60 F
Technical Data

Stay alert! Watch what you are doing.
Do not operate the washer when fagued or
under the inuence of alcohol or drugs.
This washer is provided with a Ground Fault Cir-
cuit Interrupter (GFCI) built into the power cord
plug. If replacement of the plug or cord is need-
ed, use only idencal replacement parts.
The washer is intended for outdoor use. Do not use inside.
Follow the maintenance instrucons specied in this manual.
Store the washer in an area that is clean and protects the washer
from freezing.
Servicing a Double-Insulated Appliance
In a double-insulated product, two systems of insulaon are provided
instead of grounding. No grounding means is provided on a double-
insulated product, nor should a means for grounding be added to the
product. Servicing a double-insulated product requires extreme care
and knowledge of the system, and should be done only by qualied
service personnel. Replacement parts for a double-insulated product
must be idencal to the parts they replace.
A double-insulated product is marked with the words “DOUBLE INSU-
LATION” or “DOUBLE INSULATED.” The following symbol may also be
marked on the product:
Extension Cords
Use only extension cords that are intended for outdoor use. These
extension cords are idened by a marking:
“Acceptable for use with outdoor appliances; store indoors while not
in use.”
3
General Safety Instrucons

IMPORTANT! DO NOT LET THIS PRODUCT FREEZE!
Use only extension cords having an electrical rang greater than the
rang of the product. Do not use damaged extension cords. Examine
extension cord before using and replace if damaged. Do not abuse
extension cord and do not yank on any cord to disconnect. Keep cord
away from heat and sharp edges. Always disconnect the extension
cord from the receptacle before disconnecng the product from the
extension cord.
WARNING: To reduce the risk of electrocuon, keep all con-
necons dry and o the ground. Do not touch plug with wet
hands or while standing in water.
Operang Precauons for the Force 1800
When using this product, basic precauons should always be fol-
lowed:
Read all instrucons before using the washer.
To reduce the risk of injury, close supervision is necessary, espe-
cially when the washer is being used near children or animals.
Do not use the washer in areas where ammable items are pre-
sent.
Know how to stop the washer and bleed pressures quickly. Be
thoroughly familiar with the controls of the washer. Before each
use, pressure must be released! Press the trigger on the wand,
then start the washer.
Do not over-reach or stand on unstable support. Keep good
foong and balance at all mes.
To reduce the risk of electrocuon, don’t start or run the washer
in the rain or a storm. Keep all connecons dry and o the
ground. Do not touch plug with wet hands. Do not let water leak
into the washer, as this will invalidate the warranty.
Do not leave the washer running unaended.
4

This washer has been designed for only using clean water. Do not
use corrosive chemicals.
When the washer is running, maintain a constant water supply.
Without water circulaon the sealing rings of the washer will be
damaged.
Don’t start and run the washer in a place excessively cold to pre-
vent the washer from freezing.
Do not use the washer within the range of persons unless they
wear protecve clothing and eyewear.
Do not direct the jet against yourself or others to clean clothes or
footwear.
Disconnect from the electrical power supply before carrying out
any user maintenance.
5
In addion to these instrucons, a video tutorial is also available at
www.powerhouse-intl.com or YouTube (search for The Force 1800).
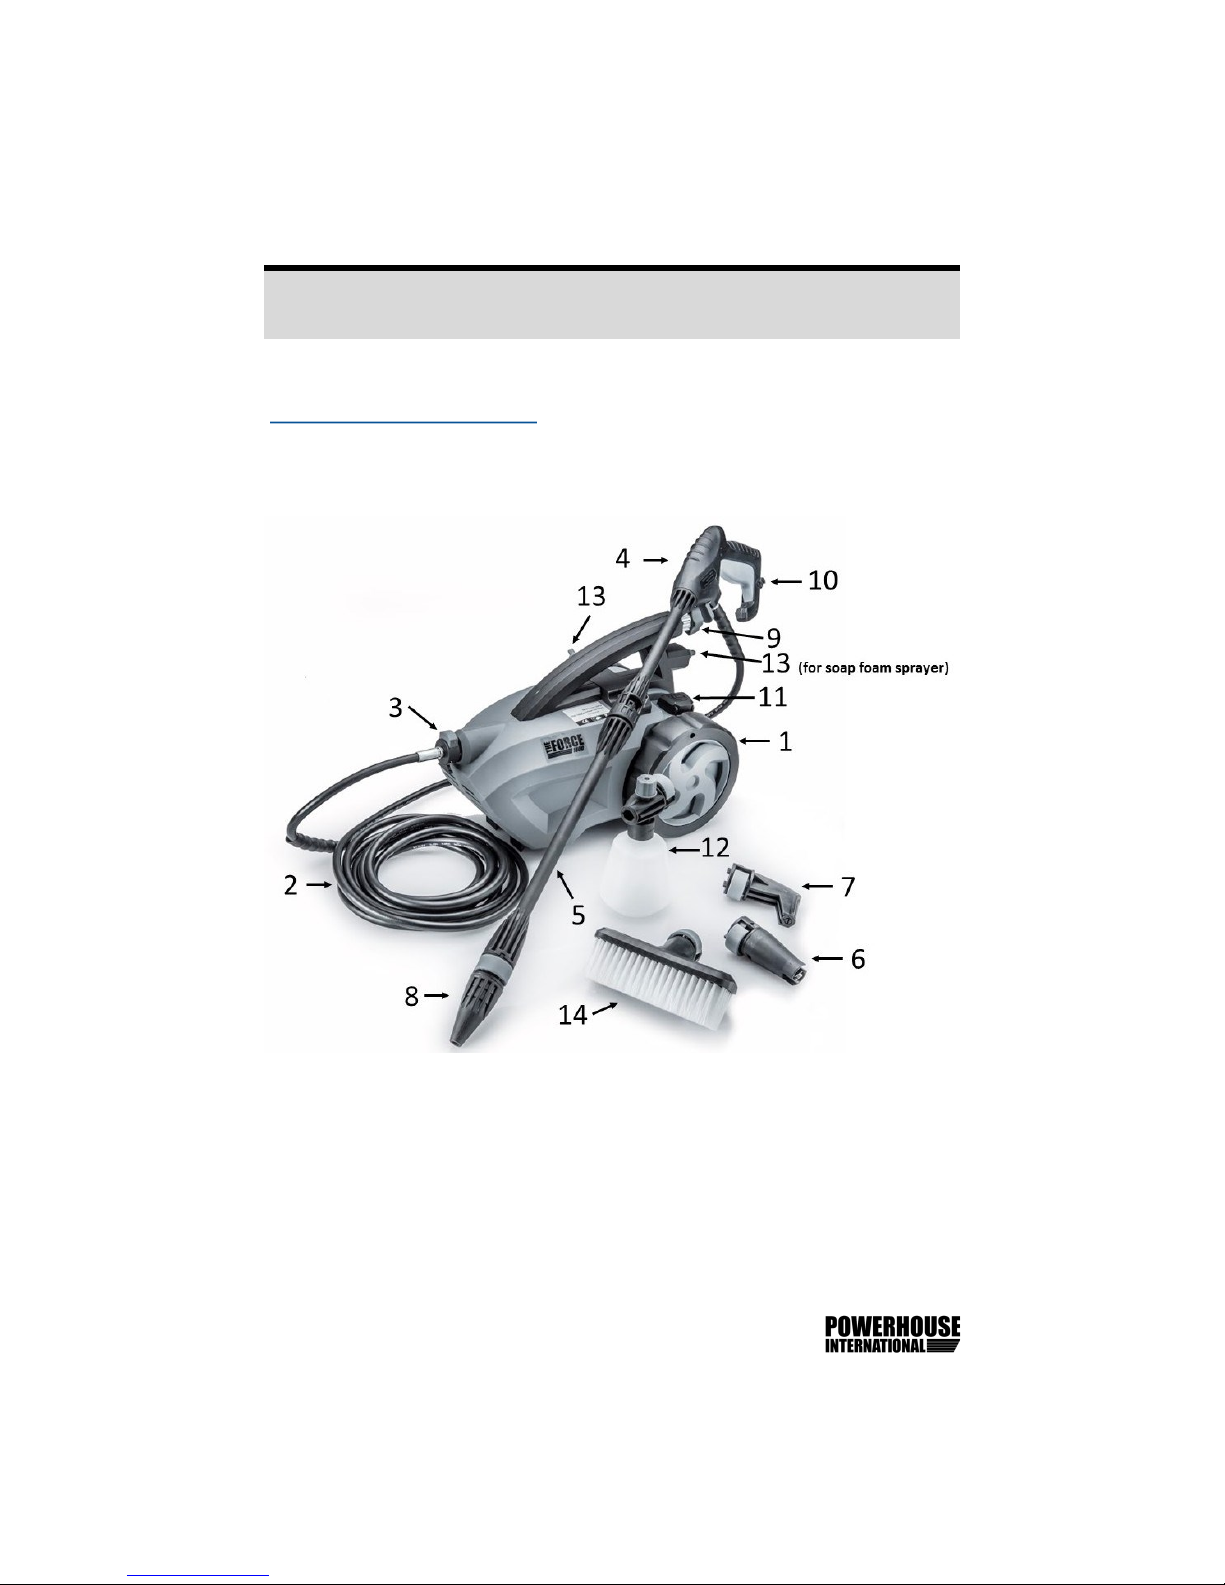
Throughout this manual numbers are used to help idenfy parts. Use
the following diagram to reference the parts:
(1) Wheels (8) Turbo nozzle
(2) High-pressure hose (9) Water hose connecon
(3) High-pressure hose quick (10) Safety locking device
connector to washer (11) Foot power switch
(4) Trigger gun (12) Soap foam sprayer
(5) Lance (13) Storage pins
(6) Mul-funcon nozzle (14) Brush aachment
(7) Angle nozzle
6
Assembly & Connecons
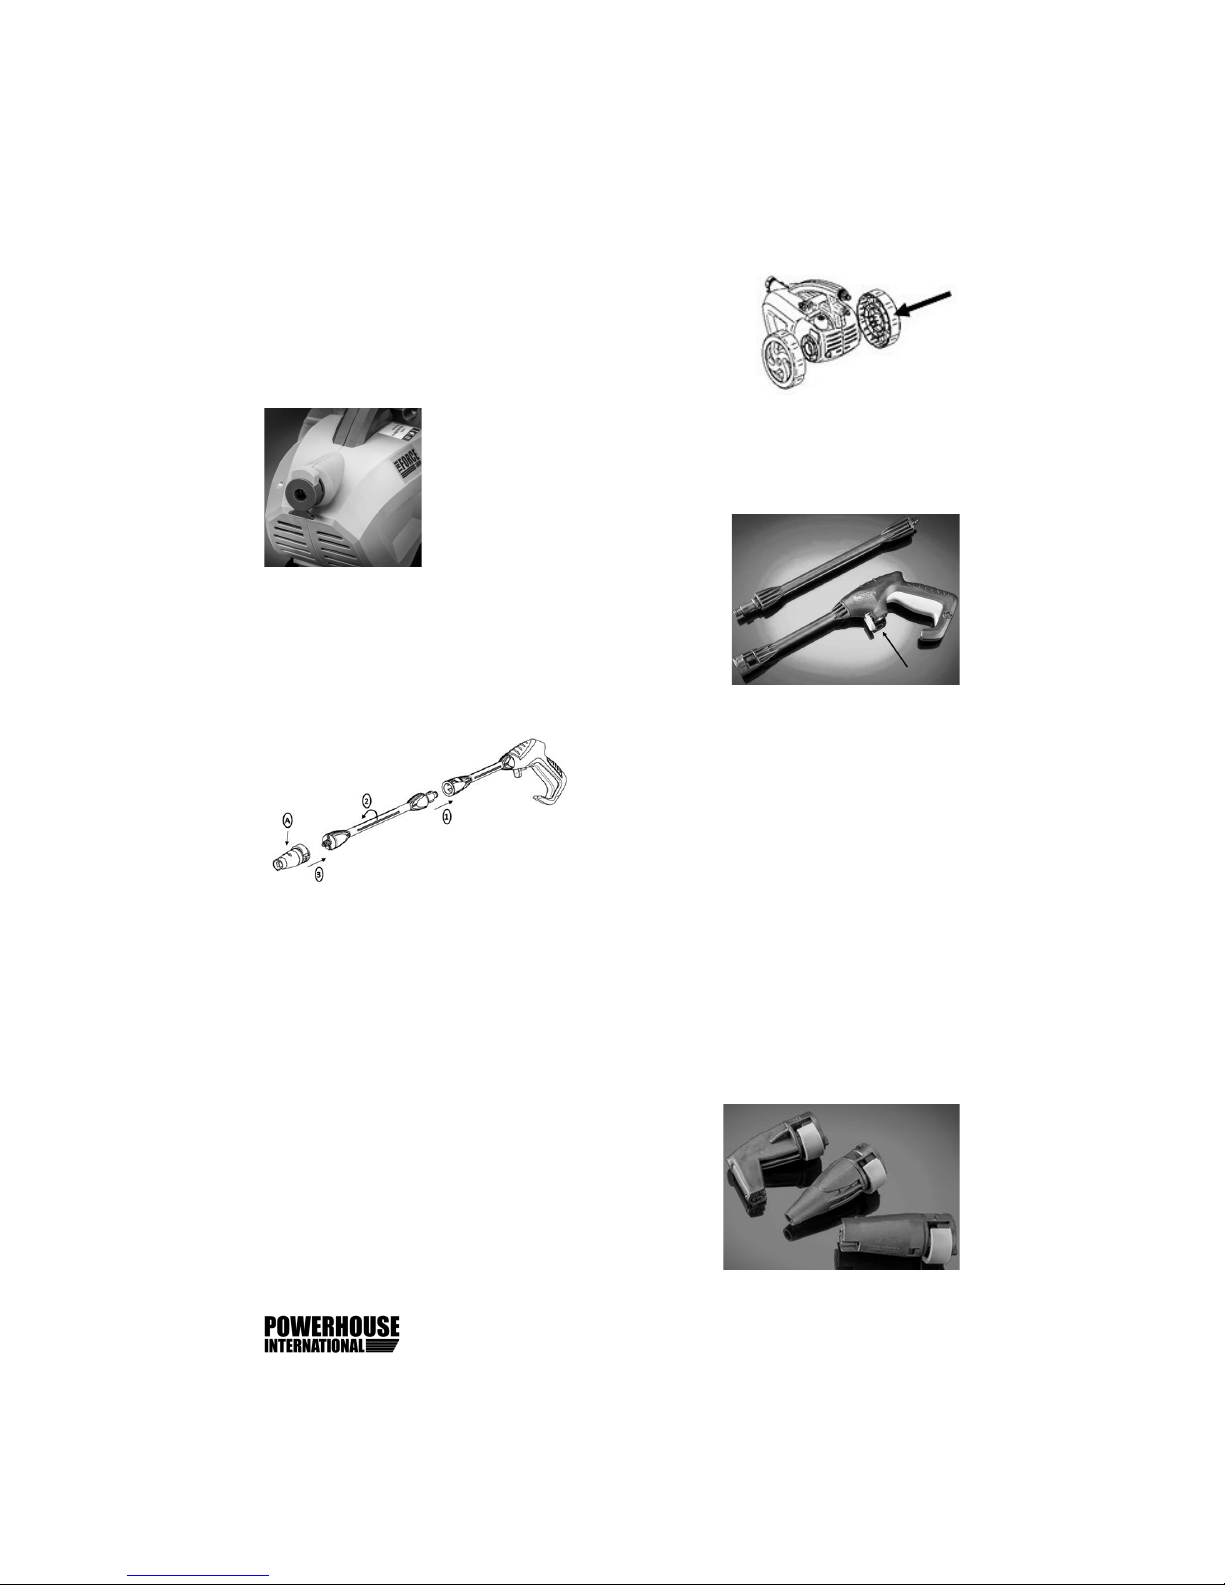
Aach the Wheels
Snap the wheels (1) onto the washer.
Connect the High-Pressure Hose
Press the buon on the high-pressure hose (2) quick
connector (3) at the front of the washer (see diagram
at le) and snap in the hose.
Aach the Trigger Gun
As indicated in the diagram at
right, aach the high-pressure hose to the
trigger gun (4) by pressing it into the connect-
or. You will hear and feel a click.
Aach the Lance
As shown at le, push the lance (5)
into the trigger gun (4). When insert-
ed, turn it unl it locks in place.
Cauon: Make sure the lance is
properly aached to the gun.
Aach a Nozzle
When aaching the nozzle, the buon ((A) in the diagram above) on
the nozzle should pop out again. Check before pressing the trigger
that the nozzle is properly inserted and the buon has popped back
out. You must line up the indents on the nozzle for it to connect cor-
rectly.
The Force 1800 pressure washer comes with
three dierent nozzles, as shown in the pic-
ture at right. From top to boom, the Angle
Nozzle (7), the Turbo Nozzle (8), and the Mul-
-Funcon Nozzle (6). Each is described be-
low.
7
When not in use, nozzles can be stored on the storage pins (13) on
the body of the washer.
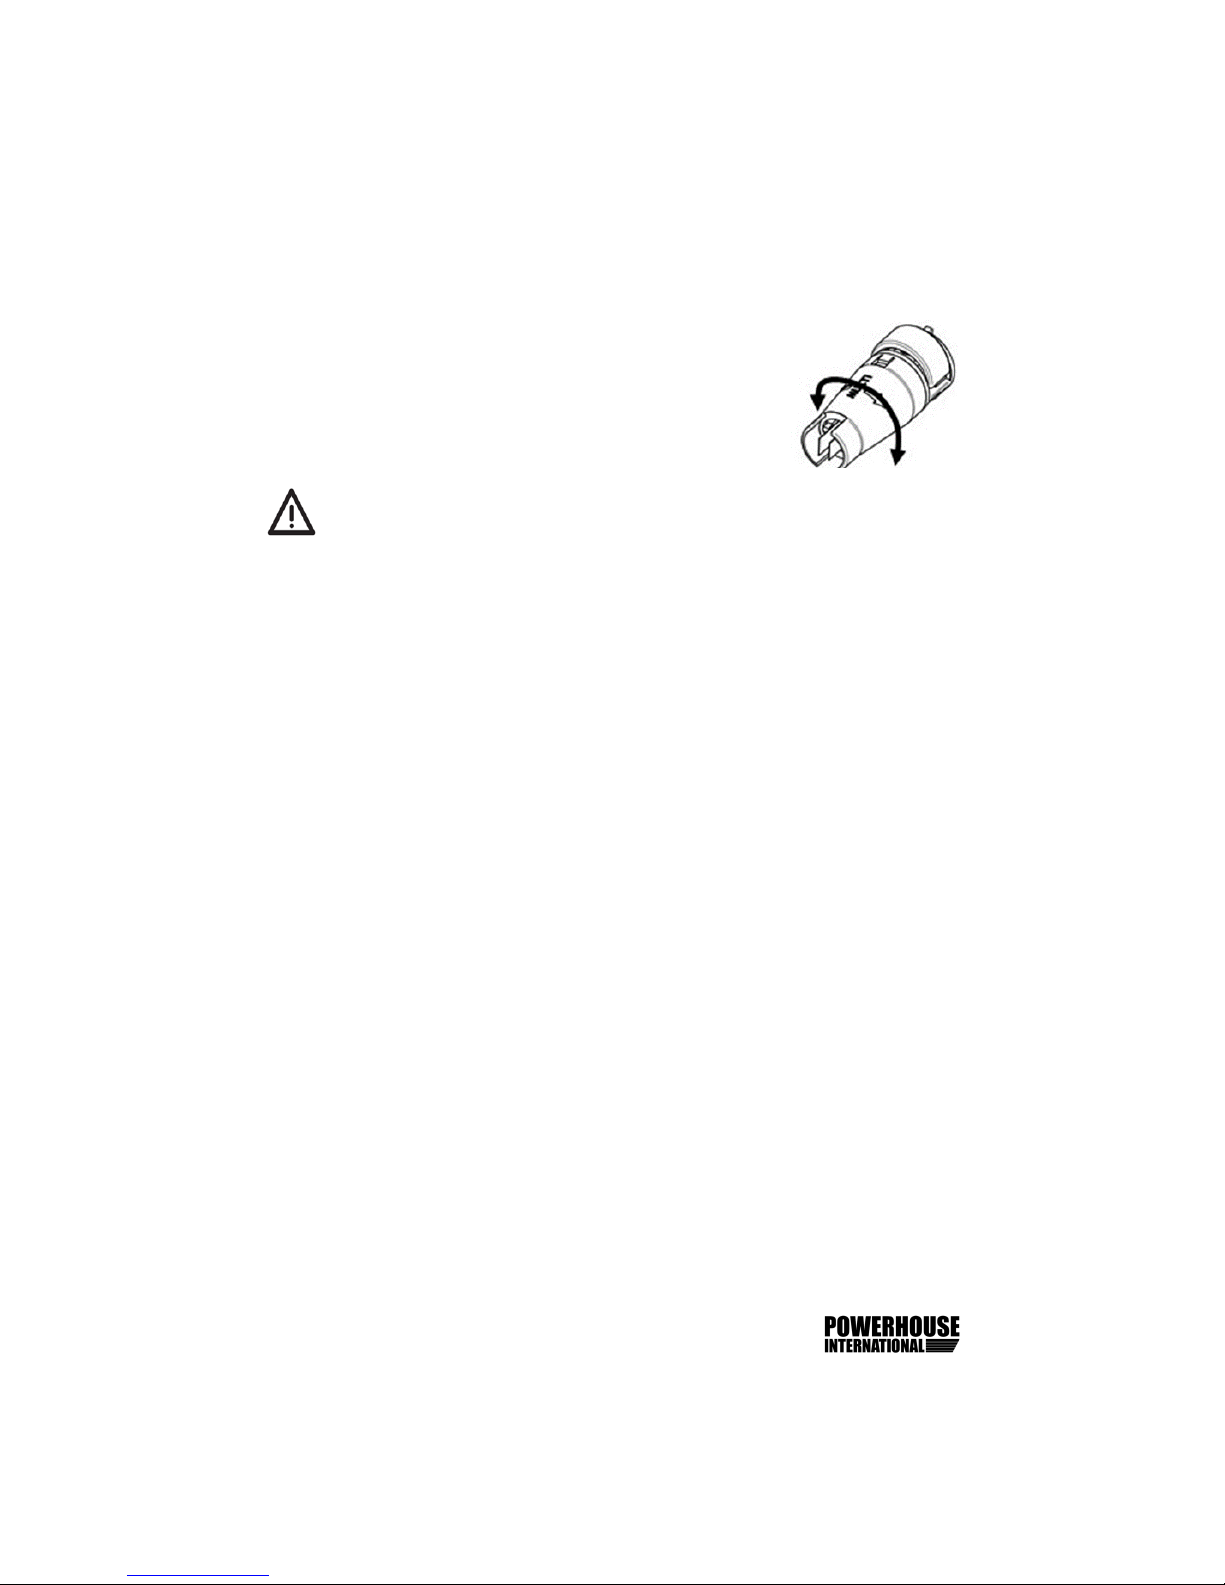
Mul-Funcon Nozzle
The spray from the mul-funcon nozzle, from a
direct stream to a fan spray, can be adjusted by
turning it.
WARNING: Do not adjust the nozzle while operang, as injury
to hands can occur.
Angle Nozzle
The angle nozzle can be used for many applicaons, such as cleaning
guers, the underbody of a car, or underneath a lawn mower. Please
use cauon when doing so since debris can come loose and injury can
occur. Aer aaching the angle nozzle use cauon with the trigger
gun and lance as the water jet will spray perpendicular to these.
Turbo Nozzle
The turbo nozzle is a high-pressure nozzle that makes a circular
paern to clean debris and can be used for most cleaning tasks.
Connect the Garden Hose
A ½" garden hose between 10 and 25 . in length will be suitable. Let
the water run through the water hose to ush any sand and dirt be-
fore connecng it to the washer to prevent damage to the washer.
Important! Only use water without any impuries. If there is a risk
of sand parcles in the inlet water (i.e., from a well), an addional l-
ter should be used.
Note: Check that the lter is in place, clean, and not clogged.
Cauon: Failure to use the lter will invalidate the warranty.
8

Connect the water hose to the water hose con-
nector (9) on the back of the washer. There is
an inlet lter already ed in the coupling to
lter out impuries, as these will damage the
pump valves. There is also a rubber gasket
ed into the inlet (and an extra in the bag
with this manual). If the hose leaks where it
connects to the machine, make sure that the
gasket is in place. Two gaskets can be used if necessary. You can ght-
en the connecon with the enclosed
wrench. At le is a picture of the lter
locaon , if you need to clean it.
Turn the water fully on.
Plug-in the Power Cord
Refer to the “General Safety Instruc-
ons” secon above for safety precau-
ons.
9

Refer to the diagram on page 6 for the numbered parts and features
referenced in this secon.
Safety Devices
Safety Locking Device. The trigger gun (4) features a
safety-locking device (10). When the safety is acvat-
ed (shown at right), the trigger gun cannot be oper-
ated.
Thermal Sensor. A thermal sensor protects the mo-
tor against overloading. The washer will restart aer
a few minutes when the thermal sensor has cooled.
Starng the Washer
The trigger gun (4) and lance (5) have a kick (thrust) when operated.
Please hold them rmly with both hands.
Important! Point the nozzle at the ground.
1. Check that the washer is in upright posion. Note: Do not place
the washer in high grass. The washer needs air circulaon!
2. Release the trigger safety lock (10).
3. Press the trigger of the trigger gun (4) and let the water run unl
all air has escaped from the water hose.
4. Step on the power switch (11) to turn on the washer.
5. Press the trigger of the trigger gun.
Important! The washer only runs when the trigger is depressed on
the spray gun. It takes a minute to force the air out of the hose and
pump. The water spray may spuer and change PSI during this me,
but this is normal and will become consistent when the air is out of
the washer.
6. Always adjust the distance (and thus the pressure) of the nozzle
to the surface you are cleaning.
10
Operang the Pressure Washer
Do not cover the washer during operaon!
Stopping the Washer
Note: The washer must be switched o, using the foot power
switch (11), when le unaended or not used:
1. Step on the power switch (11) to turn o the washer.
2. Disconnect the electrical plug from the socket (do not pull cord).
3. Shut o the water supply.
4. Press the trigger to relieve the washer of pressure.
5. Lock the trigger gun safety.
When releasing the trigger of the trigger gun, the washer motor auto-
macally stops. The washer motor will start again when you re-press
the trigger of the trigger gun.
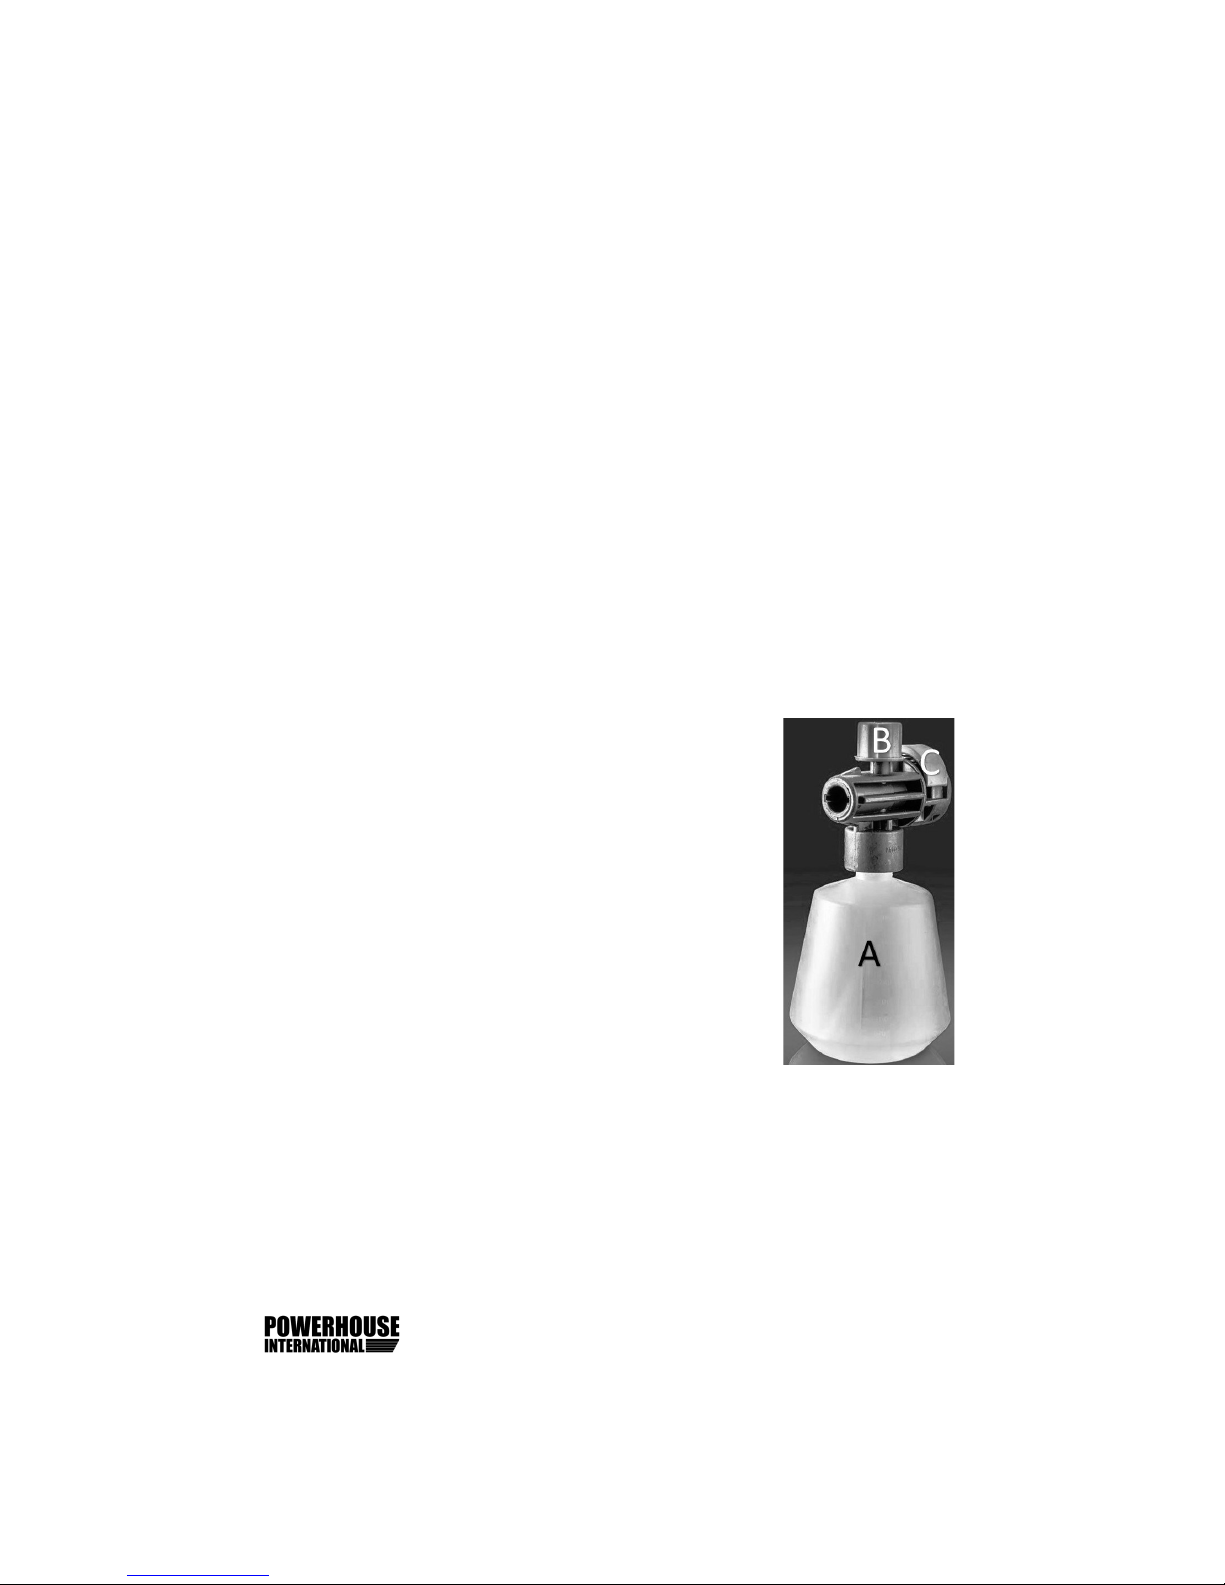
Cleaning Aachments
Soap Foam Sprayer (12)
Unscrew the container (A) from the foam sprayer.
Add soap to the container and screw the container
to the foam sprayer. Adjust the amount of soap
with the knob (B).
Note: Adjust the foam spray with Knob B. If you
want to spray water only, turn it to close.
The soap sprayer is equipped with a quick connect-
or. Press C, then insert into the lance (5).
Since the soap output is adjustable, the bole has
air intake holes at the top. It will leak soap if it is not upright. To avoid
this, store the soap bole on the pin on the back of the washer (13) in
the upright posion when not in use.
Cauon: When aaching the soap bole, the buon (C) should pop
back out. Check before pressing the trigger that the nozzle is properly
aached.
11

Brush Aachment
The brush aachment can be used aer the soap foam sprayer. For
best results, spray with the soap foam sprayer rst, let soak for a few
minutes, then switch to the brush aachment. It is eecve on cars
and boats, and cleaning stains from concrete paos, vinyl siding, or
wood decks.
Aer Use Instrucons
The washer and accessories should be stored in a room that is 60-80
degrees (never store in a room that will freeze or outside).
Pump, hose, and accessories should always be dry prior to storing:
1. Step on the power switch (11) to turn o the washer and detach
the water hose aer shung o the water supply.
2. Restart the washer (step on the power switch (11)) and press the
trigger of the trigger gun (4). Let the washer run unl no more wa-
ter runs through the trigger gun.
3. Step on the power switch (11) to turn o the washer and remove
the high pressure hose (2) and nozzle (6/7/8). Detach the high-
pressure hose by pressing the quick release buon on the trigger
gun and the high-pressure hose quick connector (3).
Cauon: When you detach the high-pressure hose, be sure you have
released the water pressure by turning o and disconnecng garden
hose and expelling remaining water
from the washer by depressing the
trigger. This will enable disassembly.
4. Unplug, and wind up hose.
5. As shown at right, store trigger
gun (4), lance (5), nozzles
(6/7/8), and other accessories in
storage pins (13) and holders on
the washer.
WARNING: Never start up a frozen washer. Frost damages are
not covered by our warranty!
12
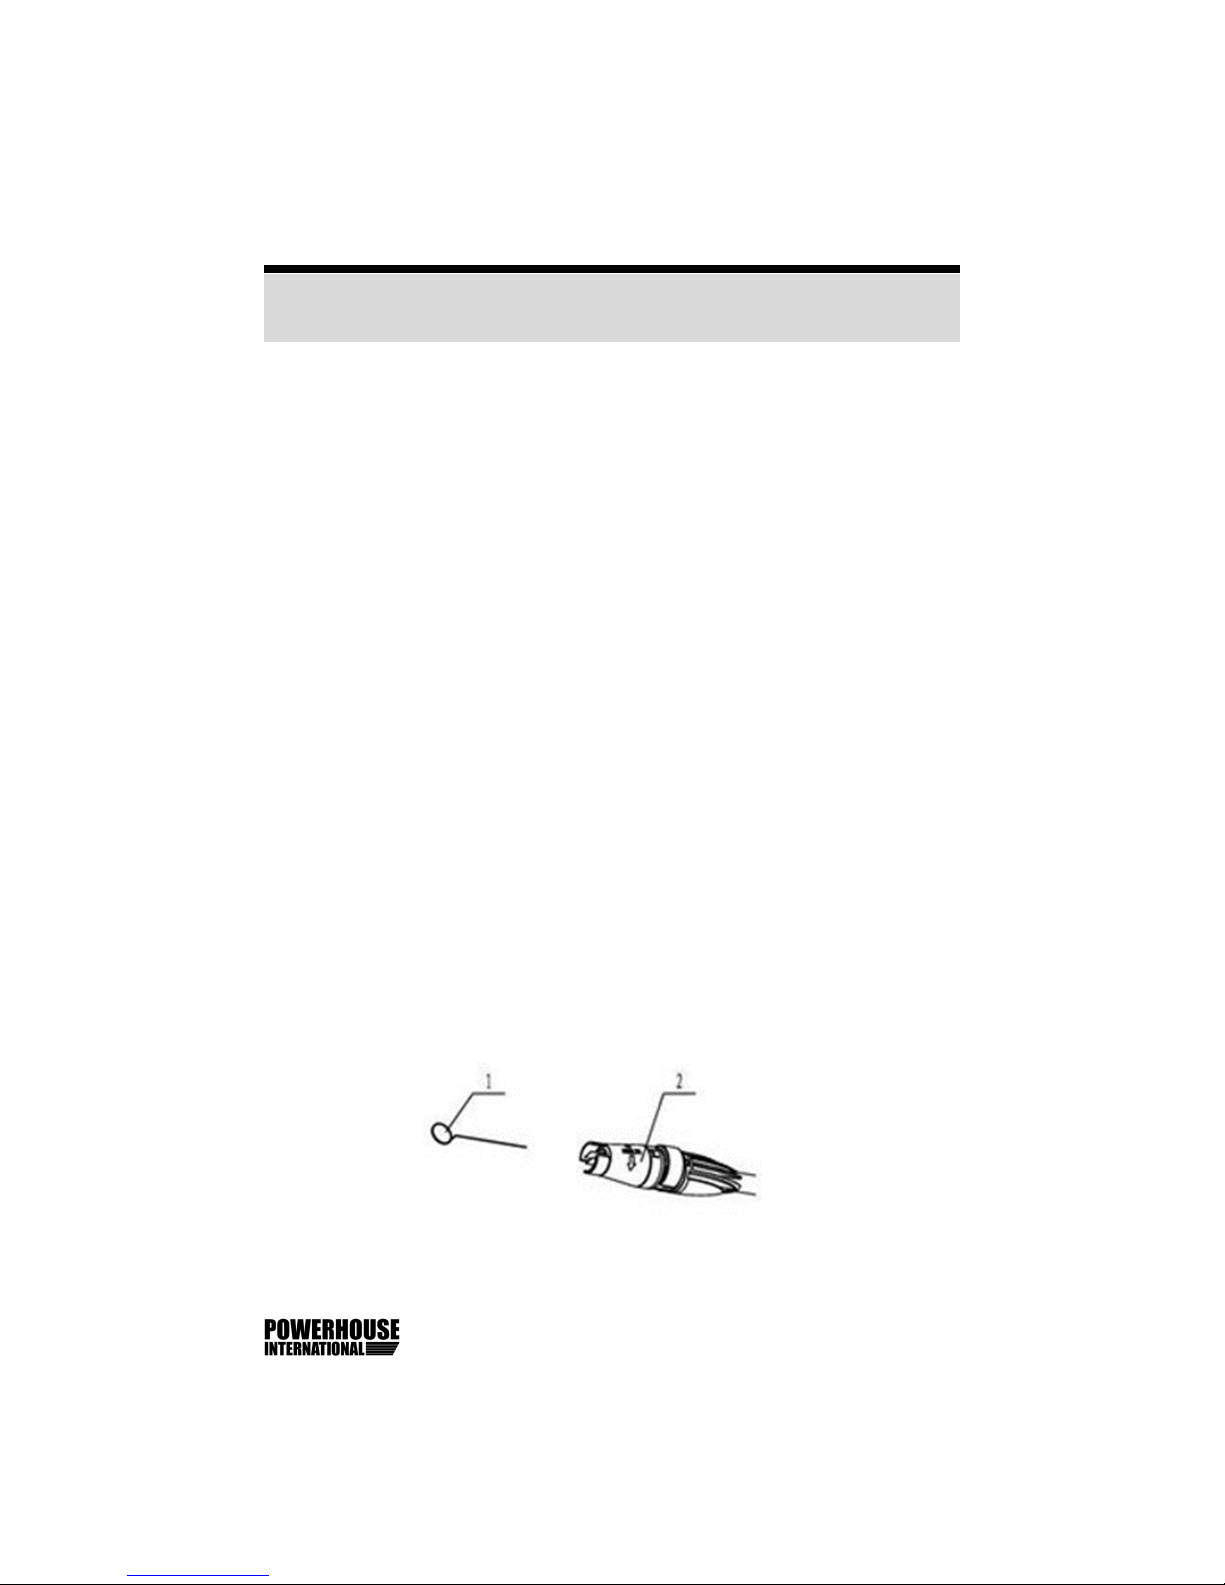
Clean the Inlet Filter
Clean the water inlet lter once a month, or more frequently, accord-
ing to use.
Carefully loosen the lter with a screwdriver and clean it (see the dia-
gram at the boom of page 6). Check that it is undamaged before re-
mounng it.
The inlet lter must always be ed inside the water inlet connector
to lter out sand, limestone, and other impuries, as they will dam-
age the pump valves.
Cauon: Failure to use the lter will invalidate the warranty.
Clean the Air Vents
The washer should be kept clean so as to let cooling air pass freely
through the vents.
Grease the Couplings
For an easy connecon, and so the o-rings do not dry up, the cou-
plings should be greased regularly.
Unclog Nozzles
The needle in the bag can be used if a nozzle is clogged.
13
Maintenance

Troubleshoong
14
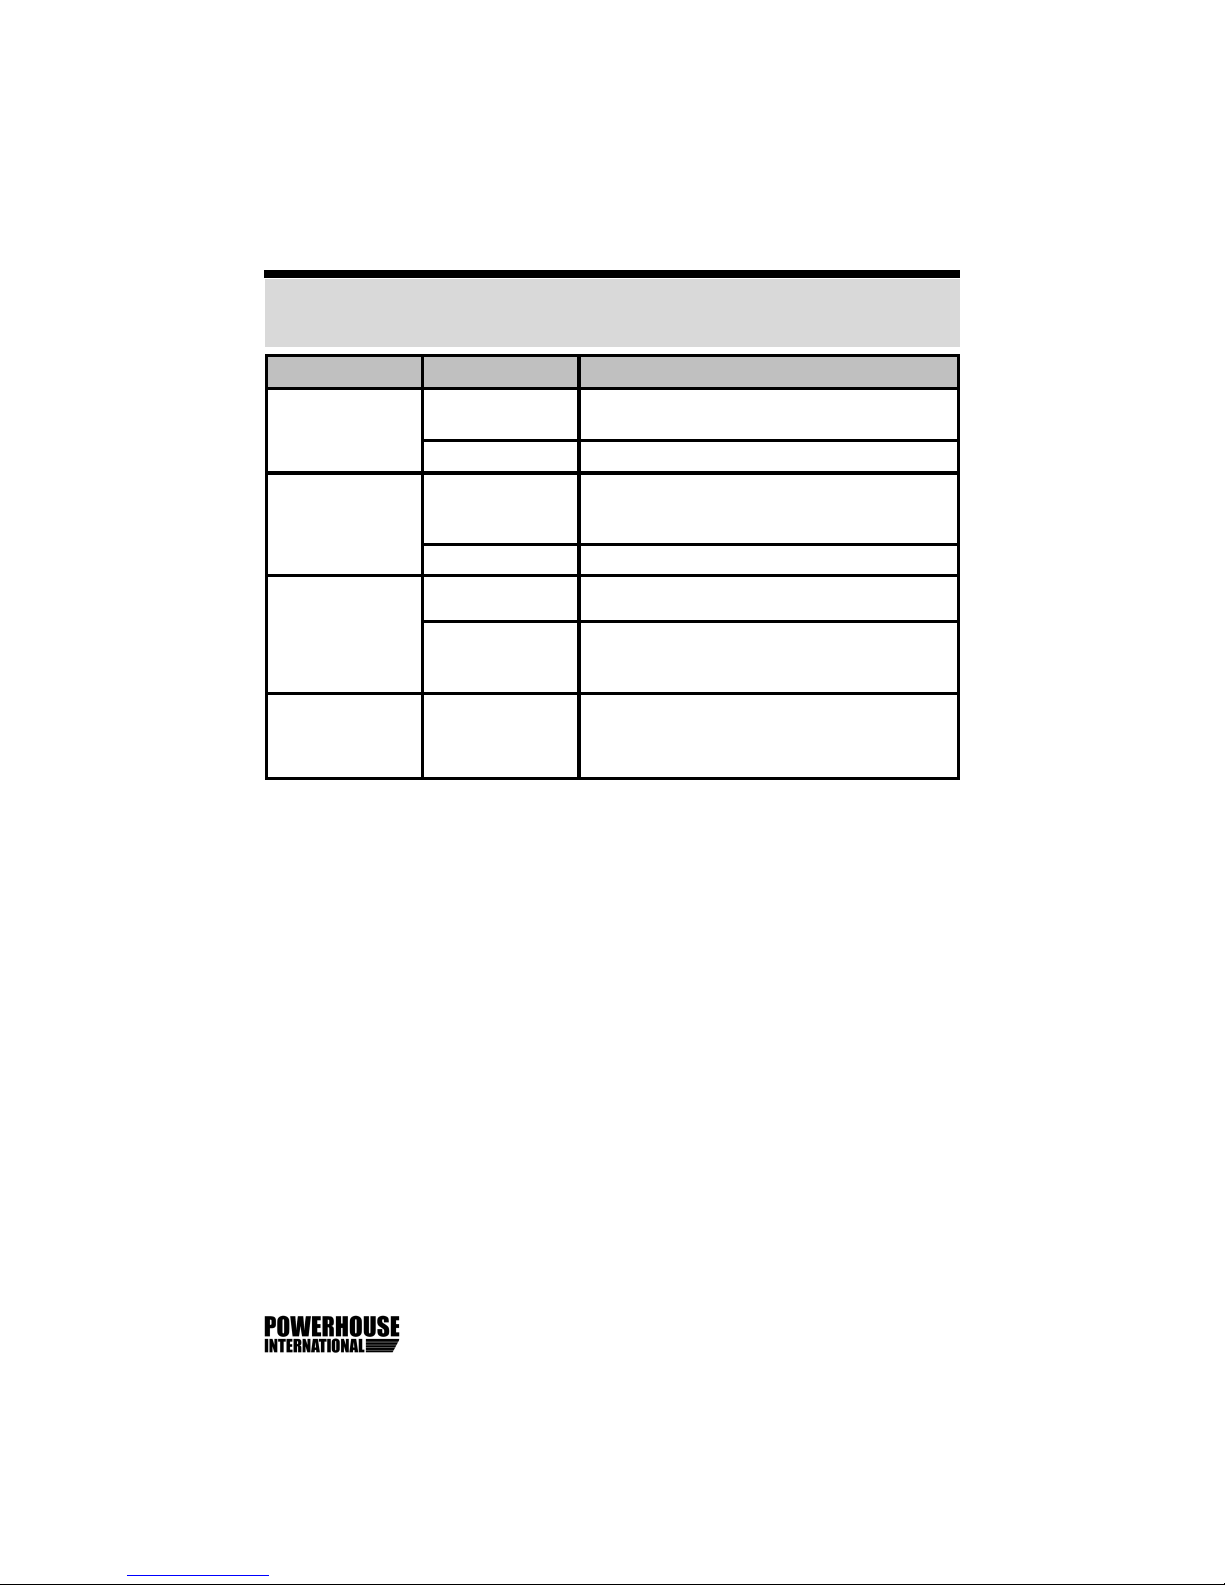
Troubleshoong
Symptom Cause Recommended acon
Washer refuses
to start
Trigger not de-
pressed
The washer only runs when the trigger is
depressed on the spray gun.
Washer not
plugged in
Plug in washer.
Defecve socket Try another socket or check GFIC in socket.
GFIC has tripped
on washer
Follow direcons to reset GFIC on back of
washer plug.
Defecve exten-
sion cable
Try without the extension cable.
Fluctuang pres-
sure (this will
happen for the
rst couple
minutes of use
while air is being
pumped from
washer)
Water supply not
sucient
Increase water pressure, check for blockage
of garden hose, and/or change to larger
hose.
Valves dirty,
worn out, or
stuck
If within the 1 Year Warranty period, e-mail
us at nepowerhouse@gmail.com. If not, take
it to a qualied appliance repair shop.
Pump is sucking
air
Check that hoses and connecons are air-
ght.
Pump seals worn If within the 1 Year Warranty period, e-mail
us at nepowerhouse@gmail.com. If not, take
it to a qualied appliance repair shop.
Washer stops GFIC has tripped Follow direcons on the back of the plug to
reset GFIC. Also check reset buon on the
outlet.
Incorrect voltage Check that the voltage corresponds to speci-
caon on the name plate.
Thermal sensor
acvated
Turn washer o and wait 5 minutes for
washer to cool down.
Nozzle parally
blocked
Clean the nozzle with the needle included
with manual, and by spraying water back-
wards through the nozzle.
Washer pul-
sang
Air in inlet hose/
pump
Depress trigger unl regular working pres-
sure resumes.
Inadequate sup-
ply of water
Increase water pressure, check for blockage
of garden hose, and/or change to bigger
hose.
Nozzle parally
blocked
Clean the nozzle with a needle included with
manual, and then by spraying water back-
wards through the nozzle.
Troubleshoong
Troubleshoong
Symptom Cause Recommended acon
Washer pul-
sang
Water lter
blocked
Clean the lter.
Hose kinked Straighten the hose.
Washer oen
starts and stops
by itself
Pump and/or
trigger gun is
leaking
If within the 1 Year Warranty period, e-mail
us at nepowerhouse@gmail.com. If not, take
it to a qualied appliance repair shop.
No water supply Connect inlet garden hose.
Water lter
blocked
Clean the lter.
Washer starts
but no water
comes out Nozzle blocked Clean the nozzle with a needle included with
the manual, and by spraying water back-
wards through the nozzle.
Water leaks from
hose intake
Washer missing
or damaged, or
connecon is
loose
Check for washer, ghten with wrench, and
make sure hose intake is not bent.
15
Table of contents
Popular Pressure Washer manuals by other brands


Kranzle
Kranzle WS-RP 1000 TS operating manual

Streamline
Streamline HIGHLINE HP-T12150PHR instruction manual

PowerWasher
PowerWasher TN-1200 Operator's manual

Shark Pressure Washers
Shark Pressure Washers DG-3022 Operating instructions and parts manual

Nilfisk-ALTO
Nilfisk-ALTO NEPTUNE NEPTUNE 1 operating instructions

Kärcher
Kärcher Cage Classic HD 13/35-4 manual