
Fit everything. Together.
FOR MORE INFORMATION CONTACT:
T
1.604.881.7875 F1.604.881.7835
www.primex.com
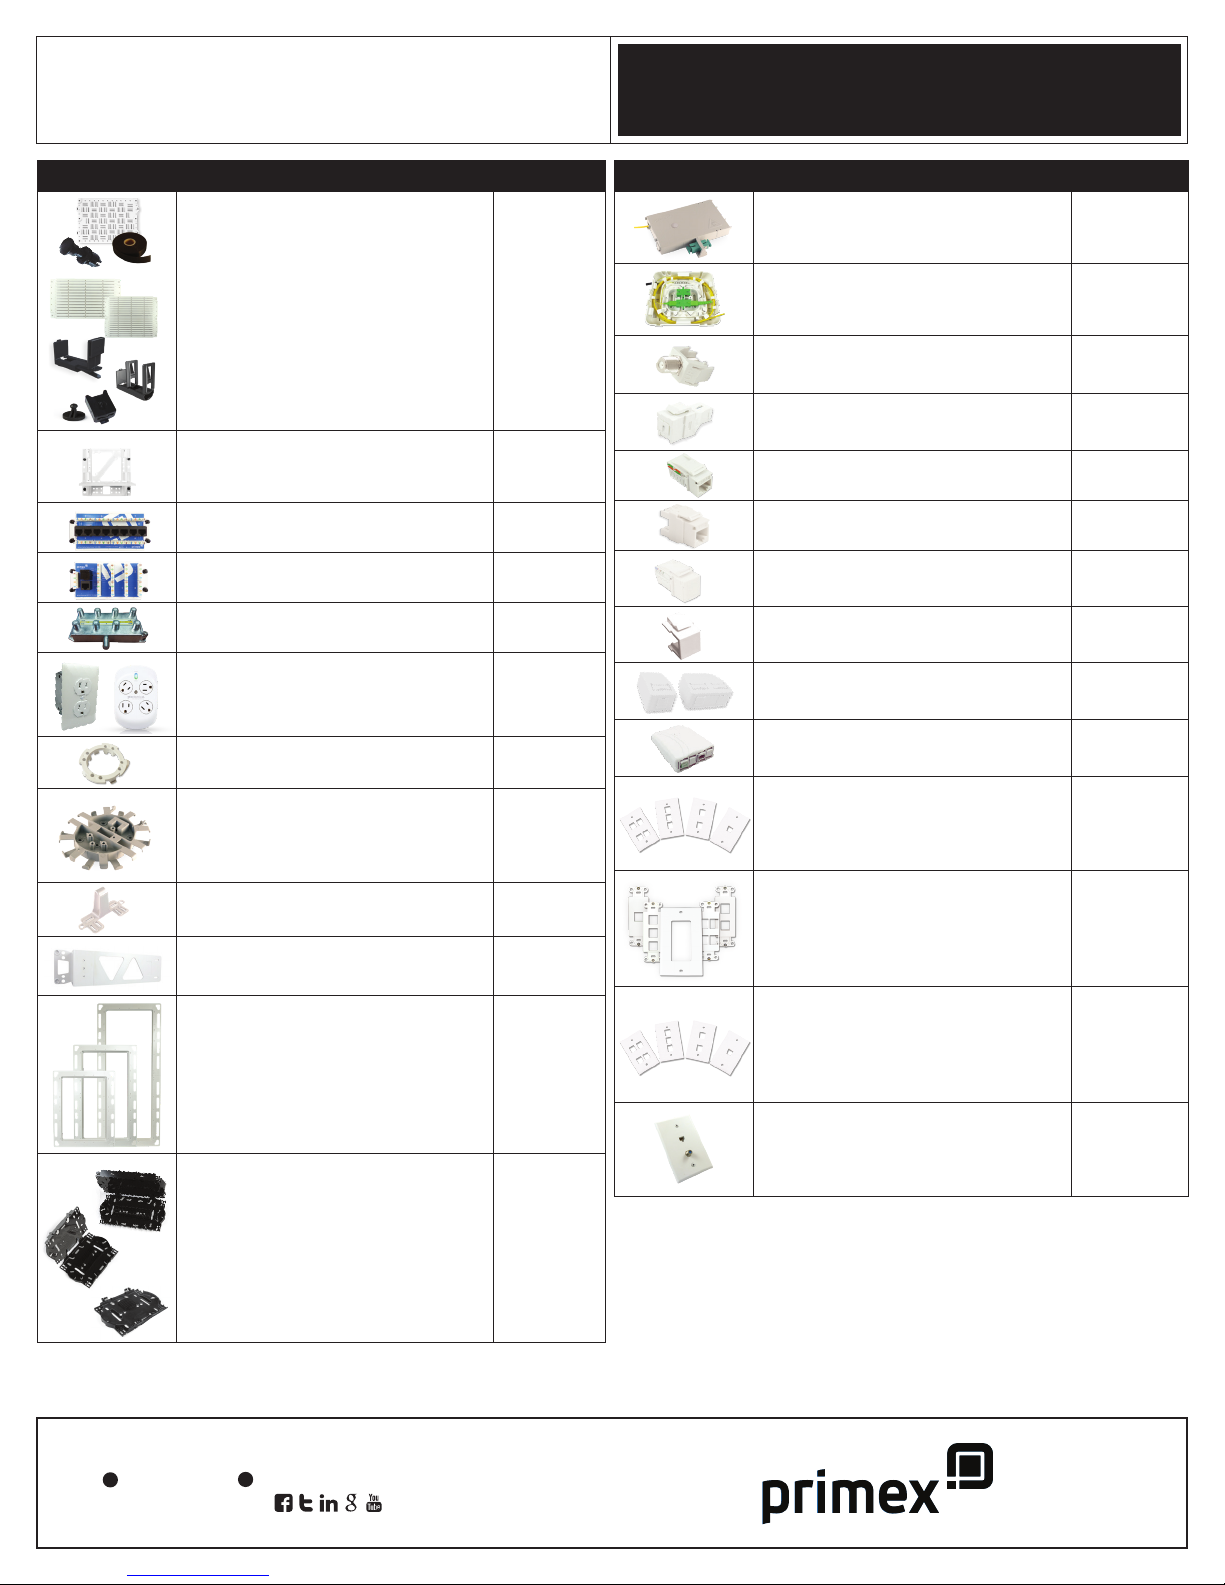
Product Description Stock Code
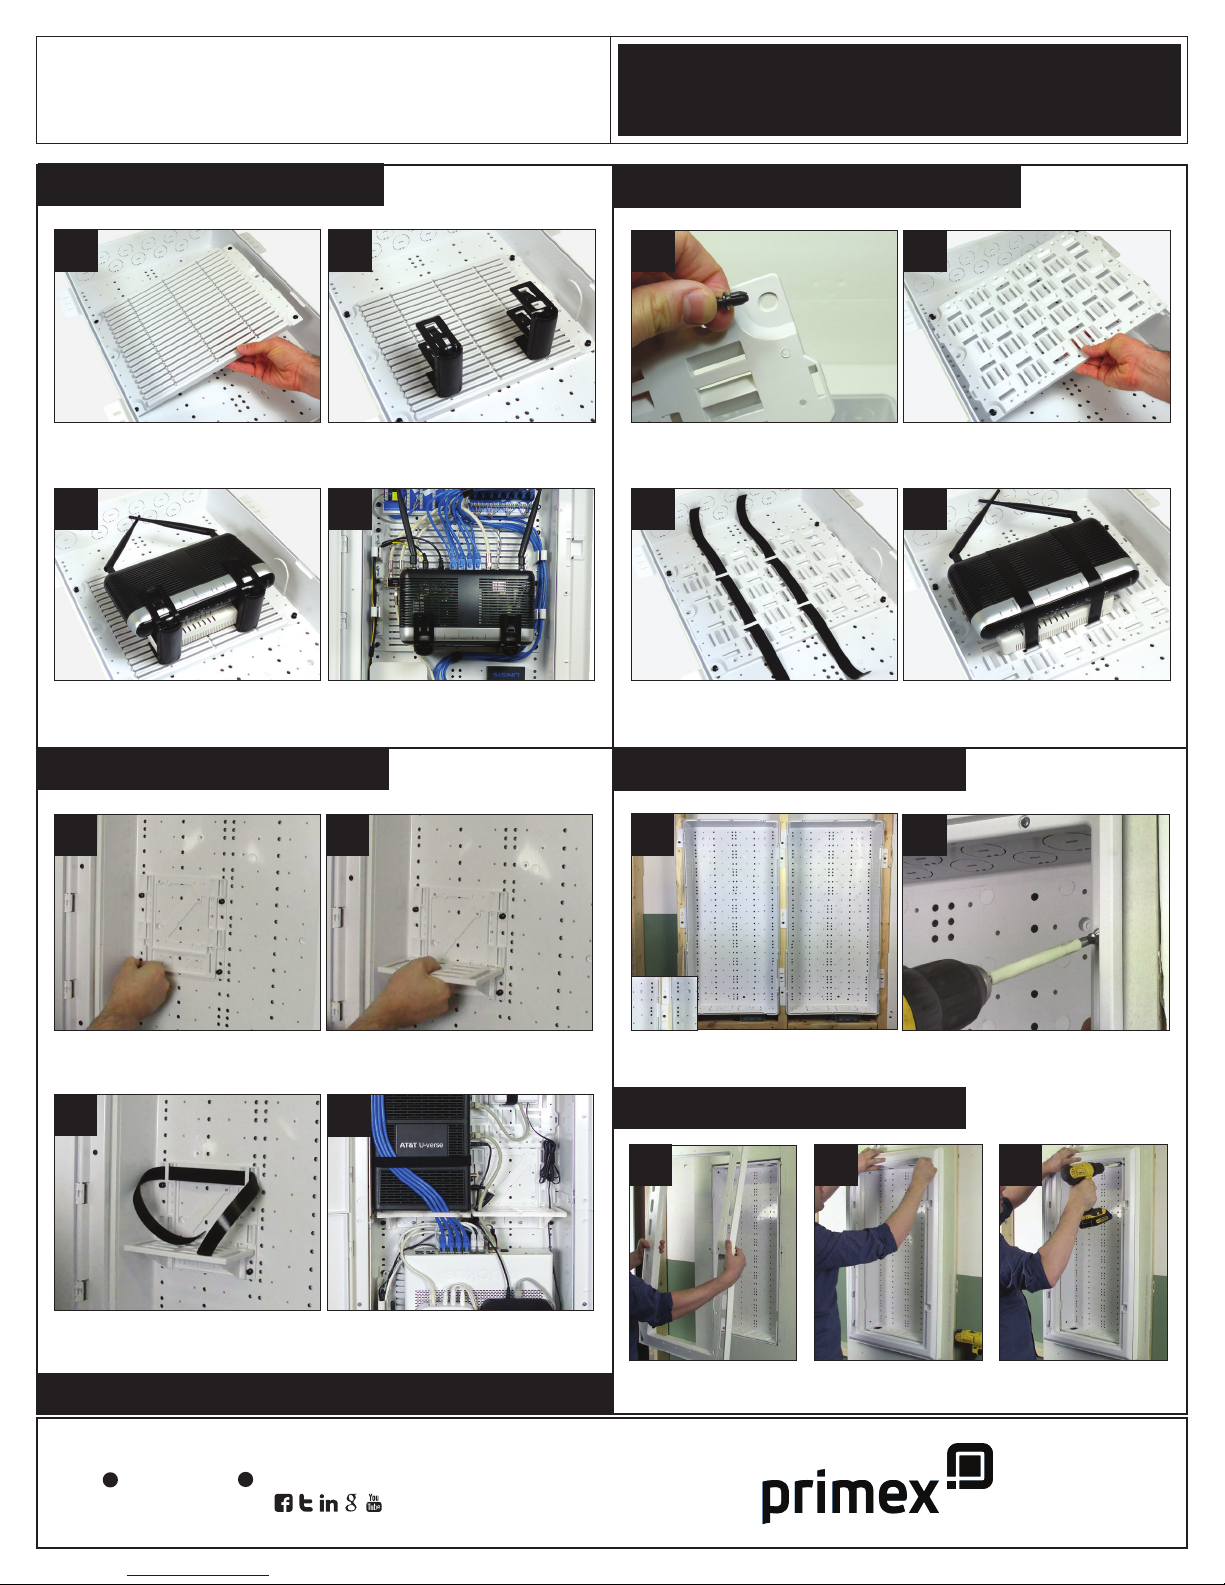
10” UMP w/5’ tape, pushpins (x10)
7” RMP w/RMB2(x2), pushpins (x10)
7” RMP w/RMB(x2), pushpins (x10)
7” RMP w/RMK(x2), pushpins (x10)
10” RMP w/RMB2(x4), pushpins (x10)
10” RMP w/RMB(x4), pushpins (x10)
10” RMP w/RMB2(x2)/RMK(x2), push-
pins(x10)
125-1623
125-1655
125-1656
125-1657
125-1658
125-1659
125-1660
Shelf Mounting System (Single-1/pk)
Shelf Mounting Sytem (Service divider-2/pk)
Shelf Mounting System (bulk-18/pk)
125-1541
125-1542
125-1522
8-Port Cat5e Data Module
8-Port Cat6 Data Module
125-0986
125-1035
8-Port Voice RJ31x Module
6-Port Cat6a Data Module
125-0987
125-0975
8-Port Coax Splitter, 1GHz
8-Port Coax Splitter, 3GHz
125-1046
125-1250
Electrical Installation Kit
360° Electrical Rotating Outlet
125-1355
125-1547
3/4”-1/2” Reducer
1”-3/4” Reducer
125-1022
125-0936
Hinged Fiber Spool 3” ABS - Short Legs
Fiber Spool 3” ABS - Short Legs
Hinged Fiber Spool 3” ABS - Long Legs
Fiber Spool 3” ABS - Long Legs
125-0932
125-0933
125-0931
125-0934
White ABS Hurricane Clip (12/pk) 125-0239
White ABS 24” Stud Bracket 125-1272
Frame Extender, P2100 (20/box)
Frame Extender, P3000 (12/box)
Frame Extender, P4200 (12/box)
125-1532
125-1533
125-1534
Fiber Splice Tray, 12 Fiber
Fiber Splice Tray, 24 Fiber
Universal Splice Tray
(fusion/mechanical/ribbon)
Quick Release Splice Mount
125-1520
125-1521
125-1620
125-1668
PRIMEX
MDE Accessories
PRODUCT
MODEL CODE
Product Description Stock Code
FTC-White ABS w/Screw Cap
FTC-White ABS w/Single SC/APC Adapter
FTC-White, w/ext. Adapter Mount
125-0945
125-0873
125-0849
FTO-w/2 SC/APC Adapter
FTO-w/1 SC/APC Adapter
FTO-w/Integrated Splice Tray
125-0885
125-0889
125-0879
F-Connector 3GHz Keystone 125-0961
SC/APC Fiber Keystone w/Shutter 125-0908
Cat5e, 110 IDC, 90° HD
Cat5e, 110 IDC, 180° HD
125-0949-WT
125-0948-WT
Cat6, 110 IDC, 90° HD
Cat6, 110 IDC, 180° HD
125-0947-WT
125-0946-WT
3-Line RJ12 Voice Jack 125-0959-WT
Blank keystone 125-0960-WT
Surface Mount Box, 1-Port
Surface Mount Box, 2-Port
125-0962-WT
125-0963-WT
Customer Premise Outlet (CPO4), 4-Port 125-0911
Single-Gang Wall Plate, 1-Port
Single-Gang Wall Plate, 2-Port
Single-Gang Wall Plate, 3-Port
Single-Gang Wall Plate, 4-Port
125-0957-WT
125-0958-WT
125-0955-WT
125-0956-WT
Decorative Wall Jack, 1-Port
Decorative Wall Jack, 2-Port
Decorative Wall Jack, 3-Port
Decorative Wall Jack, 4-Port
Decorative Wall Plate
125-0951-WT
125-0952-WT
125-0953-WT
125-0954-WT
125-0950-WT
Oversize Wall Plate, 1-Port, Glossy
Oversize Wall Plate, 2-Port, Glossy
Oversize Wall Plate, 3-Port, Glossy
Oversize Wall Plate, 4-Port, Glossy
Oversize Wall Plate, 6-Port, Glossy
125-1241-WT
125-1236-WT
125-1242-WT
125-1243-WT
125-1244-WT
Oversize Wall Plate, 2-Port, W/Cat6 & Coax,
Glossy
Oversize Wall Plate, 2-Port, W/Cat6 & Coax,
Textured
125-1288-WT
125-1237-WT
Verge MDE
P2100, P3000, P4200, P6300
452-3113


 user manual")


