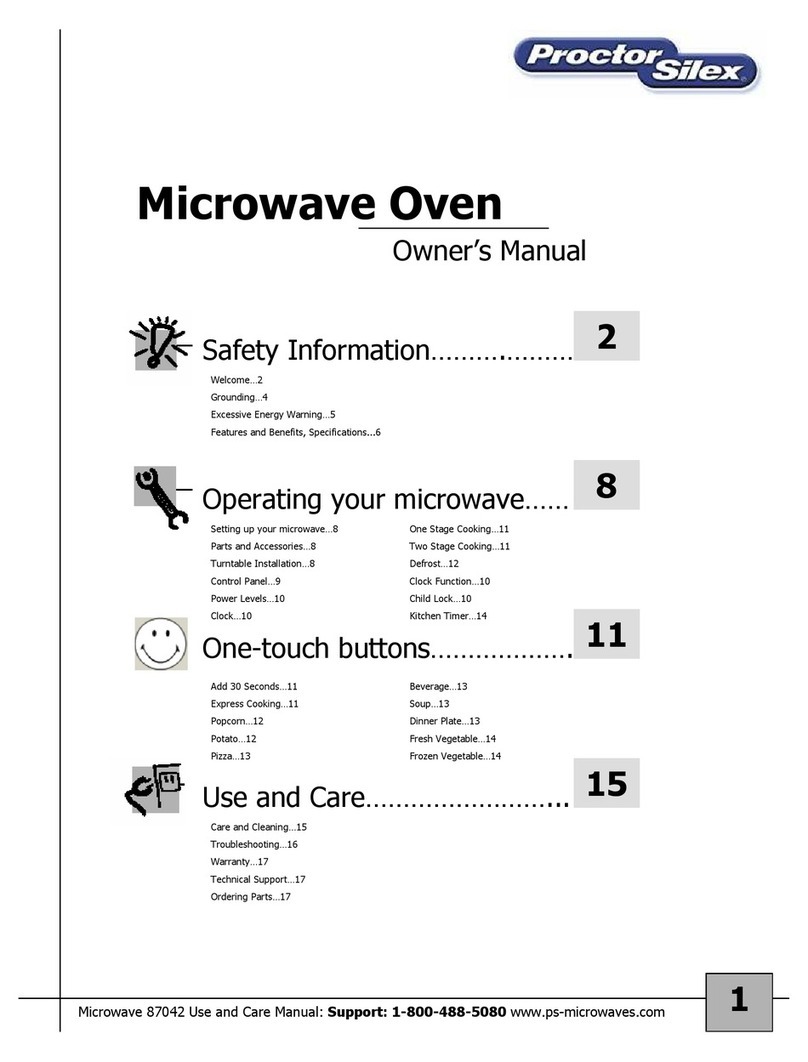
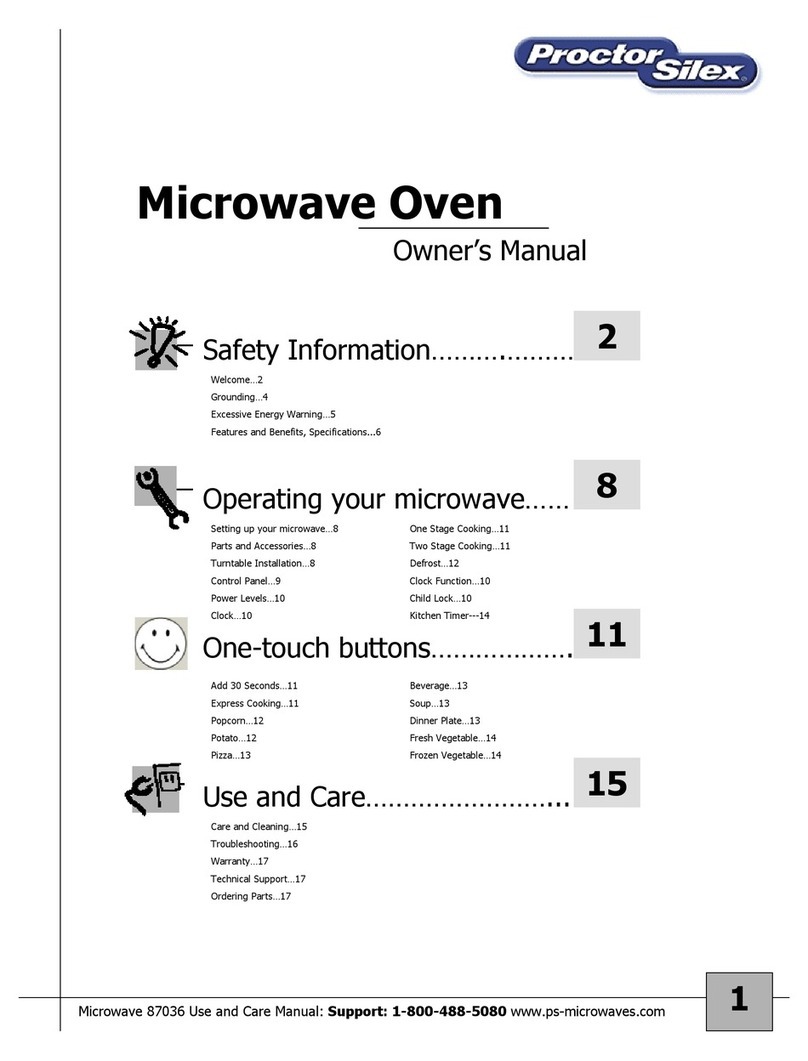
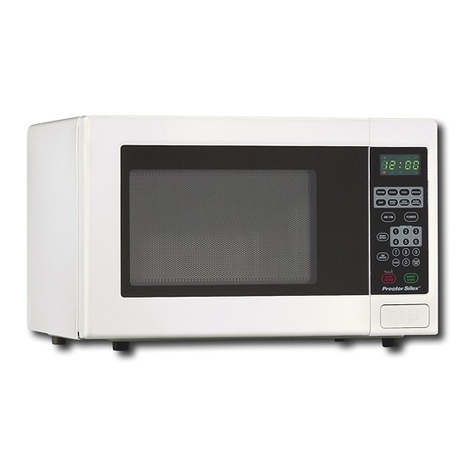
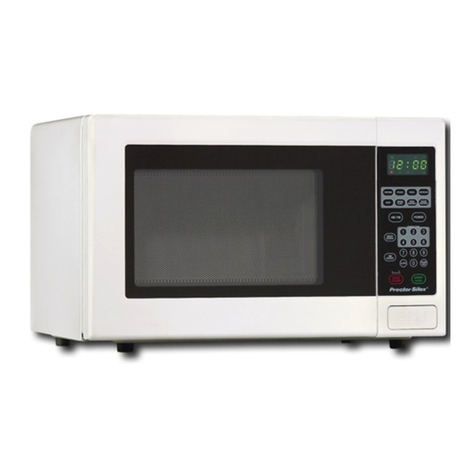
Proctor-Silex 87416 User manual

840187602 1/10 1
aintenance and Care..................
icrowave Oven
Owner’s anual
Safety Information ...................... 2
Operating Your icrowave Oven.............
One-Touch Buttons......................
Welcome ....................................2
Grounding....................................4
Excessive Energy Warning . . . . . . . . . . . . . . . . . . . . . . . . 5
Features and Benefits, Specifications . . . . . . . . . . . . . . . . . 6
Setting Up Your icrowave Oven . . . . . . . . . . . . . . . . . . . 8
PartsandAccessories ...........................8
TurntableInstallation............................8
ControlPanel..................................9
Operation ...................................10
Popcorn ....................................14
BakedPotato.................................14
Pizza.......................................14
Beverage....................................14
FrozenDinner ................................15
Reheat .....................................15
CareandCleaning .............................15
Troubleshooting...............................16
Warranty....................................17
TechnicalSupport .............................17
8
14
15

2
Congratulations, you have acquired a high-quality Proctor Silex™ icrowave Oven.
This unit is packed with many extra features that you will find convenient to use.
Six different one-touch cooking buttons provide for convenient meal preparation and tasty
snacks. It will provide you with many years of trouble-free use if you follow the safety
precautions and operating instructions provided in this easy-to-use manual. Please take
the time to read it, and save these instructions for future use. Please also remember to
record the model, series code and serial number. They are on a label on back of the unit.
Save your receipt by stapling it to this manual for convenient access.
odel number: 87416
Series code____________________ Date of purchase__________________
Serial number_____________________
When using electrical appliances, basic safety precautions should be followed,
including the following:
To reduce the risk of burns, electric shock, fire, injury to persons,
or exposure to excessive microwave energy:
1) Read all instructions before using the appliance.
2) Read and follow the specific “PRECAUTIONS TO AVOID POSSIBLE EXPOSURE TO
EXCESSIVE ICROWAVE ENERGY” found on page 5.
3) This appliance must be grounded. Connect only to properly grounded outlet.
See “I PORTANT GROUNDING INSTRUCTIONS” found on page 4.
4) Install or locate this appliance only in accordance with the provided installation
instructions.
5) Some products such as whole eggs and sealed containers—for example, closed glass
jars—are able to explode and should not be heated in this oven.
6) Use this appliance only for its intended use as described in the manual. Do not use
corrosive chemicals or vapors in this appliance. This type of oven is specifically designed
to heat, cook, or dry food. It is not designed for industrial or laboratory use.
7) As with any appliance, close supervision is necessary when used by children.
8) Do not operate this appliance if it has a damaged cord or plug, if it is not working
properly, or if it has been damaged or dropped.
9) This appliance should be serviced only by qualified service personnel. Contact service
support 1.800.711.6100 for examination, repair, or adjustment.
Welcome!
IMPORTANT SAFETY INSTRUCTIONS
wWARNING

10. Do not cover or block any openings on this appliance.
11. Do not store this appliance outdoors. Do not use this product near water.
For example, do not use near a kitchen sink, in a wet basement, near a
swimming pool, or similar locations.
12. Do not immerse cord or plug in water.
13. Keep cord away from heated surfaces.
14. Do not let cord hang over edge of table or counter.
15. When cleaning surfaces between the door and the oven that come together upon
closing, use only mild, nonabrasive soaps or detergents applied with a sponge
or soft cloth.
16. To reduce the risk of fire in the oven cavity:
• Do not overcook food. Carefully attend appliance when paper, plastic, or other
combustible materials are placed inside the oven to facilitate cooking.
• Remove wire twist-ties from paper or plastic bags before placing bag in oven.
• If materials inside the oven ignite, keep oven door closed, turn oven off and
disconnect the power cord, or shut off power at the fuse or circuit breaker panel.
• Do not use the cavity for storage purposes. Do not leave paper products, cooking
utensils, or food in the cavity when not in use.
17. Liquids, such as water, coffee, or tea can be overheated beyond the boiling point
without appearing to be boiling. Visible bubbling or boiling when the container is
removed from the microwave oven is not always present. THIS COULD RESULT IN
VERY HOT LIQUIDS SUDDENLY BOILING OVER WHEN THE CONTAINER IS
DISTURBED OR A UTENSIL IS INSERTED INTO THE LIQUID.
18. This appliance is intended for household use only.
3
SAVE THESE INSTRUCTIONS!

4
This appliance must be grounded. In the event of an
electrical short circuit, grounding reduces the risk of
electric shock by providing an escape wire for the
electric current. This appliance is equipped with a
cord having a grounding wire with a grounding plug.
The plug must be plugged into an outlet that is
properly installed and grounded.
Improper use of grounding can
result in a risk of electric shock.
1. Consult a qualified electrician or serviceman if
the grounding instructions are not completely
understood, or if doubt exists as to whether the
appliance is properly grounded.
2. If it is necessary to use an extension cord,
use only a 3-wire extension cord that has a
3-blade grounding plug, and a 3-slot receptacle
that will accept the plug on the appliance. The
marked electrical rating of the extension cord
shall be equal to or greater than the rating of
the appliance.
Important Grounding Instructions
Three-pronged
(grounding) plug
Properly polarized and
grounded outlet
wWARNING

5
Precautions To Avoid Possible
Exposure To Excessive
icrowave Energy
• Do not attempt to operate this microwave
oven with the door open since open-door
operation can result in harmful exposure to
microwave energy. It is important not to break
or tamper with the safety interlocks.
• Do not place any object between the
oven frame and the door. Do not allow
soil or cleaner residue to accumulate on
sealing surfaces.
• Do not operate the oven if it is damaged.
It is very important that the oven door closes
properly and that there is no damage to the:
1. Door (including any dents)
2. Hinges and latches (including broken
or loose parts)
3. Door seals and sealing surfaces
• The oven should not be adjusted or repaired
by anyone except properly qualified service
personnel.

6
Features and Benefits
• 0.7 Cu. Ft. (650 cm2) Oven Cavity
• 10 Power Levels
• Six Quick Cook One-Touch Settings
• Electronic Digital Display with Clock (LED)
• Turntable
• Time Cook
• Time and Weight Defrost
• Remind Signal
• Kitchen Timer
Specifications
odel ............................................. 87416
Power Source.................................. 120V ~ 60Hz
Power Consumption......................... 1050 W
aximum Output............................. 700 W
Oven Capacity................................. 0.7 cu. ft. (650 cm2)
Turntable Diameter.......................... 9.6 inches (24.3 cm)
External Dimensions ........................ 17.8 x 10.3 x 15.6 inches (45.2 x 26.1 x 39.6 cm)
Net Weight...................................... 25.1 lbs. (11.4 kg)
How to Test for a icrowave-Safe Dish
To determine if a dish is microwave safe, place the dish in the microwave oven along with
a glass measuring cup filled with one cup of water. icrowave for one minute on high and
then carefully feel the dish. If it is warm, it is not microwave safe.
Arcing
This is the microwave oven term for sparks in the oven. It can be cause by:
• etal or foil touching the side of the microwave oven.
• Upturned edges of foil not wrapped around the food.
• etals in the microwave oven such as twist ties, meat pins, or metal rimmed dishes.
• Recycled paper towels in the microwave oven that contain small flecks of metal.

7
Browning dish
Dinnerware
Glassware
Oven cooking bags
Paper plates/cups
Paper towels
Parchment paper
Plastic
Plastic wrap
Thermometers
Wax paper
Follow manufacturer’s instructions. The bottom of browning
dish must be at least 3/16 inch (0.5 cm) above the turntable.
Incorrect usage may cause the turntable to break.
icrowave-safe only. Follow manufacturer’s instructions. Do not
use cracked or chipped dishes.
Heat-resistant oven glassware only. ake sure there is no
metallic trim. Do not use cracked or chipped dishes.
Follow manufacturer’s instructions. Do not close with metal tie.
ake slits to allow steam to escape.
Use for short-term cooking/warming only. Do not leave oven
unattended while cooking.
Use to cover food for reheating and absorbing fat. Use with
supervision for short-term cooking only.
Use as a cover to prevent splattering or a wrap for steaming.
icrowave-safe only. Follow the manufacturer’s instructions.
Boiling bags and tightly closed plastic bags should be slit,
pierced or vented as directed by package. Due to various
manufacturers you may receive varying performance results
when using a bacon tray.
icrowave-safe only. Use to cover food during cooking to retain
moisture. Do not allow plastic wrap to touch food.
icrowave-safe only.
Use as a cover to prevent splattering and retain moisture.
aterials for use in microwave oven
To avoid arcing and other hazards, follow these instructions for the use of safe materials in
the microwave oven.
aterials to avoid in microwave oven
• etal pans and bakeware • Recycled paper products • Nonheat-resistant glass
• Food storage bags • Dishes with metallic trim • Brown paper bags
• Nonmicrowave-safe plastics • etal twist ties
(e.g., margarine tubs)

8
Installation:
1. Remove all packing materials
and accessories. Examine the
oven for any damage such as
dents or broken door. Do not
install if oven is damaged.
2. Select a level surface that
provides enough open space
for ventilation. Allow for
3 inches (7.6 cm) of open
space next to the sides and
back of the microwave oven.
Allow for 12 inches (30.4 cm)
of open space above the
microwave oven. Do not place
any items on top of microwave
oven and do not remove the
legs from the bottom of the
microwave oven.
3. Place the microwave oven
as far away as possible from
radios and televisions.
icrowave oven may cause
interference to these
appliances.
4. Plug the microwave oven into
a standard household outlet.
Check the rating label of the
microwave oven to ensure the
voltage and frequency are
compatible with the outlet.
5. Do not install microwave
oven over a range cooktop
or other heat-producing
appliance. Heat can damage
the microwave oven and void
the warranty.
Setting Up Your icrowave oven
6. Door assembly
7. Safety interlock system
Accessories: Glass tray,
Turntable ring assembly,
Instruction manual
Names of Oven Parts and Accessories
Remove the oven and all materials from the carton. Your oven comes with
the following accessories:
1. Control panel
2. Turntable shaft
3. Turntable ring assembly
4. Glass tray
5. Observation window
WARNING! FIRE AND SHOCK HAZARDS:
Do not remove the mica board located
on the right inside of the cooking
compartment. Unplug the microwave
oven immediately and contact service
support at 1.800.711.6100 if the mica
board becomes damaged or is missing.
Turntable Installation
1. Never place the glass upside down.
The glass tray should never be restricted.
2. Both glass tray and turntable ring assembly
must always be used during cooking.
3. All food and containers of food are always
placed on the glass tray for cooking.
4. The glass tray rotates either clockwise or
counter-clockwise; this is normal.
5. If the glass tray or turntable ring assembly
cracks or breaks, or to order a replacement
turntable, contact service support:
1.800.711.6100.
Glass
tray
Turntable
ring
assembly
1
6
75
4
2
3
9
Display
Cooking time, power, indicators, and present time
are displayed.
Quick Cook Buttons
Instant settings to cook popular foods.
Number Pads (0-9)
Touch to set times or weights.
Power
Use to set power level. To check power level during
time cooking, touch Power pad.
Timer
Timer functions independently, even while a cooking
program is in process.
Cook
Use for multi-stage cooking. Enables cooking at
multiple power and time settings automatically.
Cook By Weight
Programmed cooking based on the weight of the
foods to be cooked.
Defrost By Weight
Programmed defrosting based on the weight of the
foods to be defrosted.
Speed Defrost
Quick defrost function that alternates defrost and
stand times to quickly and effectively defrost foods.
Clock
Use to set the time of day or recall the time of day.
Reset
Clears all previous settings.
Start/Stop
Touch to start or stop cooking.
Control Panel Operation
Baked
Potato
Frozen
Dinner
Beverage
Popcorn
Pizza
Power
Cook by
Weight
Timer
Defrost
by Weight
START
STOP
Speed
Defrost
Cook
Reheat
1 2 3
4 5 6
7 8 9
Clock
0
Reset
Control Lock

10
1. Setting the Clock
1) Touch Clock pad.
2) Use the number pads to enter the correct time.
3) Touch Clock pad again.
NOTE:
This is a 12-hour cycle clock. When the oven is first plugged in or when power
resumes after a power interruption, the display will show “ENTER CLOCK TI E.”
If you prefer to not have the clock displayed, touch Reset.
2. Setting the Oven Timer
1) Touch Timer.
2) Enter the amount of time by touching the number pads.
3) Touch Start/Stop.
NOTES:
• The maximum time you can enter is 99 minutes and 99 seconds.
• Time countdown can be seen in display for 3 seconds before clock or cooking time
is returned to display.
• Touch Timer and then touch Reset to cancel Timer during timing process.
3. Setting a Cooking Program
A. One-Stage Cooking
1) Use the number pads to set cooking time. You can set a cooking time from 1 second
to 99 minutes and 99 seconds.
2) If you want to set a power level other than 100% power, touch Power, then use the
number pads to enter the power level. You can set the power level from 1 to 9.
3) Touch Start/Stop to start cooking. Use single digits to set a cooking power level.

11
B. Two-Stage Cooking
Some recipes require different stages of cooking at different temperatures.
1) SET STAGE 1: Follow steps 1 and 2 in “One-Stage Cooking.” DO NOT touch Start/Stop.
2) SET STAGE 2: Touch Cook; then enter proper cooking time and (lower) power level.
( ost 2-stage recipes use lower power for second stage.)
3) Touch Start/Stop.
NOTES:
• After Stage 1 time has elapsed, one signal sounds, signaling the beginning of Stage 2.
• After total time has elapsed, 4 signals sound and “END” appears in display. Touch Reset
or open oven door to clear “END” before starting another cooking function.
4. Speed Defrost
1) Touch Speed Defrost.
2) Enter desired defrosting time by touching correct number pads.
3) Touch Start/Stop.
NOTES:
• After time has elapsed, four signals sound and icon END appears in display. Touch Reset
pad or open the door to clear icon END before starting another cooking function.
• After setting Speed Defrost, oven can be programmed to automatically switch to
one- or two-stage cooking.
• For Speed Defrost and One-Stage Cooking, follow steps above. Before touching
Start/Stop, touch Cook, enter time and power level and then touch Start/Stop.
• For Speed Defrost and Two-Stage Cooking, follow steps above. Before touching
Start/Stop, touch Cook, enter two-stage cooking programs.
Number pad
9
8
7
6
5
4
3
2
1
Cooking Power
90%
80%
70%
60%
50%
40%
30%
20%
10%

12
5. Cook By Weight
1) Touch Cook by Weight.
2) Enter the one digit code by touching the correct number pad.
3) Enter weight.
4) Touch Start/Stop.
Cook By Weight Code Description
NOTES:
• eat must be defrosted and at refrigerated temperature.
• Weight must be in pounds and ounces.
• Ounce weights less than 10 must be preceded by a 0. If label gives weight in pounds only,
change the fraction of a pound to ounces using the following chart.
Converting Fractions of a Pound to Ounces
CODE
1
2
3
TYPE
Beef
utton
Pork
AX WEIGHT
5 lb. 16 oz.
5 lb. 16 oz.
5 lb. 4 oz.
Fractions of a pound
Less than .03
.03 to .09
.10 to .15
.16 to .21
.22 to .27
.28 to .34
.35 to .40
.41 to .46
.47 to .53
.54 to .59
.60 to .65
.66 to .71
.72 to .78
.79 to .84
.85 to .90
.91 to .97
above .97
Ounces
0
1
2
3
4
5
6
7
8
9
10
11
12
13
14
15
1 pound

13
• During cooking, the system will pause automatically and sound to remind users to turn
meat over. Touch Start/Stop to resume cooking.
• After total cooking time, four signals sound and “END” appears in display. Touch Reset
or open oven door to clear “END” before starting another cooking function.
6. Defrost by Weight
1) Touch Defrost by Weight pad.
2) Enter weight.
3) Touch Start/Stop pad.
NOTES:
• Weight must be in pounds and ounces. Ounce weights less than 10 must be preceded
by a 0. If label gives weight in pounds only, change the fraction of a pound to ounces
using the chart given on page 12.
• During defrosting you need to turn food over for uniform defrosting effect; then touch
Start/Stop pad to resume defrosting.
• After total defrosting time, four signals sound and “END” appears in display. Touch
Reset or open oven door to clear “END” before starting another cooking function.
7. Setting Child Lock
The safety lock prevents unsupervised operation by children.
To set: Press and hold Reset for 3 seconds. Lock is indicated on the display.
To cancel: Press and hold Reset for 3 seconds. Lock indication disappears.
8. Quick Cook Settings
The Quick Cook settings allow you to cook or reheat food automatically without entering
power level or time.
For smaller portions, simply touch the applicable pad and Start/Stop.
For larger portions, press the pad twice.
Frozen Dinner, Baked Potato, and Beverage allow you to cook multiple amounts of the
same food. Touch pad once and “ENTER A T” appears in the display. Enter the amount
of servings and touch Start/Stop.

14
9. Popcorn
1) Touch Popcorn.
Popcorn automatically sets the cooking time for a 3.5 oz. bag of microwave popcorn.
2) Touch Start/Stop.
NOTE:
To change the preset Popcorn time: Touch Popcorn twice. “ENTER TI E” appears in
display. Touch number pads to enter minutes and seconds. Touch Start/Stop. This new
cooking time will remain whenever you use the Popcorn setting until you reset it.
10. Baked Potato
For potatoes (4 to 6 oz. per entry):
1) Touch Baked Potato once.
2) Enter number of potatoes by touching number pads 1 to 4.
3) Touch Start/Stop.
For large potatoes (8 to 10 oz. per entry):
1) Touch Baked Potato twice.
2) Enter number of potatoes by touching number pads 1 to 4.
3) Touch Start/Stop.
11. Pizza
Reheating a slice of pizza:
1) Touch Pizza once.
2) Touch Start/Stop.
Heating a whole frozen pizza:
1) Touch Pizza twice.
2) Touch Start/Stop.
12. Beverage
For cups (5 to 7 oz. per cup):
1) Touch Beverage once.
2) Enter number of cups by touching number pads 1 to 4.
3) Touch Start/Stop.
For larger coffee mugs (9 to 11 oz. per mug):
1) Touch Beverage twice.
2) Enter number of mugs by touching number pads 1 to 4.
3) Touch Start/Stop.

15
13. Frozen Dinner
For One or two small (7-9 oz. per dinner) frozen dinners:
1) Touch Frozen Dinner once.
2) For 1 entree, touch the number pad “1.” For 2 entrees, touch the number pad “2.”
3) Touch Start/Stop pad.
For one large (10-12 oz. per dinner) frozen dinner:
1) Touch Frozen Dinner twice.
2) For 1 entree, touch the number pad “1.” For 2 entrees, touch the number pad “2.”
3) Touch Start/Stop pad.
14. Reheat
1) Touch Reheat pad.
2) Touch Start/Stop.
NOTE: This setting lets you reheat a dinner plate of chilled leftovers with good results.
Care and Cleaning
• Keep the inside of the oven clean. Food particles and liquid stains that stick to the oven walls
can hinder the operation of the microwave oven.
• Clean up spilled liquids immediately with a damp towel and mild soap. Avoid abrasive cleaners.
• To loosen food particles and stains, heat up two cups of water with lemon juice at high power
for four minutes, or until boiling. Let stand in the microwave oven for three minutes before cleaning.
• Remove the glass turntable from the microwave oven while cleaning. Do not put the turntable
directly in water immediately after cooking or it may break. Wash the turntable in warm,
soapy water or in the dishwasher.
• The outside of the microwave oven can be cleaned with damp towel and mild soap. Do not let
water seep into any openings or damage may occur to the microwave oven.

16
Problem
1. Dim oven light
2. Steam accumulating on door
or hot air coming out of
vents during cooking
3. Oven is started accidentally
with no food in it
4. Interference with TV
reception
5. icrowave oven will not start
6. Glass turntable makes noise
during operation
7. Popcorn is over-cooked
or under-cooked with
“Popcorn” Easy Button
Possible Causes
1. In low power
cooking, oven light
may become dim
2. Food releases
steam during cooking
3. icrowave oven is
started accidentally
with no food in it
4. icrowave oven oper-
ation may affect radio
and TV reception
5a. Power cord not
plugged in tightly
5b. A fuse is blown or
circuit breaker trips
5c. Problem with
electrical outlet
6. The microwave oven
cavity is dirty
7. Incorrect power level
selected for size of
popcorn bag
What To Do
1. This is normal.
2. This is normal.
3. No damage will occur if the
microwave oven runs for less
than 20 seconds.
4. This is normal.
5a. Unplug, wait 10 seconds, then
plug in again.
5b. Replace fuse or reset
circuit breaker.
5c. Consult a professional
electrician.
6. Clean the microwave oven
and Turntable rest with warm
water and microwave-safe
cleaning products.
7. Refer to page 14 for “Popcorn”
setting instructions. Always
follow manufacturer’s
instructions for popcorn if the
cooking time for the pre-set
setting differs from the
manufacturer’s recommended
time. Never leave popcorn
cooking unattended.
Troubleshooting

17
LIMITED WARRANTY
This warranty appli s to products purchas d in th U.S. and Canada. This is th
only xpr ss warranty for this product and is in li u of any oth r warranty or
condition.
This product is warrant d to b fr from d f cts in mat rial and workmanship for a
p riod of on (1) y ar from th dat of original purchas . During this p riod, your
xclusiv r m dy is r pair or r plac m nt of this product or any compon nt found to
b d f ctiv , at our option; how v r, you ar r sponsibl for all costs associat d
with r turning th product to us and our r turning a product or compon nt und r
this warranty to you. If th product or compon nt is no long r availabl , w will
r plac with a similar on of qual or gr at r valu .
This warranty do s not cov r glass, filt rs, w ar from normal us , us not in
conformity with th print d dir ctions, or damag to th product r sulting from
accid nt, alt ration, abus , or misus . This warranty xt nds only to th original
consum r purchas r or gift r cipi nt. K p th original sal s r c ipt, as proof of
purchas is r quir d to mak a warranty claim. This warranty is void if th product is
us d for oth r than singl -family hous hold us .
W xclud all claims for sp cial, incid ntal, and cons qu ntial damag s caus d by
br ach of xpr ss or impli d warranty. All liability is limit d to th amount of th
purchas pric . Every implied warranty, including any statutory warranty or
condition of merchantability or fitness for a particular purpose, is disclaimed
except to the extent prohibited by law, in which case such warranty or
condition is limited to the duration of this written warranty. This warranty giv s
you sp cific l gal rights. You may hav oth r l gal rights that vary d p nding on
wh r you liv . Som stat s or provinc s do not allow limitations on impli d
warranti s or sp cial, incid ntal, or cons qu ntial damag s, so th for going
limitations may not apply to you.
To mak a warranty claim, do not r turn this applianc to th stor . Pl as call
1.800.851.8900 in th U.S. or 1.800.267.2826 in Canada or visit proctorsil x.com in
th U.S. or proctorsil x.ca in Canada. For fast r s rvic , locat th mod l, typ , and
s ri s numb rs on your applianc .

840187602 1/10 18

840187602 1/10 1
Mantenimiento y Cuidado ............
Horno de Microondas
Manual del Propietario
Información de Seguridad ............ 2
Usando su Horno de Microondas........
Botones de Un-Toque ..................
Bienvenido ...................................2
ConexiónaTierra ..............................4
Advertencia por Corriente Excesiva . . . . . . . . . . . . . . . . . 5
Características y Beneficios, Especificaciones . . . . . . . . . . . 6
Ajustando su Horno de Microondas . . . . . . . . . . . . . . . . . 8
PartesyAccessorios ............................8
Instalación de la Plato Giratorio . . . . . . . . . . . . . . . . . . . . 8
PaneldeControl ...............................9
Operación ...................................10
Palomitas ...................................14
PapaalHorno ................................14
Pizza.......................................14
Bebidas.....................................14
ComidaCongelada ............................15
Recalentar ..................................15
CuidadoyLimpieza ............................15
ResolviendoProblemas .........................16
Garantía ....................................17
SoporteTécnico ..............................17
8
14
15

2
Felicidades, ha adquirido un Horno de Microondas Procter Silex™ de alta calidad. Esta
unidad viene cargada con muchas características extras que encontrará convenientes para
usar. Los seis diferentes botones de un-toque para cocinar proveen una preparación de
alimentos convenientes y sabrosos refrigerios. Le dará muchos años de uso sin problemas
si sigue las precauciones de seguridad e instrucciones de funcionamiento que se proveen en
este manual fácil de usar. Por favor tome su tiempo para leerlo, y guarde estas instrucciones
para un uso futuro. Por favor también recuerde grabar el modelo, código de serie y número
de serie. Están en la etiqueta en la parte posterior de la unidad. Guarde su recibo
grapándolo a este manual para un acceso conveniente.
úmero de Modelo: 87416
Código de serie ____________________ Fecha de compra __________________
úmero de serie __________________
Cuando use aparatos eléctricos, se deben seguir precauciones básicas de seguridad,
incluyendo lo siguiente:
Para reducir el riesgo de quemaduras, descarga eléctrica,
incendio, lesiones personales, o exposición a energía excesiva de microondas:
1) Lea todas las instrucciones antes de usar el aparato.
2) Lea y siga las “PRECAUCIO ES PARA EVITAR U A POSIBLE EXPOSICIÓ A E ERGÍA
EXCESIVA DE MICROO DAS” específicas en la página 5.
3) El aparato debe tener conexión a tierra. Conecte sólo a una toma con conexión a tierra
adecuada. Vea “I STRUCCIO ES IMPORTA TES SOBRE CO EXIÓ A TIERRA” que se
encuentran en la página 4.
4) Instale o ubique este aparato sólo de acuerdo con las instrucciones de instalación provistas.
5) Algunos productos tales como huevos enteros y contenedores sellados—por ejemplo, jarras
de vidrio cerradas—pueden explotar y no deben calentarse en este horno.
6) Use este aparato sólo para el uso para el que fue diseñado como se describe en este
manual. o use químicos o vapores corrosivos en este aparato. Este tipo de horno está
específicamente diseñado para calentar, cocinar o secar alimentos. o está diseñado para
uso industrial o en laboratorios.
7) Al igual que con muchos aparatos, se requiere de una supervisión cercana cuando es usado
por niños.
8) o opere este aparato si tiene un cable o enchufe dañado, si no funciona adecuadamente,
o si ha sido dañado o se haya caído.
¡Bienvenido!
¡¡ INSTRUCCIONES IMPORTANTES
DE SEGURIDAD !!
wAADDVVEERRTTEENNCCIIAA
This manual suits for next models
1
Table of contents
Languages:
Other Proctor-Silex Microwave Oven manuals

Proctor-Silex
Proctor-Silex E8020NP-SI User manual

Proctor-Silex
Proctor-Silex 87008 User manual

Proctor-Silex
Proctor-Silex 87410 User manual

Proctor-Silex
Proctor-Silex 87027 User manual

Proctor-Silex
Proctor-Silex E7017NP-BN User manual

Proctor-Silex
Proctor-Silex Microwave Oven 87025 User manual

Proctor-Silex
Proctor-Silex 87036 User manual