Prodigi RDR3500 User manual
Copyright © 2015 RCA Communications Systems
1RDR3500TM / RDR3600TM Professional Digital Two-Way Radio Instruction Manual
Congratulations on selecting the PRODIGI® RDR3500TM or RDR3600TM
from RCA Communications Systems - The most trusted name in radio!
Our newest digital series professional communications products based on DMR technology
establishes a benchmark in premium digital two-way radio equipment, made to perform
awlessly under the most demanding commercial conditions. Cutting edge design, high-end
professional grade materials and components, simple operation and superior assembly quality:
RCA Communications Systems has it all, including our exclusive no-nonsense, four-year “Warranty
Protection Program,” one of the most comprehensive warranties in the communications industry.
To ensure you achieve maximum performance from your RDR3500TM or RDR3600TM radio, please
be sure to carefully read this manual.
MODELS COVERED IN THIS MANUAL:
• RDR3500TM VHF Two-Way Radio
• RDR3500TM UHF Two-Way Radio
• RDR3600TM VHF Two-Way Radio
• RDR3600TM UHF Two-Way Radio
WARRANTY
PROTECTION PROGRAM
YEAR

RDR3500TM / RDR3600TM Professional Digital Two-Way Radio Instruction Manual
2
Technical Specications...................................4-5
Safety and General Information.......................6
ProductInspection..............................................7
RCA RDR3500TM Overview..................................8
RCA RDR3500TM Overview..................................9
Preparing Radio For Initial Use.........................10
Setting Up the Charger....................................10
Charging the Battery........................................10
Battery Storage...............................................12
Attaching the Battery......................................12
Attaching / Removing Antenna.......................13
Attaching / Removing Belt Clip........................13
Connecting Audio Accessories........................14
Turn Radio On / Off.........................................14
Adjusting the Volume.....................................15
Programmable Buttons....................................15
Assignable Radio Functions.............................16
Assignable Settings or Utility Functions........16-17
Accessing Programmed Functions...................17
Radio Keypad (only RDR3600TM)........................18
Operational Status Indicators..........................19
Display Icons................................................19-20
LED Indicator...............................................20-21
Audio Tones......................................................21
Making and Receiving Calls.............................21
Selecting a Zone.............................................21
Selecting a Channel, Subscriber ID
or Group ID..................................................22
Receiving and Responding to a Group Call........22
Receiving and Responding to a Private Call.......22
Receiving an All Call.......................................23
Making a Radio Call........................................23
Making a Call with Channel Selector Knob......23
Making a Group Call......................................23
Making a Private Call......................................24
Making an All Call..........................................24
Making a Group or Private Call with One Touch
AccessButton....................................................25
EmergencyOperations.....................................25
Initiating and Responding to Emergency
Alarm.............................................................26
Exiting Emergency Mode................................26
Advanced Features...........................................27
CONTENTS:

Copyright © 2015 RCA Communications Systems
3RDR3500TM / RDR3600TM Professional Digital Two-Way Radio Instruction Manual
Radio Check (only RDR3600TM)........................27
Sending a Radio Check...................................27
Remote Monitor (only RDR3600TM)..................28
Initiating Remote Monitor...............................28
Contacts Settings (only RDR3600TM)................28
Making a Group Call from Contacts................29
Making a Private Call from Contacts...............29
Call Log Features..............................................30
Accessing the Call Log....................................30
Storing Alias or ID from Missed Call List..........30
Deleting a Call from the Call List........................30
Call Alert Operation.........................................31
Receiving & Responding to Call Alert..............31
Making Call Alert from Contact List................31
Text Message Features (only RDR3600TM).........32
Navigate to Message......................................32
Writing and Sending a Text Message.................32
Sending a Quick Text Message........................33
Managing Fail-to-Send Text Messages.............34
Resend a Text Message...................................34
Forwarding a Text Message.............................34
CONTENTS continued
Editing a Text Message....................................34
Managing Sent Text Messages........................35
Viewing Sent Text Messages............................35
Deleting All Sent Text Messages from
Sent Items..........................................................36
Receiving a Text Message.................................36
Reading a Text Message...................................37
Managing Received Text Messages.................37
Viewing a Text Message from the Inbox..........37
Replying to a Text Message from Inbox...........38
Deleting a Text Message from Inbox................38
Privacy...................................................................39
Dual Tone Multi Frequency (DTMF)................40
Security.................................................................40
Radio Active.........................................................41
Scan.......................................................................42
Viewing an Entry in the Scan List.....................42
Scan Instructions and Methods........................42
Starting and Stopping Scan...............................43
Responding to a Scan........................................43
Deleting a Nuisance Channel............................44
RDR3500TM / RDR3600TM Professional Digital Two-Way Radio Instruction Manual
4
Restoring a Nuisance Channel..........................44
Utilities.................................................................44
Keypad Locked and Unlocked
(only RDR3600TM)............................................44
Turning Keypad Tones On or
Off (only RDR3600TM)......................................45
Setting the Squelch Level................................45
Setting the Power Level...................................46
Turning Voice Operating Transmission (VOX)
Feature On or Off...........................................46
Controlling the Display
Backlight (only RDR3600TM)................................47
Talkaround........................................................47
Turning Radio Tones / Alerts
On or OFF (only RDR3600TM)..............................48
Turning the LED Indicator
On or OFF (only RDR3600TM)..............................48
Turning the Introduction Screen
On or OFF (only RDR3600TM)..............................49
Accessing General Radio Information.............49
Checking the Radio ID....................................49
Checking the Firmware Version.......................50
Checking the Codeplug Version......................50
Care and Cleaning...........................................50
Troubleshooting..............................................51
Optional Accessories.......................................52
Glossary...........................................................56
Warranty Statement.......................................58
CONTENTS continued
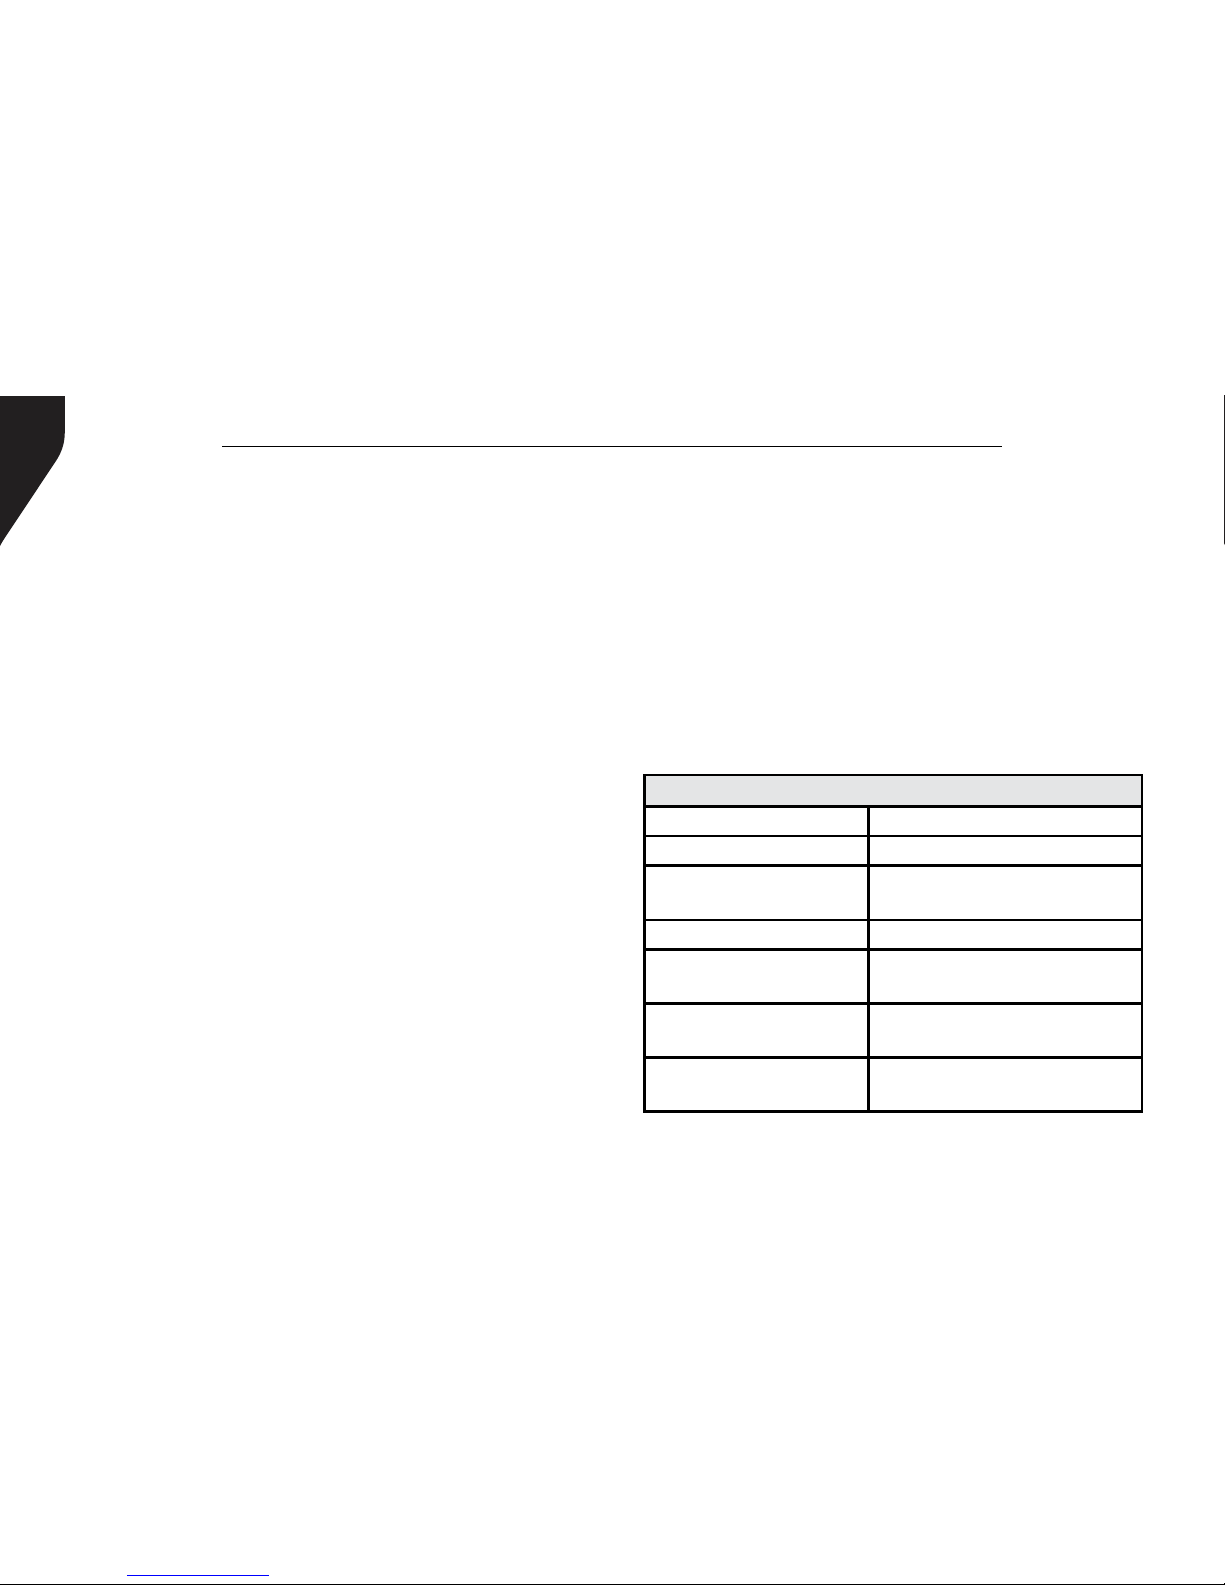
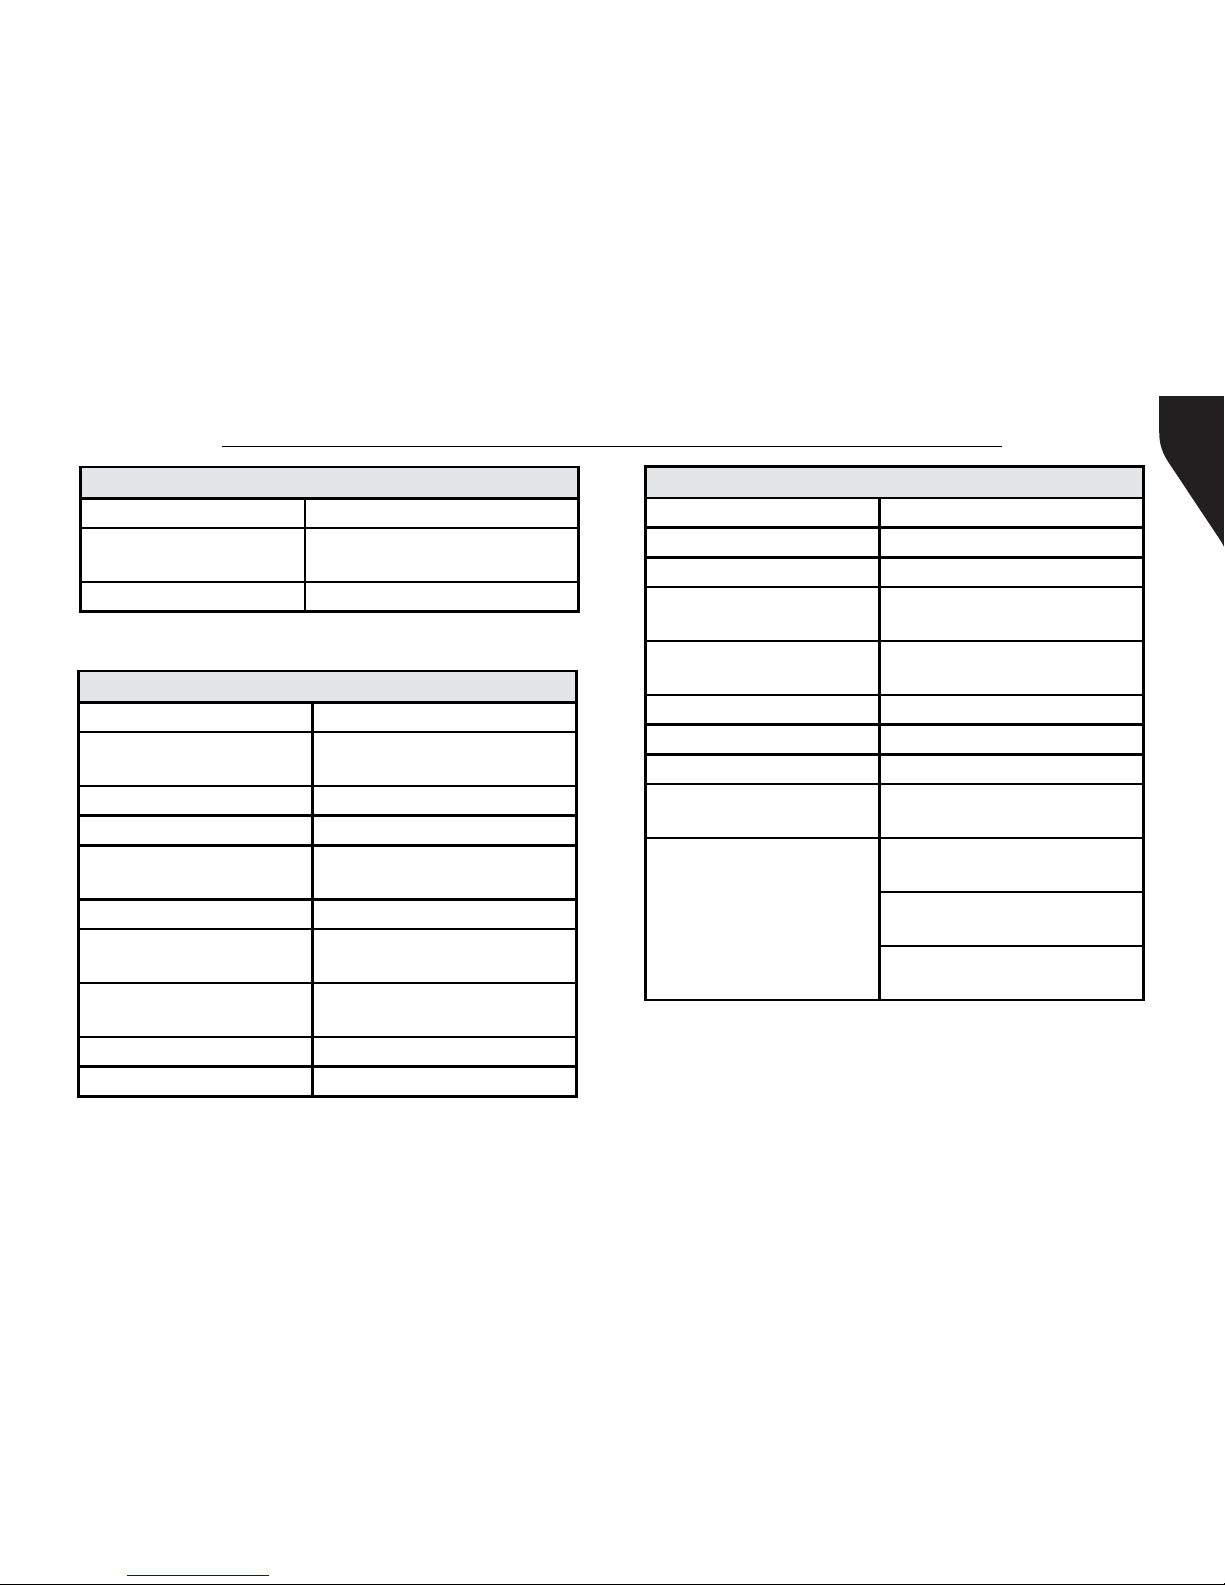
GENERAL
Model RDR3500TM / RDR3600TM
Channel Numbers 32 / 1000
Channel Spacing Digital:12.5KHz
Analog:12.5Khz/25KHz
Working Voltage DC 7.4V
Frequency VHF: 136-174MHz
UHF: 400-470Mhz
Operating Temperature (-20°C)~+50°C /
(-4°F)~+122°F
Storage Temperature (-40°C)~+80°C /
(-40°F)~+176°F
Technical Specications:
Copyright © 2015 RCA Communications Systems
5RDR3500TM / RDR3600TM Professional Digital Two-Way Radio Instruction Manual
GENERAL
Weight 320g / 0.7 lb.
Size:HxWxD (inch) 5.3” X 2.5” X 1.5”
(without antenna)
Waterproof Level IP67
RECEIVE
Frequency Stability 1.5ppm
Digital sensitivity 0.3uV/-117.4dBm(BER 5%)
0.7uV/-110dBm (BER 1%)
Intermodulation 60dB
Working Voltage DC 7.4V
Adjacent Channel
Selectivity [email protected]
Co-channel rejection [email protected]
Spurious response
rejection 70dB
Receive Spurious
radiation
-57dBm@<1GHz,
-47dBm@>1GHz
Block 84dB
Rated Audio Power 1W
TRANSMITTER
Transmit power ≤5W
FM noise [email protected]
Intermodulation 60dB
Transmit Spurious
radiation
-36dBm@<1GHz,
-30dBm@>1GHz
Adjacent Channel
power [email protected]
Idle slot power -57dBm
Modulation Character +1dB---(-3)dB
Digital transmission bit
error rate ≤3%
4FSK Digital Modulation
12.5KHz Data: 7K60F1D &
7K60FXD
12.5khZ Voice: 7K60F1E &
7K60FXE
Combination of 12.5 kHz
Voice and Data: 7K60F1W

RDR3500TM / RDR3600TM Professional Digital Two-Way Radio Instruction Manual
6
SAFETY AND GENERAL INFORMATION
This radio is restricted to occupational use
only to satisfy FCC RF energy exposure
requirements. Before using this product, read
the operating instructions.
»Turn radio off prior to entering any area
with a potentially explosive atmosphere,
such as gas, petroleum, chemicals, blasting
caps, etc.
»Do not charge the battery in a potentially
explosive atmosphere.
»Do not use any portable radio that has a
damaged antenna, as it can burn skin.
»This equipment is to be serviced only by
authorized RCA Communications Systems
technicians. Any service performed by
unauthorized technicians will void the
warranty.
»Turn radio off when near electrical blasting
caps to avoid possible interference with
blasting operations. Obey posted signs
such as those in hospitals or blasting areas
advising people to turn off all two-way
radios. Obey pilots and ight attendants
instructions to turn off radios on airplanes.
»Do not place a radio over an air bag or in
an air bag’s deployment area, as the force
with which an air bag is inated could
propel the radio and may cause serious
injury.
»Do not place the radio close to a heat
source or expose the radio to direct
sunlight for a prolonged time.
»Hold the radio while in use in a vertical
position with the microphone one to two
inches away from your lips.
»While wearing a transmitting radio, keep
the radio and its antenna at least one inch
away from your body.
For a complete list of RCA approved antennas,
batteries, chargers, holsters and audio
accessories, visit:
http://www.rcacommunicationssystems.com
Copyright © 2015 RCA Communications Systems
7RDR3500TM / RDR3600TM Professional Digital Two-Way Radio Instruction Manual
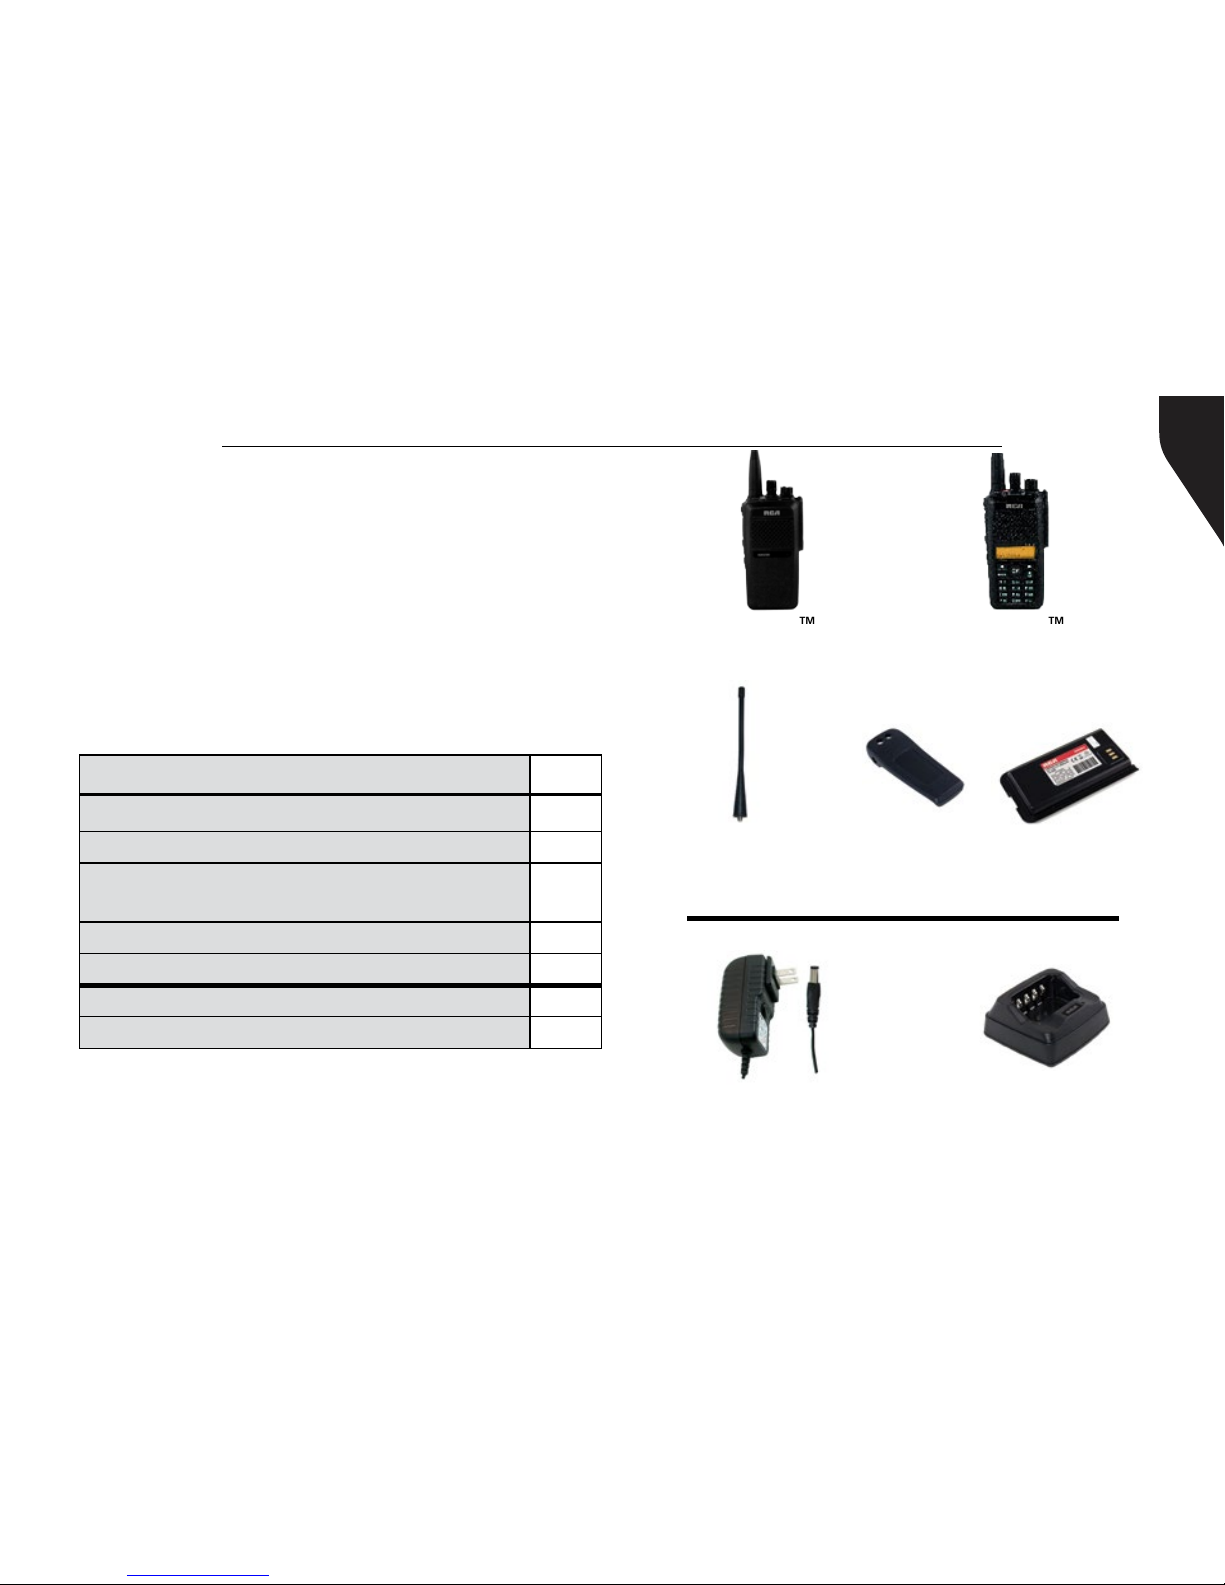
PRODUCT INSPECTION
Prior to unpacking the RDR3500TM or
RDR3600TM portable radio, please inspect the
packaging for signs of damage and report any
damage or missing components immediately
to your RCA Communications Systems Sales
and Service Outlet. Every RDR3500TM or
RDR3600TM portable radio comes with the
following items:
Item Qty.
RDR3500TM or RDR3600TM-Handheld Radio 1
B3518LI - Li-Ion Battery (1800 mAh) 1
AN3500U - Antenna for UHF Models
AN3500V - Antenna for VHF Models 1
BC3500 - Belt Clip 1
Instruction Manual 1
CH3501* - Desktop Rapid Charger 1
PS3501* - Power Supply 1
B3518LI
Li-Ion Battery
(1800 mAh)
CH3501*
Desktop Rapid Charger
PS3501*
Power Supply
BC3500
Belt Clip
Antenna
AN3500U - UHF models
AN3500V - VHF models
*Items sent in separate box if ordered.
RDR3500TM
Handheld Radio
RDR3600TM
Handheld Radio

RDR3500TM / RDR3600TM Professional Digital Two-Way Radio Instruction Manual
8
Note: The frequency band of your RDR3500TM or
RDR3600TM is marked on the radio label. If it is not visible,
identify the frequency band according to the color circle on
the antenna: white indicates UHF and red indicates VHF.
RCA RDR3500TM Overview
10
6
7
8
2
15 1
5
3
4
11
13
14 12
9
Push-to-Talk (PTT) Button
Side Button 1*
Side Button 2*
Side Button 3*
Microphone
On/Off/Volume Knob
Channel Knob
Top Button*
Antenna
LED Indicator
Accessories Connector
Battery Latch
Belt Clip
Battery
Speaker
1
2
3
4
5
6
7
8
9
10
11
12
13
14
15
RDR3500
* These buttons are programmable by your
RCA Communications Systems Dealer only
upon request at the time of purchase.

Copyright © 2015 RCA Communications Systems
9RDR3500TM / RDR3600TM Professional Digital Two-Way Radio Instruction Manual
RDR3600
10
6
7
8
2
15 1
53
4
17
16
11
13
14 12
9
Push-to-Talk (PTT) Button
Side Button 1*
Side Button 2*
Side Button 3*
Microphone
On/Off/Volume Knob
Channel Knob
Top Button*
Antenna
LED Indicator
Accessories Connector
Battery Latch
Belt Clip
Battery
Speaker
Keypad (Only RDR3600TM)
Display (Only RDR3600TM)
RCA RDR3600TM Overview 1
2
3
4
5
6
7
8
9
10
11
12
13
14
15
16
17
* These buttons are programmable by your
RCA Communications Systems Dealer only
upon request at the time of purchase.
RDR3500TM / RDR3600TM Professional Digital Two-Way Radio Instruction Manual
10
Battery Information
Charging the Battery
Your radio is powered by a Lithium-Ion (Li-
lon) battery. To avoid damage and comply
with warranty terms, charge the battery
using only an original RCA charger, exactly
as described in the charger user guide.
When the charger’s LED illuminates red,
it is an indication that the battery is being
correctly charged. When the LED illuminates
green, the battery charge is complete.
Note: Charge a new battery 12 to 14 hours
before initial use for best performance.
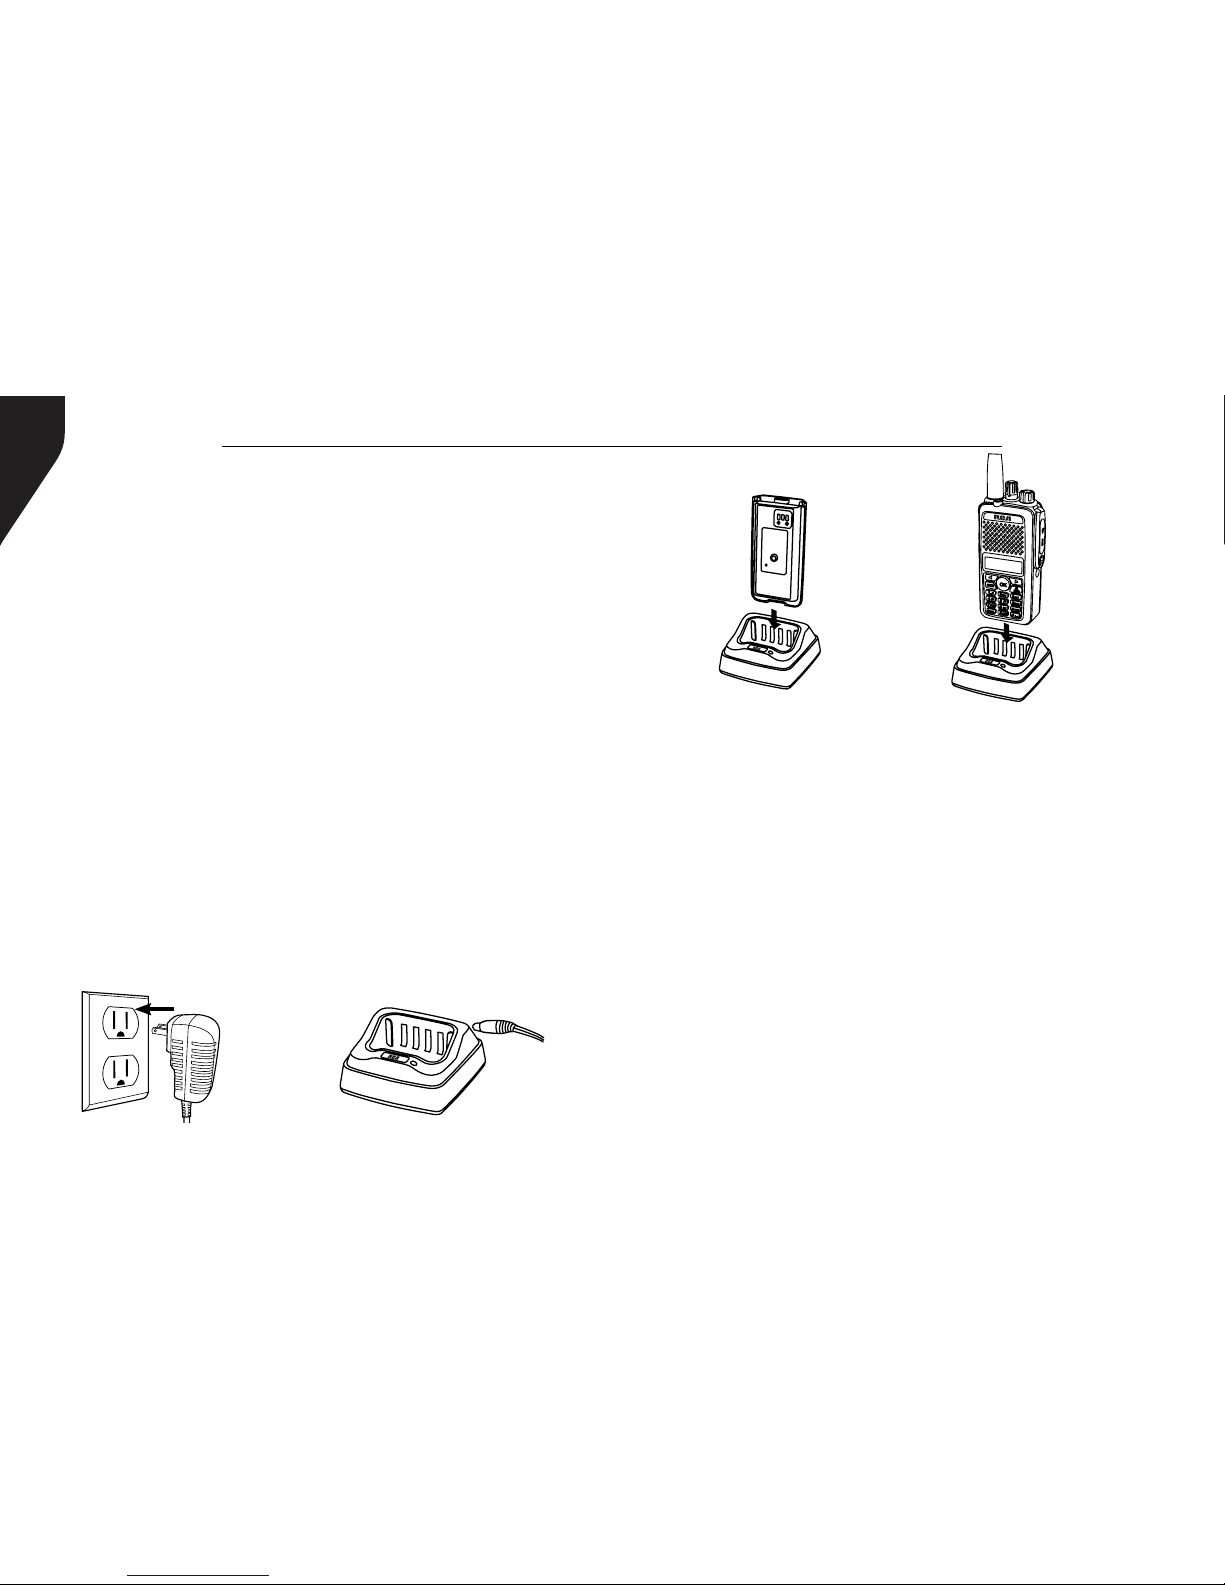
Preparing Your Radio for Initial Use
Setting Up Your Charger
1. Plug the adapter’s AC connector into the
AC outlet socket. (see image A)
2. Plug the adapter’s DC connector into the
DC socket on the back of the charger. (see
image B)
3. Place the radio with the battery attached,
or the battery alone, in the charger. (see
image C)
4. Make sure the battery contact is touching
the charging terminals. The charging
process begins when the red LED light
illuminates.
5. The green LED light will illuminate
approximately two hours later, indicating
the battery is fully charged.
RDR3600
Image A Image B
Image C

Copyright © 2015 RCA Communications Systems
11RDR3500TM / RDR3600TM Professional Digital Two-Way Radio Instruction Manual
Maximum battery capacity is normally achieved
after two or three full charge / discharge cycles.
Caution:
To reduce the risk of injury, use only batteries
specied by RCA Communications Systems.
- To avoid risk of personal injury, do not
dispose of batteries in a re.
- Dispose of batteries according to local
recycling regulations. Do not dispose as
household waste.
- Never attempt to disassemble the battery.
- When charging a battery, keep it at a
temperature between 41°F ~ 104°F (5°C ~
40°C) to ensure a full charge. Temperatures
outside this range signicantly reduce
battery life. The operating time (talk-time
and standby time) is noticeably shorter than
normal, replace the battery.
- Before charging a battery attached to a
radio, turn the radio off to ensure a full
charge. Never leave a radio on while in the
charger, as it can damage both the battery
and the radio; the charger is not a radio
stand.
- Do not cut off the power supply or remove
battery while charging.
- Never charge a battery that is wet. Dry it
with soft cloth prior charging.
- The battery will eventually weaken. When
the operating time (talk-time and standby
time) becomes noticeably shorter than
normal, replace the battery.
- Battery performance greatly decreases at
temperatures below -4°F (-20°C). Having
a spare battery is always necessary in
extremely cold environments. A cold
battery may work again when it returns to
room temperature, so keep it for later use.
- Dust on the battery contact may cause the
battery not to work or charge properly. Use
a clean dry cloth to wipe it before attaching
the battery to the radio.

RDR3500TM / RDR3600TM Professional Digital Two-Way Radio Instruction Manual
12
- Batteries with damaged contacts can be
extremely dangerous. Any battery with
damage to one or more contacts should be
replaced immediately and not used under
any circumstances.
Battery Storage
1. Fully charge a battery before storing it for
an extended period of time to avoid battery
damage due to over-discharge.
2. Recharge a battery after three months
storage to avoid reduced battery capacity
due to over-discharge.
3. When storing a battery, keep it in a dry
place at room temperature.
Attaching the Battery
1. Place the battery on the back of the radio.
(See Figure 1)
2. Press the battery down (See Figure 2) until
the battery clicks into place.
3. Push the battery latch upward until it snaps
into place. (See Figure 3)
Note: If the battery is not securely locked,
remove it and reattach it.
Figure 1
Figure 2
Figure 3
Copyright © 2015 RCA Communications Systems
13RDR3500TM / RDR3600TM Professional Digital Two-Way Radio Instruction Manual
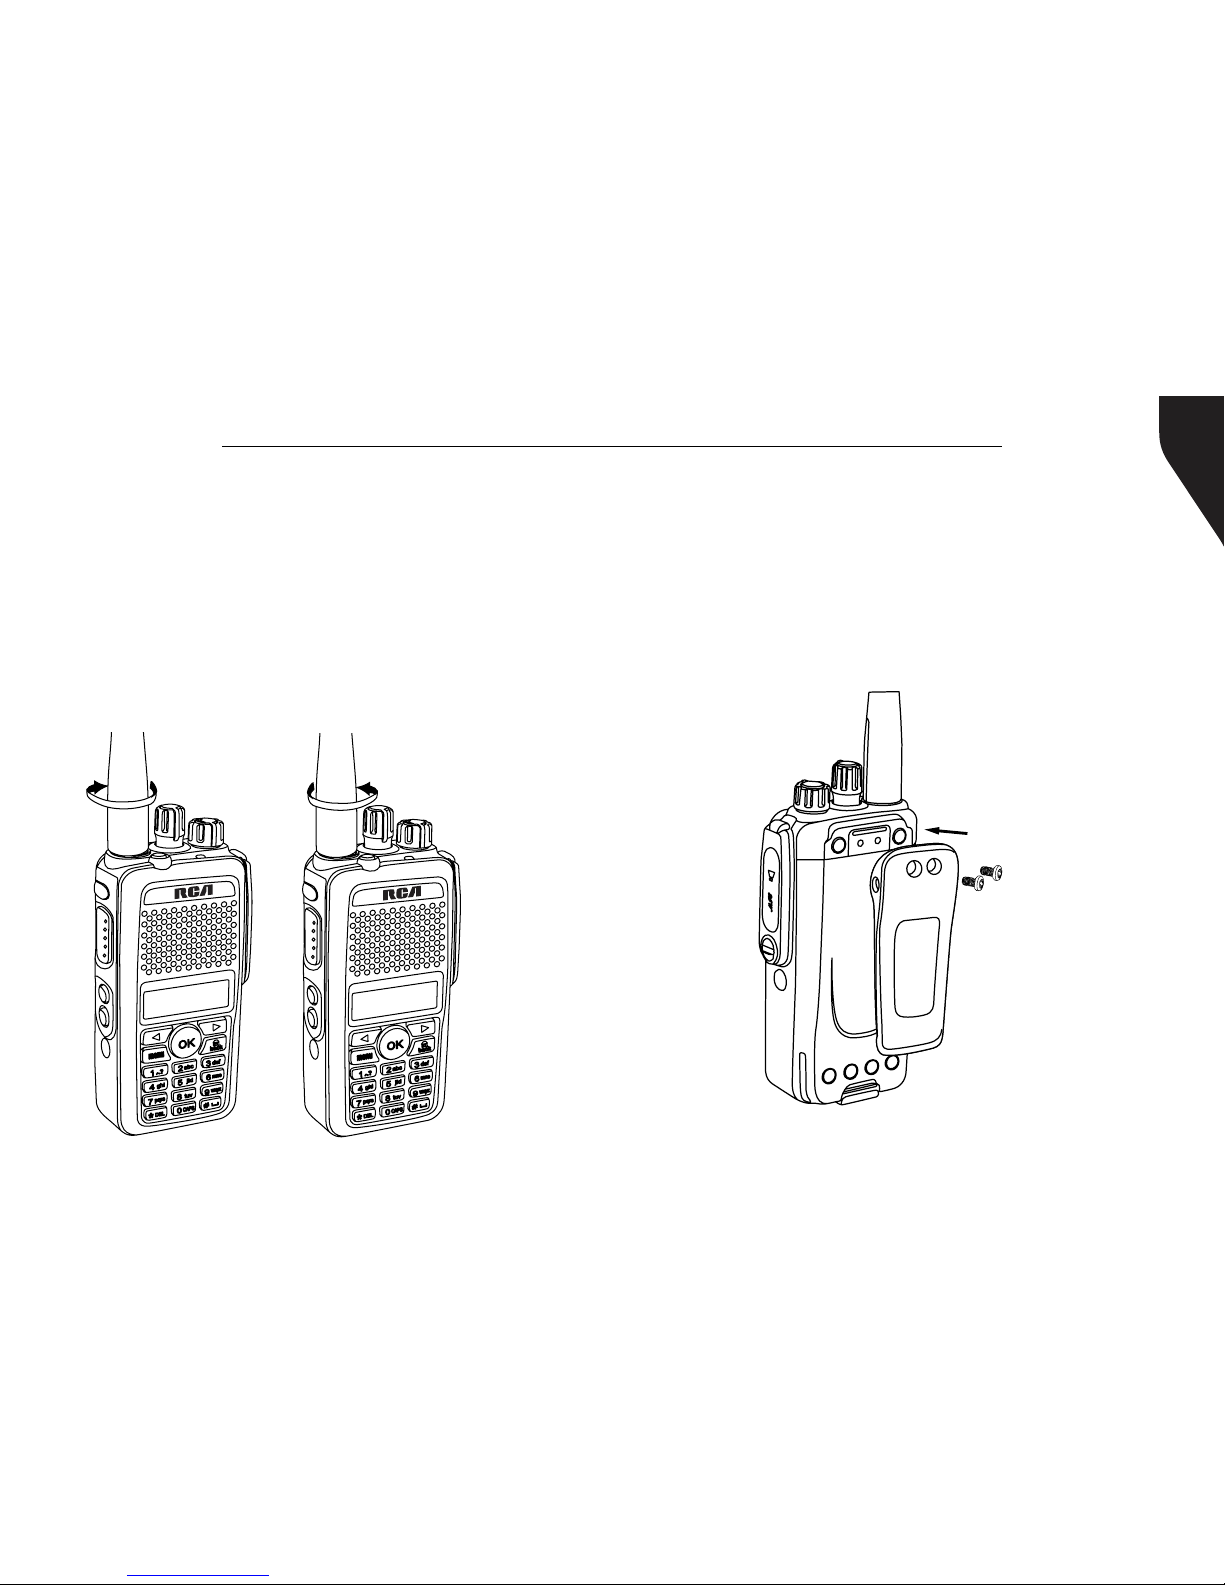
Attaching / Removing the Antenna
1. With the radio turned off, set the antenna
in its receptacle and turn clockwise until it
is screwed down. (See Figure 4)
2. To remove the antenna, turn the radio off
and turn the antenna counterclockwise.
(See Figure 5)
Note: Same procedure for RDR3500TM
Figure 4 Figure 5
R
D
R
36
00
R
D
R
36
00
Attaching / Removing the Belt Clip
Using a small screwdriver, align the belt clip’s
screw holes to the radio’s chassis. Attach by
turning the screws clockwise into the belt clip’s
screw holes. Remove by doing the reverse.
(See Figure 6)
Figure 6
* If antenna needs to be
replaced, ensure that only
RCA Communications Systems
antennas are used. Damaged
Antennas may reduce your
radio coverage.
RDR3500TM / RDR3600TM Professional Digital Two-Way Radio Instruction Manual
14
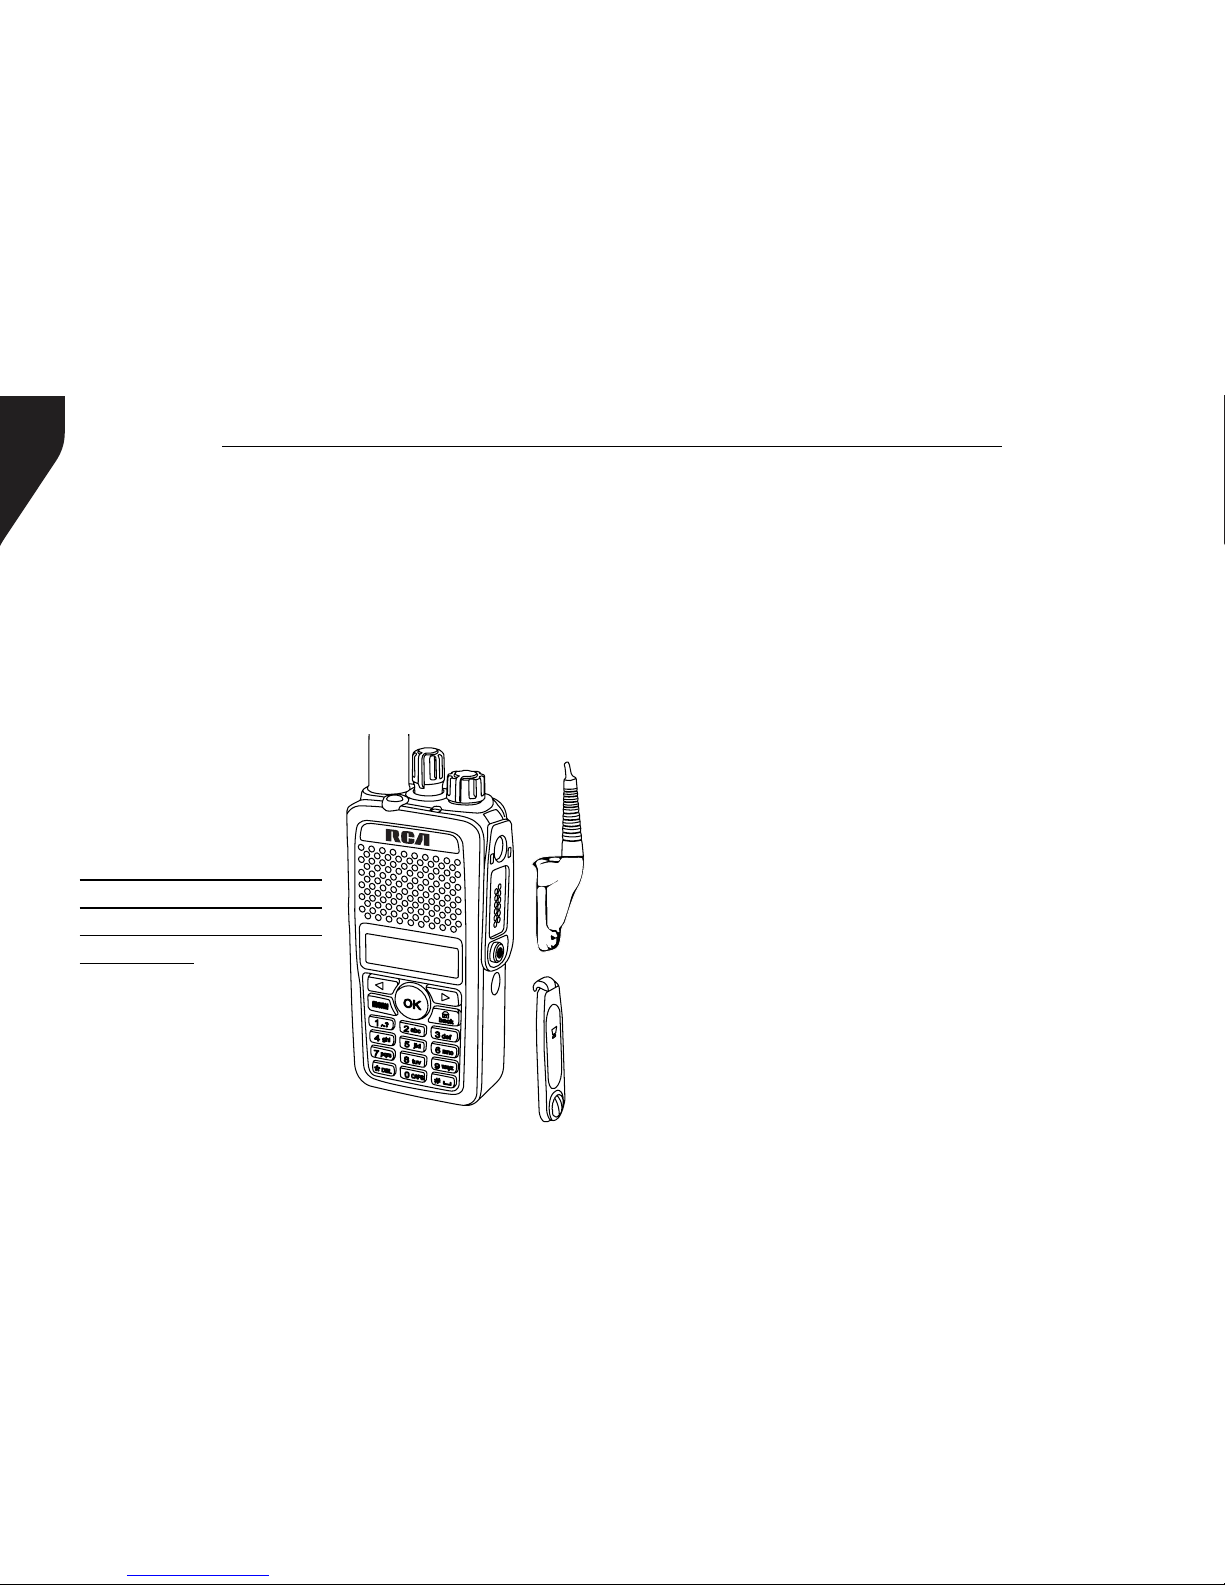
Connecting Audio Accessories
The accessory connector is located on the side
of the radio. It is used to connect RCA audio
accessories to the radio. Remove the accessory
cover by unscrewing the screw location at
the bottom of the cover. Connect the desired
audio accessory rmly into the accessory jack
and secure the screw by turning it clockwise.
(See Figure 7)
Figure 7
RDR3600
Note: Please loosen the
screw prior to removing
the audio accessory.
The use of the audio
accessory may affect the
waterproof performance
of the radio.
Turn On/Off the Radio
1. Rotate the On/Off/Volume Control Knob
clockwise until you hear a click. (See Figure
8) The LED blinks green and a brief tone
sounds, indicating that the power up test
is successful. The RDR3600TM radio displays
RCA PRODIGI followed by RCA RDR3600TM.
2. To turn off the radio, rotate this knob
counterclockwise until you hear a click.
Note: There is no power up tone if the radio
tones/alerts function is disabled. If your radio
does not power up, check your battery. Make
sure that it is charged and properly attached.
If your radio still does not power up, contact
your RCA Communications Systems dealer.

Copyright © 2015 RCA Communications Systems
15RDR3500TM / RDR3600TM Professional Digital Two-Way Radio Instruction Manual
R
D
R
3600
Adjusting the Volume
To increase the volume, turn the On/Off/
Volume Control Knob clockwise. To decrease
the volume, turn this knob counterclockwise.
(See Figure 8)
Note: Same procedure for RDR3500TM
Figure 8
Programmable Buttons
Your RCA Communications Systems
Dealer can program the programmable
buttons as shortcuts to radio functions
or preset channels/groups depending
on the duration of a button press:
- Short Press - Press and release quickly.
- Long press - Press and hold for the
programmed duration (between 1 seconds
and 3.75 seconds).
The Programmable Functions are:
All Alert Tones On/Off One Touch Access 5
Emergency On One Touch Access 6
Emergency Off Repeater/Talkaround
Nuisance Delete Scan On/Off
High/Low Transmit Power Tight/Normal Squelch
Monitor On/Off Privacy On/Off
One Touch Access 1 VOX On/Off
One Touch Access 2 Lone Worker On/Off
One Touch Access 3 Zone Toggle (Only RDR3500TM)
One Touch Access 4 Battery Indicator (Only RDR3500TM)

RDR3500TM / RDR3600TM Professional Digital Two-Way Radio Instruction Manual
16
All Alert Tones On/Off - Toggles all tones
and alerts on or off.
Emergency On - Initiates an emergency alarm
or call.
Emergency Off - Cancels an emergency
alarm or call.
Nuisance Delete - Temporarily removes an
unwanted channel, except for the Selected
Channel, from the scan list. The Selected
Channel refers to the user’s selected zone/
channel combination from which scan is
initiated.
High/Low Transmit Power - Toggles transmit
power level between high and low.
Monitor On/Off - Monitors a selected
channel for activity.
One Touch Access - Directly initiates a
predened Private or Group Call, a Call Alert
or a Quick Text message.
Scan On/Off - Toggles scan on or off.
Tight/Normal Squelch - Toggles squelch level
between tight and normal squelch levels.
Privacy On/Off - Toggles privacy (basic voice
encryption) on or off.
VOX On/Off - Toggles Voice Activated
Function on or off.
Lone Worker On/Off - Toggles Lone Worker
feature On or Off, on per channel basis.
Zone Toggle (Only RDR3500TM) - Toggles
between Channel Zone 1 and Channel Zone
2.
Battery Indicator (Only RDR3500TM) -
Indicates battery charge level, low, medium
or high.
Push-To-Talk (PTT) Button
The PTT button on the side of the radio has
two main functions:
- Press and hold down PTT button to initiate
and call and talk. Release the PTT button
to listen. The microphone is activated when
the PTT button is pressed.
- If a call is in progress, the PTT button allows

Copyright © 2015 RCA Communications Systems
17RDR3500TM / RDR3600TM Professional Digital Two-Way Radio Instruction Manual
the radio to transmit to the other radios
that are part of the call.
Note: If the Talk Permit Tone is enabled, wait
until the short alert tone ends before talking.
During a call, if the Channel Free Indication
feature is enabled on your radio (programmed
by your RCA Communications Systems Dealer),
you will hear a short alert tone the moment
the target radio (the radio that is receiving
your call) releases the PTT button, indicating
the channel is free for you to respond. You will
also hear the Channel Free Indication tone if
your call is interrupted, for example when the
radio receives an Emergency Call.
Switching Between Analog and Digital
Mode
Each channel in your radio can be programmed
as an analog channel or a digital channel. Use
the Channel Selector Knob to switch between
an analog or a digital channel.
Note: When switching from digital to analog
mode, certain features of the radio become
unavailable.
Accessing the Programmed Functions
You can access various radio functions through
one of the following ways:
A short or long press of the relevant
programmable buttons.
OR
- To access the menu, press the [ ] button.
Press the appropriate Menu Scroll button
[or ] to access the menu functions.
- To select a function or enter a sub-menu, press
the button.
- To go back one menu level, or to return to the
previous screen, press the [ ] button. Long
press the [ ] button to return to the Home
screen.
Note: Your radio automatically exits the menu after a
period of inactivity and returns to your Home screen.

RDR3500TM / RDR3600TM Professional Digital Two-Way Radio Instruction Manual
18
Radio Keypad (Only RDR3600TM)
You can use the alphanumeric keypad
to access the radio features. You can
also use the keypad to enter subscriber
numbers or IDs, and text messages.
Note: Some characters require that you press
a key multiple times. The table shows the
number of times a key needs to be pressed to
generate the required character.
Key1234567891011 12 13
1,.? 1 . , ? ! @ & ‘ % - : * #
2abc A B C 2
3def D E F 3
4ghi G H I 4
5jkl J K L 5
6mno M N O 6
7pqrs P Q R S 7
8tuv T U V 8
9wxyz W X Y Z 9
0CAPS
0 NOTE: Press to enter “0” and long press to
activate the CAPS lock. Another long press to
turn off the CAPS lock.
*DEL * or Del NOTE: Press during text entry to delete
a character.
#
˽
# or Space NOTE: Press during text entry to
insert a space.
Number of Times Key is Pressed

Copyright © 2015 RCA Communications Systems
19RDR3500TM / RDR3600TM Professional Digital Two-Way Radio Instruction Manual
Operational Status Indicators
Your radio indicates its operational status
through the following:
• Display Icons (RDR3600TM)
• Call Icons (RDR3600TM)
• Sent Item Icons (RDR3600TM)
• LED Indicator (RDR3500TM and RDR3600TM)
• Audio Tones (RDR3500TM and RDR3600TM)
Display Icons
The LCD display shows radio status, text
entries, and menu entries. The following are
icons that appear on the radio’s display.
Received Signal Strength Indicator
(RSSI) - The number of bars displayed
represents the radio signal strength and
is only displayed while the radio is in
receiving mode.
Monitor - Selected channel is being
monitored.
Power Level - Radio is set at Low
power. Radio is set at High power.
or
Tones Disable - Tones are turned off.
Scan - Scan feature is enabled.
Priority Scan - Radio detects activity
on channel/group designated as Priority
1 (if • is blinking) or Priority 2 (if • is
steady)
Unread Message - The radio has
unread message(s) in the Inbox.
Inbox Full - The radio’s Inbox is full.
Emergency - Radio is in Emergency
mode.
Privacy - The Privacy feature is enabled.
RDR3500TM / RDR3600TM Professional Digital Two-Way Radio Instruction Manual
20
Talkaround - The radio is currently
congured for direct radio to radio
communication.
Battery - The number of bars (0 – 4)
shown indicates the charge remaining
in the battery. Icon blinks when the
battery is low.
Call Icons
The following icons appear on the radio’s
display during a call and in the Contacts list to
indicate ID type.
Private Call - Indicates a Private Call
in progress. In the Contacts list, it
indicates a subscriber alias (name) or ID
(number).
Group Call/All Call - Indicates a
Group Call or All Call in progress. In the
Contacts list, it indicates a group alias
(name) or ID (number).
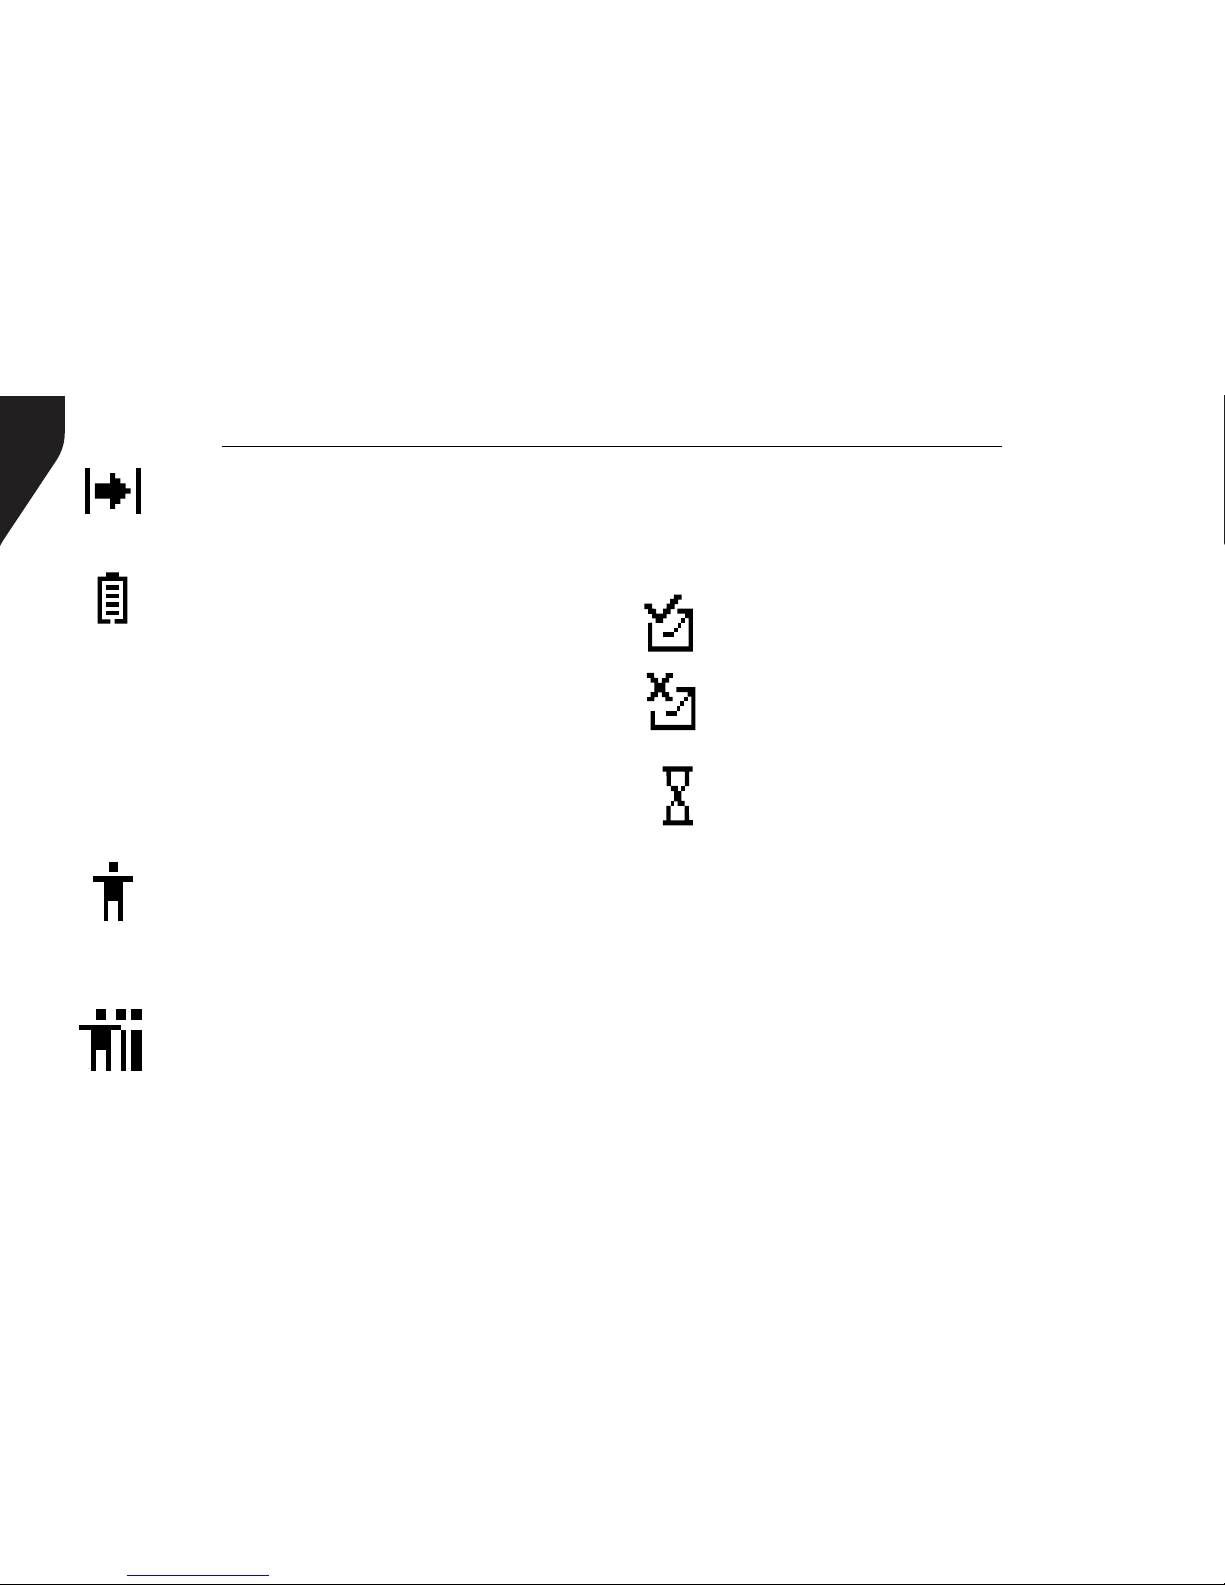
Sent Item Icons
The following icons appear at the top right
corner of the radio’s display in the Sent Items
folder.
Sent Successfully - The text message
is sent successfully.
Send Failed - The text message cannot
be sent.
In-Progress - The text message
to a group alias or ID is pending
transmission.
LED Indicator
The LED indicator shows the operational status
of your radio.
Blinking Red - Radio is scanning, Radio is
transmitting at low battery condition, receiving
an emergency transmission or has failed the
self-test upon powering up.
Solid Red - Radio is transmitting.
Blinking Green - Radio is powering up.
This manual suits for next models
5
Table of contents


