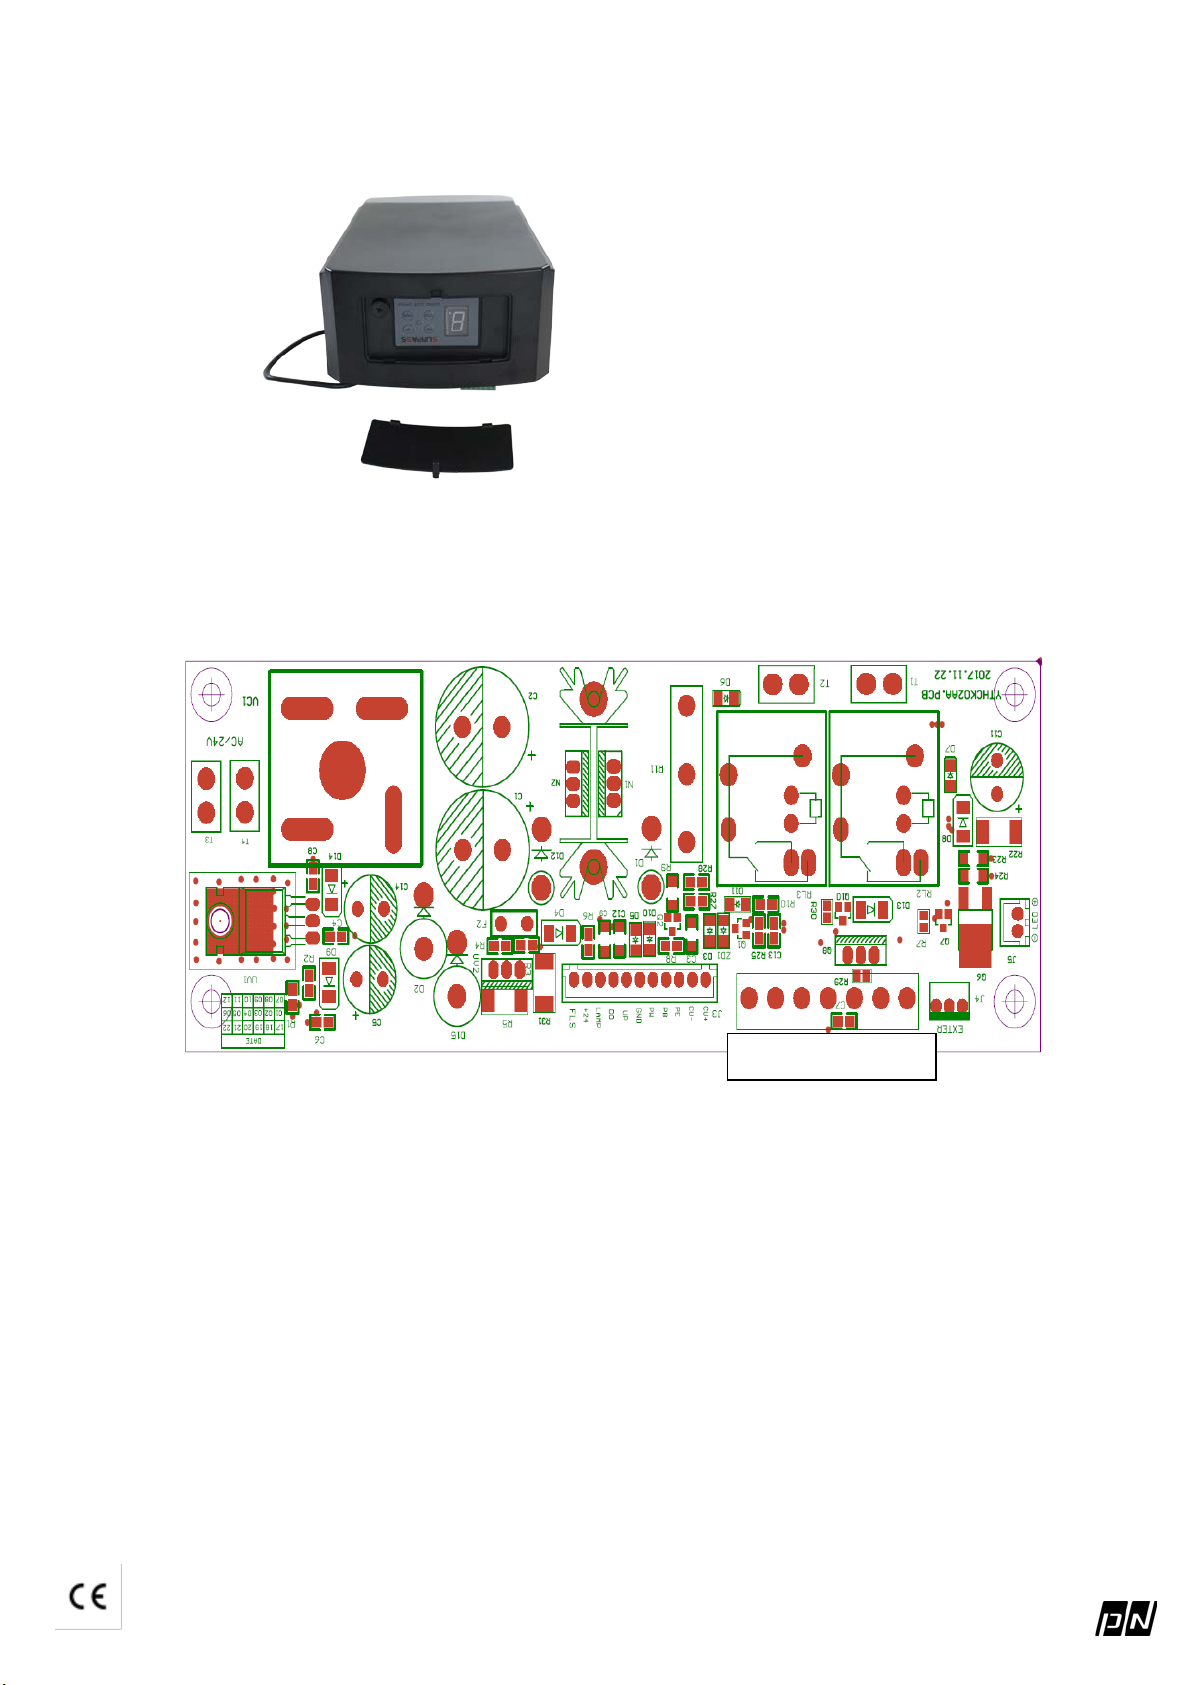
Profelmnet PEGASUS-1200 Operating instructions

Garage Door Opener
PEGASUS 1200

INSTALLATION & OWNERS MANUAL
1. Technical Specifications
Power Input 220V AC ±10% 50~60Hz Reception
frequency 433.92MHz
Motor 24V DC Decoding Rolling Code
Working Temperature >-20℃, <+50℃ Transmitter
power 27A 12V Battery
Relative Humidity ≤90℃ Globe 24V 5W
Open and close force 1000N 1200N 1500N 1800N
Courtesy
light time 3 minutes
This manual is only used by technical persons who are qualified to carry out the
installation.
No given information in this manual can be considered of any interest to the end user.
No setting or adjustments contained in this manual can be carried out by the end user.
It is important for the installer to show their clients correct operationl using of the opener
including the using of manual disengagement cord.
Inform the owner about the need of a regular and accurate maintenance, especially
regarding a regular check of the safety and reversing devices.
IMPORTANT NOTE: A poorly operating door can affect the life of the automatic opener due to
incorrect loads, and will void the warranty.
Check the reversing sensitivity at least twice a year, and adjust if it is necessary.
Make sure that the safety devices are working effectively (photo beams, etc.)
2. Installation
2.1 Recommended Tools

2.2 Installing the Operator and Rail
3. Control panel
4. Optional Terminals and Connections
1. Power supply 24V
2. Photocell
3. Common
4. Button
5. Flash
6. Battery (-)
7. Battery (+)
1 2 3 4 5 6 7

5.Programming the Unit
The system must be checked and tested when connections are completed.
5.1) Check the chain support if it is halfway to make sure the movement is problem free in
both opening and closing.
Make sure that all the standards relative to the automatic gates and doors category
have been observed.
5.2) Now carry out a test of the door disconnected the motor, and open and close the door to
verify that the mechanical parts are all in good working order and the door not bound in
its tracks.
5.3) Check that all the safety devices on the unit are working properly (emergency stop, photo
beam, etc.). This is one of the most important checks and must be done with great care; in
fact, the active safety of the automatic door depends on the correct functioning of the
safety devices. The reversing sensitivity device is of great help in minimizing damage but
only the correct installation of the safety devices will make it possible to stop the door
before it can cause any damage or injury to person and/or property.
5.4) It is now time to set the opening and closed position.
6. Setting Open and Close Positions
6.1) Press and hold SET until the LED displays the letter 1. It turns into opening state.
6.2) Now press UP again and hold, the door will travel to the open position, release the button
when the door has reached the desired position.
6.3) If the door has overrun its position, press DOWN to move the door downwards. Adjust
the position by pressing UP and DOWN.
6.4) Press SET to set the open position, the LED will display the letter 2. Now it is the time to
set the closed position.
6.5) Press and hold DOWN, the door will travel to the close position, release DOWN when
the door has reached the closed position.
6.6) If the door has overrun its position, press the UP to move the door upwards. Adjust the
position by pressing DOWN and UP.
6.7) Press the SET to confirm.
The door will now open and close automatically to map the opening and closing sensitively
driven by force.
WARNING: Keep all persons and property away from the door during the installation process.
6.8) Now the door is set in normal operational mode.
IMPORTANT NOTE: Safety systems must be checked regularly to ensure that maximum safety is
maintained at all times.
-8-

7. Adjustments
Normally, the force settings are automatically set, and the adjustment is unnecessary. However,
the force can be adjusted by an authorized professional opener installer for special purposes if
it is necessary.
7.1) Press SET and hold, the LED will display a setting number from 1 to 3, release SET, it
is now in force adjustment mode.
7.2) Press UP to increase the force one-degree, and press DOWN to decrease one degree
(maximum degree is 9 and the minimum is 1).
7.3) Press SET button to confirm.
7.4) When the door is hindered, it will rebound 15 --20cm.
8. Self Learning Transmitter
10.1) Press CODE, release until the LED displays.. Press a button on the transmitter, then
release and press again, the dot will flash to confirm the code. Success!
10.2) Repeat step 1 to code a maximum of 20 different transmitters’ and/or buttons.
10.3) To de lete all stored codes, press and hold CODE, the LED displays dot flash .,keep more than
8 seconds until the LED display C, all the settings of the transmitters are deleted
9. Function Modes
The unit has two selectable functioning modes, PHOTO BEAM, AUTO CLOSE DOOR and LOCK
DOOR.
9.1) PHOTO BEAM:
Make sure the photo beam has been installed correctly before setting the PHOTO BEAM
function.
9.1.1) Press DOWN and hold until the LED displays –, then LED displays H or || automatically
according to the original state.
9.1.2) If the LED displays H, press DOWN once, the LED displays ||, the photo beam is now
disabled.
If the LED displays||, press UP once, the LED displays H, the photo beam is now enabled.
9.1.3) Press SET to confirm and quit.

9.2) TO SET AUTO-CLOSE ON / OFF:
9.2.1) Press UP and hold until the LED displays –
9.2.2) Press button UP once, the auto close time increase 1 minute. Press button DOWN
once,decrease the auto close time 1 minute,The LED displays the current set value.
9.2.3) The Auto Close function will be disabling when the setting time is 0.
9.2.4) Press button SET to confirm and quit while the correct time is setting.
9.2.5) Unnecessary to set again even the power has dropped.
9.3) LOCK DOOR:
9.3.1) Press SET and hold, the LED will display a setting number from 1 to 4, release SET, and
it is now in lock door mode.
9.3.2) Press UP , the LED displays 1, lock door is effective. Press DOWN, the LED displays 0,
unlock door is effective.
Maintenance
No particular maintenance is required for the logic circuit board.
Check the door at least twice a year if it is properly balanced, and all working parts are in good
working condition or not.
Manual Disengagement
The opener is equipped with a manual release
cord to disengage shuttle and move door by hand while holding the handle down. Pull on
the handle to disengage the shuttle. To re-engage the door simply run opener in
automatic mode or move door by hand until the trolley engages in the chain shuttle.
In some situations that a pedestrian door is not in state, it is recommended that an external
disengagement device should be fitted .
10. Owners’ Guide
8.1
Attention in use
10.1.1
At the first time
of using the door, please test the driving system to see if it moves
well. (Test method: unlock the trolley, pull and push the door by hand.)
10.1.2
Connected with the appropriate power and socket by professionals, and connected
the earthing wire with earth.
10.1.3
Using the transmitters in your sight. Do not stand or walk under a moving door. The
transmitters should be out of reaching of children.
10.1.4
Make sure the door our off fire, moisture, electromagnetism and some other
places.
10.1.5
Check at least twice a year to make sure the door is properly balanced and that all
working parts are in good working condition. Adjust the tensile force of chain. Add
suitable amount of lubricant to the active.
10.2 Examination Guide
10.2.1
Problem
Causes
Solution
10.2.2 The chain is noisy. The chain is too loose.
Adjust nut-M8 referring to
3.2.C.
10.2.3
The motor does not
work.
The socket is not well connected or
the fuse is broken.
Check the socket or replace
the fuse.
10.2.4
After setting open and
close positions, the
motor does not work.
The screws of fixing the Hall
components are loo
se or program
mistakes.
Tighten the screws or
resetting open and close
positions.
10.2.5
The door can’t be
closed. Photo beam function works.
Cancel the photo beam
function, referring to 6.6.
10.2.6
The wall button works
well, but the
transmitter doesn’t
work.
No transmitter learning or
transmitter battery is power off.
Code referring to 6.4 or
change new transmitter
battery.
10.2.7
Transmitter distance is
too short.
The transmitter battery is nearly
power off. Change new battery.
Table of contents
Popular Garage Door Opener manuals by other brands

Chamberlain
Chamberlain MotorLift ML750 Installation and operating instructions

Chamberlain
Chamberlain WHISPER DRIVE 248739 owner's manual

Chamberlain
Chamberlain Elite 3585S 3/4 HP owner's manual

Craftsman
Craftsman 139.18451D owner's manual

DTS
DTS 512 installation manual

Herculift
Herculift SDO V8 owner's manual


Heras
Heras Delta 3a installation manual

Chamberlain
Chamberlain GT owner's manual

Zero
Zero Z03 Series User Manual and Configuration

Nice
Nice TN2010L Instructions and warnings for installation and use

B&D
B&D Controll-A-Door Advance SDO-2V2 Tri-Tran+ Homeowner's manual

Overhead door
Overhead door Legacy 850 user manual