PRYME PRYMEBLU BTH-500 User manual

Pairing with a PRYMEBLU Radio Adapter and 2-way Radio
When pairing the PRYMEBLU Speaker Microphone with a PRYMEBLU Radio Adapter, make sure that the speaker
microphone, adapter, and the two-way radio the adapter is connected to are all powered off to start.
If your PRYMEBLU Radio Adapter gets power directly from the two-way radio it is attached to:
•Hold down the Talk button on the PRYMEBLU Radio Adapter while turning the two-way radio ON.
If your PRYMEBLU Radio Adapter has its own charger/internal battery pack:
•Turn the power switch on the PRYMEBLU Radio Adapter to the ON position while holding down the
multifunction Talk button on the PRYMEBLU Radio Adapter.
•Continue to hold the Talk button on the adapter down for approximately three seconds. Release the Talk
button when the status LED on the PRYMEBLU Radio Adapter begins to flash two times per second. The
PRYMEBLU Radio Adapter is now in audio accessory pairing mode.
•Hold down the PTTButton on the PRYMEBLU Speaker Microphone while turning the device on using the
Power/Volume Knob.. Continue to hold the button down for approximately 3 seconds, until you see the LED
on the speaker microphone begin to quickly flash RED-BLUE-RED-BLUE in sequence. The PRYMEBLU Speaker
Microphone is now in pairing mode.
Reconnecting a Previously Speaker Microphone and Radio Adapter
Once the PRYMEBLU Speaker Microphone and Radio Adapter have been successfully paired together, both
devices will remember that connection. The adapter and speaker mic will attempt to reestablish their link
whenever the radio/adapter and microphone are both powered on and in within range of each other.
Re-establishing this connection can take 10-60 seconds.
3 4
Charging the Speaker Microphone
2
Controls and Connection
Federal Communication Commission Interference Statement
This equipment has been tested and found to comply with the limits for a Class B
digital device, pursuant to Part 15 of the FCC Rules. These limits are designed to
provide reasonable protection against harmful interference in a residential installation.
This equipment generates uses and can radiate radio frequency energy and, if not
installed and used in accordance with the instructions, may cause harmful interference
to radio communications. However, there is no guarantee that interference will not
occur in a particular installation. If this equipment does cause harmful interference to
radio or television reception, which can be determined by turning the equipment off
and on, the user is encouraged to try to correct the interference by one of the following
measures:
-Reorient or relocate the receiving antenna.
-Increase the separation between the equipment and receiver.
-Connect the equipment into an outlet on a circuit different from that to which the
receiver is connected.
-Consult the dealer or an experienced radio/TV technician for help.
FCC Caution: Any changes or modifications not expressly approved by the party
responsible for compliance could void the user's authority to operate this equipment.
This device complies with Part 15 of the FCC Rules. Operation is subject to the
following two conditions: (1) This device may not cause harmful interference, and (2)
this device must accept any interference received, including interference that may
cause undesired operation.
This equipment complies with FCC RF radiation exposure limits set forth for an
uncontrolled environment.To maintain compliance with FCC RF exposure compliance
requirements, please avoid direct contact to the transmitting antenna during
transmitting.
RF Exposure Warning!
This device contains transmitters and receivers which emit Radio Frequency (RF)
energy. The device is designed to comply with the limits for exposure to RF energy set
by the Federal Communications Commission (FCC) of the United States, Industry
Canada (IC) of Canada, and the regulating entities of other countries.
If you are still concerned about exposure to RF energy,
you can further limit your exposure by limiting the
amount of time you use the equipment or by placing
more distance between your body and the device,
since exposure level drops off dramatically
with distance.
1.00 April 2017
911 Mariner St., Brea, CA 92821
PH: 714.257.0300 FAX: 714.257.0500
TOLL FREE: 800.666.2654
WWW.PRYME.COM
PRYMEBLU BTH-500
Wireless Bluetooth Speaker Microphone
For use with PRYMEBLU radio adapters and cellular phones
PRYME® and PRYMEBLU® are trademarks owned by PRYME Radio Products,
Brea CA. All other product or service names are the property of their respective owners.
© 2017 PRYME Radio Products, Brea CA. All Rights Reserved
To charge the speaker microphone
1. Ensure the device is turned off using Volume/Power Knob.
2. Plug the charge cable into any powered USB outlet,
such as an AC wall charger, and then into the charge jack
on the bottom of the speaker microphone.
3. Once the charging process has begun, the LED indicator
on the speaker microphone will show a constant red light.
4. Typical charge time is approximately five hours. Actual charge time will vary depending on
several factors including the battery’s charge state, condition, and age.
5. When the battery is fully charged the LED indicator on the speaker microphone will turn off.
6. Disconnect the charger from the adapter when charging is completed.
Charging Cautions:
- Do not use a wall charger or charge cable that appears to be damaged. (Example: frayed wires,
melted plastic, etc.) Contact PRYME to get a new manufacturer-approved replacement charger.
- Do not tamper with or modify the speaker microphone or charger.
- Always turn the speaker microphone off when charging.
The BTH-500 speaker microphone has an internal
Lithium Ion rechargeable battery pack which must
be charged prior to operation, and must be
recharged regularly. A fully charged battery will
provide up to 40 hours of continuous operation
before needing to be recharged. However,
operating time can vary depending on usage
and the condition of the battery pack. Recharge
the battery regularly.
Model No.: BTH-500
Made in Taiwan
Phone Button
This button is used to answer or hang
up telephone calls when the BTH-500
is connected to a cellular phone.
Front Firing Speaker
Received calls are heard over
this speaker. The volume level
can be controlled using either
the Volume/Power Knob buttons
on the speaker microphone, or
by using the volume controls
on the two-way radio or phone.
Status LEDs
The red and blue LEDs flash
messages that let the user know
the current status of the speaker
microphone.
Replaceable Clothing Clip
The alligator-type clip secures
the speaker microphone to the
user’s clothing during use.
The clip can be rotated to
allow the microphone to
be better positioned.
Microphone
This microphone picks up
the user’s voice audio when
sending a call.
PTT Button
This button is used to
activate the push-to-talk
feature of the 2-way radio
Charge Jack
This mini-USB jack is used to
recharge the removable battery
of the speaker microphone by
connecting the BTH-500 to a
USB charger or any powered
USB source
Earphone Jack
This jack is used to connect
an optional, wired listen-only
earphone to the speaker
microphone for enhanced
privacy.
Volume Control/Power Knob
This knob allows you to turn the
BTH-500 microphone on and off
and to adjust the volume of
received calls.
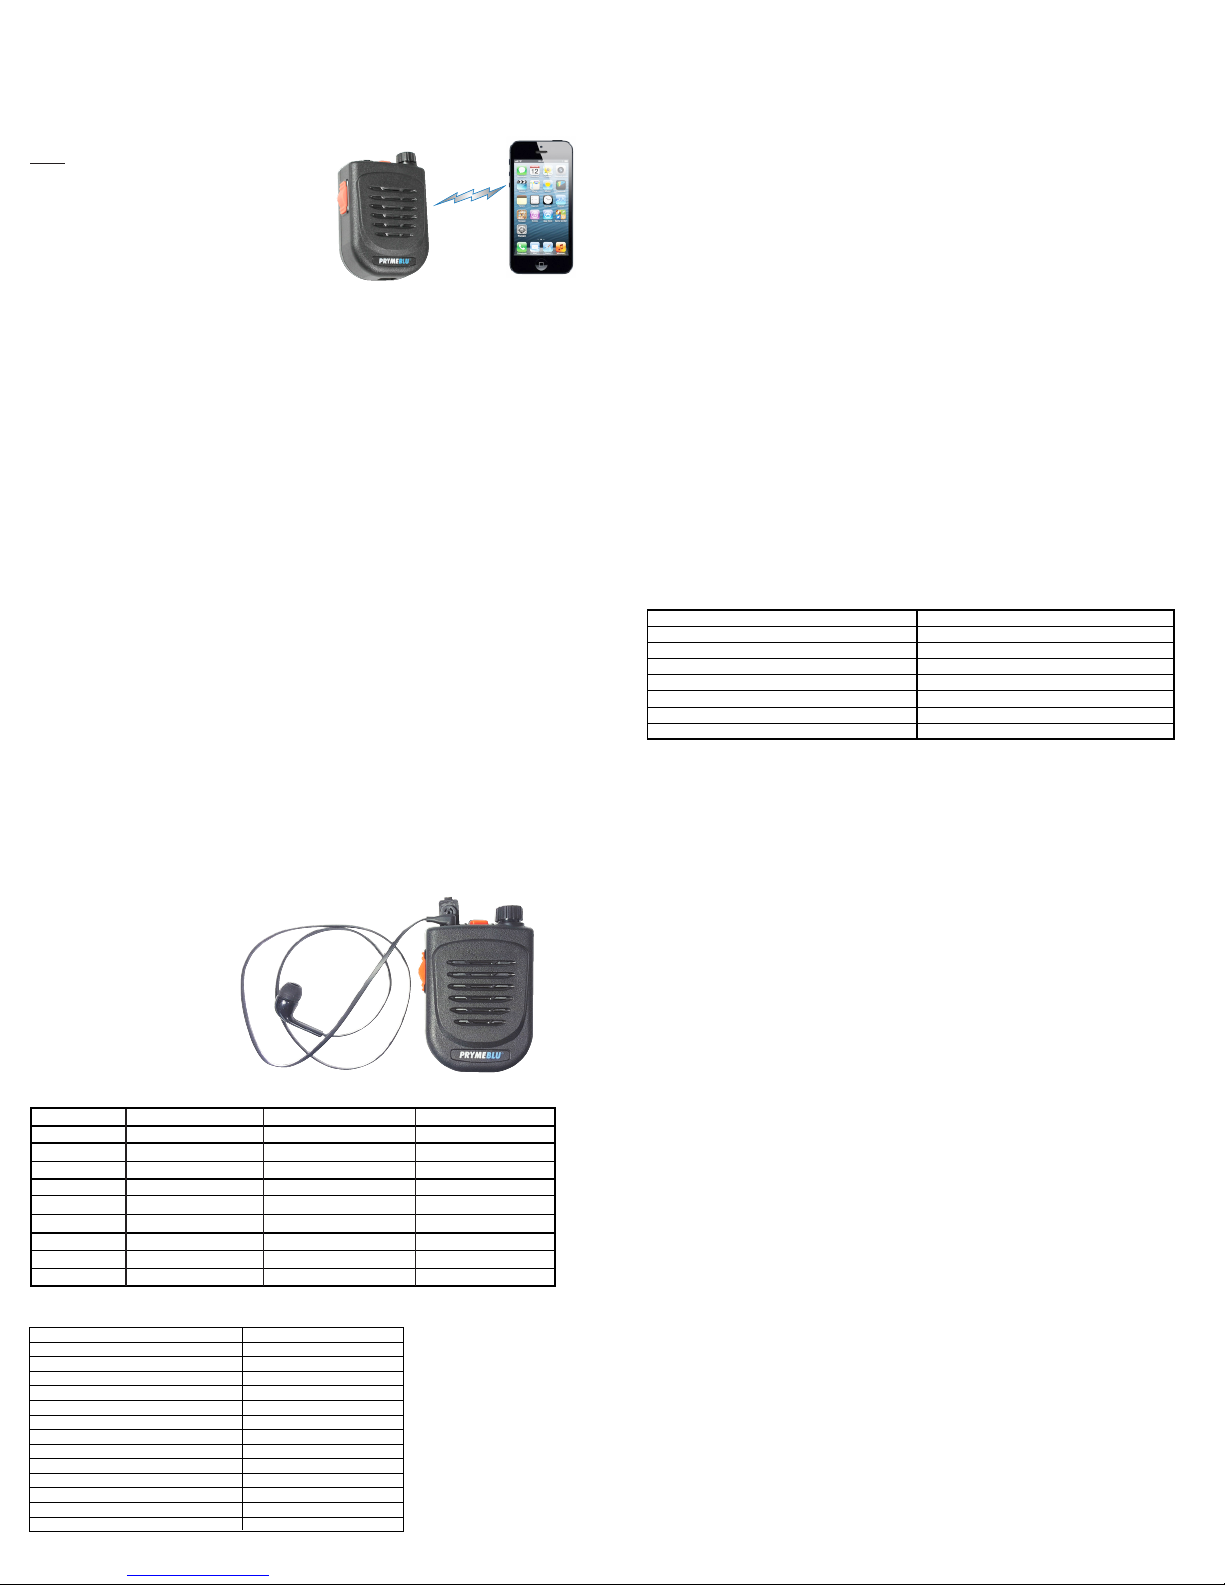
Pairing with a Cellular Telephone
The PRYMEBLU Bluetooth Speaker Microphone is capable of working with a Bluetooth-enabled cellular
telephone. The speaker microphone is even capable of simultaneously pairing with both a PRYMEBLU
Radio Adapter and a cell phone, enabling you to use the same speaker microphone for both radio and
telephone calls.
NOTE: If you wish to use the multi-pairing feature
to connect the BTH-500 to both a PRYMEBLU Radio
Adapter and a cellular phone, you must first pair the
PRYMEBLU Speaker Microphone and PRYMEBLU Radio
Adapter using the procedure shown on Page 4 of this
manual. Once the two devices have been paired to
each other, power the two-way radio/Bluetooth Radio
Adapter off, and follow the procedure shown below:
When pairing the PRYMEBLU Speaker Microphone with a cellular phone, make sure that the speaker
microphone and all other nearby Bluetooth devices are powered off before beginning.
• Hold down the PTT Button on the PRYMEBLU Speaker Microphone while turning the device on using the
Power/Volume Knob.. Continue to hold the button down for approximately 3 seconds, until you see the LED
on the speaker microphone begin to quickly flash RED-BLUE-RED-BLUE in sequence. The PRYMEBLU
Speaker Microphone is now in pairing mode.
•Activate the Bluetooth feature on your phone.
•Activate the “scan/discover new Bluetooth devices” feature on the phone. The exact steps needed to
do this will vary depending on the brand/model of phone you are using.
•Select the PRYMEBLU Speaker Microphone from the list of Bluetooth devices shown on your phone.
If the phone asks for a passcode, enter “0000”. The phone may also prompt you to confirm the connection.
•After a few seconds, the two devices should synch to one another. Once the PRYMEBLU Speaker
Microphone and phone are paired with each other, the status LED on the microphone will revert back to
a single blue flash every few seconds.
•Once successfully paired, you will be able to make and receive telephone calls using the PRYMEBLU
Speaker microphone.
Multi-Pairing Operation
Once you have successfully paired the PRYMEBLU Speaker Microphone and cellular phone, you can enable
multi-pairing operation simply by powering on the two-way radio/PRYMEBLU Radio Adapter that you
previously paired with the PRYMBLU Speaker Microphone. Within a few seconds, all three devices should
synch to each other.
8
65
7
STATUS LED MESSAGES
The meanings of the various status LED messages shown by the speaker microphone are
shown on the following table:
OPTIONAL EAPRHONES
Although the BTH-500 has a built-in speaker for listening to received calls,
some users may prefer to use a listen only earphone for enhanced privacy.
The accessory jack on the speaker microphone will accept any mono
earphone with a 3.5 mm audio plug.
When an earphone is used, the
front-firing speaker is disabled.
PRYME EH-289XB model shown.
Earphone sold separately.
PRYME makes a variety of listen-only earphones in different styles that will work with the BTH-500.
SPECIFICATIONS
Using the PRYMEBLU Speaker Microphone
Once your PRYMEBLU Speaker Microphone and PRYMEBLU Adapter and/or cellular phone have been
paired together:
Received signals will be heard over your PRYMEBLU Speaker Microphone’s front- ring speaker or
through the optional earphone. The volume of received calls can be adjusted using the
Volume/Power Knob on the speaker microphone or the volume control on the two-way radio or
cellular phone.
When transmitting or on a phone call, the operator’s voice is picked-up by the microphone in the
PRYMEBLU Speaker Microphone.
Push-to-Talk can be activated one of several different ways:
• By pressing and holding the PTT button on the PRYMEBLU Speaker Microphone.
• By pressing and holding the Talk button on the PRYMEBLU Adapter.
• Using an optional wired PTT that is plugged into the PRYMEBLU Adapter.
• Using an optional PRYMEBLU Wireless Bluetooth PTT (model BT-PTT2, sold separately). Note that if
you are using a PRYMEBLU BT-PTT2, you will first need to pair the adapter with the PTT using the
instructions located in the PRYMEBLU PTT User’s Guide.
To answer or hang up a cellular telephone call, press the orange Phone Button on the side of the
speaker microphone or use the user interface on the phone itself.
You can also activate your phone’s voice dialing feature by pressing and holding the Phone Button
on the side of the microphone for three seconds. (This function works only when the microphone is
NOT connected to a two-way radio.)
NOTE: When you are on a phone call, signals received by the two-way radio will not be heard.
Additionally, if you press the PTT button on the PRYMBLU Speaker Microphone while you are on a
phone call, the two-way radio will transmit, however no transmit audio will be sent over the air, since
microphone audio is being routed to the cellular phone.
LED INDICATION
Constant Red (while plugged into charger)
No indication (while plugged into charger)
Flashes red-blue-red-blue repeatedly
Two blue flashes every two seconds
One blue flash every two seconds
Constant red with one blue flash every two seconds
No indication
MEANING
Charge mode
Charging is finished
Pairing mode
Speaker microphone is powered on but not paired
Speaker Microphone is powered and paired
PTT is pressed
Speaker microphone is powered off
SUPPORT AND WARRANTY
PRYME Radio Products warrants this product against defects in materials or workmanship for a
period of one year from the date of retail purchase. PRYME will repair or replace a defective unit,
at our option, without charge for parts or labor. The limited warranty is extended only to the
original purchaser and is valid only to consumers in the United States and Canada. It does not
cover damage or failure caused by or attributable to Acts of God, abuse, misuse, improper or
abnormal usage, faulty installation, improper maintenance, lightning, or other incidences of
excessive voltage, or any tampering or repairs by other than a PRYME authorized repair facility. It
does not cover replacement of consumable parts, transportation costs, or damage in transit.
Repair or replacement under the terms of this warranty does not extend the terms of this
warranty. This warranty can only be modified by an officer of PRYME Radio Products, and then
only in writing. Should this product prove defective in workmanship or material, the consumer’s
sole remedies shall be such repair or replacement as provided by the terms of this warranty.
Under no circumstances shall PRYME Radio Products be liable for any loss or damage, direct,
consequential, or incidental, arising out of the use of or inability to use this product. Some states
do not allow limitations on how long an implied warranty lasts or the exclusions or limitations of
incidental or consequential damages, so the above limitations or exclusions may not apply to
you. This warranty gives you specific legal rights. You may also have other rights, which may vary,
from state to state.
For support or warranty service on your PRYME product, contact us at 1-800-666-2654 or visit us
on the web at www.PRYME.com.
COPYRIGHT AND TRADEMARK INFO
© 2017 PRYME Radio Products, Brea CA. All rights reserved.
PRYME® and PRYMEBLU® are trademarks owned by PRYME Radio Products, Brea CA.
Android is a trademark of Google Inc.
All other product or service names are the property of their respective owners.
DISCLAIMER: The Bluetooth wireless link used by PRYMEBLU products is an open
standard, unsecured technology. As such, it is not recommended for first-responder or
other mission critical users.
Bluetooth Version:
Speaker Output:
Receiver Sensitivity:
Power Class:
Range:
Display:
Bluetooth Profile:
Operating Voltage:
Battery Capacity:
Operating Time (Standby)
Operating Time (Typical)
Operating Time (Continuous Talk)
Push-to-Talk Function:
Operating Temperature:
v2.1+EDR
1 watt
-82 dBm (typ.)
Bluetooth class 2
10 meters
Blue, Red, and Green
HFP,HSP,SPP Profile
5 VDC
1,020 mAH
> 30 days
> 80 hours
> 40 hours
Built-in
-70°F to +120°F (approx.)
Model
EH-289XB
EH-389SC
EH-389XC
EH-1289SC
EH-1289XC
EH-1389SC
EH-1389XC
EH-1399X
EH-GH89-SC
Style
Earbud
Rubber Ear Hook
Rubber Ear Hook
Plastic D-Ring
Plastic D-Ring
Acoustic Tube
Acoustic Tube
Acoustic Tube
G-Hook (swivel)
Cable Length/Type
24” Straight Flat Cable
15” Coiled
25” Coiled
15” Coiled
25” Coiled
15” Coiled
30” Straight
30” Straight
10” Coiled
Connector
3.5mm right angle
3.5mm right angle
3.5mm right angle
3.5mm right angle
3.5mm right angle
3.5mm right angle
3.5mm right angle
3.5mm right straight
3.5mm right angle


