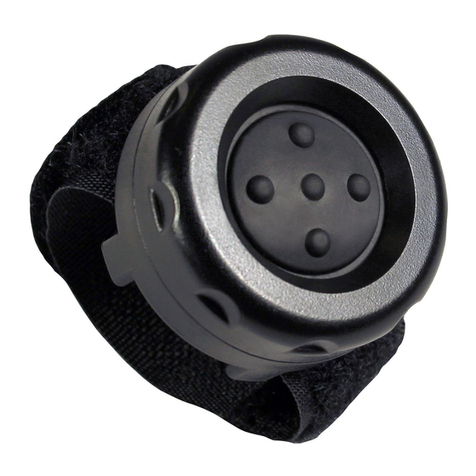
PRYME PrymeBLU BT-PTT2-ZD User manual

STEP ONE: Charging the Push-to-Talk
The BT-PTT2-ZD has an internal Lithium Ion rechargeable battery pack which must be charged prior to
operation, and must be recharged regularly. A fully charged battery will provide more than 12 hours of
operation before needing to be recharged. However, operating time can vary depending on usage and
the condition of the battery pack. Recharge the battery regularly.
To charge the Push-to-Talk:
1. Ensure the device is turned o using the power button.
2. Plug the USB port of the BT-PTT2-ZD into any powered USB outlet, such as the USB port on a
computer or into the optional AC wall charger. You will need to rst remove the protective rubber
cover. (To prevent dust and moisture from damaging your Push-to-Talk, always ensure this cover is in
place when you are not charging.)
3. Once the charging process has begun, the LED indicator on the bottom of the Push-to-Talk will show
a constant blue light.
4. When the device is done charging the LED will turn o. Typical charge time is approximately 4.5
hours. Actual charge time will vary depending on several factors including the battery’s charge state,
condition, and age.
5. Disconnect the charger from the adapter when charging is completed.
Charging Cautions
- Do not use the device with a charger that appears to be damaged.
- Do not tamper with or modify the PTT or charger.
- Always turn the Push-to-Talk o when charging.
3 4
Pairing With a Smartphone
2
Controls and Connection
PRYMEBLU®BT-PTT2-ZD
Push-to-Talk User’s Guide
For use with Zello and other push-to-talk apps on Android smart phones
PRYME® and PRYME BLU® are trademarks owned by PRYME Radio Products,
Brea CA. All other product or service names are the property of their respective owners.
© 2014 PRYME Radio Products, Brea CA. All Rights Reserved
The BT-PTT2-ZD Push-to-Talk is designed to work with smartphones running the Android operating
system. Prior to normal operation, the phone and Push-to-Talk must be paired together using the
following process:
1. Activate the pairing mode on the Push-to-Talk by holding down the PTT button while turning the
device on. Continue to hold down the PTT button until the status LED on the BT-PTT2-ZD shows two
blue ashes every second.
2. On your phone, go to Settings > Bluetooth. Move the Bluetooth slider to turn the phone's
Bluetooth radio on.
3. Select “Search for Devices” from the phone’s Bluetooth menu. The phone will scan for nearby
Bluetooth devices and a list showing the names of nearby Bluetooth devices will be shown on the
screen.
4. Choose “PTT-320” from the list.
5. Keep the phone and Push-to-Talk near each other and wait a few seconds. The devices will pair to
each other.
Reconnecting a Previously Paired Push-to-Talk and Phone
Once the BT-PTT2-ZD and phone have been successfully paired together, both devices will remember
that connection. They will reestablish their link whenever the Push-to-Talk and phone are both
powered on and in within range of each other, as long as the Bluetooth radio is enabled in the phone.
Re-establishing this connection can take 10-60 seconds.
In the event that the phone and Push-to-Talk do not automatically reestablish their link, simply press
the PTT button on the BT-PTT2-ZD to restore the connection.
Clothing Clip
The alligator-type clip can be
used to secure the Push-to-Talk
to the user’s clothing during
use. The clip can be rotated to
allow the device to be better
positioned
Power Button
Holding down this
button for one second
will turn the Push-to-Talk
device on and o
Dust Cover
Used to cover the USB port
when the BT-PTT2-ZD is not
being recharged
USB Charge Port
This port is used to connect the
BT-PTT2-ZD to any powered USB
connector for recharging
Status LED
The LED ashes messages that let the user
know the current status of the Push-to-Talk
device
PTT Button
This button is used to activate the
push-to-talk feature of the Zello app
OPTIONAL CHARGER
Universal Wall Charger with USB Port
Model Number: P-CHA-BT-USB
Sold Seperately
Federal Communication Commission Interference Statement
This equipment has been tested and found to comply with the limits for a Class B
digital device, pursuant to Part 15 of the FCC Rules. These limits are designed to
provide reasonable protection against harmful interference in a residential installation.
This equipment generates uses and can radiate radio frequency energy and, if not
installed and used in accordance with the instructions, may cause harmful interference
to radio communications. However, there is no guarantee that interference will not
occur in a particular installation. If this equipment does cause harmful interference to
radio or television reception, which can be determined by turning the equipment o
and on, the user is encouraged to try to correct the interference by one of the following
measures:
-Reorient or relocate the receiving antenna.
-Increase the separation between the equipment and receiver.
-Connect the equipment into an outlet on a circuit dierent from that to which the
receiver is connected.
-Consult the dealer or an experienced radio/TV technician for help.
FCC Caution: Any changes or modications not expressly approved by the party
responsible for compliance could void the user's authority to operate this equipment.
This device complies with Part 15 of the FCC Rules. Operation is subject to the
following two conditions: (1) This device may not cause harmful interference, and (2)
this device must accept any interference received, including interference that may
cause undesired operation.
This equipment complies with FCC RF radiation exposure limits set forth for an
uncontrolled environment. To maintain compliance with FCC RF exposure compliance
requirements, please avoid direct contact to the transmitting antenna during
transmitting.
RF Exposure Warning!
This device contains transmitters and receivers which emit Radio Frequency (RF)
energy. The device is designed to comply with the limits for exposure to RF energy set
by the Federal Communications Commission (FCC) of the United States, Industry
Canada (IC), and the regulating entities of other countries.
If you are still concerned about exposure to
RF energy, you can further limit your exposure
by limiting the amount of time you use the
equipment or by placing more distance
between your body and the device, since
exposure level drops o dramatically
with distance.
Version 1.0Z September 2014
911 Mariner St., Brea, CA 92821
PH: 714.257.0300 FAX: 714.257.0600
TOLL FREE: 800.666.2654
WWW.PRYME.COM

6
8
5
Setting Up the Zello App
7
Using the Push-to-Talk with Zello
Status LED Messages
The meanings of the various status LED messages shown by the
PRYMEBLU BT-PTT2 are shown on the following table:
SPECIFICATIONS
SUPPORT AND WARRANTY
PRYME Radio Products warrants this product against defects in materials or workmanship for a period
of one year from the date of retail purchase. PRYME will repair or replace a defective unit, at our
option, without charge for parts or labor. The limited warranty is extended only to the original
purchaser and is valid only to consumers in the United States and Canada. It does not cover damage
or failure caused by or attributable to Acts of God, abuse, misuse, improper or abnormal usage, faulty
installation, improper maintenance, lightning, or other incidences of excessive voltage, or any
tampering or repairs by other than a PRYME authorized repair facility. It does not cover replacement
of consumable parts, transportation costs, or damage in transit.
Repair or replacement under the terms of this warranty does not extend the terms of this warranty.
This warranty can only be modied by an ocer of PRYME Radio Products, and then only in writing.
Should this product prove defective in workmanship or material, the consumer’s sole remedies shall
be such repair or replacement as provided by the terms of this warranty. Under no circumstances shall
PRYME Radio Products be liable for any loss or damage, direct, consequential, or incidental, arising out
of the use of or inability to use this product. Some states do not allow limitations on how long an
implied warranty lasts or the exclusions or limitations of incidental or consequential damages, so the
above limitations or exclusions may not apply to you. This warranty gives you specic legal rights. You
may also have other rights, which may vary, from state to state.
For support or warranty service on your PRYME product, contact us at 1-800-666-2654 or visit us on
the web at www.PRYME.com.
Copyright and Trademark Info
© 2014 PRYME Radio Products, Brea CA. All rights reserved.
PRYME® and PRYMEBLU™ are trademarks owned by PRYME Radio Products.
Android is a trademark of Google Inc.
All other product or service names are the property of their respective owners.
DISCLAIMER: The Bluetooth wireless link used by PRYME BLU products is an open standard, unsecured
technology. As such, it is not recommended for rst-responder or other mission critical users.
To get the Zello app on your phone and set it up to work with the BT-PTT2-ZD Push-to-Talk,
do the following:
1. Install Zello from your Zello@Work network, or download the app from the Google Play store (for
Android) or the Apple App Store (for iOS).
2. Make sure that your phone's Bluetooth radio is enabled, and that the Push-to-Talk are powered on
and that the Push-to-Talk and phone are connected to each other.
3. Open Zello and go to Menu > Options > Under the Hood.
4. Under "Bluetooth PTT Control," choose "PTT-320". You should see a popup indicating the device
control has been activated. If you don't see it, you may need to power cycle the Push-to-talk and
repeat this step.
5. Open the Talk screen in Zello (the screen with a big round button). In the bottom-left corner of
the screen, tap-hold and slide to the Bluetooth icon to activate the PTT device in Zello.
Once setup, you will be able to use the Push-to-Talk with the Zello app, even if Zello
is running the background.
-To activate Zello’s push-to-talk feature, press and hold the PTT button on the
BT-PTT2-ZD.
-When Zello is transmitting a call, audio will be picked up by the phone’s built-in
microphone or by the microphone is your wired hands-free accessory, if one is
plugged into the phone.
-Incoming calls received by Zello will be heard over the phone’s built-in speaker or
through the earphone in your wired hands-free accessory, if you are using one.
SPECIFICATIONS
Operating temperature: -20 ° C to 50 ° C
Storage temperature: -40 ° C to 80 ° C
Size: 65mm (H) x 30mm (W) x 17mm (D)
Weight: 25 grams
Bluetooth Version: Fully Qualied Bluetooth v2.1
Chip set: CSR BC5 + 16MB external Flash
Receiver Sensitivity: -82 dBm (typical)
Bluetooth Power Class: Class 2
Maximum Range: 10 meters
Display: Two color LED
Bluetooth Prole Support: SPP (Serial Port) Prole
DC Input: 5 VDC
Current Draw: 16 mA (average), 20 mA (maximum)
Battery: 240mAh Lithium-Ion
Charging Type: USB
LED INDICATION
No indication
Two blue ashes every second
One blue ash every six seconds
Continuous solid red
Repeated rapid blue ash
One blue ash every second
Constant blue (while plugged into charger)
No indication (while plugged into charger)
MEANING
Device is powered o
Pairing mode
Bluetooth is connected
PTT button is pressed
Bluetooth link lost/not connected
Battery is low
Charge mode
Charging is nished
Table of contents
Other PRYME Switch manuals
Popular Switch manuals by other brands
H3C
H3C S7500 Series Command manual
Extron electronics
Extron electronics MLS 100 A user manual
Sony
Sony DVS-7250 user guide
Dell Networking
Dell Networking S4048-ON Getting started guide
StarTech.com
StarTech.com CAB831HD Instruction guide
IBM
IBM 2498B24 - System Storage SAN24B-4 Switch Installation, service and user guide
