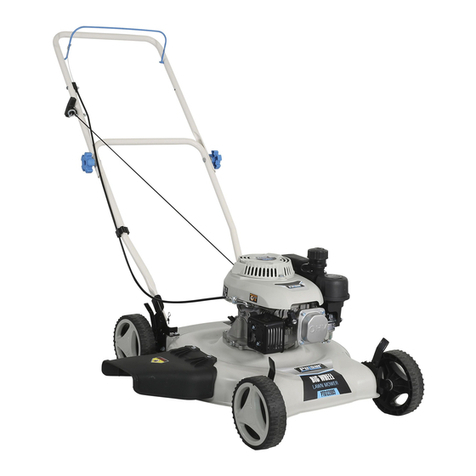
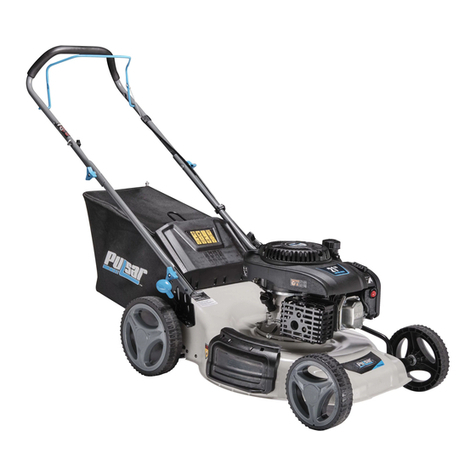
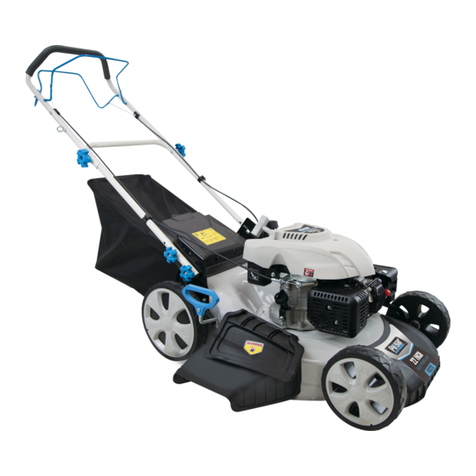
Pulsar PTG12205 User manual

You may contact Pulsar directly at 1-866-591-8921
for product and accessory information and help
finding a dealer. To register your product please
register online at: pulsar-products.com
Warning
Important:
Propsition 65 Warning
The engine exhaust from this product contains
chemicals known to the State of California to cause
cancer, birth defects, or other reproductive harm.
Imp-
ortant
WARNING

• Do not operate this machine while under the influence of
alcohol or drugs.
Uneven terrain could cause a slip or fall resulting
in severe injury.
Poor footing could cause a slip or fall.
the engine
Disconnect the spark plug wire and ground the
center electrode to a metal part of the engine.
(if equipped)
WARNING
fuel
gasoline-powered
help ensure

Setup
Important: Remove and discard the
protective plastic sheet that covers the engine.
1. Unfolding the Handle
Folding or unfolding the handle improperly can
damage the cables, causing an unsafe operating
condition.
Important: Safety &
instruction decals are
located near areas of
potential DANGER.
Replace damaged decals.
2.Attaching Wheels (See Figure 2)
•
Parts needed - 2 front wheels (7"), 2 rear
wheels (11"), 4 washers and 4 nuts.
Install the washer into wheel axle then put
on the wheel into wheel axle.
Screw lock nut into the end of the thread of
the wheel axle until it locks into place.
Repeat process on the other side of the
lawn mower to install the other three wheels.
•
•
•
Figure 2
Product Specification
Component
Rated Speed
Displacement
Cutting Width
Height Adjustment
Wheels
Machine Weight
Safety & Instruction Decals
1. WARNING: Read the Operator’s Manual.
2. Thrown Object Hazard: Keep bystanders a safe distance
from the mower.
3. Cutting/Dismemberment Hazard of Hand or Foot, Mower
Blade: Disconnect the spark plug wire and read the
instructions before servicing or performing maintenance.
4. Cutting/Dismemberment Hazard of Hand or Foot, Mower
Blade: Stay away from all moving parts and keep all
guards and shields in place.
5. Cutting/Dismemberment Hazard of Hand or Foot, Mower
Blade: Do not mow up and down slopes, only mow
across; stop the mower and engine, pick up debris before
operating; look behind and down before reversing.
•
•
Do not pinch or bend cables when folding or unfolding
the handle.
If a cable is damaged, Contact an Authorized Service
Center by calling 866-591-8921.
Specification
2800RPM
150cc
20”
1”- 3”
7” Front 11” Rear
60 lbs
1. Remove the handle knobs from the mower deck.
Important: Route the cables to the outside of the handle as
you install the handle.
1. Handle knob (2)
2. Move the handle to the operating position.
3. Install and tighten the handle knobs that you removed
in step 1. (Figure 1)
2. Filling the Engine with Oil
1. Remove the dipstick.(Figure 3)
Figure 3
3
1
Figure 1
•Then place wheel cover by tapping it in.
Your mower engine does not come filled with oil. Use
SAE 30 weight engine oil (not included)
2. Slowly pour oil into the dipstick/fill hole until the oil level
reaches the full range on the dipstick. Do not overfill.
Max 13.5oz. (0.4L), type: SAE 30 weight engine oil
with an API service rating of SF or higher.
H
L
WARNING

1. Air Filter 2. Fuel Tank Cap
3. Oil Fill / Dipstick 4. Height Adjustment
5. Handle Loosening Knob
Operation
Attachments/Accessories
A selection of Pulsar approved attachments and
accessories are available for use with the machine to
Enhance and expand its capabilities. Contact your
Authorized Service Center or Distributor 1-866-591-8921.
Filling the Fuel Tank
Important:
30 days old. (Figure 5)
Checking the Engine Oil Level
Service Interval:
the dipstick. (Figure 6)
2. Remove the dipstick and check the oil level (Figure 6)
If the oil level is low on the dipstick, slowly pour oil into
the oil fill hole to raise the oil level to the full range on
the dipstick. Do not overfill. Max fill 13.5oz (0.4 L), type
SAE 30 weight oil with an API service rating of SF or
higher.
3. Install the dipstick and tighten the screw threads.
4
Product Overview
Figure 4 Figure 5
5
4
3
2
1
Gasoline is extremely flammable with explosive vapors.
A fire or explosion from gasoline can burn you or others.
•To prevent a static charge from igniting the gasoline,
place the container and/or mower directly on the ground
before filling, not in a vehicle or on an object.
•Fill the tank outdoors when the engine is cold; wipe up
spills.
•Do not handle gasoline while smoking or near open
flame or sparks.
•Store gasoline in an approved fuel container, out of the
reach of children.
Fill the fuel tank with fresh unleaded regular gasoline
from a filling station. (Figure 5)
To reduce starting problems, add fuel
stabilizer to the fuel, mixing it with gasoline less than
Before each use.
1. Remove dipstick, wipe it clean, and fully re-insert it,
check to see if oil is needed by the oil mark that is left
H
L
Figure 6
WARNING

Cutting Height Adjustment
Adjusting the cutting height may bring you into
contact with the moving blade, causing serious injury.
•Stop the engine and wait for all the moving parts to
stop.
•Do not put your fingers under the housing when
adjusting the cutting height.
·
or it will causing serious injury or death.
If the engine has been running, the muffler will be hot
and can severely burn you. Keep away from the hot
muffler.
Adjust the cutting height as desired. Set all four wheels
to the same height.
Note: To lower the mower, move the cutting height
levers forward; to raise the mower, move them
towards the rear. (Figure 7)
1. Raise the Mower 2.Lower the Mower
Note: If the mower does not start after several attempts,
please contact your authorized service center.
Stopping the Engine
To stop the engine, release the blade control bar (Figure 10)
Important: When you release the blade control bar, both
the engine and the blade should stop within 3 seconds. If
they do not stop properly, stop using your mower
immediately and contact an authorized service center.
Figure 7
5
2. Hold the blade control bar (Figure 8) against the
handle.
Note: Height adjustment. 1”- 3”
Starting the Engine
1.Press the primer three times
Primer
3. Hold blade control bar then pull the pull start to start
the mower. (Figure 9)
WARNING
WARNING

Mulching the Clippings
Your mower comes mulch ready. If you have a grass
catcher please remove it before mulching.
Bagging the Clippings (Not Included)
Use the grass catcher when you want to collect grass
and leaf clippings from the lawn.
A worn grass catcher could allow small stones and
other similar debris to be thrown in the operator’s
or bystander’s direction and result in serious personal
injury or death to the operator or bystanders.
The blade is sharp. Contact with the blade can cause
serious personal injury.
Stop the engine and wait for all moving parts to stop
before leaving the operating position.
Operating Tips
General Mowing Tips
•Clear the area of sticks, stones, wire, branches, and
other debris that the blade may hit.
•Avoid striking solid objects with the blade. Never
deliberately mow over an object.
•If the mower strikes an object or starts to vibrate,
immediately stop the engine, disconnect the spark
plug and examine the mower for damage.
•Replace the blade when necessary with an AVVIX
replacement blade.
Cutting Grass
•Cut only a third of the grass blade at a time. Do not cut
bellow the 1.75 inch setting unless the grass is sparse
or it is late in the fall when grass growth begins to slow
down.
•When cutting grass over 6 inches tall, mow at the highest
cutting height setting and walk slower. Then adjust your
adjustment height lever to the desired height and mow
again. If the grass is to tall it will be more difficult to
navigate and could get stuck and cause the engine to
stall.
Wet grass or leaves can cause serious injury if you
slip and contact the blade. Mow only in dry conditions.
6
•Alternate the mowing direction. This helps disperse
the clippings over the lawn for even fertilization.
•If the finished lawn is unsatisfactory, try one or more
of the following.
•Replace the blade or have it sharpened.
•Walk at a slower pace while mowing.
•Raise the cutting height on your mower.
•Cut the grass more frequently.
•Overlap cutting swaths instead of cutting a
full swath with each pass.
•Set the cutting height on the front wheel one
notch lower than the rear wheels. For example,
set the front wheels at 2 inches and the rear at
2-1/2 inches
High Altitude Operation
Most small engines with carburetors are designed to
work efficiently from sea level to around 5,000 feet
elevation. As altitude increases, the air becomes thinner
with less available oxygen. This causes the air/fuel
mixture to become overly rich which can cause reduced
performance, spark plug fouling, difficult starting and
increased emissions.
A competent small engine shop can modify the carburetor
by installing different ‘jets’ that are designed for high
altitude operation. If your lawn mower is typically operated
at an altitude of 5,000 feet or above, you should ask your
dealer to ‘re-jet’ the carburetor and calibrate the air fuel
mixture to maximize performance at the altitude where it
is to be used. You will realize better overall performance,
while reducing excess emissions that occur when the
air/fuel mixture is too rich. This modification need only
be done once and should last for the life of the mower.
Keep in mind that any engine, even with properly
calibrated carburetor jets, will realize a decrease in
horsepower of about 3.5% for every 1,000 feet
(300 meter) increase in altitude, simply due to thinner
air. But an engine with a properly jetted carburetor will
always run cleaner and more efficiently at high altitude
than an identical unit with standard jets.
WARNING
WARNING
WARNING


Spark Plug Maintenance
1. Once the engine has cooled, remove the spark plug wire.
2. Remove the spark plug using a spark plug wrench.
3. Clean the spark plug with a wire brush (not supplied).
4. Using a feeler gauge set the gap to 0.75mm.
5. Install the spark plug carefully by hand, to avoid cross-threading.
6. After the spark plug is seated, tighten with the spark plug wrench to compress the washer.

Replacing the Air Filter
Service Interval: Every 25 Hours
1. Turn left to open cap of the air filter. (Figure 12)
2. Replace the air filter.(Figure 13)
Changing the Engine Oil
Service Interval: After the first 5 hours. Yearly.
Change the engine oil after the first 5 operating
hours change it yearly thereafter.
Run the engine a few minutes before changing the oil.
Warm oil flows better and carries more contaminants.
1. Perform the Pre-Maintenance procedures. Refer to
preparing for maintenance.
2. Remove the dipstick. (Figure 15)
•Disconnect the spark plug wire.
•Wear heavy gloves when servicing the blade.
8
3. Tip the mower onto its side, with the dipstick down,
to drain the used oil out through the oil fill
tube.(Figure 16)
4. Slowly pour oil into the oil deposit until the oil level
reaches the full line on the dipstick. (Figure 15) Do not
overfill. (Max 13.5oz. (0.4 L), type: SAE 30 detergent
oil with an API service of SF, SG, SH, SJ, SL, or higher.)
Note: If you overfill the engine, pour some oil out of it as
directed in Changing the Oil.
5. Install the dipstick securely.
6. Dispose of the used oil properly at a local recycling
center.
(Figure 12)
(Figure 13)
(Figure 15)
(Figure 16)
Open the
cover
Filter
3. Align cap, three tabs, with base. Press down and turn
right to secure.(Figure 14)
(Figure 14)
H
L
Replacing the Blade
Service Interval: Yearly
Important: You will need a torque wrench to install the
blade properly. If you do not have a torque wrench or are
uncomfortable performing this procedure, contact an
Authorized Service Center.
Examine the blade whenever the mower runs out of fuel. If
the blade is damaged or cracked, replace it immediately. If
the blade edge is dull or nicked, have it sharpened or
replace it.
The blade is sharp. Contact with the blade can result
in serious personal injury.
WARNING

Do not turn the lawn mower over, or fuel
and oil will leak, causing a hazardous
condition and possible malfunction of the
lawn mower
Figure1 7
7. Install new blade with all mounting hardware; tighten
blade bolt by turning clockwise.
8.
up toward the mower deck.
40-50
30-38
Correct blade hub bolt torque is very
important. Use proper tools only!
7
4. Always add fuel atabilizer to the fuel as directed by
the fuel stabilizer manufacturer.
Remove spark plug and spray a light fog of penetrating
oil, such as WD-40 into the spark plug hole; Then pull
the starter rope……..
Leave spark plug cable disconnected.
WARNING
WARNING
WARNING

10
WARRANTY
PULSAR PRODUCTS Limited 2 Year Warranty:
From the date of original purchase, Pulsar Products Inc. warrants to the original purchaser, that each Lawn Mower
sold, shall be free from defect in material and workmanship for a period of 2-years (1 Year repair and parts) (2 Year parts only)
Pulsar Products Inc., at its discretion, agrees to repair or replace any defective part that upon examination, inspection,
and testing by a Pulsar Products Inc. authorized service dealer, is found to be detective within the original warranty
period. Pulsar Products Inc. will also decide upon the use of new or rebuilt parts or comparable product. Any part or
product that is replaced will be retained by Pulsar Products Inc. This warranty period shall not be extended and any
repaired product shall be warranted for the remaining period of the original warranty. The consumer is responsible, and
shall prepay all transportation costs, including returning items to the factory or warehouse. This warranty is not transferable
and proof of purchase must be presented when requesting warranty service. If a proof of purchase receipt is not provided,
the product’s shipping date by the manufacturer will be used to determine the warranty period.
Where Warranty is Valid:
For warranty coverage, this product must be purchased from an authorized Pulsar Products Inc. dealer and the warranty
only extends to the original purchaser in the United States, Canada, or Mexico. Refurbished, used, demonstration, or floor
models are not covered by this warranty. Products purchased from online auction websites, are not covered
under this warranty. Products used for commercial use are not covered under this warranty.
Consumer Responsibilities:
•Consumer is responsible for carefully reading and following all instructions in the owner’s manual. Any product that is
damaged due to misuse or abuse will not be covered by this warranty.
•Consumer is responsible for all transportation costs to an authorized Pulsar Products Inc. Service Center.
Ground shipping will be applied for part shipment and customer will pay any additional charges for
expedited shipments.
•Consumer is responsible for labor costs associated with warranted repairs twelve (12) months after the purchase date.
Labor rates will only be based on normal working hours. Consumer is responsible for costs of parts after (24} months.
•Consumer is responsible for maintaining the lawn mower as specified in the owner’s manual. Documentation of this
maintenance may be required to cover warranty requests.
•Consumer is responsible for presenting any problems with the mower to an authorized Pulsar Products Inc
Service Center as soon as the problem exists. Warranted repairs will be completed in a reasonable period
of time, not to exceed 30 days.
What is covered under this warranty:
Replacement parts and labor. Please note that we reserve the right to repair or replace the product as we deem
appropriate.

11
WARRANTY
What this Warranty Does Not Cover:
•Normal wear: This warranty excludes normal wear items unless under normal use, the original equipment is defective
in material or workmanship and needs to be replaced prior to the first replacement interval.
•Maintenance: This warranty does not apply to routine maintenance and does not cover any adjustments or repairs not
performed by an authorized repair facility.
•Misuse: This warranty does not apply if your product has failed due to abuse, misuse, neglect, improper maintenance,
improper storage, unapproved modifications, or has been operated in any way contrary to the instructions found in the
products owner’s manual.
•Adverse conditions: This warranty does not apply if your product has failed due an accident or natural disasters.
•Product Shipment: This warranty does not apply to damage resulting from shipping, handling, or warehousing: Any
damage claims to this product caused by shipment must be filed with freighter.
•Damage to property: This warranty does not include consequential damages, incidental damages, or damage to
property.
•Other exclusions: This warranty does not apply if your product has been sold “as is” or where the factory applied serial
number has been removed. Refurbished used, demonstration or floor models are not covered by this warranty.
How to Obtain Warranty Service:
Take the original receipt and product to the place of purchase or mail the original receipt and product to the address found
on the web site if purchased on-line. You can also locate your nearest Pulsar Products Inc. dealer for service or warranty
questions by calling toll free at 1-866-591-8921 Mon-Fri 7:00 AM to 4:00 PM Eastern Standard Time.
Customer Support:
Product owners are welcome to contact customer support at 1-866-591-8921 with any questions and concerns they might
have. During the duration of the warranty, the following services are provided to the consumer:
Guidance: - The service center will answer operational, technical, and maintenance questions for simple procedures that
the customer feels they can safely perform.
Parts: - If a customer needs a part that can be self-installed, that part will be shipped free of charge. Ground shipping will
be applied for part shipment. The customer will be responsible for any additional charges for rush shipments. If the product
is no longer under warranty, the customer may purchase parts and will be responsible for all shipment costs.
Service Center: - Customers may take their product to an authorized service center for servicing or repairs. Transportation
or shipment costs of the unit will be the responsibility of the customer. To set up a service appointment with a service
center nearest you call 1-866-591-8921. To streamline scheduling, service centers do not offer warranty service
without an appointment.
PULSAR PRODUCTS INC.’S OBLIGATION UNDER THIS WARRANTY IS EXCLUSIVELY LIMITED TO PRODUCT
REPAIR OR REPLACEMENT AND SHALL NOT BE LIABLE FOR ANY INCIDENTAL OR CONSEQUENTIAL DAMAGES
INCLUDING BUT NOT LIMITED TO THE EXPENSE OF DELIVERING PRODUCT TO AND FROM REPAIR CENTER,
LOSS OR DAMAGE TO PERSONAL PROPERTY, LOSS OF REVENUE, TELEPHONE CHARGES, LOSS OF TIME,
OR INCONVENIENCE. SOME STATES, PROVINCES, OR JURISDICTIONS DO NO ALLOW THE EXCLUSION OR
LIMITATION OF INCIDENTAL DAMAGES, SO THE ABOVE LIMITATION MAY NOT APPLY TO YOU. THIS WARRANTY
GIVES YOU SPECIFIC LEGAL RIGHTS, AND YOU MAY ALSO HAVE OTHER RIGHTS WHICH VARY FROM STATE TO
STATE OR PROVINCE TO PROVINCE.

Introducción
Esta cortadora de césped está diseñada para ser usada por
propietarios residenciales o profesionales, contratados
operadores. Se diseña principalmente para el césped del corte
en céspedes bien mantenidos en características residenciales
o comerciales. No está diseñado para cortar cepillo o para
usos agrícolas.
Lea esta información cuidadosamente para aprender a operar
y mantener su producto correctamente y para evitar lesiones
y daños al producto. Usted es responsable de operar el
producto correctamente y con seguridad.
Puede ponerse en contacto con Pulsar directamente en
866-591-8921 para obtener información sobre productos y
accesorios, ayudar a encontrar un distribuidor o para registrar
su producto. Este manual identifica peligros potenciales y tiene
mensajes de seguridad identifica por el símbolo de alerta de
seguridad (Figura 1), que señala un peligro que puede causar
lesiones graves o la muerte si usted no sigue las precauciones
recomendadas.
1. Símbolo de Alerta de Seguridad
Este manual utiliza dos palabras para resaltar
información.Importante Llama la atención en especial las
informaciones mecánicas Y la nota destaca información
general digno de especial atención.
Importante: Este motor no está equipado con un silenciador
de pararrayos de chispa. Es una violación de la Sección 4442
del código de recursos públicos de California para usar o
operar el motor en cualquier terreno cubierto de bosque,
cepillado o cubierto de pasto. Otros Estados o áreas federales
pueden tener leyes similares.
El manual del propietario del motor adjunto se suministra para
obtener información sobre la agencia de protección ambiental
de los Estados Unidos (EPA) y el control de emisiones de
California regulación de sistemas de emisión, mantenimiento y
garantía. Los reemplazos pueden ser ordenados a través del
fabricante del motor.
Para los modelos con caballos de fuerza indicados del motor,
el grueso caballos de fuerza del motor era laboratorio
clasificado por el fabricante del motor de de acuerdo con
SAEJ1940. Como configurado para cumplir con los requisitos
de seguridad, emisión y operación de, la potencia real del
motor en esta clase de cortacéspedes será significativamente
menor.
ADVERTENCIA
CALIFORNIA
Advertencia de la proposición 65
Los gases de escape del motor de este producto
Contiene sustancias químicas conocidas en el estado
Del Estado de California como causantes de cáncer,
defectos de nacimiento U otros daños reproductivos.
No manipule los controles del motor ni altere la velocidad del
del gobernador; el hacerlo puede crear una condición
insegura resultando en lesiones personales.
Seguridad
Este cortacésped cumple o excede los requisitos de seguri-
dad de la lámina de la CPSC para los cortacéspedes
rotatorios del césped del caminar-detrás y b 71,1 del
Instituto Nacional Americano de las normas en efecto en el
momento de la producción.
Leer y comprender el contenido de este manual antes de
Arrancar el motor.
El símbolo de alerta de seguridad (Figura 1) se usa para
alertarle a posibles peligros de lesiones personales. Obe-
dezca todos los mensajes de seguridad que siguen este
símbolo para evitar posibles lesiones o la muerte. El uso o
mantenimiento inapropiado de esta podadora puede resultar
en lesiones o la muerte. Para reducir este potencial, cumplir
con las siguientes instrucciones de seguridad.
Las siguientes instrucciones han sido adaptadas de la
norma ANSI/OPEI b 71,1-2003.
Esta cortadora es capaz de amputar manos y pies y de
lanzar objetos. El no observar las siguientes instrucciones
de seguridad puede resultar en lesiones graves o la muerte.
Operación General
•Lea, entienda y siga todas las instrucciones en la máquina
y en el (los) manual (es) antes de arrancar.
•No ponga las manos o los pies cerca o debajo de la
máquina. Manténgase alejado de la abertura de descarga
en todo momento.
•Sólo permita que los adultos responsables, que estén
familiarizados con las instrucciones que operen esta
máquina.
•Despeje el área de objetos como rocas, alambres,
juguetes, etc., que podrían ser lanzados por la hoja. Man-
téngase detrás del mango cuando el motor esté en marcha.
•Asegúrese de que el área esté despejada de espectadores
antes de operar la máquina de parada si alguien entra en el
área.
•No opere la máquina descalzo o mientras usa sandalias.
Use siempre calzado sustancial.
•No tire de la máquina hacia atrás a menos que sea absolu-
tamente necesario. Siempre mirar hacia abajo y detrás
antes y mientras se mueve hacia atrás.
•Nunca dirija el material descargado hacia nadie. Evite el
material de descarga contra una pared o obstrucción. El
material puede rebotar hacia atrás hacia el operador.
Detenga la hoja cuando cruce las superficies de grava.
•No opere la máquina sin el cathcher de césped completo,
el protector de descarga, el protector trasero u otros disposi-
tivos de protección de seguridad en su lugar y trabajo.
•Nunca deje una máquina en marcha sin vigilancia.
•Detenga el motor y espere hasta que la hoja llegue a una
parada completa antes de limpiar la máquina, retirar el
colector de césped o desatascar el protector de descarga.
•Opere la máquina solamente durante el día.

•No opere esta máquina mientras esté bajo la influencia
de alcohol o drogas.
•Nunca opere la podadora en un pasto mojado.
Asegúrese siempre de su pie; camine, nunca corra.
•Desenganche el sistema de accionamiento, si está
equipado, antes de arrancar el motor.
•Si la máquina empieza a vibrar anormalmente, detenga
el motor y compruebe la causa inmediatamente. La
vibración es generalmente una advertencia de apuro.
•Siempre use protección ocular cuando opere la máquina.
•Un relámpago puede causar lesiones graves o la muerte.
Si ve rayoso oye truenos en la zona, no opere la máquina
busque refugio.
•Véanse las instrucciones de fabricación para un correcto
funcionamiento y la instalación de los accesorios. Utilice
únicamente accesorios aprobados por el fabricante
Operación Inclinada
Las laderas son un factor importante relacionado con
accidentes de resbalones y caídas, que pueden resultar
en lesiones graves. La operación en todas las laderas
requiere precaución adicional. Si se cayó inquieto en
una pendiente, no cortarlo.
•Corte a través de la cara de las laderas, nunca hacia
arriba y hacia abajo. Tenga sumo cuidado al cambiar de
dirección en laderas.
•Vigile si hay agujeros, raíces, protuberancias, rocas u
otros objetos ocultos. El terreno desigual puede causar
resbalones o caídas que resultan en lesiones graves. La
hierba alta puede ocultar obstáculos.
•No corte sobre césped mojado o en pendientes
excesivamente empinadas. Pie pobre podría causar un
resbalón o caída.
•No corte cerca de desniveles, zanjas o embarques.
podrías perder el equilibrio.
Niños
Trágicos accidentes pueden ocurrir si el operador no está
alerta a la presencia de niños. A menudo los niños son
atraídos a la máquina y el segado de actividad. Nunca
asuma que los niños permanecerán en el último lugar donde
se les vio.
•Esté consciente y apague el cortacésped si un niño entra
en el área.
•Nunca permita que niños hagan funcionar la máquina.
•Tenga mucho cuidado al acercarse a esquinas ciegas,
arbustos, árboles u otros objetos que puedan bloquear la
vista de un niño.
Servicio
Manejo seguro de la gasolina
Para evitar lesiones personales o daño a la propiedad,
use cuidado extremo en gasolina que se maneja. La
gasolina es sumamente inflamable y los vapores son
explosivos.
•Apague todos los cigarrillos, cigarros, pipas y otras fuentes
de ignición.
•Use solamente un recipiente de gasolina aprobado.
•nunca quite la tapa de gas ni añada combustible con el
motor en marcha. Permita que el motor se enfríe antes de
reabastecerse de combustible.
•Nunca recargue la máquina en interiores.
•Nunca guarde la máquina o el bote de combustible donde
haya una llama abierta, una chispa o una luz del piloto como
en los calentadores de agua o en los otros aparatos.
•Nunca llene el bote de gasolina dentro de un vehículo o en
un camión o remolque la cama con un forro de plástico.
Coloque siempre los botes de gasolina en el suelo lejos de
el vehículo antes de llenar.
•Si esto no es posible, entonces recargue el equipo
con un contenedor portátil, en lugar de una boquilla
dosificadora de gasolina.
•Mantenga la boquilla en contacto con el borde del tanque
de combustible o la abertura del recipiente en todo
momento hasta que se haya completado el repostaje. No
use un dispositivo de bloqueo de la boquilla abierta.
•Si se derrama combustible sobre la ropa, cambie la ropa
inmediatamente.
•Reemplace la tapa de gas y apriétela firmemente.
Los gases de combustión contienen el monóxido
de carbono, el veneno inodoro, mortal que le
puede matar.
No dirija el motor dentro o en área encerrada.
Servicio General
•Nunca opere la máquina en un área cerrada.
•Mantenga todas las tuercas y pernos apretados para
asegurarse de que el equipo esté en condiciones de trabajo
seguras.
•Nunca manipule los dispositivos de seguridad. Compruebe
su apropiado operación con regularidad.
•Mantenga la máquina libre de pastos, hojas u otros
desechos acumulados. Limpie el derrame de aceite o
combustible y elimine cualquier residuo de combustible
empapado. Permita que la máquina se enfríe antes de
guardarla.
•Si golpea un objeto extraño, detenga e inspeccione la
máquina. Reparar si es necesario antes de arrancar.
•Nunca realice ajustes o reparaciones con el motor en
funcionamiento. Desconecte el cable de la bujía y la tierra
para evitar el arranque no intencionado.
•Comprobar la hierba catche componentes y el desempeño
Guard frecuentemente y sustituir con los fabricantes
las piezas recomendadas, cuando sea necesario.
•Las cuchillas del cortacésped están afiladas. Envuelva la
hoja o use guantes, y tenga mucho cuidado al darle
servicio.
•No cambie el ajuste del regulador del motor en el motor.
•Mantenga o reemplace las etiquetas de seguridad e
instrucciones según sea necesario.
ADVERTENCIA

Preparacion
Importante: Retire y deseche el
plastico que protectejeel motor.
1. Desplegando la Manija
2. Instalación de Ruedas (Figura 2)
•
Piezas necesarias: 2 Ruedas delanteras (7 "), 2
traseras (11 "), 4 randelas y 4 tuercas.
Instale la arandela en el eje de la rueda y luego
coloque en la rueda en el eje de la rueda.
Atornille la tuerca de seguridad en el extremo
de la rosca de el eje de la rueda hasta que siente
en su lugar.
Repita el proceso en el otro lado del
cortacésped para instalar las otras tres ruedas.
•
•
•
•
Figura 2
1. Retire las perillas de la manija de la plataforma del
cortacésped. Importante: Encamine los cables hacia el
exterior del mango cuando instale el mango.
1. Pomo de la manija (2)
2. Mueva la manija a la posición de operación.
3. Instale y apriete las perillas de la manija que retiró
en el paso 1. (Figura 1)
2. Llenar el Motor con Aceite
1. Remove the dipstick.(Figure 3)
Figura 3
3
1
Figura 1
Luego coloque la cubierta de la rueda.
Your mower engine does not come filled with oil. Use
SAE 30 weight engine oil (not included)
H
L
Especificación del Producto
Componente
Velocidad Nominal
Desplazamiento
Recorte de Anchura
Ajuste de Altura
Ruedas
Peso
Especificación
2800RPM
150cc
20”
1”- 3”
7” Delanteras 11” Traseras
60 lbs
Calcomanías de Seguridad y Instrucciones
Importante: Las calcomanías
de seguridad e instrucciones
están ubicadas cerca de áreas
de PELIGRO potencial.
Reemplace las calcomanías
dañadas.
1. ADVERTENCIA: Lea el manual del operador.
2. Riesgo del Objeto lanzado: Mantenga a personas
presentes una distancia segura del cortacésped.
3. Peligro de corte/desmembramiento de la mano o del pie,
de la lamina del cortacéspedes: Desconecte la bujía y lea
las instrucciones antes de realizar el mantenimiento.
4. Peligro de corte/desmembramiento de la mano o el pie
Manténgase alejado de todas las piezas móviles y
mantenga todos los protectores y escudos en su lugar.
5. Peligro de corte/desmembramiento de la mano o el pie
No corte las laderas hacia arriba y hacia abajo, sólo corte
a través; apague la máquina y el motor, recoja los
desechos antes de el funcionamiento; mire hacia atrás y
hacia abajo antes de invertir.
ADVERTENCIA
El plegado o desdoblado de la empuñadura puede
dañar los cables, causando condiciones de
funcionamiento inseguras.
•No dañe los cables doblándose o desplegando el
mango.
•Si se daña un cable, comuníquese con un centro de
servicio autorizado llamando al 1-866-591-8921.
2. Ponga lentamente el aceite en el orificio hasta que
el nivel de aceite alcanza el rango completo en la
varilla medidora. No llene demasiado.
Máx. 13.5 oz. (0.4L), tipo: aceite de motor SAE 30
peso con una calificación de servicio API de SF o
superior.

Llenando el Tanque de Combustible
4
Figura 4 Figure 5
5
4
3
2
1
H
L
Figure 6
Descripción del Producto
1. Filtro de aire 2. Tapa del tanque
de combustible
3. Llenado de aceite/Varilla 4. Ajuste de altura
5. Perilla
Funcionamiento
Aditamentos y Accesorios
Una selección de aditamentos aprobados por Pulsar
y accesorios están disponibles para su uso con la
máquina para mejorar y expandir sus capacidades.
Comuníquese con su centro de servicio autorizado de
o con el distribuidor 1-866-591-8921.
La gasolina es sumamente inflamable y explosivo. Un
Incendioo explosión de la gasolina puede provocar
quemaduras u otros.
•Para evitar que una carga estática encienda la gasolina,
coloque el recipiente y/o el cortacésped directamente
sobre el suelo antes de llenarlo, no en un vehículoo en
un objeto.
•Llene el tanque al aire libre cuando el motor esté frío.
Limpie los derrames.
•No maneje gasolina cuando esté fumandoo alrededor
de una llama o chispas abiertas.
•Almacene la gasolina en un recipiente de combustible
aprobado, fuera de el alcance de los niños.
Llene el tanque de combustible con gasolina regular sin
plomo. (Figura 5)
Importante: Para reducir los problemas de arranque,
agregue combustible estabilizador al combustible,
mezclándolo con gasolina menos de
30 días de edad. (Figura 5)
ADVERTENCIA
1.Quite la varilla de aceite, límpiela, y instale la varilla
de aceite. (Figura 6)
Comprobación del Nivel de Aceite del Motor
Intervalo de servicio:Antes de cada uso
3. Instale la varilla de aceite.
2. Quite la varilla de aceite y compruebe el nivel del
aciete (Figura 6) Si el nivel de aciete esta debajo de
la señal añade aceite despacio para levantar el nivel del
aciete a la señal llena en la varilla de aceite. No sobrellene
(Max llena 13.5oz (0.4 L), Use aciete de detergente de
SAE 10W-30 con un API servicio de SF o más alto.)

1. Levanta el cortacésped 2. Bajar el cortacésped
Figura 7
Figura 9
5
Nota: Ajuste de altura. 1"- 3”
Ajuste de la Altura de Corte
El ajuste de la altura cortante le puede traer en el
contacto con la lámina móvil, causando lesiones
graves
•Pare el motor y espere a que todas las piezas móviles
para detener.
•No coloque los dedos debajo de la carcasa cuando se
ajuste la altura de corte.
Arranque del Motor
Nota:
Si la podadora no se inicia después de varios intentos,
Parada del Motor
Intervalo de servicio:
Importante:
Cuando suelta la barra de control de la lámina,
ambos el motor y la lámina se deberían parar dentro de 3
segundos. Si no se paran correctamente, dejan de usar su
cortacésped inmediatamente comuníquese con un centro
de servicio autorizado.
Si el motor ha estado funcionando, el silenciador
estará caliente y puede quemarlo gravemente.
Manténgase alejado del silenciador caliente.
Ajuste la altura de corte deseada. Ajuste las cuatro
ruedas a la misma altura.
póngase en contacto con su centro de servicio autorizado.
Antes de cada uso o diariamente. Para parar el motor, suelte
la barra de control de la lámina (Figura 10)
ADVERTENCIA
ADVERTENCIA
1.Presione el cebador tres veces
Cebador
2. Sostenga la barra de control de la lámina
(Figura 8) contra el mango.
3.Sostenga la barra de control de la hoja y luego
jale el comienzo del tirón para arrancar el
cortacésped. (Figura 9)
Nota: Para bajar el cortacésped, mueva la palanca de la altura
de corte hacia adelante; para levantar el cortacésped, mueva la
palanca hacia la parte trasera. (Figura 7)
Figura 10
Figura 8

Un colector de pasto usado podría permitir que
pequeñas piedras y otros desechos similares sean
arrojados en la dirección del operador o del espectador
y ocasionar lesiones personales graves de o la muerte
al operador o transeúntes.
La navaja está afilada. El contacto con la navaja puede
causar lesiones personales graves.
Pare el motor y espere a que todas las piezas móviles
se detengan antes de salir de la posición de
funcionamiento.
Consejos de Funcionamiento
Puntas Generales
•Limpie el área de palos, piedras, alambre, ramas y
otros escombros que la navaja puede golpear.
•Evite golpear objetos sólidos con la navaja. Nunca
deliberadamente siegue sobre un objeto.
•Si el cortacésped golpea un objeto o comienza a vibrar,
inmediatamente pare el motor, desconecte la chispa
y examine el cortacésped del daño.
•Sustituya la navaja cuando es necesario por un navaja
de reemplazo.
Cortar el Césped
•Corte sólo un tercio de la hoja de pasto a la vez. No corte
bel ajuste de 1,75 pulgadas a menos que la hierba sea
escasa o es tarde en el otoño cuando el crecimiento de la
hierba comienza a retardar abajo.
•Cuando corte pastos de más de 6 pulgadas de altura,
corte a la altura del ajuste más alto del y camine más
despacio. A continuación, ajuste la palanca de ajuste de
la altura a la altura deseada y corte nuevamente.
. Si el pasto es alto será más difícil navegar y podría quedar
atascado y hacer que el motor se pare.
El pasto mojado o las hojas pueden causar lesiones
graves si se resbala y se pone en contacto con la hoja.
Corte solamente en condiciones secas.
6
•Alterne la dirección de segado. Esto ayuda a dispersar
los recortes sobre el césped para incluso la fertilización.
•Si el césped acabado no es satisfactorio, pruebe uno o
más de lo siguiente.
•Reemplace la cuchilla o la afile.
•Camine a un ritmo más lento mientras siega.
•Eleve la altura de corte de su cortacésped.
•Corte la hierba con más frecuencia.
•Traslape las hileras de corte en lugar de cortar una
Operación a gran altitud
La mayoría de los motores pequeños con carbura-
dores están diseñados para funcionar eficiente-
mente desde el nivel del mar hasta una altura de
alrededor de 5,000 pies. A medida que aumenta la
altitud, el aire se vuelve más delgado con menos
oxígeno disponible. Esto hace que la mezcla de
aire / combustible se vuelva demasiado rica, lo que
puede reducir el rendimiento, la falta de bujías, el
arranque difícil y el aumento de emisiones.
Un taller competente de motores pequeños puede
modificar el carburador mediante la instalación de
diferentes "jets" que están diseñados para el
funcionamiento a gran altitud. Si su cortacésped-
funciona normalmente a una altura de 5,000 pies o
más, debe pedirle a su distribuidor que "reactive" el
carburador y calibre la mezcla de aire y combus-
tible para maximizar el rendimiento a la altitud
donde se va a usar. Obtendrá un mejor rendimiento
general, al tiempo que reducirá el exceso de
emisiones que se producen cuando la mezcla del
aire / combustible es demasiado rica. Esta modifi-
cación solo debe hacerse una vez y debe durar
toda la vida.
Tenga en cuenta que cualquier motor, incluso con
chorros de carburador calibrados correctamente,
experimentará una disminución en la potencia de
aproximadamente 3.5% por cada 1,000 pies (300
metros) de aumento en la altitud, simplemente
debido al aire más delgado. Pero un motor con un
carburador adecuadamente propulsado por chorro
siempre funcionará de manera más limpia y
eficiente a una gran altitud que una unidad idéntica
con chorros estándar.
ADVERTENCIA
ADVERTENCIA
ADVERTENCIA

Mantenimiento
Nota: Determine los lados izquierdo y derecho de la máquina desde la posición normal de funcionamiento.
Intervalo de Servicio de
Mantenimiento
Antes de Cada uso o
Diariamente
Cada 25 Horas
Antes del Almacenamiento
Anual
Procedimiento de Mantenimiento
•Asegúrese de que el motor se detenga dentro de 3 segundos después
de soltar la barra de control de la navaja.
•Limpie los recortes de pasto y la suciedad de debajo.
•Vacíe el depósito de combustible antes de repararlo como se indica
y antes del almacenamiento anual.
•Reemplace el filtro de aire. Reemplácelo con más frecuencia en
condiciones de funcionamiento polvorientas.
•Sustituya la navaja o téngala afilado (más con frecuencia si el borde
no esta filoso).
•Refiérase al manual de su operador de motor para cualquier
procedimiento de mantenimiento anual adicional.
Mantenimiento de la Bujía
1. Espere que el motor se haya enfriado, despues retire la bujia.
2. Retire la bujía con una llave de bujías.
3. Limpie la bujía con un cepillo de alambre (no incluido).
4. Usando un calibre, ajuste el espacio a 0.75mm.
5. Instale la bujía con cuidado con la mano, para evitar que se enrosque.
6. Después de que la bujía esté asentada, apriete con la llave.
This manual suits for next models
1
Table of contents
Languages:
Other Pulsar Lawn Mower manuals

Pulsar
Pulsar PTG1221S User manual

Pulsar
Pulsar PTG1221T User manual

Pulsar
Pulsar PTG1220D5 User manual

Pulsar
Pulsar PTG12205BM User manual

Pulsar
Pulsar PTG1221SE User manual

Pulsar
Pulsar PTG1221SA2 User manual

Pulsar
Pulsar PTG1220DBM User manual

Pulsar
Pulsar PTG1220D5A User manual

Pulsar
Pulsar PTG1221A2 User manual

Pulsar
Pulsar PTG1221 User manual