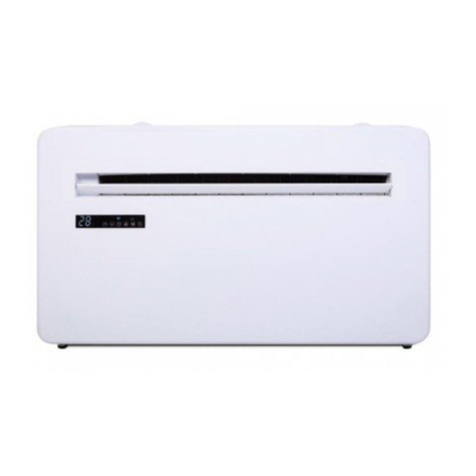
Puravent Prem-I-Air Elite EH1776 User manual

Our Address
Puravent, Adremit Limited, Unit 5a, Commercial Yard,
Settle, North Yorkshire, BD24 9RH
Get In Touch
Call: 0845 6880112
Email: [email protected]
EH1776
Double Duct Air Conditioner
INSTALLATION AND USER MANUAL
BEFORE INSTALLING AND USING THIS AIR CONDITIONER, PLEASE READ ALL
INSTRUCTIONS CAREFULLY.

Our Address
Puravent, Adremit Limited, Unit 5a, Commercial Yard,
Settle, North Yorkshire, BD24 9RH
Get In Touch
Call: 0845 6880112
Email: [email protected]
P12
3° INCLINATION
P5
P0
D
P1
P11
1
LIFT IT UP
HERE
LIFT IT UP
HERE
2
3
5
W
6
7
11
P3
Outdoor
2m
2m
P6
P9
P14
sp
i
ri
t
le
ve
l
P7
P17
LIFT IT UP
HERE
P15
LIFT IT UP
HERE
P8
P18
P10
Rubber cup
Water
Indoor
11
P16
P4
H
P13
Soft
End
Hard
End
4
6
5
9
8
10
Filter
grating
Air
directional
flap
P2
Wiring control
Fresh
air
system
Power
cord
DISPLAY
RED
LED
power
supply
is
connected;
GREEN
LED
compressor
is
on;
YELLOW
LED
timer
is
on;
a
BLUE
LED
night
mode
is
on;

Our Address
Puravent, Adremit Limited, Unit 5a, Commercial Yard,
Settle, North Yorkshire, BD24 9RH
Get In Touch
Call: 0845 6880112
Email: [email protected]
CONTENTS
ENGLISH
1.1 INTRODUCTION.......................................................................................1
1.2 IMPORTANT SAFETY INSTRUCTIONS ......................................................1
1.3 RECIEVING THE GOODS ............................................................................2
1.4 HANDLING ...............................................................................................2
1.5 LIST OF ACCESSORIES............................................................................2
1.6 TECHNICAL FEATURES ..............................................................................2
2.1 POSITIONING THE AIR CONDITIONER......................................................3
2.2 PAPER TEMPLATE ......................................................................................3
2.3 DRILLING THE WALL .....................................................................................3
2.4 FASTENING THE BRACKET ......................................................................4
2.5 INSTALLATION OF THE PIPES ....................................................................4
2.6 FITTING THE GRATINGS .............................................................................4
2.7 FITTING THE AIR CONDITIONER ON THE BRACKET .................................4
3.1 DESCRIPTION OF LCD ICONS ....................................................................5
3.2 REMOTE CONTROL FUNCTIONS ..............................................................6
3.3 HEATING MODE ..........................................................................................7
3.4 COOLING MODE .........................................................................................7
3.5 DRY MODE ..................................................................................................8
3.6 FAN MODE ..................................................................................................8
3.7 SLEEP MODE ..............................................................................................9
3.8 AUTO MODE................................................................................................9
3.9 TIMER OFF FUNCTION ...........................................................................10
3.10 TIMER ON FUNCTION ........................................................................ 10
3.11 (Optional) Wired Wall Pad Controller ....................................................... 11
3.12 FRESH AIR SYSTEM................................................................................12
3.13 INSTALLING AND CHANGING THE BATTERY ........................................... 12
3.14 MAINTENANCE.....................................................................................13
3.15 TROUBLESHOOTING ......................................................................................... 13
1. GENERAL INFORMATION
2. INSTALLATION
3. USE AND MAINTENANCE

Our Address
Puravent, Adremit Limited, Unit 5a, Commercial Yard,
Settle, North Yorkshire, BD24 9RH
Get In Touch
Call: 0845 6880112
Email: [email protected]
1. GENERAL
INFORMATION
ENGLISH
1
1.1 INTRODUCTION
Please note: Do not dispose of any
packaging until the installation of the air
conditioner is completed.
After having removed the packing, check that
all the content is intact and complete. (See
list of accessories). In the event of missing
parts, contact your retailer.
This air conditioner has been designed to cool
or heat the air of a room and should only be
used for this purpose.
The manufacture cannot be held liable for
damage caused to property or injure to persons
or animals due to incorrect installation,
regulation and maintenance or improper use.
This air conditioner contains R410a refrigerant,
at the end of its life, the disposal of this air
conditioner must be in accordance with the
strict regulation governing the recycling of this
product, please use caution during the
disposal. Please contact your local authority
for regulatory advice.
Don’t switch on before having totally assembled
the air conditioner and before installing in its
correct operating position.
Before starting the appliance, check that it is
correctly earthed, according to the legislation
in force in the country concerned.
1.2 IMPORTANT SAFETY
INSTRUCTIONS
When using this electrical appliance, basic
safety precautions should always be followed:
Do not place objects on, or allowobjects to
obstruct the air inlet or outlet openings.Extreme
care should be taken when any product is used
by, or near children and pets, and whenever the
product is left operating and unattended.
Please note:
Before operating the product, remove the air
conditioner from its packaging and check if it
is in good condition.
Do not let children play with the packaging or
the plastic bags.
Do not operate any product with a damaged
cord or plug, or after the air conditioner
malfunctions, has been dropped, or damaged
in any manner.
Return the air conditioner to an authorised
service center for examination and repair to
avoid any hazard.
Do not attempt to repair or adjust any electrical
or mechanical functions on this air conditioner
as this may void the warranty, always contact
your local service engineer.
Always operate the product from a power
source of the same voltage, frequency and
rating as indicated on the product identification
plate. This air conditioner is not intended for
use in wet or damp locations.
Do not place the air conditioner near an open
flame, cooking or heating appliance or hot
surface.
Do not let the power cord hand over the edge
of a table or counter. Arrange the power cord
away from an area where it may cause a trip
hazard. Never place the power cord under a
carpet or rug. Do not operate the air conditioner
in areas where petrol, paint, or other flammable
liquid are used or stored.
Do not carry out any cleaning or maintenance
or access internal parts until the air conditioner
has been disconnected from the mains
electricity supply.
Do not alter the safety or regulating devices.
Do not pull, remove or twist the electric cable
connected to the air conditioner, even if
disconnected from the mains electricity
supply avoid prolonged direct contact with
the flow of the air from the air conditioner
and the room being closed with no ventilation
for a prolonged period.
Repair or maintenance work must be carried
out by a service engineer or by qualified
technicians in compliance with the instructions
given in this booklet. Do not alter the appliance,
any modifications could cause damage or injury and
the manufacture of the appliance will not be
liable for any damage or injury caused by
unauthorized modification.
This instruction booklet is an integral part of
the appliance and should therefore be carefully
preserved and always accompany the appliance
in the event of transfer to another owner or user
or another installation engineer. Should the
booklet be damaged or lost, please request an
additional manual or download from the prem-i-
air website at www.prem-i-air.com

Our Address
Puravent, Adremit Limited, Unit 5a, Commercial Yard,
Settle, North Yorkshire, BD24 9RH
Get In Touch
Call: 0845 6880112
Email: [email protected]
1. GENERAL
INFORMATION
ENGLISH
2
1.3 RECEIVING THE GOODS
The air conditioner is delivered in a protective
packaging and is accompanied by an instruction
manual. This manual is an integral part of the air
conditioner and should therefore be carefully
read and preserved. When the air conditioner is
unpacked, please check that the air conditioner
and accessory pack are complete and
undamaged.
1.4 HANDLING
Be fully aware of the weight of the air conditioner
before attempt ing to lift it. Take all necessary
precautions to avoid damag ing the product or
causing personal injury. It is advisable to remove
the packaging only when the air conditioner has
beenlocated inthe point of installation. Carefully
remove the adhesive strips positioned on the air
conditioner. Packaging components must be
tidied
up correctly and not left within reach of
children as this could be dangerous.
Waste electrical products should not be
disposed of
with household waste. Please
recycle where facilities
exist. Check with
your LocalAuthorityor retailer for
recycling
advice.
Any batteries used inthe remotecontrol contain
materials, which are hazardous to the environ-
ment. They must be removed from the remote
control when they reach the end of their life and
disposed of responsibly.
1.6 TECHNICAL FEATURES (P1,P2)
1.5 LIST OF ACCESSORIES (P0)
1.
FASTENING BRACKET
2.
REMOTE CONTROL
3.
REMOTE CONTROL HOLDER
4.
DRA INAGE PIPE
5.
EXTERNAL GRATING
6.
PLASTIC SHEET AIR PIPE
7.
KIT OF SCREWS
8.
GRATING FIXING CORD
9.
INSTRUCTION MANUA L
10.
PAPER TEMPL ATE FOR WALL DRI LLING
11.
160mm RING
12.
150mm RING
This product hasbeenmanufactured tocom-
ply with 2006/95/EC and with amendments
92/31/EEC and 93/68/EEC
*The above data could be changed in order to improve the performance
STAND ARD TEST CONDI TIONS - EN 14511-
OPER ATING CONDI TIONS IN COOLI NG AND
DEHUMIDIFICATION MODE
- Inside 270C DB; 190C WB
- Outside 350C DB; 240C WB
OPER ATING CONDI TIONS IN HEATING MODE
- Outside 70C DB; 60C WB
- Inside 200C DB
Description
Value
Cooling capacity*W(BTU/h)
2632(9000)
Heating capacity*W(BTU/h)
2730(9500)
Rated voltage(V)
230
Absorbed power in cooling*(W)
981
Absorbed current in cooling*(A)
4.3
Absorbed power in heating*(W)
880
Absorbed current in heating*(A)
3.9
Air flow(m3/h)
400
Noise level(dB A)
47
Dehumidification capacity*(L/24h)
16.3
Temperature Control
18-300C
Fuse
(T3
.15
L)
250V
Refrigerant
R410A
Global warmer potential(GWP)
2088
Tonnes of CO2 equivalent
1.34
Dimensions H/W/D(cm)
58/100/23.5
Net
weight
(KG)
45

Our Address
Puravent, Adremit Limited, Unit 5a, Commercial Yard,
Settle, North Yorkshire, BD24 9RH
Get In Touch
Call: 0845 6880112
Email: [email protected]
3
2.INSTALLATION
ENGLISH
2.1 POSITIONING THE AIR
CONDITIONER (P3)
To maintain the best performance from your air
conditioner, prevent breakdowns or hazards, you
must position it correctly. Please follow the
guidelines andinstructions below infull, as failure
todosocould cause potential installation problems.
- The air conditioner must be installed on an
exterior wall that has access to the outside with a
minimum of 2 meters clearance to the outside.
- The air conditioner mustbe fitted leaving room
all around as illustrated in the paper template.
- The wall on which the air conditioner is installed
must be sturdy and able to withstand the weight of
the air conditioner.
After determining the best place for installation
as described above, please check to ensure that
the wall can be drilled in the chosen area without
interfering with other structures orinstallations
(
beams, lintels, girders, pipes, wires, etc).
Please also ensure that there are no obstacles on
the outside of the wall, which may obstruct air
circulation through the drilled holes, for example:
(plants, and their leaves, slats or paneling, drain
pipes, overflows and gratings, etc.). Any
obstruction could interfere with the correct
performance of the air conditioner.
2.2 PAPER TEMPLATE(P4)
Fasten the template to the wall once the
following guidelines have been thoroughly
checked.
- Do not drill any holes until you are completely
confident that there are no obstacles in the area
you wish to drill and there are no obstructions
which could be hidden by the construction of the
wall, for example: electrical wiring, water & gas
pipes or supporting lintels or beams.
- Ensure that a spirit level is used, as the air
conditioner must be level.
- Follow the installation instructions in full.
2.3 DRILLING THE WALL(P5)
Please note: If you are drilling the hole above
ground floor level, please ensure that the area
has been secured; while the holes are being
drilled
the outside area should be supervised,
until drilling has
been completed.
INLET ANDOUTLET HOLES
- This operation should be carried out using the
proper tools (diamond tip or core drills with
high
twisting torque and adjustable rotation speed).
- Fasten the template to the wall taking care to
check the distance from the floor and or ceiling and
keep it horizontal by using a spirit level.
- Use a pilot drill to mark the center of each core
hole to be drilled.
- Use a core boring head having a diameter of
162 mm to drill the two holes for inlet and outlet
airflow.
The holes must
have a downward
inclination of
3-5 degrees to prevent
any back flow of water
from the pipes.
DRAI NAGE HOLE (P13)
This air conditioner has a dualsystem to drain
the condensate moisture automatically.
Before installing the Air Conditioner choose
which
isthe most suitable system for your
installation.
Please read carefully the follow instructions.
System “A”: Drill a hole through the wall
measuring 30mm in diameter in the position
shown
on the paper template. Drainage occurs
by
gravity. For this reason, it is essential for
the
drain line to have a minimum downward
inclination of atleast 3 degrees throughout
its
length: connect the drain pipe(from rubber
terminal) tothe air conditioner (back side)
after unplugging the black rubber cup (see pic-
ture P13). With this solution, you can drain the
condensate moisture to a suitable wastewater
drain. Please pay particular attention to not
draining the water where it may cause a
nuisance.
System “B”: If it is not possible to install the
drainage pipe as described in system A. do not
unplug the black rubber cup (picture P13).
The
condensate moisture will go outside via the hot
air exhaust pipes(see picture P14).

Our Address
Puravent, Adremit Limited, Unit 5a, Commercial Yard,
Settle, North Yorkshire, BD24 9RH
Get In Touch
Call: 0845 6880112
Email: [email protected]
4
2.INSTALLATION
ENGLISH
2.6 FITTING THE GRATINGS
(P7,P8,P9,P10)
Tofit the two external gratings please proceed as
2.4 FASTENING THE BRACKET(P6)
- Drill the holes for anchoring the fastening bracket
to the wall using preferably the 6 holes shown in
black on the paper template. If the wall is not
sturdy enough it is advisable to use extra anchor
bolts using the holes showed in grey on the paper
template.
- The anchor bolts provided require an 8mm hole;
the wall should be inspected to determine if
the
provided bolts are suitable or if it is necessary to
use
different anchor bolts. The manufacturer is
not
liable in the case of underestimation of the
structural
integrity of the anchorage made at the
time of
installation.
2.5 INSTALLATION OF THE PIPES
- After drilling the holes, the plastic sheet supplied
with the air conditioner needs to be fitted through
them.
- Measure the depth of the wall and cut the
supplied
plastic sheet to size.
- Roll the sheet and insert it into the hole (see
below), paying
attention to the joint line, which
must be always
in the
upper position. Remember
that the sheet must
have the same inclination as
the holes (min 30).
Insert the rings into the holes.
follows: familiarise yourself with the fitting of the
grating to the tube, before installation. Insert the
cords through the center of the grating. One
grating fits on the outside of the tube and the other
fits inside. The air discharge is the bigger hole and
the grating therefore fits on the outside of the air
discharge tube. Insert the supplied cord into the
hole. Fold the outer grating in half grasping the
cord with your free hand. Insert your arm inside the
pipe with the grating and push all the way to the
outside. Let the grating unfold and pull the cord
toward you. With a little patience
and
manipulation, the 2 gratings will fit the end of
the
tubes. Grasping the cord, insert your fingers
between the fins and pull the grating toward you
until the grill is properly fitted into the pipe,
keeping the fins in vertical position. If the external
grating is accessible, and to prevent its accidental
removal, it is
recommended to fasten it to the wall
with wall plugs and screws with a diameter of 6 mm.
Tighten
the cord and fasten it to the vent on the
internal
flanges.
2.7 FITTING THE AIR CONDITIONER
ON BRACKET (P11,P12)
After checking again that the bracket is
securely
fastened to the wall, and that any
necessary
preparations for electric connection and
condensate drainage (if itneeds) have been made,
fasten the air conditioner to its supporting bracket.
Lift it up by holding the sides at the bottom.
Tilt the air conditioner slightly toward the
bracket.
The air conditioner can now be pushed
firmly
against the wall. Inspect the installation carefully
to make sure that the insulating back
panel fits
firmly against the wall and there are
no gaps at the
back of the air conditioner and
that the two plastic
semicircles on the rear of
the air conditioner are
placed inside of the two
plastic hoses fixed inside
the wall.

Our Address
Puravent, Adremit Limited, Unit 5a, Commercial Yard,
Settle, North Yorkshire, BD24 9RH
Get In Touch
Call: 0845 6880112
Email: [email protected]
5
3. USE AND MAINTENANCE
ENGLISH
3.1 DESCRIPTION OF LCD ICONS
3.2 REMOTE CONTROL FUNCTIONS
MODE BUTTON: Set upthe air conditioner operating mode
ON/OFF BUTTON: Turn on or turn off the air conditioner
UP BUTTON: Increase the temperature and time
DOWNBUTTON: Decrease the temperature andtime
FAN SPEED BUTTON: Set up the fan speed
TIMER ON BUTTON: Set up the time the air conditioner starts
TIMER OFF BUTTON: Set up the time the air conditioner stops
CLOCK BUTTON: Adjust the clock
LOUVRESWING BUTTON: Adjust the airflow direction
SLEEP
BUT TON: Automatically adjusts the mode & temperature according to the circadian rule.
RES ET
BUT TON: Resets the unit.
SPARE
BUT TON
: Not Used
Icons
Meaning
Icons
Meaning
Auto
Fan speed
Cooling
Airflow
direction
Dry
Timer off
Fan
Timer on
Heating
Sleep
Clock
TEMP
Not Used
1
2
3
4
7
5
6
8
9
11
10
12
1
2
4
5
6
9
10
3
7
8
11
12

Our Address
Puravent, Adremit Limited, Unit 5a, Commercial Yard,
Settle, North Yorkshire, BD24 9RH
Get In Touch
Call: 0845 6880112
Email: [email protected]
6
3. USE AND MAINTENANCE
ENGLISH
3.3 HEATING MODE
3.4 COOLING MODE
Sequence of operation
Sequence of operations
Press the ON/OFF button "
",
switch on the air conditioner, it will
run in memory mode.
Press the MODE button " ", set
up the mode to cool " ", the air
conditioner will run in cooling.
Press UP " " or DOWN "
"
button, to adjust the
temperature.
Press the FAN SPEED button
"
", set up the fan speed,
is
low speed, is middle speed,
is high speed, (flashing)
is auto speed. For auto fan,
the speed is chosen by the
difference between the room
temperature and the set temp.
Press the ON/OFF button " ",
switch off the air conditioner. Next
time this button is pressed,
the air conditioner will operate
in this mode by memory.
Press the ON/OFF button "
",
switch on the air conditioner, it will
run in memory mode.
Press the MODE button " ", set
up the mode to heat " ", the air
conditioner will run in heating.
Press UP " " or DOWN "
"
button, to adjust the
temperature.
Press the FAN SPEED button
"
", set up the fan speed,
is
low speed, is middle speed,
is high speed, (flashing)
is auto speed. For auto fan,
the speed is chosen by the
difference between the room
temperature and the set temp.
Press the ON/OFF button " ",
switch off the air conditioner. Next
time this button is pressed,
the air conditioner will operate
in this mode by memory.

Our Address
Puravent, Adremit Limited, Unit 5a, Commercial Yard,
Settle, North Yorkshire, BD24 9RH
Get In Touch
Call: 0845 6880112
Email: [email protected]
7
3. USE AND MAINTENANCE
ENGLISH
3.5 DRY MODE
3.6 FAN ONLY
MODE
Sequence of operations
Press the ON/OFF button "
",switch on the
air conditioner, it will run in memory mode.
Press the MODE button " ", to set the mode
to fan " ", the unit will run in fan mode.
Press UP " " or DOWN "
" button, to
adjust the temperature
Press the FAN SPEED button "
the fan speed, is low speed,
", set up
is middle
speed, is high speed, (flashing) is
auto speed.
For auto fan, the speed is chosen by the
difference of room temperature and setting
temperature.
Room temperature-setting temperature>5℃
high speed.
Room temperature-setting temperature>3℃
middle speed.
Room temperature-setting temperature>1℃
low speed.
Press the ON/OFF button "
", switch off the
air conditioner. Next time this button
is pressed, the air conditioner operates in
this mode by memory.
Press the ON/OFF button "
",
switch on the air conditioner, it will
run in memory mode.
Press the MODE button " ", set
up the mode to dry " ", the air
conditioner will run in
dehumidifying mode.
Press UP " " or DOWN "
"
button, to adjust the
temperature.
FAN SPEED button is "
"
disable, indoor fan speed is always
low in dry mode.
Press the ON/OFF button " ",
switch off the air conditioner. Next
time when this button is pressed,
the air conditioner will operates
in this mode by memory.

Our Address
Puravent, Adremit Limited, Unit 5a, Commercial Yard,
Settle, North Yorkshire, BD24 9RH
Get In Touch
Call: 0845 6880112
Email: [email protected]
8
3. USE AND MAINTENANCE
ENGLISH
3.7 SLEEP MODE Sequence of operations
3.8 AUTO MODE Sequence of operations
Press the ON/OFF button " ", switch on the air
conditioner, it will run by memory mode.
Press the MODE button " ", set up the mode to
auto " ", the air conditioner will run in auto mode
.(Reference to “emergency operation”)
According to the difference of room temperature
and set temperature the unit will automatically
choosethe running mode (cool, heat, fan). The
temperature set buttons UP “ ” and DOWN
“ ” are disabled.
When room temperature 200C, the unit will run
in heat mode.
When temp 200C and 250C, the unit will run
in fan only mode.
When room temperature 250C, the unit will run
in cool mode.
Press the FAN SPEED button " ", set up the
fan speed, is low speed, is middle speed,
is high speed, (flashing) is auto
speed.
For auto fan, the speed is chosen by the
difference of room temperature and the setting
temperature.
Press the ON/OFF button " ", switch off the air
conditioner. Next time this button is pressed,
the air conditioner operates in this mode by
memory.
Press the
ON/OFF
button "
",
switch on the air conditioner, it will
run in memory mode.
Press the MODE button " ", set
up the mode to cool " " / heat " "
(heat pump) / auto" ", the air
conditioner will run this mode.
Press UP " " or DOWN "
"
button, to adjust the setting up
temperature.
Press the SLEEP button " " , this
icon will display on LCD, sleep
function is set up; press it again,
cancel the sleep function.
If the sleep function is launched,
the fan speed is steady in low
speed.

Our Address
Puravent, Adremit Limited, Unit 5a, Commercial Yard,
Settle, North Yorkshire, BD24 9RH
Get In Touch
Call: 0845 6880112
Email: [email protected]
3. USE AND MAINTENANCE
ENGLISH
10
3.9 TIMER OFF FUNCTION Sequence of operation
3.10 TIMER ON FUNCTION
Press the ON/OFF button "
",
switch on the air conditioner, it will
run in memory mode.
Press the MODE button " " set
up the desired mode.
Press UP " " or DOWN "
"
button, to adjust the
temperature.
Press the FAN SPEED button
"
", set up the fan speed,
is
low speed, is middle speed,
is high speed, (flashing)
is auto speed.
For auto fan, the speed is
chosen by the difference of room
temperature and the setting
temperature.
Press the TIME OFF button " " ,
set up the time the air conditioner
switches off. Press the button “ ”
each time, adjusting up 1 hour;
Press the button “ ” each time,
adjusting up 1 minute; When the
time has elapsed, the air
conditioner will switch off
automatically. Pressing this button
again before the air conditioner
switches off will cancel the timer
setting
Sequence of operation
The air conditioner is switched off.
Press the TIME ON button " " ,
set up the time which the air
conditioner turns on. Press the
button “ ”each time, adjusting
up 1 hour; Press the button “ ”
each time, adjusting up 1 minute.
Set up the operation MODE,
TEMPERATURE, FAN SPEED etc.,
when the time has been reached,
the air conditioner will start
automatically. If the TIMER ON
button is pressed again, the TIMER
ON setting will be cancelled.

Our Address
Puravent, Adremit Limited, Unit 5a, Commercial Yard,
Settle, North Yorkshire, BD24 9RH
Get In Touch
Call: 0845 6880112
Email: [email protected]
3. USE AND MAINTENANCE
ENGLISH
11
Press
the
ON/
OFF
button
to
switch
the
air conditioner
ON or OFF,
it
will
run
in
memory
mode.
Press
the
MODE
button
to
select
cooling
or
heating
mode.
Button
is
disabled.
Press
the
UP
or
DOW
N
button
to
select
the
desired
tempe
rature.
3.11 (Optional) Wired Wall Pad Controller
Wired Wall Pad Controller Installation
-
Connect the wall pad wiring to the unit connector.
-
Open the return air filter assembly and finger guard grille, you will see a wire with wall pad connector
as shown in picture below:

Our Address
Puravent, Adremit Limited, Unit 5a, Commercial Yard,
Settle, North Yorkshire, BD24 9RH
Get In Touch
Call: 0845 6880112
Email: [email protected]
3. USE AND MAINTENANCE
ENGLISH
12
3.13 FRESH AIR SYSTEM
Push here to open
Fresh air system
Push here to close
When the fresh air system is open the air conditioner will change the room air automatically: in this way
new clean and fresh air will be pumped into the room.
You can open or close the fresh air system at any time.
If the air fresh system is closed the air conditioner performance is much higher so we suggest that the
fresh air system should remain closed and open it for just a few minutes eachday.
3.12 INSTALLING AND CHANGEING THE BATTERY
--Open the battery cover, hold the hook and
lightly pull up.
--Insert the battery (AAA, 2pcs), the positive
terminal
must align with the + mark on the
plastic
surface.
--Replace the battery cover.
Inspection: If you press the ON / OFF button
“ ” and no icons are displayed then please
check the battery installation.
Closed position
Open position

Our Address
Puravent, Adremit Limited, Unit 5a, Commercial Yard,
Settle, North Yorkshire, BD24 9RH
Get In Touch
Call: 0845 6880112
Email: [email protected]
3. USE AND MAINTENANCE
ENGLISH
13
3.14 MAINTENANCE
(P15,P16,P17,P18)
FILTERS CLEANING:
The filters should be regularly cleaned to
keep the air conditioner running efficiently.
Clean the filters every two weeks.
How to proceed:
1.
Disconnect the air conditioner from the
electrical supply.
2.
Extract the filer grating (P15) in the same
direction as the arrow.
Take out the filter as shown in P17.
Proceed to wash them (do not use hot water)
and
only when they are fully dried replace
them in the
same way.
ATTENTION: Do not use the air conditioner
without filters as it could seriously damage
the air conditioner.
POSSIBLE SOLUTIONS
•The air conditioner does not work for 3 min when
switched on.
1. Automatic protection of the conditioner.
Wait for 3 min and
the air conditioner will
start to work again.
•Strange smell in the room / Water drips from
the
air conditioner.
1. Incorrect connection of the drainage pipe
2. Damp in the room, coming from walls,
carpets, furnishing or similar.
3. Incorrect installation of the air conditioner
•The remote control does not work.
1. Exhausted batteries.
2. Wrong insertion of the batteries inside
the
remotecontrol.
EXTERNAL CLEANING:
-
Disconnect the air conditioner from the
electrical supply.
-
Wipe external surfaces clean with adamp
cloth only.
-
Do not use an abrasive cloth or solvents,
as this may damage the surfaces.
-
Do not use excessively wet cloths or
sponges, as water could damage
the air
conditioner and compromise safety.
3.16 TROUBLESHOOTING
PROBLEMS & POSSIBLE
CAUSES / SOLUTIONS
•
The air conditioner does not work.
1.
Wrong settings of the timer –Please check.
2.
Problems on the power supply / Call the
service center.
•Theair conditioner doesnot cool the
room.
1.
The room temperature is too high \Wait
until
the temperature goes down.
2.
The temperature is not properly set / Check
it
3.
The grids could be obstructed / Check and
remove the obstructions
If the supply cord is damaged, it must be replaced
by the manufacturer or its service agent or a
similarly qualified person in order to avoid a
hazard.
The max operating temperature for the air
conditioner:(max cooling: outdoor DB430C /
WB260C, indoor DB320C /WB230C;min heating:
outdoor DB-50C /WB-60C, indoor DB200C )
This appliance is not intended for use by persons
(including children) with reduced physical,
sensory or mental capabilities, or lack of
experience and knowledge, unless they have
been given supervision or instruction concerning
use of the appliance by a person responsible for
their safety.
Children should besupervised toensure that they
do not play with the appliance.

Our Address
Puravent, Adremit Limited, Unit 5a, Commercial Yard,
Settle, North Yorkshire, BD24 9RH
Get In Touch
Call: 0845 6880112
Email: [email protected]
Sma ltimen to delle apparecchia-
Disposal of your old appliance Entsorgung von Altgeräten
ture obsolete
1.
Quando sun prodotto è riportato
il simbolo di un bidone della spaz-
zatura sbarrato da una croce signi-
fica che il prodotto è coperto dalla
Direttiva Europea 2002/96/EC.
2.
Tutti i prodotti elettrici ed elettro-
nici dovrebbero essere smaltiti se-
paratamente rispetto alla raccolta
differenziata mun icipale, med iante
impianti di raccolta specifici desi-
gnati dal governo o dalle autorità
locali.
3.
Il corretto smaltimento delle ap-
parecchiature obsolete contribuisce
a prevenire possibili conseguenze
negative sulla salute umana e sul-
l’ambi ente.
4.
Per informazioni più dettaglia-
te sullo smaltimento delle appa-
recchiature obsolete, contattare il
comune, il servizio di smaltimento
rifiuti o il negozio in cui è stati ac-
quistato il prodotto.
1.
When this crossed-out bin sym-
bol appears on a product it means
that the product is covered by Eu-
ropean Directive 2002/96/EC.
2.
All electrical and electronic prod-
ucts should be disposed of sepa-
rately from the municipal waste
stream via specific collection facili-
ties designated by the government
or the local authorities.
3.
Proper disposal of your old ap-
pliance will hele prevent potential
negative consequences for the en-
vironmen t and human health.
4.
For more detailed information
about disposal of your old appli-
ance, please contact your munici-
pality, the waste disposal service
or the shop where you purchased
the product.
1.
Wenn dieses Symbo l eines
durchgestrichenen Abfalleimers
auf einem Produkt angebracht ist,
unterliegt dieses Produkt der euro-
päischen Richtlinie 2002/96/EC.
2.
Alle Elektro-und Elektronik-Alt-
geräte müssen getrennt vom Haus-
müll uber dafür staatlich vorgese-
hene Stellen entsorgt werden.
3.
Eine ordnungsgemäß e Entsor-
gung des Altgeräts trägt dazu bei,
Schäden an der Umwelt und der
men schlichen Gesundheit zu ver-
mei den.
4.
Weitere informat ionen zur Ent-
sorgung des Altgeräts erhalten
Siebei derStadtverwaltung, beim
Entsorgungsamt oder in dem Ge-
schäft, in dem Sie das Produkt er-
worben haben.
Élimination des appareillages
obsolètes
1.
Quand figure sur un produit le
symbolereprésentant unepoubelle
barrée d’unecroix, cela indique que
le produit est assujetti à la Directive
européenne 2002/96/EC.
2.
Tous les appareils et composants
électriques et électroniques doivent
être èliminès auprès dedéchetteries
spécifiques indiquées par les pou-
voirs publics nationaux ou par les
autorités lacales.
3.
La bonne élimination des appa-
reillages obsolètes contribue àpré-
venir les conséquences dommagea-
bles pour la santé des personnes et
pour l’enwironnemen t.
4.
Pour plus d’informations concer-
nant l’élimination desappareillages
obsolètes, veuillez contacter votre
mairie, leservice d’élimination des
ordures ou encore le magasin où le
produit a été acheté.
Como deshacerse de aparatos
elèctricos y electrónicos fiejos
1.
Si en un profucto aparece el
símbolo de un contenedor de bas-
ura tachado, significa que èste se
acoge a la Directiva 2002/96/EC.
2.
Los aparatos elèctricos no se
deben desechar junto con los
residuos domès ticos,sino a travès
de puntos de recogida designados
por el gobierno o las autoridades
locales.
3.
La correcta recogida y tratami-
ento de los dispositivos inserivbles
contribuye a evitar riesgos poten-
ciales para el medio ambiente y la
salud pública.
4.
Para obtener más informac ión
sobre cómo deshacerse de sus
aparatos elèctricos y electrónicos
viejos, póngase en contacto con su
ayuntamiento, el servicio de recog-
ida de basuras o el estable cimiento
donde adquirió el producto.
Eliminação doseuantigo apa-
relho
1.
Quando este símbolo de caixo-
te do lixo com uma cruz em cima
estiver afixado a un produto, sig-
nifica que o produto se encontra
abrangido pela Directiva Europeia
2002/96/EC.
2.
Todos os produtos eléctricos e
electrónicos devem ser eliminados
separadamente do lixo domèstico
atravès de pontos de recolha de-
signados para o edeito pelo gover-
no ou pelas autoridades lacais.
3.
A eliminação crrecta do seu apa-
relho antigo ajuda aevitar potenciais
consequências negativas para o
ambiente e para a saúde humana.
4.
Para obterinformaçõesmaisde-
talhadas acerca da eliminação do
seu aparelho antigo, contacte as
autoridades locais, um serviço de
eliminação de residuos ou a loja
onde comprou o produto.
Smaltimen
to
delle
apa arecchiature
obsolete
Disposal
of
your
old
appliance
Entsorgung
von
Altgeräten
Élimination
des
appareillages
obsolètes
Como
deshacerse
de
aparatos
elèctricos
y
electrónicos
fiejos
Eliminação
do
seu
antigo
aparelho
IT
UK
DE
FR
ES
PT
Table of contents
Other Puravent Air Conditioner manuals
Popular Air Conditioner manuals by other brands

Thermal Edge
Thermal Edge CS011-105 Series User's & technical manual

Springer
Springer BC-127 owner's guide

Mitsubishi Electric
Mitsubishi Electric SUZ-SWM40VA Technical & service manual

Zennio
Zennio KLIC-TS user manual

Daikin
Daikin SkyAir RZAG71M7V1B installation manual

Technibel
Technibel CAFM75R5IA instruction manual