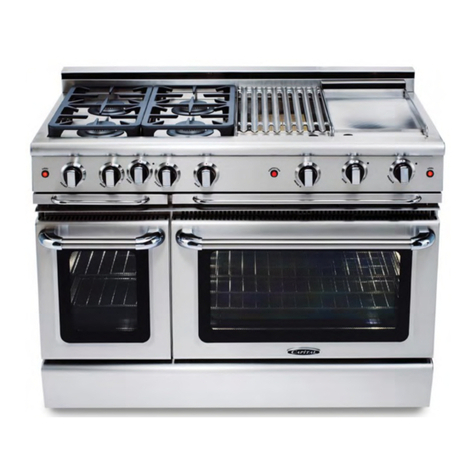
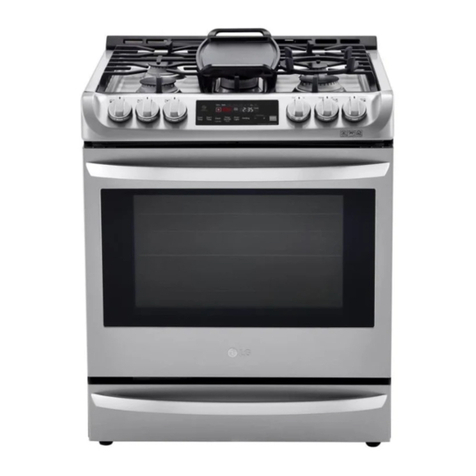
R/Evolution 227947 User manual

You should read this user manual carefully before
using the appliance
Przed uruchomieniem urządzenia należy koniecznie
dokładnie przeczytać niniejszą instrukcję obsługi
Kod : 227947
227930
KUCHNIA GAZOWA
5-PALNIKOWA
Z PIEKARNIKIEM
GAZOWYM LUB
NA PODSTAWIE
User manual
Instrukcja obsługi

Keep this manual with the appliance.
Zachowaj instrukcję urządzenia.
For indoor use only.
Do użytku wewnątrz pomieszczeń.
2
EN

Dear Customer,
Thank you for purchasing this Revolution appliance. Before using the appliance for the first time, please
read this manual carefully, paying particular attention to the safety regulations outlined below.
IMPORTANT SAFETY REGULATIONS
• This appliance is intended for commercial use only and must not be used for
household use.
• The appliance must only be used for the purpose for which it was intended and
designed. The manufacturer is not liable for any damage caused by incorrect oper-
ation and improper use.
• Keep the appliance and electrical plug away from water and any other liquids. In
the event that the appliance should fall into water, immediately remove plug from
the socket and do not use until the appliance has been checked by a certified tech-
nician. Failure to follow these instructions could cause a risk to lives.
• Never attempt to open the casing of the appliance yourself.
• Do not insert any objects in the casing of the appliance.
• Do not touch the plug with wet or damp hands.
• Danger of electric shock! Do not attempt to repair the appliance yourself. In case
of malfunctions, repairs are to be conducted by qualified personnel only.
• Never use a damaged appliance! Disconnect the appliance from the electrical
outlet and contact the retailer if it is damaged.
• Warning! Do not immerse the electrical parts of the appliance in water or other
liquids. Never hold the appliance under running water.
• Regularly check the power plug and cord for any damage. If the power plug or
power cord is damaged, it must be replaced by a service agent or similarly qualified
persons in order to avoid danger or injury.
• Make sure the cord does not come in contact with sharp or hot objects and keep it
away from open fire. To pull the plug out of the socket, always pull on the plug and
not on the cord.
• Ensure that the cord (or extension cord) is positioned so that it will not cause a
trip hazard.
• Always keep an eye on the appliance when in use.
• Warning! As long as the plug is in the socket the appliance is connected to the
power source.
• Turn off the appliance before pulling the plug out of the socket.
• Never carry the appliance by the cord.
• Do not use any extra devices that are not supplied along with the appliance.
3
EN

• Only connect the appliance to an electrical outlet with the voltage and frequency
mentioned on the appliance label.
• Connect the power plug to an easily accessible electrical outlet so that in case of
emergency the appliance can be unplugged immediately. To completely switch off
the appliance pull the power plug out of the electrical outlet.
• Always turn the appliance off before disconnecting the plug.
•Never use accessories other than those recommended by the manufacturer. Fail-
ure to do so could pose a safety risk to the user and could damage the appliance.
Only use original parts and accessories.
• This appliance is not intended for use by persons (including children) with reduced
physical, sensory or mental capabilities, or lack of experience and knowledge.
• This appliance must not be used by children under any circumstances.
• Keep the appliance and its cord out of reach of children.
• Always disconnect the appliance from the mains if it is left unattended or is not in
use, and before assembly, disassembly or cleaning.
• Never leave the appliance unattended during use.
GENERAL INSTRUCTION
The appliance described in this manual has been
built to meet 2014/35/EU (Safety), 2014/30/EU
(EMC), Re 2016/426/EU (GAR), Re 1935/2004/EC,
Re 2023/2006/EC directives; and UNI EN 203…, UNI
EN 437, EN 60335-1, EN60335-2-36 and EN55014
standards. This appliance has been designed ex-
clusively for cooking food, any other use is consid-
ered improper: be careful that no live animal, per-
son or “dangerous” objects are placed inside the
oven. It should only be used by qualified personnel
in professional kitchens. Materials in contact with
foodstuffs are suitable for use. The unit must nev-
er be left unattended when it is being used! The ap-
pliance should be checked once a year by a quali-
fied technician. Switch the appliance off in the case
of a failure or malfunction.
Care must be taken when using the appliance because the cooking surfaces are
very hot. The appliance must be installed, connected and serviced properly by qual-
ified personnel according to the regulations and directives in force in the country
where it is installed, as well as the instructions in this manual.
UNIT CHARACTERISTICS
These installation and user’s instructions refer to
the category II2H3+ gas ranges. The data plate is
outside the back panel to the appliance. The sup-
plementary plate is also made of self-adhesive pol-
yester and is affixed near the data plate; it contains
all information regarding the appliance. The gas
distribution network fitting fig.1 meets ISO 7/1 and
ISO 228/1 standards with a ø ½” connection, situat-
4
EN

ed at the back of the machine. The structure of the
appliance is made of stainless steel, the burners
are made of Pyral and cast iron, and the oven one
is made of stainless steel. All models have adjust-
able feet.
Install a shut-off cock in the line between the appliance and the gas distribution
network. Install an omnipolar switch between the appliance and the electrical dis-
tribution network.
CONNECTION TO THE GAS DISTRIBUTION NETWORK
Before you install the appliance, make sure that the gas company has authorized
the installation, compare the data relevant of the appliance (data plate) with the
local supply
Remove the packaging from the appliance as well
as the protective plastic sheet, and, if necessary,
remove traces of glue with a suitable solvent. To
dispose of the packaging, follow local directives
(for more details refer to the chapter “ECOLOGY
AND THE ENVIRONMENT”. Prior to connecting
the unit to the gas network, check the data plate
to see if the unit has been set and tested for the
type of gas supplied. If the gas type indicated on the
data plate is not the same as that supplied, please
refer to the paragraph “CONVERSION AND ADAP-
TATION”. Connect the appliance to the gas distri-
bution network using metal pipes with a suitable
diameter; install a homologated shut-off cock be-
tween the appliance and the distribution network.
If flexible pipes are used, they must be made of
stainless steel according to the standards in force.
When installing the appliance, all the regulations in
force must be observed, such as:
- Installation and safety standards;
- Regional and/or local regulations, such as building
codes;
- Directives and regulations of the electricity board;
- Accident prevention regulations in force;
- Fire prevention regulations;
- Applicable I.E.C. regulations
We recommend installing the appliance in a
well-ventilated environment, or under an extrac-
tion hood to remove the fumes or vapors pro-
duced during the cooking cycle. All models have
an equipotential earth terminal fig.1in the bottom.
The appliances with an electric oven have a hole
for the cable fig.1. The appliance can be installed
alone or in line. Respect a minimum distance of
80mm between the appliance and any walls made
of flammable material, partitions, kitchen furniture
or nearby equipment. The contact surfaces must
be covered with non-combustible heat insulating
material. The appliance, and especially the power
lead, must not be installed anywhere near heat
sources and the temperature of the place in which
the appliance is installed must not rise above 50°C.
After installing the appliance check for any leaks in
the fittings. Use non-corrosive foam products, such
as leak detection sprays, to look for any leaks.
5
EN

When checking for leaks do not use naked flames!
The manufacturer shall not be held responsible and the guarantee is void in the
case of damage caused by negligence in following the operating and installation
instructions or by improper use. The guarantee is void in the case of connections
which have been made in a way which doesn’t meet the current standards and
fire-fighting regulations.
EVACUATION OF BURNT GASES: A1 APPLIANCE
Appliances must be installed under an extraction hood with forced draught, subjected to gas supply.
CHECKING THE PRESSURE
The distribution network pressure must meet the following specifications.
LPG ALLOWED from 20/25 to 35/45 mbar
NOT ALLOWED below 20/25 above 35/40 mbar
METHANE - H ALLOWED from 17 to 25 mbar
NOT ALLOWED below 17 above 25 mbar
If the gas distribution network pressure on the in-
stallation site doesn’t meet the above values, in-
form the gas board and do not turn the unit on until
the cause and a solution have been found.
The distribution network pressure can be taken
with a U manometer (min. definition 0.1 mbar),
connected to the pressure outlet behind control
panel.
1. Remove the control panel.
2. Remove the screw and sealing washer from the
pressure outlet and connect the manometer.
3. Turn the unit on following the enclosed instruc-
tions and check that the pressure is within the per-
mitted pressure range.
4. Disconnect the manometer and replace the
screw and the sealing washer in the pressure out-
let.
5. Replace the control panel.
ELECTRICAL CONNECTION
Before proceeding with the electrical connection, check the specifications on the
data plate. The appliance is supplied with a power cable (3x1,5 H07RN-F).
The installer must make the connection after hav-
ing installed a standard plug connected to an easy-
to-reach socket, or in case of a permanent connec-
tion, after having installed a main switch, which, as
well as being easy to reach, must disconnect all of
the contacts supplying electrical energy to the ap-
pliance, with a minimum distance of at least 3mm
between the poles. The earth wire must never be
disconnected.
The power cable must not be installed near heat
6
EN

sources and the temperature of the place in which
the appliance is installed must not rise above 50°C.
The appliance must also be connected to an equi-
potential earth. This connection can be made using
the equipotential terminal marked with the symbol
, placed under the appliance near the right rear
foot. The equipotential wire must have a section of
10mm2.
TRASFORMATION AND ADAPTATION
Connection to the distribution network, installation, and maintenance of the ap-
pliance must only be carried out by qualified technicians only, in observance of all
applicable regulations!
COOKTOP BURNERS:
1. Remove burner body and lid.
2. Replace nozzle with a suitable one for the new type of gas indicated in the nozzle table.
3. Restore the initial condition.
MINIMUM:
1. Pull the knobs off and remove the control panel if necessary.
2. Adjust the minimum by-pass nozzle fig.16.
3. Restore the initial condition.
OVEN BURNER:
1. Remove the base of the oven fig.15, unscrew and lift the burner, unscrew and replace the nozzle with a
suitable one for the new type of gas indicated in the nozzle table.
MINIMUM:
1. Pull the knobs off and remove the control panel if necessary.
2. Adjust the minimum by-pass nozzle fig.16.
3. Restore the initial condition.
If the bottom of the oven chamber is removed, it must be put back in exactly the
same position.
7
EN

PUTTING THE RANGE INTO SERVICE
The first time the oven is switched on you will notice a bad smell due to production
residues such as grease, oil and resin.
When using the oven for the first time you should switch it on at the highest temper-
ature for at least 1 hour, making sure that it is empty. After this time has elapsed,
the oven is ready for use. Clean the oven after every time you use it.
RECOMMENDATIONS FOR USE: For best results, it is a good rule never to put food in a cold oven. It is best
to wait for the oven to reach the chosen temperature first. Never line the oven walls with aluminum sheets,
especially the bottom part of the cooking chamber.
TURNING THE BURNERS ON AND OFF
COOKTOP BURNERS:
Press and turn fig.7 from position
t o keeping it pressed. After the flame has lit,
hold the knob down for roughly 10 seconds;
so the thermocouple heats up and keeps the safety
valve open.
Burner min
Burner MAX
TURNING THE BURNER OFF: Turn the knob to the position.
TURNING THE ELECTRIC OVEN ON AND OFF
All the cooking must be done with the oven door closed.
TURNING THE OVEN ON:
I The heating elements are controlled by a selector
switch, while the temperature inside the cham-
ber is controlled by a thermostat (50-270°C). The
selector lets you choose the most suitable type of
heating using the appropriate heating elements.
The green indicator light will come on to indicate
that the oven is connected to the mains..
8
EN

Set the knob to the desired temperature 50-270°C.
The orange light indicate that the heating elements are on.
Select manual or the cooking time 10-120 min. or manual.
TURNING THE ELECTRIC OVEN OFF:
Turn the knobs to .
Turn the switch installed upstream of the appliance off.
DESCRIPTION OF ELECTRIC MULTIFUNCTION OVEN
Cooking must be done with the oven door closed.
ELECTRIC MULTIFUNCTION OVEN ON:
Open the oven door.
Set the knob to the desired function.
Lamp
Bottom and ceiling heating elements
Bottom heating element
Ceiling heating element
Grill
Fan + grill
Fan + Bottom and ceiling heating elements
Fan + Round heating element
Defrosting/Cooling function
9
EN

10
EN
Set the knob to the desired temperature 50-270°C.
The orange light indicate that the heating elements are on.
Select manual or the cooking time 10-120min. or manual.
TURNING THE ELECTRIC OVEN OFF:
Turn the knob to .
TURNING THE GAS OVEN ON AND OFF
All the cooking must be done with the oven door closed.
The burner has a safety valve that cuts off the gas supply if the flame should acci-
dentally go out.
TURNING THE OVEN ON:
Open the oven door.
Press and turn the knob
fig.3 from position to
keeping it pressed in.
With igniter or a match,
light the flame. After the
flame has lit, hold the
knob down for roughly 10 seconds; so the thermo-
couple heats up and keeps the safety valve open.
Trough the hole in inspection cover fig.7 check the
flame is light.
Set the knob to the desired temperature 150-
260°C.
Select cooking time 5-55 min.
TURNING THE GAS OVEN OFF:
Turn the knob to .

11
EN
WHAT TO DO IF THE UNIT IS NOT GOING TO BE USED FOR A LONG TIME
Turn the gas shut-off cock installed upstream of the appliance off. Clean the unit thoroughly following the
instructions and dry it carefully.
MALFUNCTIONS
In any case, if you suspect the presence of anomalies, ALWAYS CLOSE the gas shut-off cock and inform the
authorized after-sales service.
Unauthorized persons should never attempt to repair the appliance, or carry out
maintenance. Tampering with the appliance voids the warranty.
OPERATIONAL CHECKS
Before the unit is delivered to the user the following checks must be carried out:
THERMAL CAPACITY: Check that the pressure and
type of gas supplied where the unit is to be used
is the same as that indicated on the plate. If it is
not, the unit must either be converted or adapted.
In this case please refer to the paragraph: “Conver-
sion or Adaptation”. Check that the right nozzles
have been installed. Refer to the nozzle table and
check that the nozzles indicated in the table are the
same as those installed on the unit. An additional
check of thermal capacity entails verifying the gas
consumed with the volumetric method: light the
burner and after approximately 10 minutes (oper-
ating conditions) check that the gas flow (in m3/h
or in kg/h) corresponds to that indicated in nozzle
table.
APPEARANCE OF THE FLAME AND PRIMARY AIR-
FLOW: The flame should be blue and there should
be no yellow dots in it; it must be stable at its base.
If the colour of the flame tends towards yellow, it
means the primary airflow is not adjusted proper-
ly. If the primary airflow is too fast the flame will
be short and tend to burn above the burner. The
appearance of the flame must also be checked
15 minutes after the appliance has been running
at full power. The flame must remain stable even
when passing quickly from minimum to maximum.
USER’S INSTRUCTIONS: user must be trained on
the correct use and functions of the appliance. We
would like to point out that any alterations made to
the room where the unit is installed could influence
the amount of air used for combustion and for this
reason the function of the unit must be checked
again. When these checks have been done, test the
unit for leaks.
MAINTENANCE & CLEANING
REPLACING PARTS
Only qualified personnel should replace faulty
parts. Prior to commencing any kind of work, dis-
connect the unit from the gas distribution network
and the electrical power supply.
CLEANING AND CARE OF THE APPLIANCE

12
EN
The unit must be cold to clean it.
Keeping the appliance clean is very important for
a long and trouble-free working life. The remova-
ble parts should be washed separately with warm
water and detergent, then rinsed in running wa-
ter. The steel parts may be cleaned with a damp
cloth and with a non-abrasive detergent and then
dried by using a soft, dry cloth. For very resist-
ant stains, use hot water and vinegar. Do not use
harsh or abrasive detergents to clean the stainless
steel parts. Iron cleaning pads should not be used
as they cause the formation of rust. For the same
reason, avoid contact with ferrous materials. When
cleaning, avoid using abrasive paper or cloth; in-
stead and only in special cases you can use pumice
stone powder; we recommend using sponges (ex.
Scotch) to remove stubborn deposits. You can also
use common sprays for cleaning ovens and grills
to remove stubborn deposits. If spray products are
used, follow the manufacturer’s instructions. The
enameled parts should not be cleaned with abra-
sive or acid products. Avoid using steel wool or
metal pads for cleaning. It is important to clean the
oven each time you use it; this way it will be eas-
ier to remove cooking residues and avoid burning
them the next time the oven is used, which would
also result in a bad smell. To minimize the emis-
sion of polluting substances in the environment we
suggest cleaning the appliance with products that
are at least 90% biodegradable
CLEANING INSIDE THE OVEN
Turn the electric power off or make sure you have
turned the burner of the oven of before doing any
work on it. Let the oven cool down and clean it
thoroughly with a damp cloth and warm water us-
ing a non-abrasive detergent (or with the special
products readily available for cleaning ovens). Do
not use abrasive cloths or pads or other products
that could irreparably damage the enamel. Normal
cooking temperatures help transform grease and
oil splashes into a mist of residual dust that can be
easily removed at the end of the cooking process
when the oven has cooled down by simply using a
damp sponge. We recommend heating the oven pe-
riodically to the maximum temperature so that the
residual dust can be removed once it has cooled
down. Be careful not to damage the thermostat
sensor inside the oven while you are cleaning it.
MAINTENANCE
The appliance needs no specific maintenance be-
sides normal cleaning; we do however suggest
having it checked once a year by the assistance
centre for which, we recommend drawing up a
maintenance contract.
SAFETY PRECAUTIONS
REMEMBER THAT THE APPLIANCE:
Must never be left unattended when it is being used!
When the unit is switched on, its surfaces get very hot so please take great care!
The appliance is intended for professional use and therefore only qualified person-
nel should use it! Installation as well as any conversion or adaptation to a differ-
ent type of gas must be carried out in accordance with current laws and only by

13
EN
qualified and authorized personnel. In the case of fire, close the shut-off cock to cut
off the gas supply immediately, then use a suitable fire extinguisher to fight the fire.
WARRANTY
Any defect affecting the functionality of the appli-
ance that becomes apparent within one year after
purchase will be corrected by free repair or re-
placement provided the appliance has been used
and maintained in accordance with the instructions
and has not been abused or misused in any way.
Your statutory rights are not affected. If the appli-
ance is claimed under warranty, state where and
when it was bought and include proof of purchase
(f.e. receipt).
In line with our policy of continuous product devel-
opment we reserve the right to change the product,
packaging and documentation specifications with-
out notice.
DISCARDING & ENVIRONMENT
When decommissioning the appliance, the prod-
uct must not be disposed of with other household
waste. Instead, it is your responsibility to dispose to
your waste equipment by handing it over to a des-
ignated collection point. Failure to follow this rule
may be penalized in accordance with applicable
regulations on waste disposal. The separate col-
lection and recycling of your waste equipment at
the time of disposal will help conserve natural re-
sources and ensure that it is recycled in a manner
that protects human health and the environment.
For more information about where you can drop off
your waste for recycling, please contact your local
waste collection company. The manufacturers and
importers do not take responsibility for recycling,
treatment and ecological disposal, either directly
or through a public system.

Szanowny Kliencie,
Dziękujemy za zakup urządzenia firmy Revolution. Prosimy o uważne zapoznanie się z niniejszą instrukc-
ją przed podłączeniem urządzenia, aby uniknąć uszkodzeń spowodowanych niewłaściwą obsługą. Należy
zwrócić szczególną uwagę na zasady bezpieczeństwa.
WAŻNE ZASADY BEZPIECZEŃSTWA
• Nieprawidłowa obsługa i niewłaściwe użycie mogą spowodować poważne usz-
kodzenie urządzenia lub zranienie osób.
• Urządzenie stosuj wyłącznie zgodnie z przeznaczeniem. Producent i/lub
Sprzedawca nie ponosi żadnej odpowiedzialności za szkody spowodowane niepraw-
idłową obsługą i niewłaściwym użytkowaniem urządzenia.
• W czasie użycia zabezpiecz urządzenie i wtyczkę kabla zasilającego przed kon-
taktem z wodą lub innymi płynami. W mało prawdopodobnym przypadku zanurze-
nia urządzenia w wodzie, natychmiast wyciągnij wtyczkę z kontaktu, a następnie
zleć kontrolę urządzenia specjaliście. Nieprzestrzeganie tej instrukcji może spow-
odować zagrożenie życia.
• Nigdy nie otwieraj samodzielnie obudowy urządzenia.
• Nie wtykaj żadnych przedmiotów w obudowę urządzenia.
• Nie dotykaj wtyczki kabla zasilającego wilgotnymi rękami.
• Ryzyko porażenia prądem! Regularnie kontroluj stan wtyczki i kabla. W przypadku
wykrycia uszkodzenia wtyczki lub kabla, zleć naprawę w wyspecjalizowanym punk-
cie naprawczym.
• Nigdy nie używaj uszkodzonego urządzenia! W przypadku, gdy urządzenie spad-
nie lub ulegnie uszkodzeniu w inny sposób, przed dalszym użyciem zawsze zleć
przeprowadzenie kontroli i ewentualną naprawę w wyspecjalizowanym punkcie
naprawczym.
• Ostrzeżenie! Nie zanurzaj elektrycznych części urządzenia w wodzie lub w innych
płynach. Nigdy nie trzymaj urządzenia pod bieżącą wodą.
• Nigdy nie naprawiaj urządzenia samodzielnie może to spowodować zagrożenie
życia.
• Chroń kabel zasilający przed kontaktem z ostrymi lub gorącymi przedmiotami i
chroń go przed otwartym ogniem. Jeżeli chcesz odłączyć urządzenie z kontaktu,
zawsze chwytaj za wtyczkę, nigdy nie ciągnij za kabel.
• Zabezpiecz kabel (lub przedłużacz), aby nikt przez omyłkę nie wyciągnął go z kon-
taktu ani się o niego nie potknął.
• Urządzenie powinno być używane tylko do celów, dla których zostały pierwotnie
zaprojektowane.
14
PL

• Kontroluj funkcjonowanie urządzenia w czasie użytkowania.
• Dzieci nie uświadamiają sobie zagrożeń, jakie może spowodować użycie urządzeń
elektrycznych. Nigdy nie pozwalaj dzieciom posługiwać się elektrycznymi urządze-
niami gospodarstwa domowego bez nadzoru.
• Gdy urządzenie nie jest używane oraz zawsze przed czyszczeniem, odłącz je od
źródła zasilania, wyciągając wtyczkę z kontaktu.
• Uwaga! Jeżeli wtyczka kabla zasilającego jest podłączona do kontaktu, urządzenie
cały czas pozostaje pod napięciem.
• Wyłącz urządzenie, zanim wyciągniesz wtyczkę z kontaktu.
• Nigdy nie przenoś urządzenia za kabel zasilający.
• Nie używaj akcesoriów innych niż dostarczone z urządzeniem.
• Urządzenie można podłączać wyłącznie do gniazda o napięciu i częstotliwości
zgodnej z danymi znajdującymi się na tabliczce znamionowej.
• Unikaj przeciążenia.
• Po użyciu wyłącz urządzenie wyjmując wtyczkę z gniazda.
• Instalacja elektryczna musi odpowiadać krajowym i lokalnym przepisom.
• Z urządzenia nie mogą korzystać osoby (także dzieci), u których stwierdzono
osłabione zdolności fizyczne, sensoryczne lub umysłowe, albo którym brakuje od-
powiedniej wiedzy i doświadczenia, chyba że odbywa się to pod nadzorem lub zgod-
nie z instrukcjami osoby odpowiedzialnej za ich bezpieczeństwo.
INFORMACJE WSTĘPNE
Urządzenie opisane w niniejszej instrukcji zostało
skonstruowane w sposób zapewniający zgodność
z wymogami rozporządzeń i dyrektyw 2014/35/UE
(Bezpieczeństwo), 2014/30/UE (EMC), 2016/426/UE
(urządzenia spalające paliwa gazowe), 1935/2004/
WE, 2023/2006/WE oraz norm UNI EN 203...., UNI
EN 437, EN 60335-1, EN60335-2-36 i EN55014.
Urządzenie zostało zaprojektowane wyłącznie
do gotowania potraw, a każde inne zastosowanie
uważane jest za niewłaściwe. Uważać, aby w piecu
nie umieszczać żadnych żywych zwierząt, osób ani
„niebezpiecznych” przedmiotów. Urządzenie pow-
inno być używane wyłącznie przez wykwalifikowany
personel w profesjonalnych kuchniach. W urządze-
niu można stosować materiały dopuszczone do
kontaktu z żywnością . Nie wolno pozostawiać
urządzenia bez nadzoru podczas jego eksploatac-
ji! Urządzenie powinno być sprawdzane raz w roku
przez wykwalifikowanego technika. W przypadku
awarii lub usterki wyłącz urządzenie.
Podczas korzystania z urządzenia należy zachować ostrożność, ponieważ palniki
są bardzo gorące. Urządzenie musi być prawidłowo zainstalowane, podłączone i
serwisowane przez wykwalifikowany personel zgodnie z przepisami i dyrektywami
obowiązującymi w kraju, w którym zostało zainstalowane, jak również instrukcjami
zawartymi w niniejszej instrukcji.
15
PL

SPECYFIKACJA TECHNICZNA
Niniejsza instrukcja dla instalatora i instrukcja dla
użytkownika dotyczy pieców gazowych kategorii
II2H3+. Tabliczka znamionowa znajduje się na ze-
wnątrz tylnego panelu urządzenia. Tabliczka uzu-
pełniająca - również wykonana z samoprzylepnego
poliestru i umieszczona w pobliżu tabliczki znami-
onowej - zawiera wszystkie informacje dotyczące
urządzenia. Przyłącze ø ½” sieci gazowej (rys. 1)
spełnia normy ISO 7/1 i ISO 228/1 i umieszczone
jest z tyłu pieca. Konstrukcja urządzenia wykonana
jest ze stali nierdzewnej, palniki z pyralu i żeliwa,
a piec ze stali nierdzewnej. Wszystkie modele wy-
posażone są w regulowane nóżki.
Pomiędzy urządzeniem a siecią zainstaluj homologowany zawór odcinający.
Pomiędzy urządzeniem a siecią zasilającą zainstaluj przełącznik wielobiegunowy
PODŁĄCZENIE DO SIECI GAZOWEJ
Przed zainstalowaniem urządzenia upewnij się, czy firma gazownicza zatwierdziła
instalację oraz porównaj odpowiednie dane urządzenia (tabliczka znamionowa) z
danymi przyłącza lokalnego.
Zdejmij opakowanie oraz folię ochronną i w razie
potrzeby usuń pozostałości kleju za pomocą od-
powiedniego rozpuszczalnika. W celu utylizacji
opakowania postępuj zgodnie z lokalnymi wytyczny-
mi (więcej szczegółów w rozdziale „EKOLOGIA I
ŚRODOWISKO”). Przed podłączeniem urządzenia
do sieci gazowej należy sprawdzić na tabliczce
znamionowej, czy urządzenie zostało ustawione i
przetestowane pod kątem rodzaju dostarczanego
gazu. Jeśli typ gazu wskazany na tabliczce zna-
mionowej jest inny niż podany na tabliczce znami-
onowej, zapoznaj się z rozdziałem „KONWERSJA I
ADAPTACJA”. Podłącz urządzenie do sieci gazowej
za pomocą metalowych rur o odpowiedniej śred-
nicy; pomiędzy urządzeniem a siecią zainstaluj
homologowany zawór odcinający. Jeśli wykorzy-
stywane są przewody elastyczne, muszą być one
wykonane ze stali nierdzewnej zgodnie z obow-
iązującymi normami. Podczas instalacji urządzenia
należy przestrzegać wszystkich obowiązujących
przepisów, takich jak:
- Normy w zakresie instalacji i BHP;
- Przepisy regionalne i/lub lokalne, takie jak prze-
pisy budowlane;
- Dyrektywy i rozporządzenia dotyczące urządzeń el-
ektroenergetycznych;
- Obowiązujące przepisy dotyczące zapobiegania
wypadkom;
- Przepisy przeciwpożarowe;
- Obowiązujące rozporządzenia I.E.C
Zalecamy zainstalowanie urządzenia w dobrze
wentylowanym środowisku lub pod okapem w celu
usuwania oparów powstających podczas cyklu got-
owania. We wszystkich modelach zacisk ekwipo-
tencjalny uziemienia (rys. 1) umieszczony jest z
dołu urządzenia. Urządzenia z piecem elektrycz-
nym mają otwór na kabel (rys. 1). Urządzenie może
być instalowane samodzielnie lub jako moduł w
ciągu. Należy zachować minimalną odległość 80
mm między urządzeniem a ścianami wykonanymi z
materiałów łatwopalnych, ścianek działowych, me-
bli kuchennych lub pobliskiego wyposażenia. Powi-
16
PL

erzchnie mające kontakt z urządzeniem muszą być
pokryte niepalnym materiałem termoizolacyjnym.
Urządzenie, a w szczególności przewód zasilający,
nie może być instalowane w pobliżu źródeł ciepła,
a temperatura w miejscu, w którym urządzenie jest
instalowane nie może wzrosnąć powyżej 50°C. Po
zainstalowaniu należy sprawdzić urządzenie pod
kątem nieszczelności w armaturze. Zaleca się sto-
sowanie niekorozyjnych produktów piankowych,
takich jak spraye do wykrywania nieszczelności, w
celu wykrycia ewentualnych nieszczelności
Podczas sprawdzania szczelności nie używaj otwartego ognia!
Producent nie ponosi odpowiedzialności, a gwarancja traci ważność w przypadku
szkód spowodowanych nieprzestrzeganiem zaleceń w zakresie obsługi i instalac-
ji urządzenia lub niewłaściwej eksploatacji. Gwarancja traci ważność w przypadku
połączeń wykonanych w sposób niezgodny z obowiązującymi normami i przepisami
przeciwpożarowymi.
ODPROWADZANIE GAZÓW ZE SPALANIA: URZĄDZENIE A1
Urządzenia muszą być zainstalowane pod okapem wyciągowym z wymuszonym ciągiem i podłączone do
źródła zasilania gazem.
KONTROLA CIŚNIENIA
Ciśnienie w sieci gazowej musi być zgodne z następującymi specyfikacjami.
LPG DOPUSZCZALNE od 20/25 do 35/45 mbar
NIEDOPUSZCZALNE poniżej 20/25, powyżej 35/40 mbar
METAN - H DOPUSZCZALNE od 17 do 25 mbar
NIEDOPUSZCZALNE poniżej 17, powyżej 25 mbar
Jeżeli ciśnienie w sieci gazowej w miejscu in-
stalacji odbiega od powyższych wartości, należy
poinformować o tym dostawcę gazu i nie włączać
urządzenia do momentu znalezienia przyczyny i ro-
związania.
Ciśnienie w sieci gazowej można zmierzyć za po-
mocą manometru U-rurkowego (min. podziałka 0,1
mbar), podłączonego do wylotu ciśnienia za pan-
elem sterowania
1. Zdemontuj panel sterowania.
2. Wykręć śrubę i wyjmij uszczelkę z wylotu ciśnie-
nia i podłącz manometr.
3. Włącz urządzenie zgodnie z załączoną instrukcją
i sprawdź, czy ciśnienie mieści się w dopuszczal-
nym zakresie.
4. Odłącz manometr i ponownie załóż śrubę i
uszczelkę na wylocie ciśnienia.
5. Zamontuj ponownie panel sterowania.
17
PL

PODŁĄCZENIE ELEKTRYCZNE
Przed przystąpieniem do wykonania podłączenia elektrycznego sprawdź dane tech-
niczne na tabliczce znamionowej. Urządzenie dostarczane jest z przewodem zasila-
jącym (3x1,5 H07RN-F).
Instalator musi wykonać podłączenie po zain-
stalowaniu standardowej wtyczki podłączonej
do łatwo dostępnego gniazda lub, w przypadku
podłączenia stałego, po zainstalowaniu wyłączni-
ka głównego, który musi być łatwo dostępny
i zapewniać odłączenie wszystkich styków
dostarczających energię elektryczną do urządze-
nia, z minimalną przerwą między biegunami wyno-
szącą co najmniej 3 mm. Przewodu uziemiającego
nie wolno odłączać.
Przewód zasilający nie może być montowany w
pobliżu źródeł ciepła, a temperatura w miejscu, w
którym urządzenie jest instalowane, nie może wz-
rosnąć powyżej 50°C. Urządzenie musi być również
podłączone do instalacji uziemiającej. Podłączenie
to można wykonać za pomocą zacisku ekwipotenc-
jalnego oznaczonego symbolem , umieszczone-
go pod urządzeniem w pobliżu jego prawej tylnej
nóżki. Przekrój przewodu uziemiającego musi
wynosić 10 mm2.
KONWERSJA I ADAPTACJA
W celu konwersji urządzenia na inny rodzaj gazu,
np. z gazu ziemnego na LPG, konieczna jest wy-
miana dysz palnika głównego i regulacja obejścia.
Wszystkie dysze są oznaczone liczbą, która ws-
kazuje średnicę w 1/100 mm i są dostarczane w
worku. Po każdej konwersji lub adaptacji piec musi
zostać poddany próbie eksploatacyjnej, a tabliczka
uzupełniająca musi zostać uaktualniona zgodnie z
przeprowadzoną konwersją lub adaptacją
Podłączenie do sieci gazowej, instalacja i konserwacja urządzenia mogą być wykony-
wane wyłącznie przez wykwalifikowanych techników, z zachowaniem wszystkich
obowiązujących przepisów!
18
PL

PALNIKI NA PŁYCIE DO GOTOWANIA:
1. Zdemontuj korpus i pokrywę palnika.
2. Wymień dyszę na przeznaczoną do docelowego typu gazu, zgodnie z informacjami w tabeli dysz.
3. Zamontuj palnik.
MINIMALNY ZAKRES DYSZY OBEJŚCIOWEJ
1. Zdemontuj pokrętła i - w razie potrzeby - panel sterowania.
2. Wyreguluj minimalny zakres dyszy obejściowej (rys. 16).
3. Zamontuj pokrętła i panel sterowania.
PALNIK PIECA:
1. Zdemontuj podstawę pieca (rys. 15), odkręć i unieś palnik, odkręć i wymień dyszę na przeznaczoną do doce-
lowego typu gazu, zgodnie z informacjami w tabeli dysz
MINIMALNY ZAKRES DYSZY OBEJŚCIOWEJ
1. Zdemontuj pokrętła i - w razie potrzeby - panel sterowania.
2. Wyreguluj minimalny zakres dyszy obejściowej (rys. 16).
3. Zamontuj pokrętła i panel sterowania.
Zdemontowane dno komory pieca należy zamontować ponownie w dokładnie tym
samym położeniu.
OBSŁUGA PIECA FIVECHEF
Przy pierwszym włączeniu pieca możesz zauważyć nieprzyjemny zapach spow-
odowany pozostałościami z procesu produkcji, takimi jak smar i żywica. Przy
pierwszym użyciu należy włączyć pusty piec na najwyższą temperaturę na co najm-
niej 1 godzinę. Po upływie tego czasu piec jest gotowy do pracy. Piec należy czyścić
po każdym użyciu.
ZALECENIA DOTYCZĄCE OBSŁUGI: Żywności przeznaczonej do obróbki cieplnej nie należy umieszczać w
zimnym piecu. Najlepiej poczekać, aż piec osiągnie żądaną temperaturę. Ścian, a zwłaszcza dna komory
pieca, nie należy wykładać blachą aluminiow
WŁĄCZANIE I WYŁĄCZANIE PALNIKÓW
PALNIKI NA PŁYCIE DO GOTOWANIA:
Naciśnij i obróć pokrętło (rys. 7) z pozyc-
ji do pozycji , przytrzymując je wciśnięte. Po
zapaleniu płomienia przytrzymaj pokrętło wciśnięte
przez około 10 sekund, aby termopara nagrzała się
i utrzymywała otwarty zawór bezpieczeństwa.
19
PL

Min. płomień palnika
Maks. płomień palnika
WYŁĄCZANIE PALNIKA: Obróć pokrętło do pozycji.
WŁĄCZANIE I WYŁĄCZANIE PIECA ELEKTRYCZNEGO
WŁĄCZANIE PIECA
Elementy grzejne są sterowane przełącznikiem
wybierakowym, natomiast temperatura wewnątrz
komory jest sterowana termostatem (50-270°C).
Wybierak umożliwia wybór optymalnego rodzaju
ogrzewania przy użyciu odpowiednich elementów
grzejnych. Zaświecona zielona lampka sygnalizuje
podłączenie pieca do sieci elektrycznej.
Za pomocą pokrętła wybierz temperaturę 50-270°C.
Zaświecona pomarańczowa kontrolka sygnalizuje włączenie elementów grzejnych.
Wybierz tryb ręczny lub ustaw czas gotowania 10-120 min.
WYŁĄCZANIE PIECA ELEKTRYCZNEGO:
Obróć pokrętło do pozycji .
Wyłącz wyłącznik zainstalowany przed urządzeniem.
OPIS WIELOFUNKCYJNEGO PIECA ELEKTRYCZNEGO
Cykl gotowania należy prowadzić przy zamkniętych drzwiach pieca.
20
PL
This manual suits for next models
1
Table of contents
Languages:
Popular Range manuals by other brands

Frigidaire
Frigidaire FEF362MXESC Service data sheet

Tappan
Tappan Convectionare 30-3866 Guide book

Electrolux
Electrolux TGF316GSB Use & care manual

Hotpoint Ariston
Hotpoint Ariston C 34S G1 R /HA operating instructions

Frigidaire
Frigidaire FEF362MXESA Service data sheet

Amana
Amana Electronic Range Use and care guide