Rado DiaMaster Maxi User manual

‘DiaMaster’ Chronograph (maxi)
You have acquired a chronograph that unites ageless design and ultra-
modern technology in an exceptional timepiece – reliable, scratchproof
and water-resistant to 30 meters (98 feet), just as one is accustomed to
from Rado watches. The chronograph functions are easy to operate and
allow time measurements accurate to 1⁄100th of a second.
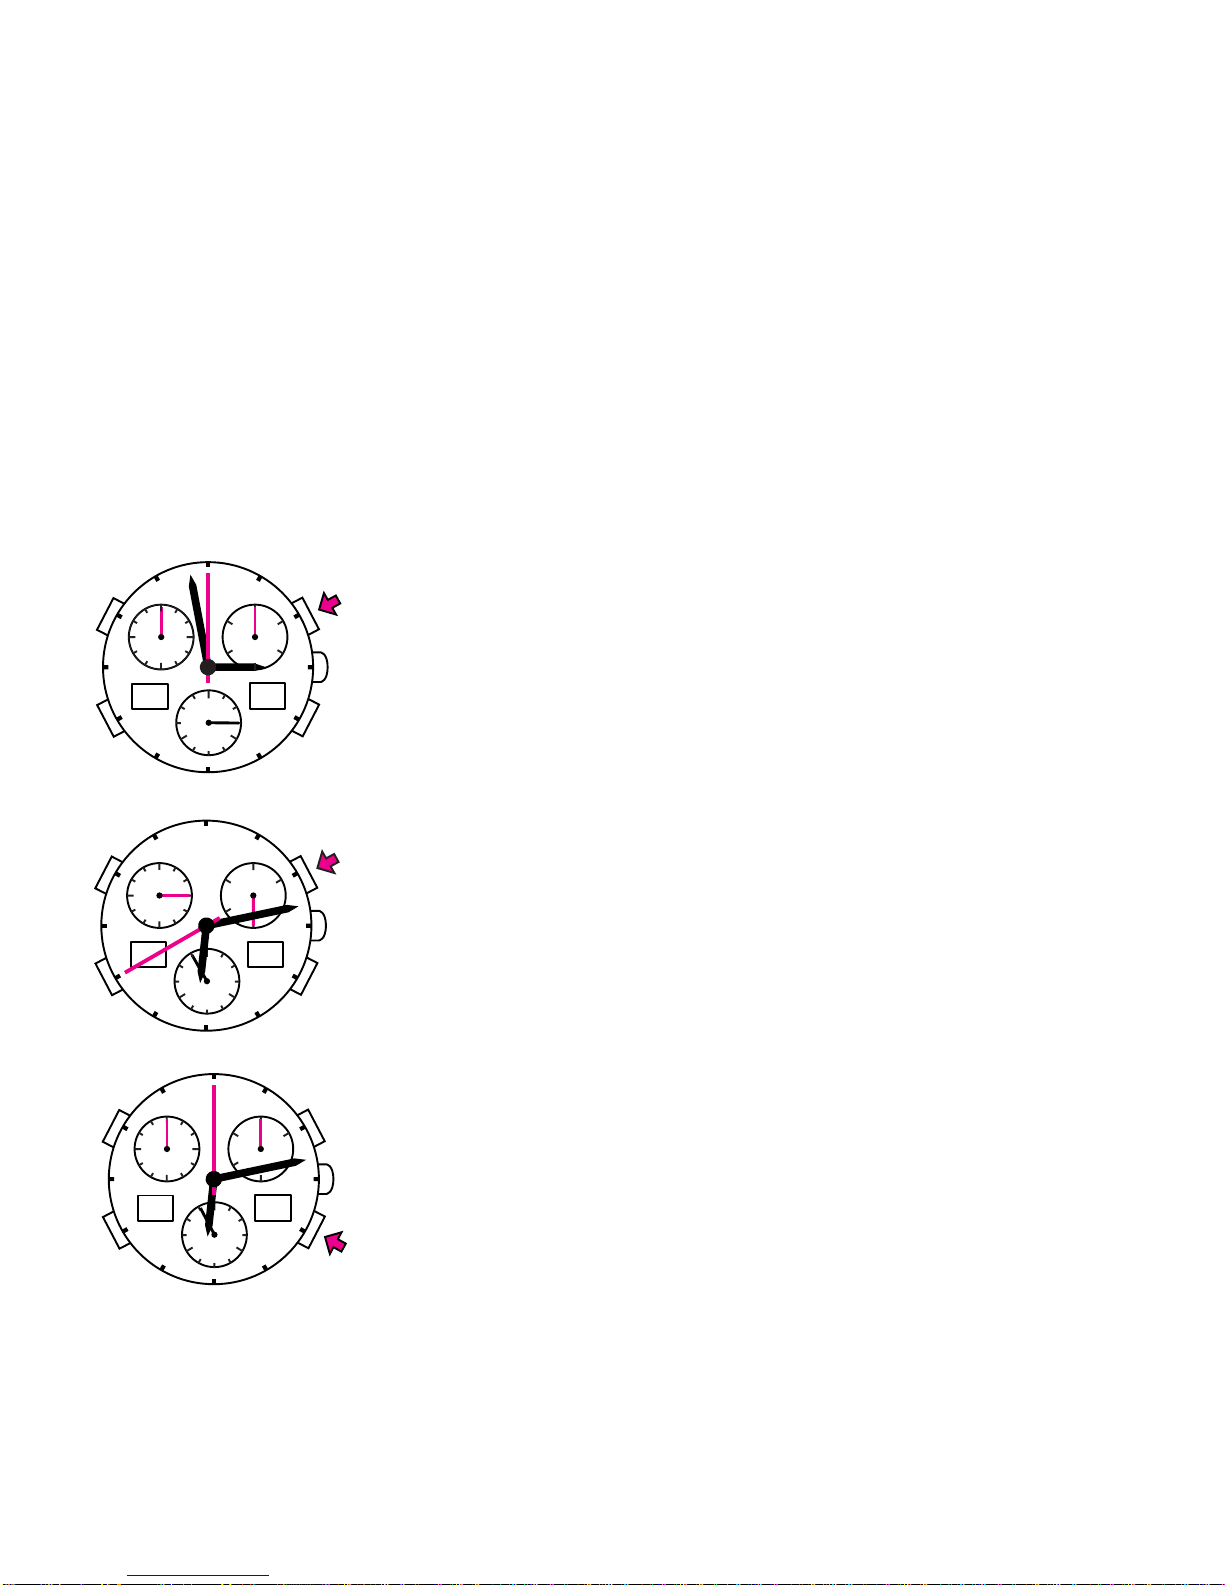
Key to the accompanying diagram
Watch:
A) hour hand
B) minute hand
C) second hand
Digital display (in the basic setting):
D) left: alarm status (ON or OF)
E) right: date
Chronograph hands:
F) hour counter
G) minute counter
H) second counter

Normal time measurement
Start
Stop
The measured time is 3 hours,
15 minutes, 40 seconds
and 85⁄100ths of a second.
Reset to zero
All chronograph hands are reset to zero and
the chronograph is ready for the next time
measurement.
00CH
12
3
6
9
60
20
40
30
1020
85Ad
12
3
6
9
60
20
40
30
1020
23OF
12
3
6
9
60
20
40
30
1020
Chronograph functions

Intermediate time (SPLIT)
Start
First intermediate time
1st push: the first intermediate time
can be read off.
2nd push: the chronograph hands
return to the running time.
For further intermediate times repeat this
procedure.
Stop
The total time can be read off.
Reset to zero
All chronograph hands are reset to zero and
the chronograph is ready for the next time
measurement.
14SL
12
3
6
9
60
20
40
30
1020
48ST
12
3
6
9
60
20
40
30
1020
23OF
12
3
6
9
60
20
40
30
1020
00CH
12
3
6
9
60
20
40
30
1020

Lap time (LAP)
Start
First lap time
1st push: the first lap time can be read off.
2nd push: the chronograph hands
return to the running time.
Second lap time
1st push: the second lap time can be read off.
2nd push: the chronograph hands
return to the running time.
For further lap times repeat this procedure.
Stop last lap
The last lap time can be read off.
28LP
12
3
6
9
60
20
40
30
1020
76LP
12
3
6
9
60
20
40
30
1020
15ST
12
3
6
9
60
20
40
30
1020
00CH
12
3
6
9
60
20
40
30
1020

Display total time
Reset to zero
All chronograph hands are reset to zero and
the chronograph is ready for the next time
measurement.
Tachymeter scale
The basic unit is a distance of 1 kilometre or
1 mile. The time taken to travel this distance
gives the average speed (in km/h or mph).
Start
23OF
12
3
6
9
60
20
40
30
1020
00CH
12
3
6
9
60
20
40
30
1020
19T
12
3
6
9
60
20
40
30
1020

23OF
12
3
6
9
60
20
40
30
1020
Stop
The speed can be read off from
the tachymeter scale.
Reset to zero
All chronograph hands are reset to zero and
the chronograph is ready for the next time
measurement.
Re-adjusting the chronograph hands
After battery change it can happen that
the chronograph hands do not return to
zero. This can be corrected as follows:
Pull out the crown one notch.
5814
12
3
6
9
60
20
40
30
1020
85Ad
12
3
6
9
60
20
40
30
1020

Hour counter:
Push button.
Minute counter:
Push button.
Second counter:
Push button.
Push crown back in to basic position.
5814
12
3
6
9
60
20
40
30
1020
5814
12
3
6
9
60
20
40
30
1020
5814
12
3
6
9
60
20
40
30
1020
24OF
12
3
6
9
60
20
40
30
1020

NB:
Short push: Forward movement of one unit.
Longer push: Rapid movement of the hands.
Important:
Always push the crown back in to its basic position (position 0) after
adjustments have been made. Doing this protects the watch against
the penetration of dirt and water.

4513
12
3
6
9
60
20
40
30
1020
45
13
12
3
6
9
60
20
40
30
1020
Setting the time (hours, minutes,
seconds)
The watch additionally has a digital time
display which is set separately.
NB: Wait until the second hand is at 60,
then pull out the crown.
Pull the crown out fully. The digital
time-of-day display blinks.
Hands:
Adjust the hands to the right time by turning
the crown.
Time setting

Digital display:
Adjusting the minutes.
Adjusting the hours.
AM/PM or 24-hour display
Pull the crown out fully.
The second hand stops moving and the
digital time-of-day display blinks.
Setting the date
Pull the crown fully out and briefly push the
button. The digital display blinks. The month
is shown on the left and the day on the right.
58
13
12
3
6
9
60
20
40
30
1020
58
14
12
3
6
9
60
20
40
30
1020
5802
12
3
6
9
60
20
40
30
1020
232
12
3
6
9
60
20
40
30
1020
TI 24

Setting the month.
Setting the day.
Push the crown back in to its basic position.
243
12
3
6
9
60
20
40
30
1020
233
12
3
6
9
60
20
40
30
1020
24OF
12
3
6
9
60
20
40
30
1020
NB:
Short push: Forward movement of one unit.
Longer push: Fast correction.

Time zones, Summer/Winter times
The hours can be adjusted without affecting
the running minutes and seconds.
Pull the crown out one notch.
The time is now shown on the digital display.
Set the desired hour by turning the crown.
The digital display is adjusted automatically.
Push the crown back in to its basic position.
23OF
12
3
6
9
60
20
40
30
1020
5814
12
3
6
9
60
20
40
30
1020
5816
12
3
6
9
60
20
40
30
1020

29th February
The chronograph has a semi-perpetual calendar so it is only necessary
to adjust the date every four years (in leap years): after 28th February
the display automatically shows 1st March. Adjustment in leap years:
5814
12
3
6
9
60
20
40
30
1020
29OF
12
3
6
9
60
20
40
30
1020
Alarm:
In its basic setting the chronograph shows the alarm status in the digital
display on the left:
ON = alarm switched on
OF = alarm switched off
Pull the crown out one notch.
The time is now shown on the digital display.
Turn the hour hand back 24 hours (two
complete anti-clockwise revolutions of
the hour hand).
Push the crown back in to its basic position.
The 29th February is now shown in the
digital display on the right.

Setting the alarm:
Displaying the alarm time:
Briefly push the button.
To activate the setting mode, push the
button briefly. The digital time blinks.
Setting the hour.
30
06
12
3
6
9
60
20
40
30
1020
3007
12
3
6
9
60
20
40
30
1020
3006
12
3
6
9
60
20
40
30
1020
Important
The setting of an alarm time is relative to the digital time. Check that
the digital time is set to the correct time of day.

4507
12
3
6
9
60
20
40
30
1020
23ON
12
3
6
9
60
20
40
30
1020
23OF
12
3
6
9
60
20
40
30
1020
Setting the minute.
Memorising the alarm time:
The alarm time is now memorised and the
alarm automatically switched on. You can
check the alarm tone by
pushing the button for longer than
1 second.
Switching the alarm on and off
Switching the alarm off:
Push the button for longer than 1 second.
«OF» is shown on the left digital display.
NB:
Short push: Forward movement of one unit.
Longer push: Fast correction.

Switching the alarm on:
Push the button for longer than 1 second.
«ON» is shown on the left digital display,
followed by a beep of confirmation.
Switching the alarm tone off
Briefly push the button to switch off the
alarm tone.
Battery
Your Rado chronograph will let you know that the battery is running
down by blinking of the digital display. A run-down battery must be
replaced as soon as possible by a Rado
retailer. We recommend that you have the watch checked
for water-resistance at the same time.
Approximate battery life: 2 years.
Renata battery No. 394, 1.55V
Ø 9.50mm, height 3.60mm
23ON
12
3
6
9
60
20
40
30
1020
23ON
12
3
6
9
60
20
40
30
1020
Table of contents
Other Rado Watch manuals