RAIDILLON 42-A10 User manual

1
Instructions for use

2

3
INDEX
6
5
2
3
4
1
7
English...................................................... p 4
24
44
64
84
104
p
p
p
p
p
Français...................................................
Nederlands................................................
Español....................................................
中文..........................................................
Deutsch...............................................
Certicate of warranty ...............................................p 124

4
CONTENTS
1.1 Introduction
1.2 Raidillon
1.2.1 Different calibres
1.3 Deployment straps and clasps
1.4 Recommendations and tolerances
1.4.1 Water resistance
1.5 Setting time, day and date
1.6 Automatic chronographs
1.6.1 Overviews
1.6.2 Double chronograph
1.7 Dual time zone
1.8 Power reserve
1.9 International warranty

5
Dear customer,
We congratulate you on the purchase of your Raidillon watch
and wish to thank you for the trust you have placed in our
product.
Please refer to the instructions for use and keep this manual
as well as your Raidillon’s box.
Raidillon remains at your disposal for any further information.
Yours sincerely,
Fabien de Schaetzen
C.E.O.

6
1.2 RAIDILLON
Born from a passion for cars and racing, Raidillon watches and
chronographs are EXCLUSIVELY produced in limited editions.
Raidillon is the name given to Spa-Francorchamps’ most famous curve, this track
being many pilots’ favourite due to its varied layout and its technical nature. First
Raidillon watches were presented on this Belgian track in June 2001. These time-
pieces combined innovative Belgian design and highly reputable Swiss mecha-
nisms. Both attractive and highly technical, they are clearly modern whilst main-
taining their watch-making heritage.
Exclusively producing limited editions of 55 copies, the brand constantly renews
itself and yields new models on a yearly basis, their “rarity” determined by their
exclusive character.
As a stylish instrument, similarly to dashboard meters, the Raidillon watch is both
sporty and masculine, and its easily legible dial with anti-reective sapphire conveys
clear information. Its self-winding clockwork mechanisms are of Swiss quality,
featuring the ETA 2824 movement which was rst manufactured in 1793. The
chronographs feature the Valjoux 7750 calibre.

7
Manufacture
Since 1793, ETA SA Manufacture Horlogère Suisse has had a unique
place in the watch-making industry. Its unique technical, industrial and human
heritage allows it to use the skills passed on from decade to decade in order to
shape the future.
Nowadays, ETA SA Manufacture Horlogère Suisse is relying on this
unique know-how to continuously develop new industrialisation technologies
and create quartz and mechanical Swiss Made movements.
Its 20 production sites based in the foothills of the Jura region and
of the Valais and Tessin Swiss cantons combine all the necessary know-how to
produce and assemble watch mechanics which will serve as references throu-
ghout the world in terms of reliability and performance.

8
1.2.1 Different calibres
Raidillon watches and chronographs feature various “Swiss-made” calibres
produced in prestigious workshops:
42-A10
42 mm case in 10 ATM version, featuring the ETA 2824 calibre,
with automatic 3-hand movement and a date window at 3 o’clock.
38-CAT and 42-CAT
38 and 42 mm cases in 5 ATM version, featuring the Valjoux 7750
chronograph calibre with a day window and a date window.
42-C10
42 mm case in 10 ATM version, featuring the Valjoux 7750
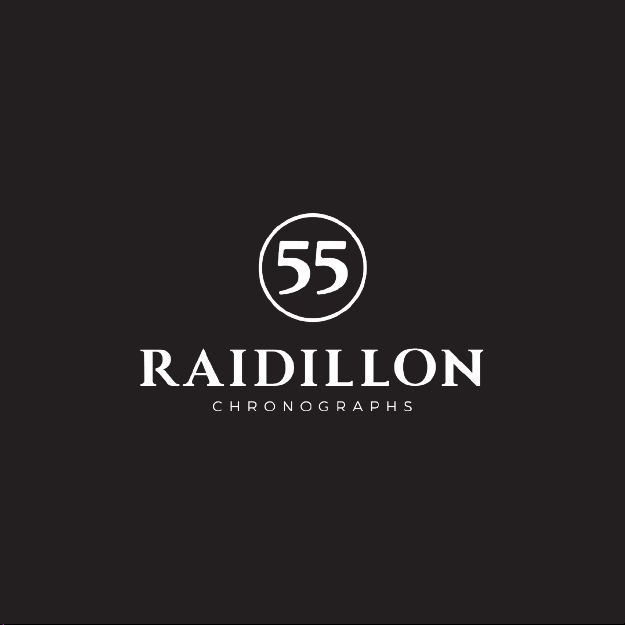
chronograph calibre and the Raidillon oscillating weight.
42-J10
42 mm case in 10 ATM version, calibre: ETA 2892/2, power
reserve and dual time zone with additional Soprod 9035 module,
pearly, Geneva waves and blue screws, Raidillon oscillating weight.
42-RD1
42 mm case in 10 ATM version, dual time zone chronograph calibre,
Valjoux 7750 with a date counter at 3 o’clock and a Raidillon oscilla-
ting weight.
42-RR1 and 42-RR2
42 mm case in 10 ATM version, double chronograph calibre, Valjoux
7750 and a Raidillon oscillating weight.
1
2
3
4
6
5

9
1.3 DEPLOYMENT STRAPS AND CLASPS
1.3.1 The single-fold deployment clasp
Open your Raidillon watch clasp by pressing
simultaneously on both pushbuttons located on
both sides of the buckle.
Open the buckle to loosen the strap and remove
the watch from your wrist.
1
2
Raidillon manufactures its straps with utmost care. They are hand-
sewn in a world-famous Belgian workshop.
We only use top quality eco-processed leather.
We offer an extensive selection of colours and materials: rubber, lamb
leather, nubuck, Louisiana alligator and stainless steel.

10
Open the adjustment mechanism by pressing one
of the pushbuttons with your nail or a plastic object
in order to release the clasp’s upper part.
Remove the pin and insert it in the chosen strap
hole.
Fix the clap once again by successively inserting
both pushbuttons in the matching holes.
Put on your watch and slide the long end of the
strap through the xed hoop.
Close the folding clasp until you hear a soft click
and insert the long end of the strap into the mobile
loop.
3
4
5
6
7

11
1.3.2 Buttery deployment clasp
Open your Raidillon
watch’s clasp by pres-
sing simultaneously
on both pushbuttons
located on both sides
of the buckle.
1Open the buckle to
loosen the strap and
remove the watch
from your wrist.
Release the adjust-
ment mechanism
by removing the pin
from the hole of the
strap’s long end.
Make the mecha-
nism slide along the
long end, and close it
again by introducing
the pin in the chosen
hole.
Fit your watch on
your wrist and in-
sert the long end
throught the xed
loop.
2
3 4
5Close the deploy-
ment strap until you
hear a soft click and
insert the long end
into the mobile loop.
6

12
1.4 SPECIAL RECOMMENDATIONS AND
TOLERANCES
What should I do so that my Raidillon watch works perfectly for many years?
• Magnetic elds: avoid placing your watch on speakers or a refrigera-
tor, as these appliances generate strong magnetic fields which could
damage your watch mechanism.
• Sea swimming: always rinse your watch with fresh water after swimming.
Leather, buffalo and alligator straps aren’t designed to resist to water.
• Impacts: thermal and mechanical shocks should be avoided!
• Crown screwing: If need be, always carefully screw the crown in order to
prevent the mechanism to be exposed to water and dust.
• Cleaning: metallic bracelets and cases should be cleaned using a tooth-
brush and soapy water, and dried with a soft cloth.
• Chemical products: avoid direct contact with solvents, detergents, per-
fumes, cosmetic products etc. as they could damage the strap, the case
and the gaskets.
• Temperatures: avoid exposing your watch to extreme temperatures
(above 60°C or 140° F and below 0° C or 32° F) or to extreme variations.
• Chronograph pushbuttons: in order to prevent water from penetrating
the mechanism, don’t manipulate chronograph pushbuttons underwater.

13
WINDING
Your watch will work better if it is fully wound. It will benet from more energy
to activate the calibre parts, will have full power reserve and will be more accu-
rate. The precision of a mechanical self-winding movement will wary according to
the wearer’s habits. Raidillon watches’ accuracy uctuates between – 5 and +15
seconds per day.
Automatic winding up (fully depressed crown)
Your wrist’s natural movements automatically wind up your Raidillon watch, which
has a 40-hour power reserve. Manual winding up is only necessary if you don’t
wear your watch/chronograph for several days.
Manual winding up
Winding up is carried out on the 1st position (unscrew the crown as shown in the
diagram on page 15) by holding the crown between the thumb and the index
and rotating it towards the dial’s midday mark (if the winding up is carried out
counter-clockwise, the movement won’t be affected). Generally, thirty crown
spins are necessary to wind up a watch. There is no risk of over-winding a watch:
a specic system, referred to as a slipping spring, prevents the barrel spring from
jamming and there is therefore no risk of breaking a mechanical part.
Monthly winding up
We recommend a fully manually winding up of your watch at least once per
month.

14
Your Raidillon watch features a 5 or 10 ATM water resistance
according to the model. The water resistance index is indicated at the bottom
of the case. This means your watch has been tested at an overpressure of 5 or
10 ATM, corresponding to a 50 or 100-metre static immersion depth - 1 ATM
(atmosphere) = ~10 metres.
A watch’s absolute water resistance can’t always be guaranteed. It can be
affected by gasket wear or an impact on the crown. According to the ISO 22810/
NIHS92-20standard,userswearingtheirRaidillonwatchunderwater areadvisedto:
Have a water resistance test of your watch at a dealership authorised
by Raidillon.
Ensure that the strap is t for the watch’s intended use.
Avoid sudden temperature variations.
Avoid dropping and knocking the watch.
Not to use controls, pushbuttons or crowns underwater, or outside
water as long as the watch isn’t dry.
Properly replace the crown and pushbuttons after any handling.
Rinse the watch using fresh water after use in sea water.
You may use your watch during short swims and dives from the edge of a pool,
but not from diving boards. Your watch isn’t suited for use whilst scuba diving,
nor whilst practising sports presenting a high likelihood of impacts, such as
1.4.1 Water resistance
1
3
4
5
6
7
2

15
1.5 SETTING TIME, DAY AND DATE
All our watches feature a screw-down crown. This function guarantees
perfect water resistance until the depth the model was designed for.
The crown features 4 different positions:
-position 0 : the crown is screwed on
-position 1 : to manually wind up of the watch
-position 2 : to set the day/date
-position 3 : to set the hour/minutes
To perform an action, the crown should always be unscrewed (by turning
downwards) and screwed back, once the action is nished, in order to maintain
water resistance (press towards the case whilst screwing upwards towards the
crown).
1.5.1 Setting time
Unscrew the crown by turning it downwards.
Pull the crown to an extreme position - position (3).
Set the time by turning the crown in the chosen direction.
Place the crown back into position (1) and screw it upwards until it
reaches position (0).
1
2
3
4
0 1 2 3

16
Unscrew the crown by turning it downwards and pull it to the
intermediate position (2).
Set the date by turning the crown upwards to change the date and
downwards to change the day.
Push the crown and screw it upwards until you reach position (0).
It is necessary to set the date again following months of less than 31
days.
1.5.2 Quick date rectication
1
2
3
4
9:00pm
4:00am
Never change the date
between 21.00 and 04.00.
Automatic watches need
to be wound up if not
used for a long time.

17
1.6 AUTOMATIC CHRONOGRAPHS
1.6.1 Overviews
The rst chronograph was invented by watchmaker Louis Moinet in 1816. The
name is derived from the Greek word ”chronos”, which means “time”. Mainly
used for sports activities, it is also favoured in the eld of aviation and for scientic
experiments.
The central second hand displays seconds with quarter-second accuracy.
• A counter located at 12 o’clock adds up minutes until 30.
• A second counter located at 6 o’clock adds up hours until 12.
• Where applicable, a third counter located at 9 o’clock displays the small second.
• Where applicable, day and date windows are located at 3 o’clock.
Chronograph
second hand
30-minute counter
Hour hand
Small second
12-hour counter
Tachymetric
scale
Minute hand
On/o pushbutton
– Engaging and release
of the
chronograph’s hand
and counters
4-position
crown
Day and date
window
Chronograph
hand and counter
reset
pushbutton
Use:
• Press the A pushbutton : the
chronograph starts,
• Press the A pushbutton : the
chronograph stops,
• Press the B pushbutton : reset.

18
1.6.2 Double chronograph
Double chronographs feature two second hands, the second one, called
split-second hand, being used to measure intermediate times before instantly
catching up with the rst one and continue to measure seconds.
Benet of the double chronograph function
The way the split-second hand
progresses and stops allows for
simultaneous timing of several events or
actions starting at the same moment
but lasting different times. Several
successive periods of time are therefore
measured, and their respective lengths
can be compared. Such comparative
timing is frequently used during sports
competitions, for example to time laps
during car races.
Le Raidillon by Night © van Bever

19
Using the double chronograph function :
Start the timing by pressing the (A) pushbutton: the split-second hand
overlaps the second hand and becomes invisible.
Press the (C) pushbutton for the split-second hand to stop.You may
also see the intermediate time as the chronograph still operates.
Press the (C) pushbutton again to make the split-second hand overlap
the second hand again.
To measure a second intermediate time, press the (C) pushbutton a
third time until the split-second hand stops again.
Press the (A) pushbutton to stop timing.
Please note that once the timing stops, you should press the (C) push
button in order for the split-second hand to overlap the second hand
and for both hands to be reset to zero.
Finally, press the (B) pushbutton to reset.
A pushbuttonC pushbutton
B pushbutton
Split-second hand
1
2
3
4
5
6
7

20
1.7 DUAL TIME ZONES
Your dual time zone Raidillon watch will follow you everywhere and be
the perfect co-traveller at all times. In addition to the local time, the watch can
also display the time of a second time zone.
The discreet 24-hour display is
found in the small second window at
9 o’clock, and indicates the current
time in the chosen time zone.
A white hand goes around the
counter once per day and indicates
the time in the second time zone,
graduated from 0 to 24.
In order to change the second time
zone, one only needs to press the
pushbutton at 10 o’clock.
The double time zone is indicated in
the dial located at 12 o’clock.
An orange hand spins round the
counter once per day and indicates
the time in the second time zone,
graduated from 0 to 24.
In order to change the time, one
only needs to depress the notch
located on the case at 10 o’clock
using a small plastic tool or a pin.
This manual suits for next models
7
Table of contents
Languages: