20
21
!
!
!
!
!
- Battery is provided when you purchase the product.
- It is Lithium Polymer Battery which has its safety device on over current and temperature attached.
- Be careful not to dissemble it at your discretion or apply shocks to it, which can cause explosions and fires.
- For damages from discretionary manipulation or drop, you cannot get its repair services.
- If it is dropped into water, do not use it, go to the technical service center and have it checked.
- If its surface expands or it leaks, do not use it and go to the technical service center for checking it.
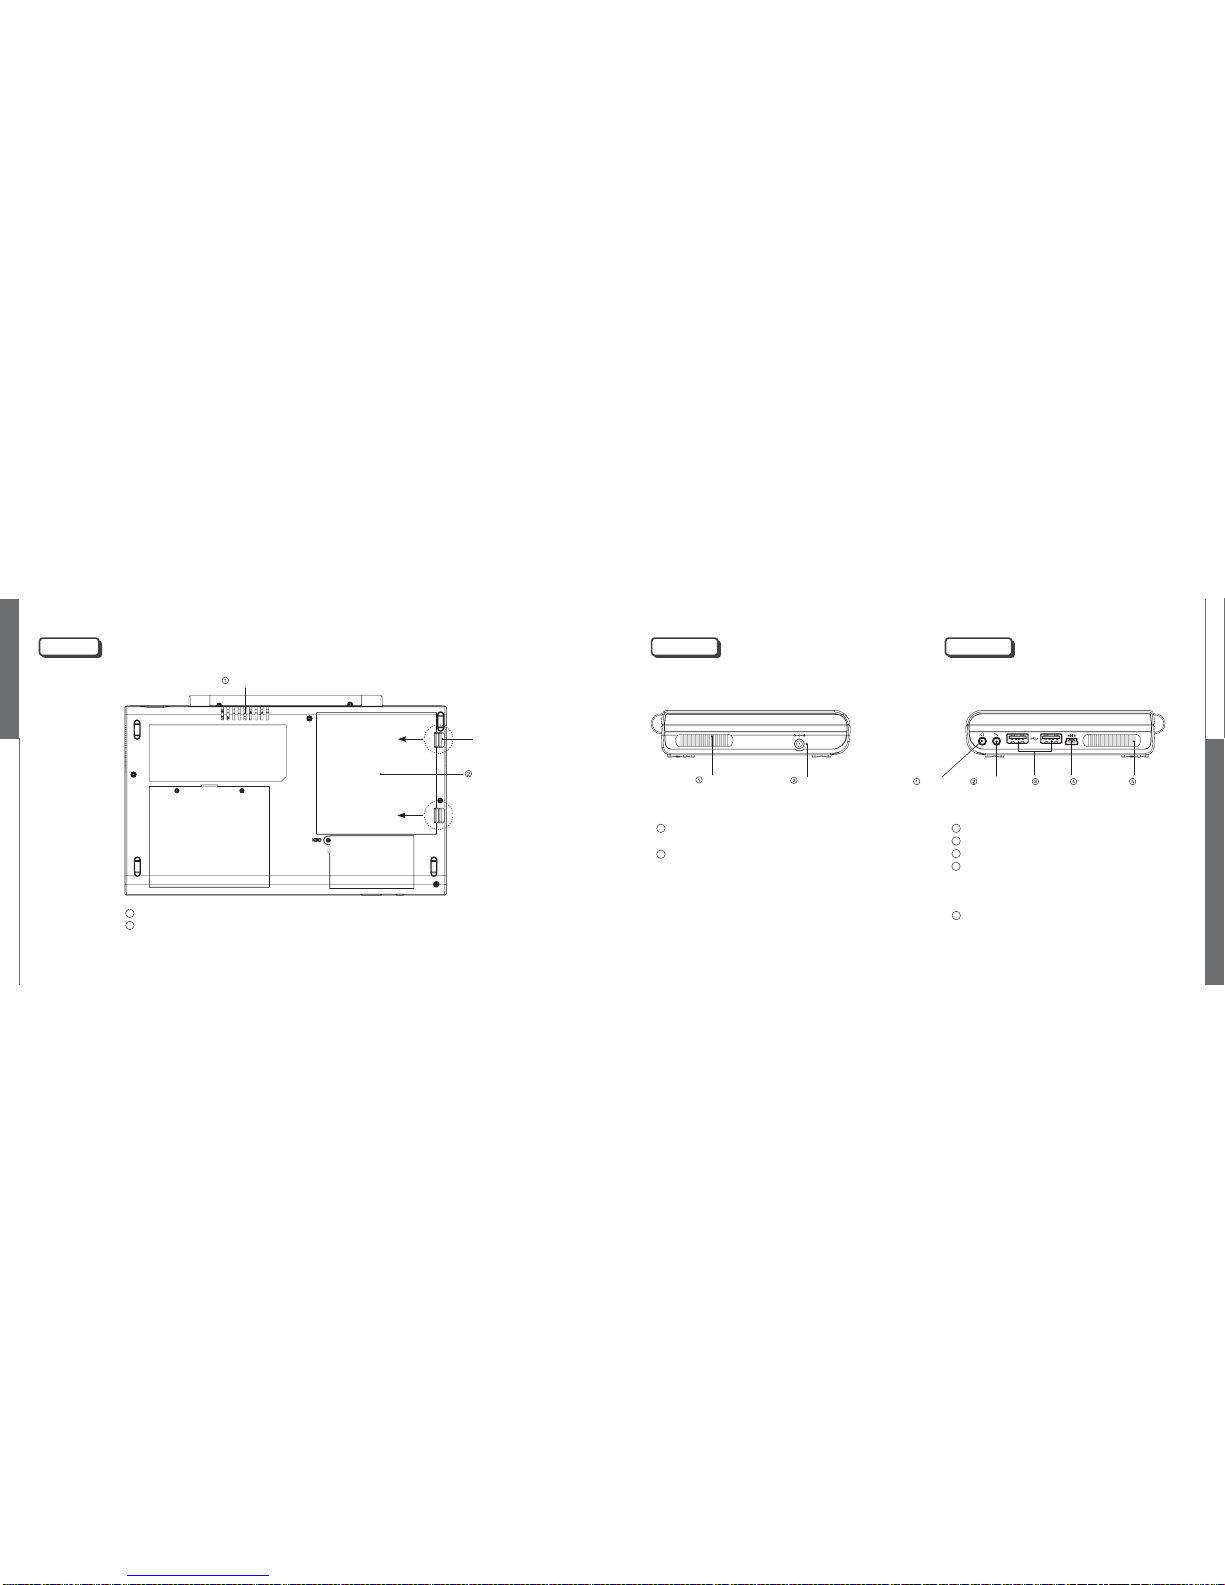
2-1 Removing/mounting battery
- Put battery terminal tightly to the back terminal to push in until it sounds “Snap.”
- Check it if it does completely snap into the body.
- To remove it, follow the opposite order. Push the locking pin upward to lift.
- Battery in use or being charged can be hot. So be careful when you use it.
2-2 Charging battery
- Do not use adapters other than the genuine charging adapter provided with when you purchase.
- If you use a non-genuine adapter, it won’t charge or it can cause fires.
- To charge it fully, discharge it completely at the first time before charging.
- Its temperature can increase while you charge it.
- Be careful not to block the product with a blanket or clothes while you charge it.
- You can check its charging status at the Windows Taskbar and the power control from the control panel.
- For low-power warning setting, you can set it at the power control from the control panel.
- If the temperature of the product is high, its charging time can be delayed due to the operation of the temperature
sensor inside the battery.
Battery
2-3 Checking battery level
If you move the cursor to the icon of power control at Windows Taskbar, it will show the battery level with percentage (%).
The battery time is measured by Windows system and can be different from the actual remaining time.
2-4 Cautions for use of battery
1. Do not leave it under sunshine or in the surroundings with temperature over 60°C like in the car parked in summer.
It can cause the product or the battery to overheat.
2. Charge the battery at temperature of 10°C to 30°C. Charging it over this temperature can cause it to overheat. And
charging it at low temperature can lengthen the charging time.
3. For safety of a user, use the designated AC adapter and genuine battery provided with the product.
This product is designed to operate only with the genuine battery.
4. The temperature of the battery goes up when it is in use or being charged. Do not worry about it as It is normal.
5. Do not leave it close to every heat source (radiator, heater, etc.) as it can cause explosions or fires.
6. Be careful not to have it exposed to humidity and water.7. Do not disassemble it.8. Do not apply any mechanical shock to it.
9. Remove it from the product to prevent it from being damaged when you don’t use it for a long time.
10. If its time for use is still not enough even after its full charge, its life becomes almost exhausted. So you need to replace it
with a new one.
11. You do not need to discharge it to charge.
12. Charge it fully before use when you don’t use it for a long time.
Battery
Battery