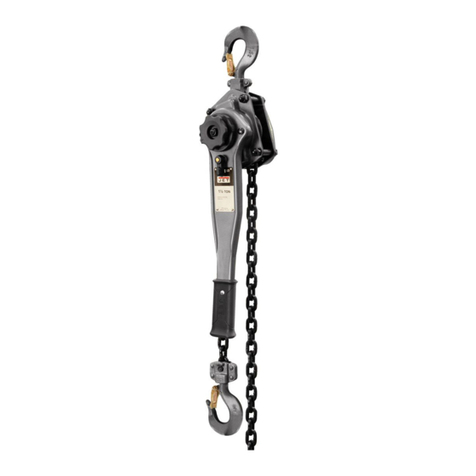
Raptor LW75 Installation and operation manual

- 0 -
OPERATING &
MAINTENANCE
INSTRUCTIONS
“RAPTOR” Lever Hoist
Note: The Owner/Operator must read carefully and understand
All the information presented here before operation.

- 1 -
Content
1. Introduction…………………………………………. 2
2. Correct Operation/General Warnings……………… 2
3. In Service Inspection & Maintenance……………… 3
4. Operation…………………………………………….. 4
5. Maintenance/Inspection…………………………… 5
6. EC Declaration of Conformity……………………… 5
7. Specifications………………………………………… 6
8. Exploded View & Part List….………………………. 7
THANK YOU FOR PURCHASING THE “RAPTOR LEVER HOIST”. FOR YOUR
SAFETY, CORRECT OPERATION & MAINTENANCE - PLEASE CAREFULLY
READ THIS INSTRUCTION MANUAL PRIOR TO OPERATION.
NOTE: All of the information reported herein is based on data available at the
moment of printing. The manufacturer reserves the right to modify its own
products at any moment without notice and incurring in any sanction.
INTRODUCTION
The “RAPTOR” hand operated Manual Lever Hoist is a versatile lifting device that
can be used for either lifting, pulling and/or tensioning, using a suitable fixed
anchor point or suspended from a suitable trolley.
The frame, cover and lever have been manufactured from high quality steel
stampings, and the gears from heat treated steel. Both the upper and lower swivel
hooks from forged steel and fitted with safety catches and the load chain fitted to
the lever hoist is ISO Grade 80.

- 2 -
2 - CORRECT OPERATION / GENERAL WARNINGS
1) Retain this Manual for future reference.
2) Do not use this hoist in areas containing flammable vapors, liquids, gasses or
combustible dust or fiber.
3) Do not use the hoist in highly corrosive, abrasive, wet environments.
4) The hoist can be used in ambient temperatures between -10C and +50C.
5) At ambient temperatures below 0C the hoist brake should be inspected and tested
before operation.
6) Never exceed the capacity stated on the hoist.
7) Do not use the hoist for lifting or transporting of personnel.
8) Do not lift or transport loads while any personnel are under or within the danger
zone.
9) It is the operators responsibility to ensure the load is attached to the hoist in a safe
and secure manner before movement of load.
10) Never leave a suspended load unattended.
11) Never use other devices to exert extra force to the lifting or lowering application.
12) Never use the load chain to sling around item to be lifted.
13) Respect hoist, always place hoist safely/carefully on the ground.

- 3 -
3 - IN SERVICE INSPECTION & MAINTENANCE
INITIAL INSPECTION
Check that the correct hoist and the capacity of hoist are suitable for the job in hand.
Prior to operating hoist for the first time, the hoist must be checked by a competent
person. Visually check hoist has been delivered and/or stored in a safe and undamaged
condition.
IN-SERVICE INSPECTION – Before operation
Prior to operating hoist check all components are free from excessive wear and general
condition of hoist is good. Inspect the housing, chain and hooks are all in good working
condition. If hoist is fitted with brake it should be tested before operation. Check that
anchor point is sufficient to take the intended load.
LOAD CHAIN INSPECTION
The Load Chain should be inspected for wear, defects, and deformations or
superficial/corrosion marks before use, if operator is unsure of condition of chain it
should be checked by a trained and competent person. Clean and lubricate at regular
intervals.
CHAIN STOP INSPECTION
Check that the chain stop is fitted securely to one link of chain only.
TOP/BOTTOM HOOK INSPECTION
Both the top and bottom hooks should be inspected for wear, defects, and deformations
or superficial/corrosion marks before use. Check that safety catches are fitted and are
working correctly if operator is unsure of condition of hooks, they should be checked by
a trained and competent person.

- 4 -
REEVED CHAIN INSPECTION
If the unit is fitted with two or more falls of chain, the hoist should be inspected to make
sure the load chain is free from kinks and/or not twisted.
REMEMBER – The load chain welds should always face away from load sheave
4 - OPEARTION
FREE CHAINING – Remove load before switching to Free Chaining Position
To select free chaining move the selector lever to central position (neutral). Then rotate
the free chaining wheel counterclockwise to disengage the brake, the chain can now be
pulled through machine in either direction by hand for quick tensioning of load. To
disengage the free chaining feature, position the selector switch to the load or unload
position – pull the load chain in either direction to insure the unit is out of the free
chaining mode. DO NOT take up the load chain to the point where the chain stop or
bottom hook becomes jammed against the frame of the hoist.
ATTACHING/LIFTING LOADS
Secure top hook to an appropriate anchor point.
Attach lower hook to the load so that it is seated correctly in the bow of the hook and
check that the safety catch has closed. Do not wrap the chain around the load and hook
back onto the load chain and do not let the load come into contact with the load chain.
Make sure the top and bottom hooks are in a straight line and the frame is free to swivel
on the upper hook.
Lifting/Pulling & Tensioning Load – Position the selector switch to the LOAD position,
take up the “slack” chain, and then operate the handle in an up and down motion. If work
is stopped while hoist is under load DO NOT re-position the selector switch as the load
will fall. The hoist has been designed for hand use only; do not use an extension on the
lever.

- 5 -
LOWERING/LOOSENING LOAD
Move selector switch to the unload position. Again operate lever in an up and down
motion until the load has safely reached the ground.
LOCKED BRAKE
If the hoist which is under load is suddenly relieved of the load i.e. by taking load off
bottom hook or by pulling a load down walls etc. The brake will also lock if the bottom
hook is pulled tightly against the hoist frame.
To unlock the brake, turn the Selector lever to the unload position and pull on the lever
sharply.
5 - MAINTENANCE/INSPECTION
To maintain continuous and satisfactory operation, a regular inspection procedure must
be initiated so that worn or damaged parts can be replaced before they become unsafe.
The intervals of inspection must be determined by the individual application and are
based upon the type of service to which the hoist is subjected. To test the brake a test
load with capacity the same as the hoist should be used.
The hoist should be visually inspected by the operator / competent person daily or
before each use.
To check for worn parts the hoist may need to be disassembled this should only be
carried out by a qualified repairer and not by the operator.
Annual inspection and re-certifying of the hoist should be carried out in accordance to
European Safety Regulations – therefore the hoist must be returned to a recognized and
competent lifting equipment repair centre.

- 6 -
6 - EC DECLARATION of CONFORMITY 2006/42/EC
We hereby declare, that the design, construction and commercialized
execution of the below mentioned machine complies with the essential health
and safety requirements of the EC MACHINERY DIRECTIVE. The validity of
this declaration will cease in the case of any modification or supplement not
being agreed with the manufacturer beforehand.
Furthermore, validity of this declaration will cease in case that the machine will
not be operated correctly and in accordance to the operating instruction
manual and/or not being inspected regularly.
PRODUCT DESCRIPTION - Hand Operated Ratchet Lever Hoist
MODEL RANGE - LW Series
CAPACITY - 750Kgs to 6000Kgs
IDENTIFICATION - Located on Serial Plate on Machine
And stated on individual EC
Declaration of Conformity supplied
separate to this booklet
RELEVANT EC
DIRECTIVES - The Machinery Directive 2006/42/EC
1
st Edition December 2009

- 7 -
7. SPECIFICATIONS
Model L
W
75 L
W
100 L
W
150 L
W
200 L
W
300 L
W
600
Liftin
g
Ca
p
acit
y(
tonne
)
0.75 1.0 1.5 2.0 3.0 6.0
Load Chain
(
Dia. x Pitch
)
(
mm
)
6 x 18 6 x 18 8 x 24 8 x 24 10 x 30 10 x 30
No. of Falls of Load chain 1 1 1 1 1 2
Min. Distance Between Hooks A321 328 376 385 475 495
B23.8 25.6 28.6 32.5 42.9 50.8
C28.5 29.5 31.8 33.5 39.7 43.0
D17.5 18.6 20.6 22.8 31.8 34.5
E279 279 413 413 413 413
F111 111 121 121 191 191
G56 58 60 65 86 94
H56 56 60 60 106 106
J151 151 175 175 200 200
Dimensions (mm)
K
60 60 76 76 86 86

- 8 -
8.Exploded View & Part List

- 9 -
Record of Examination

- 10 -
Date Description of inspection Signed
This manual suits for next models
5
Table of contents
Other Raptor Chain Hoist manuals
Popular Chain Hoist manuals by other brands

misia
misia XM SERIES Installation, operation and maintenance manual

Safety Hoist
Safety Hoist EH-500 Operator's manual

Beta Max
Beta Max Beta Lite OPERATING AND MAINTENANCE PROCEDURES

Yale
Yale UNOplus A Series Translated Operating Instructions

KITO
KITO Chain Sling 100 Assembly manual

AeroFlow
AeroFlow PERFORMANCE instruction manual

BorMann
BorMann BPA4012 manual

Thiele
Thiele TWN 1320 Mounting instructions

KITO
KITO ER2 Series owner's manual

Stahl
Stahl ST50 TRANSLATION OF ORIGINAL OPERATING AND INSTALLATION INSTRUCTIONS

Grizzly
Grizzly G8703 instruction sheet

Coffing Hoists
Coffing Hoists Concert Series Operating, Maintenance & Parts Manual