3-10) Camera connected.
Press and hold the camera window
to display additional menu.
Pressing the button shows the
menu for right setting, logging out,
and exiting etc.
8:30
Hospital
Divices List
IP Camera
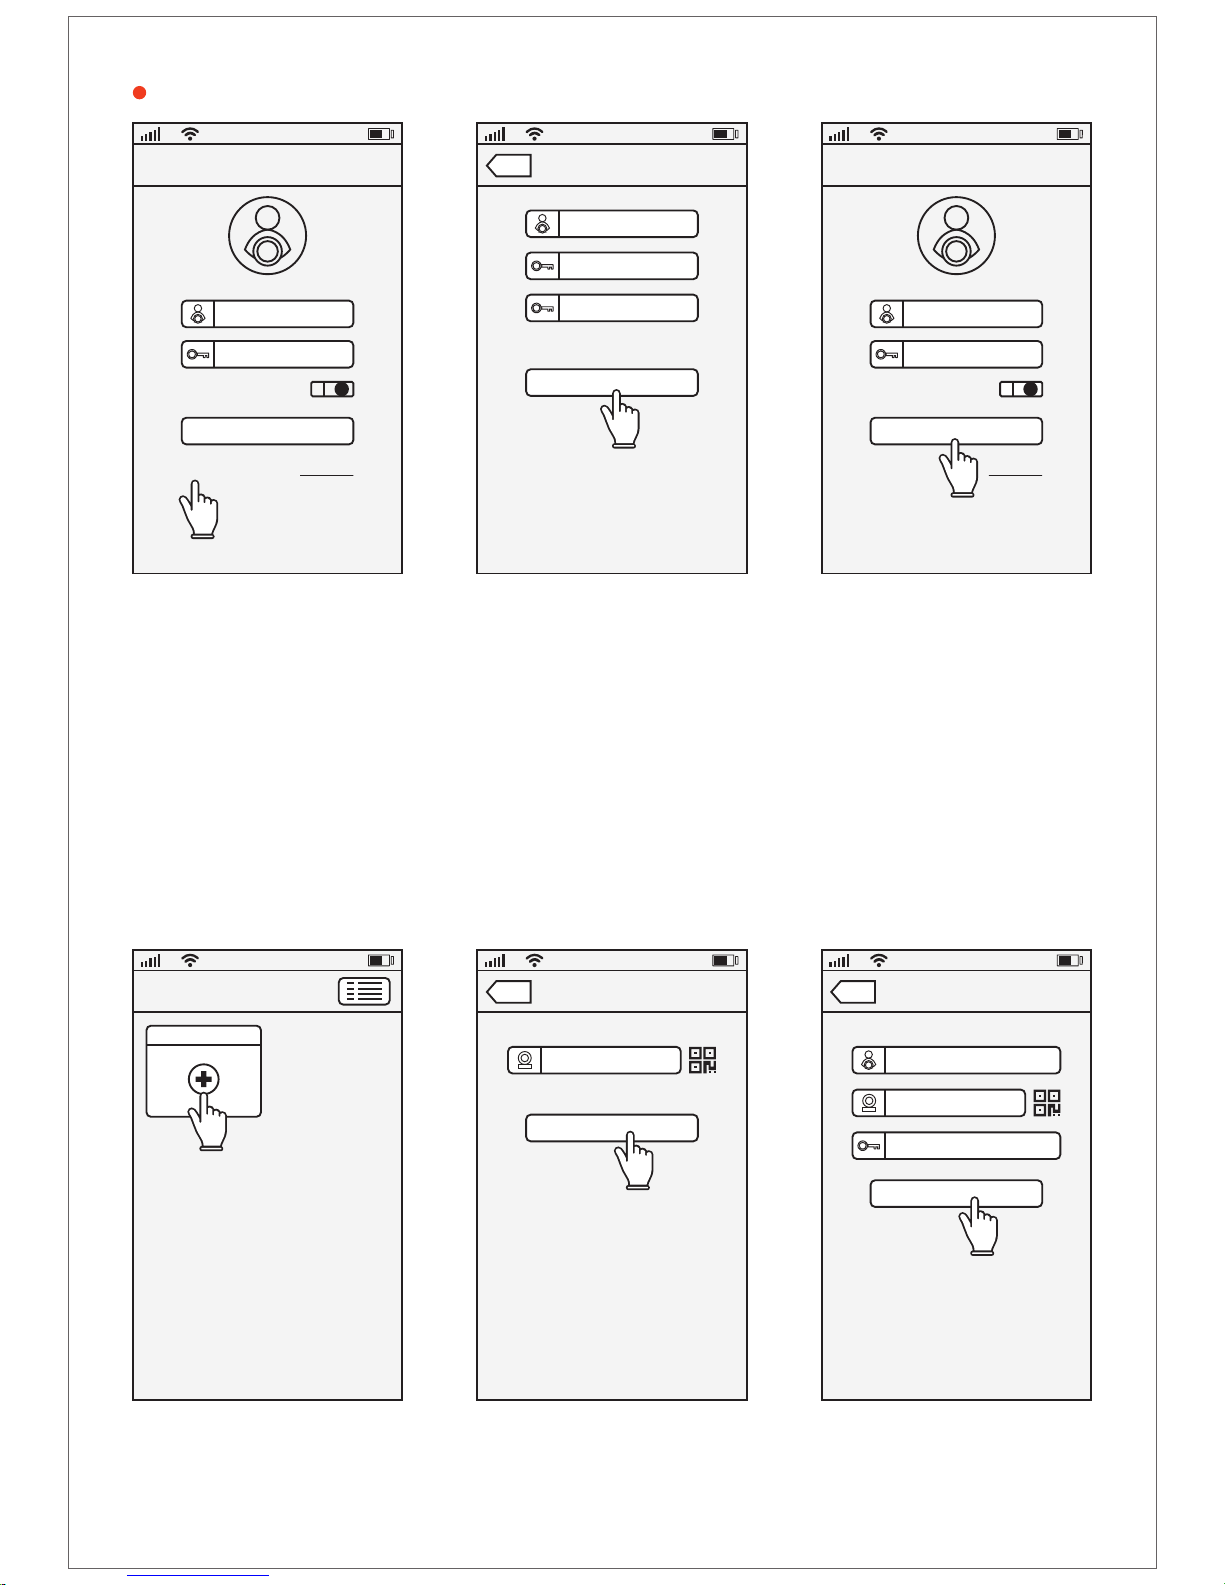
Add new device
4-1) If the connection is not smooth
due to a problem in the Internet network,
the above screen appears.
Please press QR code setting.
8:30
WI-FI Setting
Device ID (ex: 404087)
Try Again
QR Code Setting
WI-FI setting failed
Back
Network busy! Please try again.
First, please confirm whether the device make
beeping sound. If not beeping, you need back to
the first step of Add New Device?
If you heard continuous beeping sound, check
whether input incorrect Wifi password, and try
again.
If this setting failed several times, please try “QR
Code Setting” to cinfigure Wifi
4-2) Enter your Wi-Fi password
and press the Next button.
8:30
WI-FI Setting
Device ID (ex: 404087)
Back
Press “Reset” button with the Reset
pin for 10 seconds untill hear a clash
sound from the device, then input
Wi-Fi password and tap “Next”
Input Wi-Fi password
Wi-Fi name
Next
When you scan the QR code to
the camera, make sure the
direction is slightly different so
that the scan is smooth.
4-3) The QR code appears on the screen.
Bring your smartphone to the camera
lens inside the Vetpel at a distance of
20 ~ 30cm and move it forward a little bit.
When you hear the Ding~ sound
from the camera press the Next button,
and your device is now connected to Wi-Fi.
8:30
QR Code Setting
Back
Move camera back and forth slowly scan
the QR code above at the distance about
20~30cm, after hear a beeping sound, tap
“Next”
Next
IP Camera
<When looking at the top of the inside>
<Please let the camera recognize the QR code screen.>