II. DISPLAY FORMAT IN DIFFERENT MODE
Press button Dto switch to different modes
Calendar Clock →(Press D) →Daily Alarm →(Press D) →Lap →(Press D) →Split →(Press D) →Dual
Timer →(Press D) →Stroke →(Press D) →Back to Calendar Clock
III. CALENDAR AND CLOCK SETTING
Press button D to enter Calendar & Clock mode.
Hold button C until seconds digits are flashing to enter clock setting mode.
Press button B to adjust the flashing digits and the press button A to confirm.
Right after the confirmation, minutes digits will then start to flicker. Press button B again to adjust and button A
to confirm.
Repeat the above process until you get a correct time setting.
As soon as time setting is finished a “12H” display will be shown. Press button B to switch to 12 hour or 24 hour
format and then press button C to confirm.
IV. ALARM SETTING MODE
Press button D to enter Alarm mode.
Hold button C until the hour digits are flashing to enter alarm setting mode.
Press button B to adjust the flashing digits and then press button A to confirm.
Right after the confirmation, minutes digits will then start to flicker. Press button B again to adjust and button C
to confirm.
V. ALARM ON/OFF
Press button D to enter Alarm mode
Press button A to set alarm on •))) or off
VI. POWER SAVING
To preserve batteries, the unit will automatically switch off if the unit is left unused for over 9 hours.
Display will reappear with a press on either buttons.
VII. TROUBLESHOOTING
Malfunction Problem
Incorrect Data Record Check proper operation in the user manual
Black Display Temperature is too hot or display exposed to direct sunlight too long
Display Readout Fades Poor battery contacts or dead battery
Display Shows Irregular Take out battery and install again
Figures
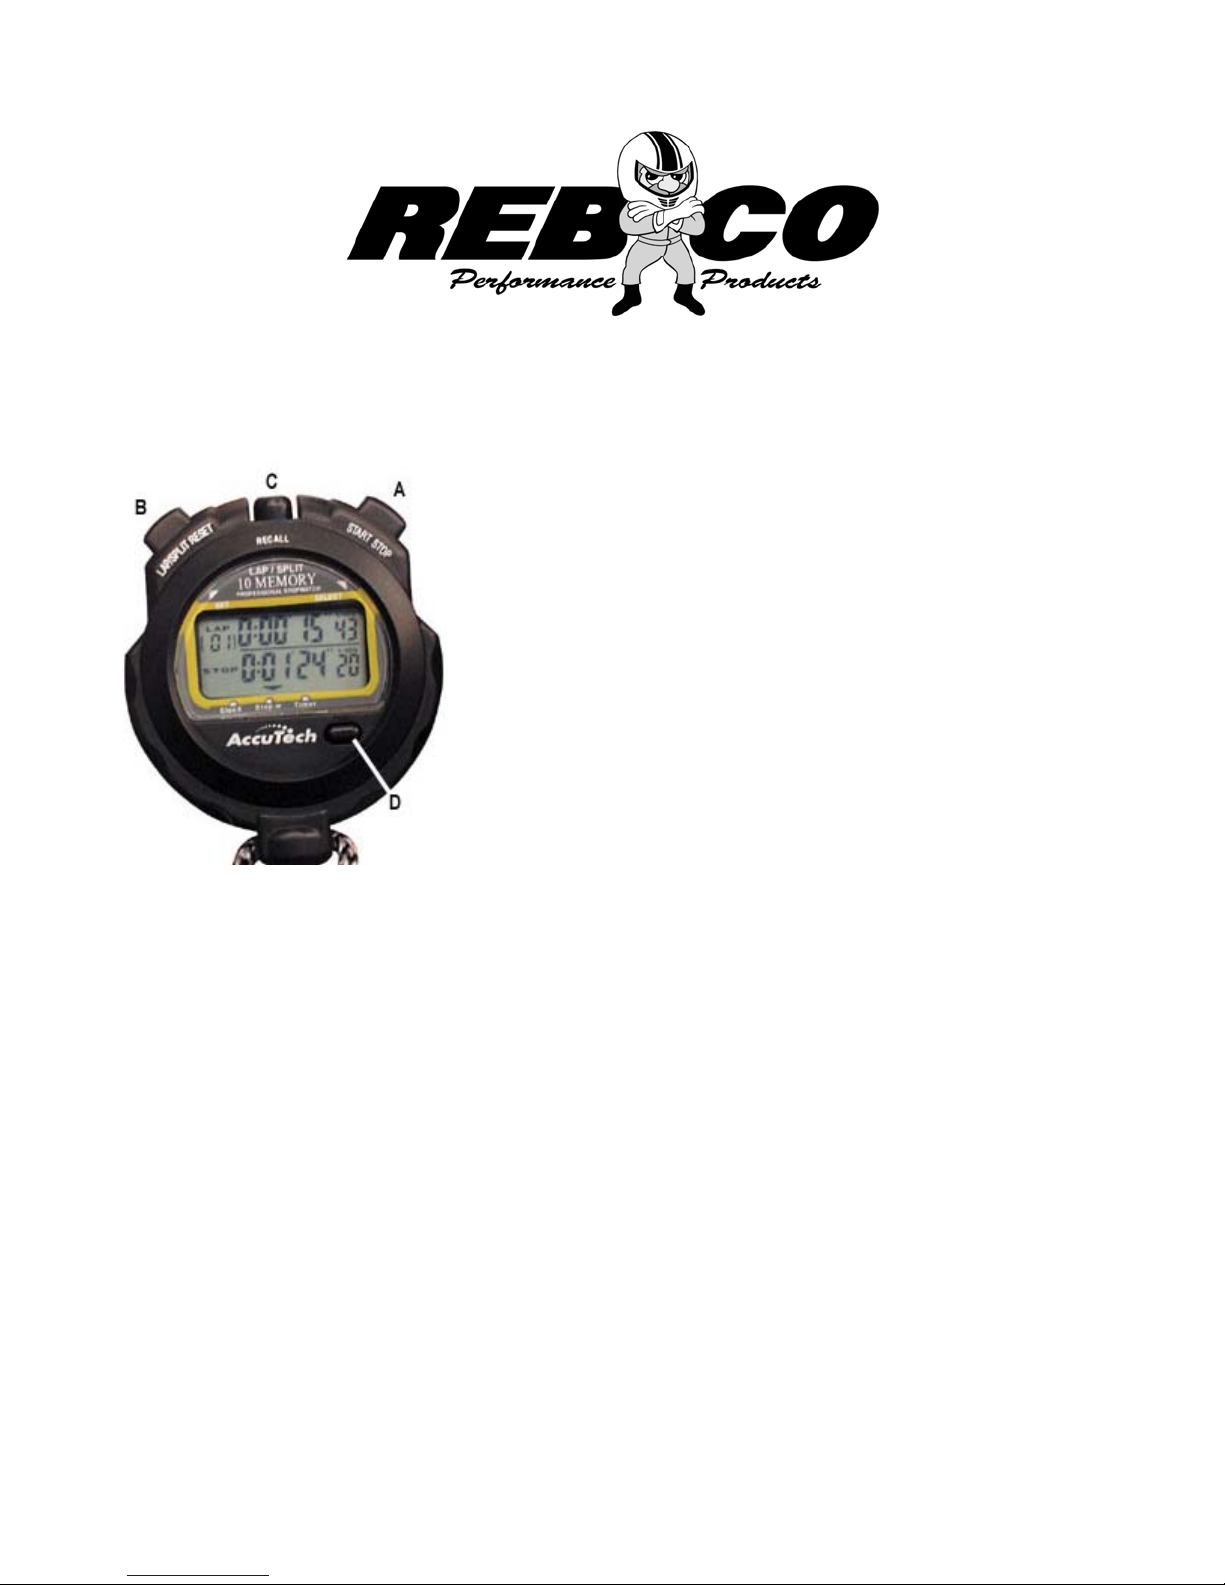
VIII. STOPWATCH
Press button D to enter Stopwatch mode.
Before using the stopwatch, be sure to reset all digits to zero first, “0:00’00’00”. When the stopwatch is stopped,
press button B to reset. When the stopwatch is counting, press button A to stop the measurement and then
press button B to reset.
Press button A to start or stop the measurement.
Press button B to record a lap or split when the stopwatch is counting.
REFERENCE:
• STANDARD MEASUREMENT: A-A-B START-STOP-RESET
• ACCUMULATED ELAPSED TIME MEASUREMENT: A-A-A-A-B START-STOP-RESTART-STOP-RESET
• SPLIT TIME/LAP TIME MEASUREMENT: A-B-B-A-B START-SPLIT LAP 1-SPLIT LAP 2-STOP-RESET
- “Split time” refers to an elapsed time required to cover a distance from the start to a given point
- “Lap time” refers to an elapsed time required to cover a given section of the whole distance
• RECALL LAP/SPLIT MEMORY: C-A-A-A-C-B RECALL FASTEST LAP-RECALL LAST SPLIT/LAP-RECALL
FIRST SPLIT/LAP-RECALL SECOND SPLIT/LAP-RETURN TO NORMAL MODE-RESET