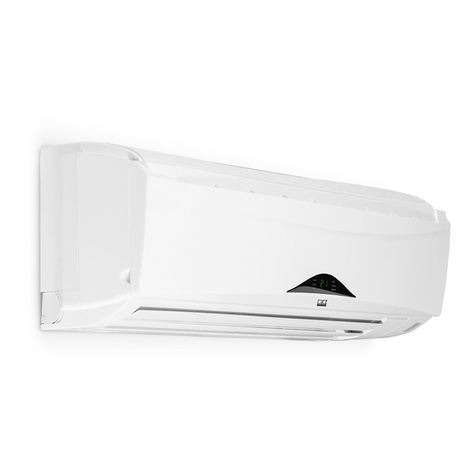
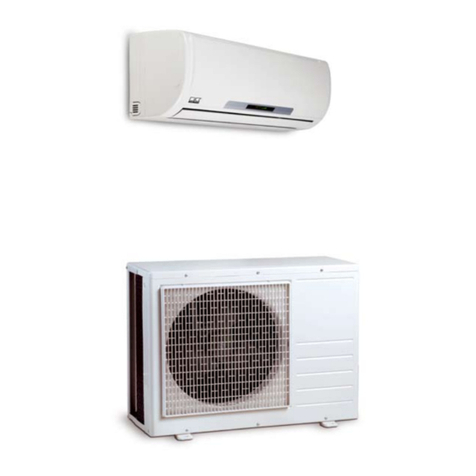
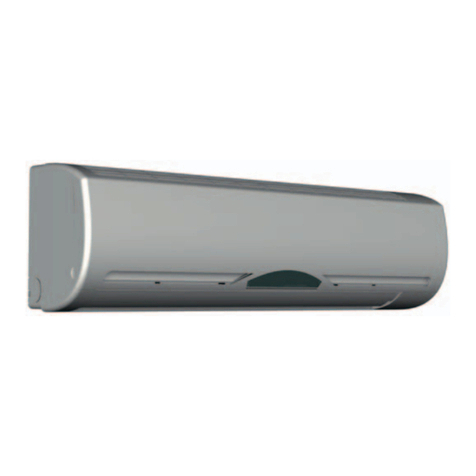
REMKO RXW 681 User manual

Issue GB – U01
REMKO RXW
RXW 261, RXW 351, RXW 521, RXW 681
Wall units
Operation · Technology · Spare parts
Downloaded from AC-Manual.com Manuals

Downloaded from AC-Manual.com Manuals

Contents
These operating instructions should be read carefully
prior to commissioning / operation of the equipment!
These instructions are part of the equipment and must always
be kept in the vicinity of the installation or on the equipment
Subject to modifications; No liability accepted for errors or misprints!
Safety notes 4
Environmental protection and recycling 4
Warranty 4
Transport and packaging 5
Description of the equipment 5
Combinations 5
Operation 6-12
Shutdown 13
Care and maintenance 13-14
Troubleshooting and customer service 15-16
Installation instructions for qualified personnel 17
Installation 18
Condensation connection 19
Electrical connection 19
Electrical connection diagram 20
Electrical circuit diagram 20
Commissioning 20-21
Unit dimensions 21
Unit illustration 22
Spare parts list 22
Technical data 23
Made by REMKO
3
Downloaded from AC-Manual.com Manuals

Safety notes
Carefully read this manual before
starting the unit for the first time. It
contains useful tips,
information as well as hazard
warnings to prevent injury or
material damage .
Non-observance of this manual
may endanger persons, the
environment as well as the
equipment itself and will void any
claims for liability.
■ Store this manual as well as
the refrigerant datasheet in the
vicinity of the unit.
■ The unit should only be set
up and installed by qualified
personnel.
■ The setup, connection and
operation of the unit and
its components must be in
accordance with the operating
conditions stipulated in this
manual and comply with all
applicable local regulations.
■ Units designed for mobile use
should be safely set up on a
suitable floor and in a vertical
position. Units designed for
stationary use should only be
operated in their permanently
installed state.
■ It is prohibited to make
modifications or changes to
equipment or components
supplied by REMKO as this may
cause malfunctions.
■ Equipment and components
should not be operated in areas
where there is a heightened
damage risk. Observe the
minimum clearances.
■ The electrical supply should
be adapted to fulfil the
requirements of the unit.
■ The operational safety of
equipment and components is
only assured providing they are
used as intended and in a fully
assembled state. Safety devices
should not be modified or
bypassed.
■ Do not operate equipment
or components with obvious
defects or signs of damage.
■ All housing parts and openings,
e.g. air inlets and outlets, must
not be blocked by foreign items,
fluids or gases.
■ The equipment and components
must be kept in a safe distance
from inflammable, explosive,
combustible, aggressive and
dirty areas or atmospheres.
■ Persons coming into contact
with equipment parts may suffer
burns or injury.
■ Installation, repair and
maintenance work should only
be carried out by authorised
specialists. Inspection and
cleaning can be performed
by the operator providing the
equipment is not under voltage.
■ Take appropriate hazard
prevention measures when
performing installation, repair or
maintenance work or cleaning
the equipment.
■ The equipment or components
should not be exposed to any
mechanical stresses, extreme
levels of humidity or direct
exposure to sunlight.
Disposal of packaging
All products are packed for
transport in environmentally
friendly materials. Make a valuable
contribution to reducing waste
and sustaining raw materials. Only
dispose of packaging at approved
collection points.
Disposal of units and
components
For the manufacture of the units
and components, only recylable
materials have been used.
Help protect the environment
by ensuring that the units or
components (for example
batteries) are not disposed in
household waste, but only in
accordance with local regulations
and in an environmentally safe
manner, e.g. through authorised
disposal and recycling specialists or
at collection points.
Warranty
Prerequisite for any warranty
claims is that the purchaser or his
client has completely filled out the
"warranty registration card" and
commissioning report included
with the unit at the time when
the equipment was purchased and
commissioned and returned the
completed card to REMKO GmbH
& Co. KG.
The warranty conditions are listed
in the "General business and
delivery conditions. The contractual
parties can also agree additional
terms beyond the scope of the
above. For this reason please
contact your direct contracting
partner first.
Environmental
protection and
recycling
REMKO RXW
4
Downloaded from AC-Manual.com Manuals

The equipment is shipped in sturdy
transport packaging. Immediately
check the equipment on delivery
and make a note of any damage or
missing parts on the delivery note.
Inform the forwarding agent and
contractual partner.
Warranty claims at a later date will
not be accepted.
Description of the
equipment
Transport and
packaging
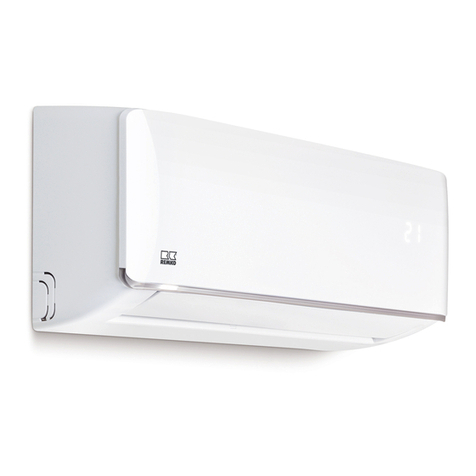
The indoor unit on the split-design
combined room air conditioning
units serves to extract heat from
the indoor room being cooled. The
outdoor component then expels
this heat to the outside.
If combined heating/cooling
units are operated as heaters, the
heat absorbed by the outdoor
component can be discharged
by the indoor unit into the room
being heated.
The unit is designed for installation
high up on indoor walls.
It is operated via an infrared
remote control.
The indoor unit consists of a fin
vaporiser, vaporiser fan, regulation
system and condensation pan.
The indoor unit can be combined
with REMKO outdoor components
that provide sufficient cooling
output. The outdoor component is
controlled via the regulation of the
indoor unit.
Condensation pumps
are available as an accessory.
Schematic of refrigerant circuit
Vaporiser fan
Connection to suction line
Connection to injection line
Vaporiser
Refrigerant pipes are used to connect the indoor unit to the outdoor
component.
Outdoor component
System design
Stop valve
Indoor unit
Liquefier fan
Injection pipe
Suction pipe
Indoor area
Outdoor area
Condensation pipe
Control cable
Mains cable
Condensation pipe
RXW 261 RXW 351 RXW 521 RXW 681
RXS 261H •
RXS 351H •
RXS 521H •
RXS 681H •
Combinations
Cooling / heating
RXW 261 RXW 351 RXW 521 RXW 681
RXM 226 ••
RXM 235 ••
RXM 252 ••
RXM 268 ••
RXM 326 •• •
RXM 335 •••
RXM 426 ••••
RXM 435 ••••
Cooling
5
Downloaded from AC-Manual.com Manuals

The indoor unit is easy to operate
using an infrared remote control.
This is supplied as standard.
The indoor unit beeps to
acknowledge the correct
transmission of data.
If it is not possible to program
the indoor unit with the remote
control, then it can also be
operated manually.
Manual operation
The indoor units can be put into
operation manually. After the air
inlet screen has been opened,
the inner recessed button can be
pressed and automatic mode can
be activated.
In manual operation, the following
settings apply:
Cooling mode: last setting
Fan speed AUTO
Heating mode: last setting
Fan: AUTO
Press the button on the infra-red
remote control to interrupt manual
operation.
Display on indoor unit
The display lights up according to
the settings.
The infrared remote control
sends the programmed settings
in a distance of up to 6 m to the
receiver of the indoor unit.
A troublefree reception of data is
only possible if the remoter control
is directed to the receiver and no
objects hinder the transmission.
First insert the supplied batteries
(two each, Type AAA) into the
remote control.
To do so, remove the cover on the
battery compartment and insert
the batteries, in correct polarity.
(see marks).
Operation
Problems are shown in code
(see chapter Troubleshooting
and Customer service).
CAUTION
Infrared remote control
Immediately replace flat
batteries with a new set,
otherwise there is a risk of
leakage. It is recommended
that the batteries are removed
if the equipment is shut down
for long periods.
NOTE
max. 6 m
Max. distance 6 m
Display on indoor unit
Timer
Automatic mode
Fan speed
Display
Display of coded
error messages,
room and target
temperature
Cooling mode
Swing operation
Sleep function
Dehumidfiying mode
Temperature unit
Heating mode
REMKO RXW
6
Downloaded from AC-Manual.com Manuals

2. Cooling mode
In this mode, the warm room
air is cooled to the desired
temperature.
3. Dehumidification mode
In this mode the room is mainly
dehumidified, the adjusted
temperature is retained.
4. Heating mode
(only for RXS...H)
In this mode, the warm air in
the room is warmed up to the
desired temperature.
This mode should not be used
for RXM units (malfunctions
may occur)
"FAN" Button
Press this button to set the
required fan speed. 4 levels
are available: Automatic, high,
medium and low fan speed.
"FINS“ Button
With this button, the desired fin
position can be set. There are
5 positions and an oscillating
function available.
"SLEEP" Button
After pressing this button, the
target temperature in cooling
operation increases within
half an hour automatically by
0.5 °C, in heating operation,
the target temperature is
reduced within one hour by
1 °C.
"SWING" Button
This button directly activates
the oscillating function of the
fins for better air distribution in
the room.
Buttons on the remote control
"ON/OFF" Button
Press this button to start the
unit.
“TOO HOT“ Button
This button is used to the
desired temperature can be
increased down to 16 °C.
"TOO-COLD" Button
This button is used to the
desired temperature can be
increased up to 31 °C.
"MODUS" Button
Press this button to select the
operating mode. The indoor unit
has 4 modes:
1. Automatic mode
In this mode, the unit works in
cooling or in heating mode.
"TIMER ON“ Button
This button is used to program
the automatic turn on time
of the unit within the next 24
hours.
"TIMER OFF“ Button
This button serves to program
the automatic switch-off time
for the device within the next
24 hours.
"HR" Button
Press this button to set the
hours.
"MIN" Button
Press this button to set the
minutes.
“RESET button“
(in the battery compartment)
Press this button to reset the
remote control to its factory
default configuration.
"CLOCK" Button
(in the battery compartment)
By pressing this button, the
time setting is activated.
“DISPLAY“ Button
With this button, the display is
turned on and off (no influence
on unit function)
7
Downloaded from AC-Manual.com Manuals

Button functions
The stand by readiness of the remote control is signalled by the blinking
dot on the remote control.
Stand by of remote control
RESET Button By pressing the RESET button in the battery compartment, the remote
control can be reset. Then the time is to be programmed (see “CLOCK
button“).
RESET 5 sec. Setting the clock
By pressing the ON / OFF button, you can activate or deactivate your
unit. The programmed settings and adjustment values before the unit
was turned off will appear on the display.
ON/OFF Button
ON/OFF ON/OFF
▲/▼ Buttons The ▼button can be used to reduce the desired target temperature, the
▲button can be used to increase it. In automatic mode, the temperature
can be increased or decreased by 1° C.
In dehumidification mode, no temperature adjustment can be made.
▼
Cooling mode
The display turns off
after 1 min.
Automatic mode
A symbol is shown on the display to indicate that the settings are being transferred.
▼
▼
▼
REMKO RXW
8
Downloaded from AC-Manual.com Manuals

The time can be programmed by pressing the CLOCK button inside the
battery compartment. “CLOCK“ blinks in the display and the current
time is set via the HR. and MIN. button. Pressing the CLOCK button
again completes the programming, the display no longer blinks.
CLOCK Button
CLOCKHR/MINCLOCK
MODE Button Use the MODE button to select between the individual operating modes.
A total of 4 modes are available:
1. Automatic cooling or heating operation
2. Cooling predominant operating mode for summer
3. Dehumification Operating mode for summer or winter
4. Heating predominant operating mode for winter (only for
RXS...H)
MODEMODEMODE
Automatic Cooling Dehumidification Heating
In automatic mode, the regulation autonomously selects between
heating and cooling operation when the unit is first turned on. A nominal
temperature of 24 °C is preset. The regulating range is between 22 °C
and 26 °C. This can still be increased or decreased with the ▲/▼ buttons
by 1° C.
AUTOMATIC Mode
AUTOMATIC
MODE
In cooling mode, the air in the room is cooled down to the set target
temperature. The desired room temperature is set with buttons ▲/▼ in
1 °C increments. If the room temperature is 0.5 °C above the selected
target temperature, then the indoor unit starts to cool down the air in
the room. If the temperature falls by approx. 1 °C below the adjusted
room temperature, then the regulation turns the cooling function off.
To protect the compressor, the regulation only turns the cooling on again
after a waiting period of 3 minutes.
COOLING Mode
COOLING
OPERATION
MODE
9
Downloaded from AC-Manual.com Manuals

HEATING Mode In the heating mode, you can heat the room in spring or fall with the
RXS...H. The selected room temperature is set with buttons ▲/▼ in
1 °C increments. If the room temperature is 1 °C below the selected
target temperature, then the indoor unit starts to heat the air in the
room. If the temperature falls by approx. 1.5 °C below the selected room
temperature, then the regulation turns the heater function off. To protect
the compressor, the regulation only turns the heater on again after
a waiting period of 3 minutes.
MODE
HEATING
OPERATION
In dehumidification mode, the target temperature is set to 24 °C. Due
to the low temperature of the refrigerant, the dew point of the air on
the condenser is lower. The excess moisture in the air is condensed by
the vaporiser, the room is dehumidified. The fan speed is permanently
set to the lowest setting in order to achieve a maximum level of
dehumidification. The compressor switches on and off in intervals
between 17°C and 24°C.
DEHUMIDIFICATION MODE
DEHUMIFICATION
MODE
MODE
The fan speed can be adjusted with this button. A selection can be made
between low, medium, high and automatic fan speed.
FAN Button
FANFANFAN FAN
With this button, the air discharge fins are individually adjusted.
A selection can be made between 5 positions and an oscillating function.
FIN Button
REMKO RXW
10
Downloaded from AC-Manual.com Manuals

TIMER Button
The activation and switch-off time can be programmed with this button.
By pressign the button Timer on or Timer off, the timer is activated
and the time display turns off. The timer symbol for the switch-on/
off time will flash. The timer display on the indoor unit lights up. The
desired turn on or turn off time is set by pressing the buttons HR. and
MIN. After completed adjustment, the timer symbol blinks for another
30 seconds. When the programmed time has been reached, the device
is automatically turned on or off. If the indoor unit is automatically
switched on, then the mode, temperature and fan speed for the last
setting is reactivated. The turn on/off time can be prematurely cancelled
by pressing the appropriate timer button or the ON/OFF button. The
timer display on the indoor unit goes out.
TIMER Buttons ON
Timer on HR/MIN 30 sec.
TIMER Buttons OFF
Timer off HR/MIN 30 sec.
With this button, a programming function is activated, which causes the
target temperature in the cooling mode to increase after one hour by
1 °C and after 2 hours by 2 °C. In heating mode, the target temperature
is decreased after one hour by 1 °C and after 2 hours by 2 °C. The unit is
automatically turned off after 8 hours.
SLEEP Button
SLEEPSLEEPSLEEP
The oscillating function of the air discharge fins can be adjusted with this
button. This makes it possible to directly switch between an adjusted
position and the oscillating function. The air distribution in the room is
improved with the swing function.
SWING Button
SWINGSWINGSWING
11
Downloaded from AC-Manual.com Manuals

There are individually adjustable
fins for adjusting the horizontal air
distribution on the air discharge
side.
Manual air distribution
Moving interior parts such as
the fan have the potential to
cause injury during operation!
Only make adjustments after
swing operation has been
turned off.
CAUTION
Shift lever left
Manual air distribution
Shift lever right
TIMER Buttons ON/OFF The regulation turns the unit on and off daily at the programmed time.
During operation, all settings and the timer symbol can be seen on the
display. During shut down, the display 0->1 and the Timer symbol can be
seen.
Unit On Unit Off Example:
The regulation turns on at 10:20.
The unit is in operation until 05:00.
REMKO RXW
12
Downloaded from AC-Manual.com Manuals

Regular care and observation
of some basic points will ensure
trouble-free operation and a long
service life.
Care and maintenance
Prior to performing any
work, ensure the equipment
is isolated from the voltage
supply and secured to prevent
accidental switch-on!
CAUTION
Temporary Shutdown
1. Allow the indoor unit to run for
2 to 3 hours in air circulation
mode or in cooling mode at the
maximum temperature setting
in order to remove any residual
moisture from the unit.
2. Shut down the system using
the remote control.
3. Switch off the voltage supply
to the unit.
4. Check the unit for visible signs
of damage and clean it as
described in the chapter "Care
and maintenance".
Shutdown
Care
■
Ensure the unit is protected
against dirt, mould and other
deposits.
■
Clean the indoor and outdoor
unit using a damp cloth. Do
not use any caustic, abrasive
or solvent-based cleaning
products. Do not use a jet of
water.
■
Clean the fins on the unit prior
to long shutdown periods.
Type of task
Checks / maintenance / inspection
Commissioning
Monthly
Six-monthly
Yearly
General • •
Measure voltage and current • •
Check fan is functioning correctly • •
Dirt on vaporiser • •
Check condensation drain • •
Test insulation • •
Check moving parts • •
Sealing test for refrigerant circuit • • 1)
Maintenance
■ It is recommended that
maintenance contract with
annual maintenance interval
with an appropriate specialist
company.
This ensures the operational
reliability of your equipment!
TIP
Permanent shutdown
Ensure that equipment and
components are disposed of
accordance with local regulations,
e.g. through authorised disposal
and recycling specialists or at
collection points.
Contact REMKO GmbH & Co. KG
or your contract partner for a list
of specialist companies near you.
The statutory regulations
require an annual sealing
test for the refrigerant circuit
in relation to the refrigerant
filling level. The inspection
and documentation is to be
carried out by corresponding
specialist engineers.
NOTE
1) see note
13
Downloaded from AC-Manual.com Manuals

Cleaning the housing
1. Disconnect the power supply to
the unit.
2. Open the air intake grill on the
front side and fold it upward.
3. Clean the grill and housing
using a soft, damp cloth.
4. Reconnect the power supply
again.
Air filter for indoor unit
Clean the air filter at intervals of
no more than 2 weeks. Reduce this
interval in case of heavily soiled air.
Cleaning the filter
1. Disconnect the supply voltage
to the equipment.
2. Open the front side of the unit
by folding the grill upward and
letting it engage (Fig. 1).
3. Lift the filter up slightly and pull
it out from underneath (Fig. 1).
4. Clean the filter with a regular
vacuum cleaner (Fig. 2).
To do so, turn the dirty side
upward.
5. Any dirt can also be removed
carefully with lukewarm water
and mild cleaning agents (Fig. 3).
To do so, turn the dirty side
downward.
6. If water is used, let the filter
dry out properly in air before
replacing it in the unit.
7. Carefully insert the filter. Ensure
it locates correctly.
Cleaning the condensation
pump (optional equipment)
An optional integrated or separate
condensation pump may be in the
indoor unit, which pumps out any
accumulated condensation into
higher positioned drains.
Observe the care and maintenance
guidelines in the separate
operating instruction manual.
1 Fold up the guard 2 Clean with a vacuum cleaner 3
Cleaning with lukewarm water
8. Close the front side as
described above but in reverse
order.
9. Switch the supply voltage back
on.
10.
Switch the unit back on.
REMKO RXW
14
Downloaded from AC-Manual.com Manuals

check Remedial measures
The unit does not start
or switches itself off.
Power outage, undervoltage
Are all other electrical
installations functioning
correctly?
Check voltage and if necessary
wait before switching back on
Defective mains fuse
Main circuit breaker is open
Are all lighting circuits
functioning correctly?
Replace mains fuse
Close main circuit breaker
Damaged mains cable
Are all other electrical
installations functioning
correctly?
Repair by a specialist
Waiting time after switch-on too
short
Is there a restart after approx. 5
minutes? Schedule longer waiting periods
Temperature outside operating
range
Are the fans for the indoor
unit and outdoor component
working?
Note the temperature ranges of
the indoor unit and the outdoor
component
Overvoltages due to
thunderstorms
Have there been any lighting
strikes in the area recently?
Turn the main fuse off and turn
it on again
Have it checked by a specialist
Fault in external condensation
pump
Did the pump turn off due to a
fault outage? Check pump clean if necessary
The unit does not
respond to the
remote control
Transmission distance too large /
Receiver faulty
When pressing the button is
there a signal sound on the
indoor unit?
Reduce the distance to less than
6 m or change position
Defective remote control Is the outdoor component in
manual operation? Replace the remote control
Receiver or transmitter unit
exposed to excessive solar
radiation
Is the function working if
shaded?
Place the transmitter or receiver
unit in the shade
Electro-magnetic fields interfere
with transmission
Is the function working when
turning off any sources of
interference?
Signal is not transmitted
when interference sources are
operational
Button on remote control
jammed / two buttons pressed
at same time
Does the “Send” symbol appear
on the display?
Release the button / only press
one button
Batteries in remote control
depleted
Have new batteries been
inserted? Is the display
incomplete?
Insert new batteries
Troubleshooting and customer service
Please note the continuation of this “Troubleshooting chart“ on the next page !
Malfunction
The equipment and components are manufactured using state-of-the-art production methods and tested several
times to verify their correct function. If malfunctions should occur, please check the functions as detailed in the
list below. For installations with an indoor unit and outdoor component, refer to the chapter "Troubleshooting
and customer service" in both manuals. Please inform your dealer if the unit is still not working correctly after all
the functional checks have been performed!
15
Downloaded from AC-Manual.com Manuals

Fault Possible cause Check Remedial measures
The unit is running
with reduced or
without cooling or
heating output
Filter is dirty / air inlet / outlet
opening is blocked by by debris Have the filters been cleaned? Clean the filters
Doors and windows open /
heating or cooling load was
increased
Have there been any
constructional /
application-related changes?
Close doors and windows /
install additional systems
Neither cooling nor heating
mode has been set
Does the "cooling / heating"
symbol appear in the display? Correct the settings for the unit
Fins of outdoor component are
blocked by debris
Is the fan on the outdoor
component running are the fins
unobstructed?
Check fan or winter regulation,
reduce air resistance
Leaking refrigerant circuit Are there signs of frost on the
fins of the indoor unit? Repair by a specialist
Condensation output
on the unit
Drain pipe of the collection
container blocked / damaged
Is unobstructed condensation
drainage ensured?
Clean the drainage pipe and
collection container
Faulty external condensation
pump or float
Is the condensation pan full
of water and the pump is not
working?
Call out a specialist to replace
the pump
Condensation has not drained
away and has collected in the
condensation pipe
Is the condensation pipe routing
sloped downhill and is it clear?
Route the condensation pipe
in a downhill slope or clean it if
necessary
Condensation does not drain off
Are the condensation pipes
unblocked and is there a steady fall?
Are the condensation pump and
float switch functioning correctly?
The condensation pipe must have
a fall. If necessary, clean the pipe.
A faulty condensation pump and
float switch should be replaced.
Problem display by blinker code
Display Cause Required action
E1 Sensor air circulation faulty / tripped Contact specialist dealer
E2 Sensor on vaporiser faulty / tripped Contact specialist dealer
E4 Cooling mode: No cooling output after 30 minutes
Heating mode: No heat output after 30 minutes Contact specialist dealer
E5 Cooling mode: Antifreeze protection has responded
Heating mode: Overheating protection has tripped Contact specialist dealer
E6 Bridge inner control line interrupted Check bridge plug
Leaking refrigerant circuit Are there signs of severe frost
on the large stop valve? Repair by a specialist.
Icing up of unit In conjunction with RXM:
Heating/automatic mode set Check mode setting Set cooling mode
REMKO RXW
16
Downloaded from AC-Manual.com Manuals

Installation instructions for qualified personnel
Important points prior to
installation
Minimum clearances
Observe the minimum clearances
to allow access for maintenance
repair work and for optimum air
distribution.
Minimum clearances
200
120
1500
120
120
All values in mm
Connection variations
The following connection
variations for the refrigerant,
condensation and control lines can
be utilized.
Connection variations
1 Outlet on the wall, right
2 Outlet through the wall, right
3 Outlet through the wall, left
4 Outlet on the wall, left
12
34
For installation of the entire
system, observe the operating
instructions of the indoor unit and
the outdoor unit.
■
Transport the unit in its original
packaging as close as possible
to the installation location. This
avoids transportation damage.
■
Check the contents of the
packaging for completeness
and check the unit for visible
transport damage.
Immediately notify any
deficiencies to the contractual
partner and forwarding agent.
■
Lift the unit at the corners
and not by the refrigerant or
condensation connections.
■
The refrigerant pipes
(injection and suction pipe),
valves and connections to make
them tight against vapour
diffusion. If necessary, also
insulate the condensation pipe.
■
Select an installation location
which allows air to freely
flow through the inlet and
outlet (see section "Minimum
clearances")
■
Do not install the unit in
the immediate vicinity of
devices with intensive thermal
radiation. Installation near
sources of thermal radiation
reduces the output of the unit.
■
Seal off open refrigerant pipes
with suitable caps or adhesive
strips to avoid the infiltration
of moisture and never kink or
compress the refrigerant pipes.
■
Only use the union nuts for the
refrigerant pipes included in
the delivery, and remove them
shortly before connecting the
refrigerant pipes.
■
Establish all electrical
connections in accordance with
the relevant DIN- and VDE
standards.
■
See electrical connection
diagram Ensure the electrical
cables are properly connected
to the terminals, otherwise
there is a risk of fire.
Installation material
The indoor unit is fastened using
4 threaded rods (provided by the
customer) over a wall brace.
Selection of the installation
location
The indoor unit is designed for
horizontal wall installation above
doors.
However, it can also be used in
the upper wall area (min. 1.75 m
above the floor).
17
Downloaded from AC-Manual.com Manuals

Unit installation
The indoor unit is attached by
means of a wall bracket, under
consideration of air discharge side
located in the lower part.
1. Mark the mounting points
on the statically permissible
building sections according to
the dimensions of the unit.
2. If necessary, remove the break
out opening on the housing.
3. Connect the refrigerant
pipes, electrical cables and
condensation pipe to the indoor
unit as described below.
4. Hang the indoor unit onto the
wall bracket by tilting it back
slightly and by pressing the
bottom part of the unit against
the bracket.
5. Check again to ensure that the
unit is level (Bild 4).
Installation
Installation should only be
performed by authorised
specialists.
NOTE
The units are factory filled with
dry nitrogen to check for leaks.
The pressurised nitrogen is
released when loosening the
union nuts.
CAUTION
Connection of refrigerant
pipes
The on-site connection of the
refrigerant pipes is made at the
rear of the unit.
If necessary, a reduction or
expansion needs to be installed on
the indoor unit.
These fittings are included as
standard with the indoor unit.
Once installed, the connections
should be insulated to make them
vapor diffusion proof.
4 Horizontal alignment
The wall bracket for the unit must
be attached with suitable screws
and anchors.
REMKO RXW
18
Downloaded from AC-Manual.com Manuals

Condensation connection
Due to the dew point shortfall,
condensation forms on the
vaporiser during the cooling
operation on the indoor unit.
Below the vaporiser is a collection
tray, which must be connected to
a drain.
■
The condensation pipe should
have a fall of min. 2 %. (Fig. 5).
If necessary, fit vapour diffusion
proof insulation.
■
The condensation pipe from
the unit should run freely
into the drainage pipe. If the
condensation runs directly into
a sewer pipe, install a trap to
prevent any unpleasant odors.
■
When operating the unit at
outdoor temperatures below
+4 °C, ensure the condensation
pipe is laid to protect it against
frost. If necessary, install a pipe
heater.
■
After completed routing, check
for unobstructed condensation
discharge and ensure that
a permanent seal is provided.
The condensation hose is designed
to be installed on the left side
(view from front).
Electrical connection
A protected power supply cable
and asix-core (RXS) or a four-
core (RXM) control cable should
be connected to the outdoor
component and indoor unit
respectively.
All electrical installation
work should be performed
by specialist contractors.
Isolate the voltage supply
when connecting the electrical
terminals.
CAUTION
■
If an optional condensation
pump is used in conjunction
with the unit, it may be
necessary to install an
additional relay with a higher
contact rating after the switch-
off contact on the pump to
switch off the compressor.
Make the connection as follows:
1. Open the air intake grill.
2. Unfasten the cover on the right
side and at the bottom right
rear. (Fig. 6).
3. Connect the unit to the
control cable from the outdoor
component. See electrical
connection diagram. For series
RXW 681 IT, the terminal block
for the power supply as well
as for the control contacts is
behind the front cover.
4. Re-assemble the unit.
■
We recommend to install
a main / repair switch on the
building near the indoor unit.
■
The terminal blocks for making
the connections are located at
the rear of the unit. When the
unit is installed, measurements
can be made from the front by
removing the cover.
5
Condensation connection
Min. 2% drop
19
6
Connecting the indoor unit
Front terminal block for
control line and power
supply from the outdoor unit
Cover
Downloaded from AC-Manual.com Manuals

Electrical connection diagram
Electrical circuit diagram
RXW 261 to 681
Connection RXM 226 to 435
Connection RXS 261H to 681H
Outdoor component
Indoor unit Mains cable
Neutral conductor
Phase conductor
Earth conductor
230 V~,
50 Hz,
L1 / N
/ PE
Control conductor
Compressor contactor
N
L1
PE
L
N
1
PE
N
L
PE
3
Commissioning
Commissioning should only be
performed by specially trained
personnel and documented
after the certificate has been
issued.
Observe the manuals
for the indoor unit and
outdoor component when
commissioning the entire
system.
NOTE
Functional test for
cooling mode.
1. Switch the supply voltage on.
2. Use the remote control to
turn on the unit and select
the cooling mode, maximum
fan speed and lowest target
temperature.
3. Measure and record all
the required values in the
commissioning report and
check the safety functions.
4. Check the control system
for the unit using the
functions described in the
chapter "Operation". Timer,
temperature setting, fan speeds
and changing to ventilation or
dehumidification mode.
5. Check the correct function
of the condensation pipe by
pouring distilled water into the
condensation tray.
A bottle with a spout is
recommended for pouring the
water into the condensation
tray.
3
1
2
L
NAC-N
FM SM
EXF
4WV
AC-L
COMP
Outdoor component
Indoor unit Mains cable
Neutral conductor
Phase conductor
Reverse flow valve
230 V~,
50 Hz,
L1 / N
/ PE
Control conductor
Compressor contactor
N
L1
PE
L
N
3
2
3
N
L
2
1
PE
1
PE
Control conductor
Control conductor
Earth conductor
Fan motor
front terminal block
Colour code
WH = white
BU = blue
BN = brown
Display
Receiver
circuit board
Sensor
Vaporiser Sensor
Air circulation
Vaporiser
fan motor Swing motor
Transformer
Phase conductor
Neutral conductor
Earth conductor
Liquefier fan
Reverse flow valve
Compressor
REMKO RXW
20
Downloaded from AC-Manual.com Manuals
Table of contents
Other REMKO Air Conditioner manuals

REMKO
REMKO MVD 702 User manual

REMKO
REMKO RKL 300 User manual

REMKO
REMKO RKV 13 T User manual

REMKO
REMKO KWK Series User manual

REMKO
REMKO RXS H Series User manual

REMKO
REMKO RXT 523 DC User manual

REMKO
REMKO ATY 261 User manual

REMKO
REMKO SKM ESKM 250 Eco User manual

REMKO
REMKO RKS 510 User manual

REMKO
REMKO MXT Series User manual

REMKO
REMKO RKW 13 W User manual

REMKO
REMKO SKT 521 User manual

REMKO
REMKO RKL 470 User manual

REMKO
REMKO MKT 240 User manual

REMKO
REMKO MVT 602 DC User manual

REMKO
REMKO KWD EC Series User manual

REMKO
REMKO SKT Series User manual

REMKO
REMKO KWK Series User manual

REMKO
REMKO ML Series User manual

REMKO
REMKO RKL 350 User manual