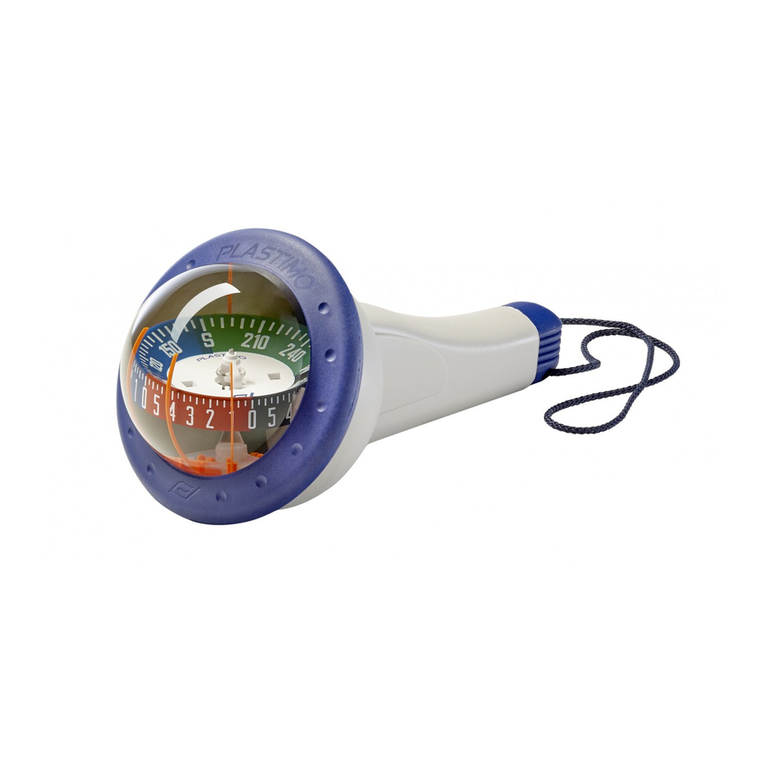
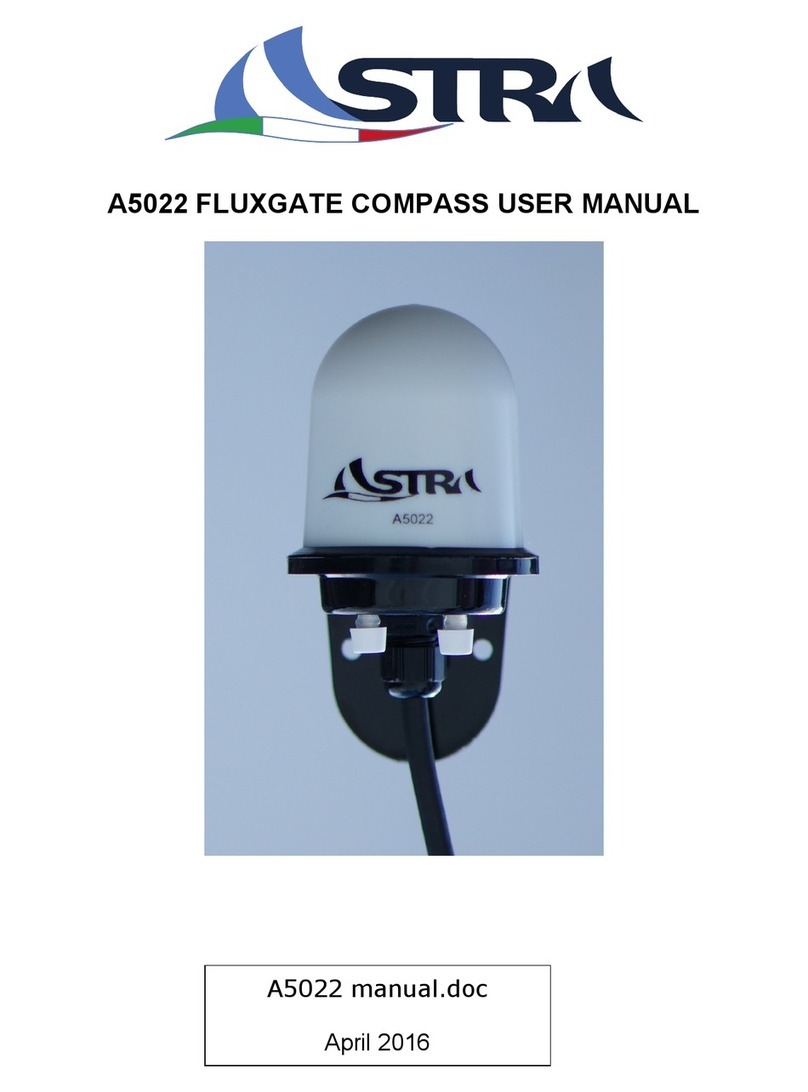
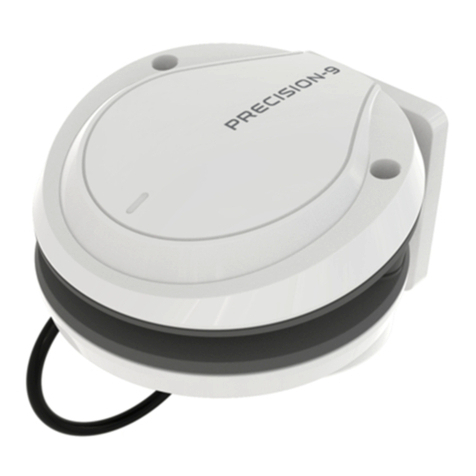
Ritchie Navigation RitchieSport X-10 User manual

X-10 Sport Compass
®
SPORT COMPASSES
MADE IN U.S.A.
All Magnetic Compasses are vulnerable to
magnetic interference which will produce errors
(deviation). It is the Owner/Operator and/or
Helmsman’s responsibility to make sure the
compass is properly installed and compensated,
using the built-in compensator system for
permanent interference such as: Marine Radios, Electronic
Instruments, Speakers, Motors, etc.; and, to keep the
environment of the compass clear of temporary magnetic
interference.
Installation: For maximum accuracy and performance select a
location easily visible to the operator and with minimum magnetic
interference. Compass should be level and aligned parallel with
centerline of
vehicle/boat. The universal bracket should fit any mounting situa-
tion and can be reversed by removing screws. The mounting
bracket has holes for mounting with NON MAGNETIC self tapping
screws or bolts and nuts. Double faced tape is supplied. To
adhereproperly the surface must be clean, dryand warm(60
degrees or above).
Important: Before installing compass permanently, adjust in
selected location to be sure it can be properly compensated.
Electric motors, stereo speakers and windshield wiper motors
often cause magnetic interference.
Suggestion: For easy removal, Velcro*tape could be used.
Adjusting: Your RitchieSport compass has a built-in correcting
magnet system. The slotted ends should be horizontal before
starting the adjust procedure.
-Neutral (horizontal)
-Maximum Adjustment (vertical)
Asmall non-magnetic screwdriver is provided for adjusting pur-
poses. When making adjustments, have vehicle engine running
and accessories in normal operating condition. With slotted ends
in neutral position and using known courses available from
maps/charts, landmarks or roads, adjust as follows:
1. Head North. Turn side corrector until compass reads North.
2. Head East. Turn front corrector until compass reads East.
3. Head South. Turn side corrector and correct for 1/2
of error if any observed.
4. Head West. Turnfront corrector and correct for 1/2 of
error if any observed.
For more accurate readings, repeat compensating steps in same
order,each time correcting for 1/2 the indicated error at the four
compass points: N,S,E, and W.If after following the steps outlined,
you cannot compensate the compass to a reasonable standard
and either corrector is in the maximum position (vertical), a new
installation location must be found. After relocating, returnthe
compensators to the neutral position (horizontal) and re-adjust as
before.
Lighting: Twelve (12) Volt DC night lighting is supplied. The COP-
PER CONDUCTOR IS ATTACHED TO +, and the SILVER
COLOR CONDUCTOR IS GROUND.
Reversing the connections will not damage the LED, but IT WILL
NOT LIGHT.
Lighting circuit should be appropriately fused.
Warranty: We warrant all Ritchie products to be free of defects in
workmanship or materials. If within five years of purchase date an
instrument fails to give satisfactory service, it will be repaired or
replaced without charge. This guarantee does not cover breakage
through accident or misuse. Replacement or repair will be made if
the instrument is returned to a Ritchie Authorized Service Station or
directly to E. S. Ritchie & Sons, Inc., 243 Oak Street, Pembroke,
MA02359, prepaid. For up-to-date Service Station Information or
toregister your compass visit our Web Page at www.ritchienaviga-
tion.com
*Registered Trademark of VELCRO USA, INC.
RitchieSport is a Trademark of E.S. Ritchie & Sons, Inc.
Tous les compas magnétiques sont vulnérables
aux interférences magnétiques, qui produiront
des erreurs (déviation). Il incombe au proprié-
taire/ opérateur et/ou au timonier de s’assurer
que le compas est correctement installé et
compensé, en utilisant le système de compensation intégré
pour les interférences permanentes, telles que radios marines,
instruments électroniques, haut-parleurs, moteurs, etc, et de
veiller à ce que l’environnement du compas ne soit pas
soumis à des interférences magnétiques temporaires.
Installation: Afin d’obtenir précision et performances maximales,
sélectionnez un endroit facilement visible par l’opérateur et qui est
soumis au minimum d’interférences magnétiques. Le compas doit
être de niveau et aligné parallèlement à l’axe du véhicule ou du
bateau. Ce support universel peut être utilisé quel que soit le type
de montage, son orientation peut être inversée après avoir retiré
les vis servant d’axes. La fixation peut être effectuée avec des vis
autotaraudeuses ou des boulons et écrous NON MAGNETIQUES.
Un adhésif double face est fourni pour l’installation sur le pare-
brise (pour obtenir une bonne adhérence, la surface doit être pro-
pre, sèche, la température ne doit pas être inférieure a 15˚C).
Important: Avant d’installer le compas de façon permanente,
positionnez le provisoirement à l’endroit sélectionné afin de
vous assurer qu’il peut être compensé correctement. Les
moteursélectriques, les enceintes stéréo et les moteurs
causent souvent des interférences magnétiques.
Suggestion: Pour permettre un retrait facile, une bande Velcro*
peut êtreutilisée.
Réglage: Votre compas RitchieSport est muni d’un système
d’aimants correcteurs incorporé. La position neutre obligatoire
avant’d’entamer la procédure de réglage est réalisée lorsque les
fentes des tiges de commande sont horizontales.
-Neutre(horizontales)
-Réglage maximum (verticales)
Un petit tournevis amagnétique est fourni pour réaliser le réglage
sans perturber le compas. Effectuer la compensation en faisant
fonctionner le moteur et les accessoires dans des conditions nor-
males. II est nécessaire de posséder un compas étalon (compas
de relèvement) qui vous permettra en l’utilisant en dehors du
champ perturbateur d’obtenir un relèvement vrai qui vous servira
de rèference. Faites le reglage de la façon suivante:
1. Vers le nord. Faites tourner le correcteur latéral jusqu’à ce que
le compas indique le nord.
2. Vers l’est. Faites tourner le correcteur avant jusqu’à ce que le
compas indique l’est.
3. Versle sud. Faites tourner le correcteur latéral et corrigez la
moitié de l’erreur le cas échéant.
4. Vers l’ouest. Faites tourner le correcteur avant et corrigez la
moitié de l’erreur le cas échéant.
Pour obtenir des lectures plus précises, recommencez la procé-
dure de compensation de la même manière, en corrigeant chaque
fois la moitié de l’erreur indiquée aux quatre points cardinaux: N,
E, S, et O. Si, apres avoir effectué la procédure ci-dessus, vous ne
pouvez pas compenser le compas dans des tolérances
raisonnables et si l’un des correcteurs est dans la position maxi-
male (verticale), il faut chercher un autre endroit pour l’installation.
Après avoir trouvé ce nouvel endroit, remettez les compensateurs
dans la position neutre (horizontale) et refaites les réglages
comme auparavant.
Eclairage: Un éclairage de nuit est fourni sous forme d’une diode
électroluminescente fonctionnant sur du courant continu de 12
volts. Le FIL DE CUIVRE SE BRANCHE AUPOLE +, et le FIL DE
N
CAUTION:
N
ATTENTION:
COULEUR ARGENTEE VA A LIA MASSER. Le fait d’inverser les
branchements n’abimera pas la diode électroluminescente, mais
ELLE NE S’ALLUMERA PAS.
Le circuit d’éclairage doit être equipé avec des fusibles
d’ampérage correct.
Garantie: Nous garantissons tous les produits Ritchie. Si, dans les
cinq années suivant la date d’achat un instrument ne donne pas
satisfaction, il sera remplacé ou réparé sans frais. Cette garantie
ne couvre pas le bris causé par un accident ou les abus, Le rem-
placement ou la réparation sera effectue si l’instrument est ren-
voyé àun centre de service après-vente agréé de Ritchie, ou
directement à A.E.S. Ritchie & Sons, ins, 243 Oak Street,
Pembroke, MA 02359 (Etats-Unis) en port payé.
*Marque déposée de VELCRO USA, INC.
Alle Magnetkompasse sind gegen Fehler
(Abweichungen) verursachende magnetis-
che Störeinflüsse empfindlich. Es obliegt
dem Eigentümer/Bediener bzw.
Rudergänger, dafür zo sorgen, daß der
Kompaß ordnungsgemäß angebracht und abgeglichen wird.
Verwenden Sie zum Abgleich gegen Dauerstörungsquellen
wie Seefunkgeräte, elektronische Instrumente, Lautsprecher,
Elektromotoren u. dgl. das eingebaute Kompensator- bzw.
Ausgleichersystem und entfernen Sie außerdem jegliche tem-
porären Störquellen aus dem unmittelbaren Kompaßbereich.
Installation: Um für lhren Kompass maximale Genauigkeit und
Leistung zu gewährleisten, wählen Sie am besten einen Einbauort,
der für den Bedienenden leicht sichtbar ist und minimale mag-
netische Störungen bietet. Der Kompass solite waagrecht instal-
liert werden und parallel auf die Mittellinie des Fahrzeugs/Boots
ausgerichtet sein. Der Universalbügel kann in jedur
Installationssituation angewandt werden und kann durch Entfernen
der Schrauben umgedreht werden. Der Einbaubügel hat Löcher,
damit er mit Hilfe von NICHTMAGNETISCHEN selbstschneiden-
den Gewinde-sch-rauben oder Bolzen und Schrauben fest-
gemacht werden kann. Zweiseitiges Klebeband wird mitgeliefert.
Damit der Einbaubügel richtig festsitzt, muß die Oberfläche
sauber, trocken und warm (über 15 ˚ C) sein.
Wichtig: Bevor Sie den Kompass endgültig installieren,
passen Sie ihn dem gewählten Montageort so an, daß er
richtig justiert werden kann. Elektromotoren, wie z.
B.Stereolautsprecher, und Scheibenwischermotoren verur-
sachen oft magnetische Störungen.
Unser Vorschlag: Benützen Sie einen Velcro* Klettverschluß mit
Klebeband, um den Einbaubügel hinterher leicht entfernen zu
können.
Einstellung: lhr RitchieSportKompass enthält ein eingebautes
Magnet System zur Einstellung. Die eingeschlitzten Enden sollten
waagrecht stehen, bevor Sie mit dem Einstellungsvorgang
beginnen.
-völlig entmagenitisiert(waagrecht)
-völlig magenitisiert (senkrecht)
Ein kleiner,nichtmagnetischer Schraubenzieher leigt zur
Justierung bei. Lassen Sie den Motor des Fahrzeugs laufen und
das Zubehör im normalen Betriebszustand, wenn Sie die
Einstellung vornehmen. Nehmen Sie die Einstellung mit Hilfe von
bekannten Strecken und Landkarten, Grenzsteinen oder Straßen,
wie folgt vor (nicht vergessen: die eingeschlitzten Enden müssen
dabei waagrecht stehen):
1. Richten Sie das Fahrzeug nach Norden aus. Drehen Sie an
der seitlichen Korrekturschraube so lange, bis der Kompass
auf Nord steht.
2. Richten Sie das Fahrzeug nach Osten aus.
Drehen Sie an der vorderen Korrekturschraube so lange, bis
der Kompass auf Ost steht.
3. Richten Sie das Fahrzeug nach Süden aus.
Seitliche Korrekturschraube auf 1/2 der Fahlanzeige verdrehen.
4. Richten Sie das Fahrzeug nach Westen aus. Vordere
Korrekturschraube auf 1/2 der Fehlanzeige verdrehen.
Falls Sie eine noch genauere Einstellung wünschen, wiederholen
Sie die obigen Schritte in der selben Reihenfolge und verbessern
so jedesmal die auftretende Fehleinstellung an den vier
Kompasspunkten N, O, S, und W um die Hälfte. Falls es lhnen
N
ZU BEACHTEN:
87895 E.S. Ritchie_X-10 NEW 6/5/06 7:22 PM Page 1

Per ottenere letture piu accurate, ripetere I passi di compen-
sazione descritti, nello stesso ordine, correggendo ogni volta metà
dell’errore indicato ai quattro punti cardinali: N, E, S, O. Se, una
volta sequiti I passi indicati, non fosse possibile compensare la
bussola in modo ragionevole ed uno dei due correttori fosse già
stato posto nella posizione di massima regolazione, è necessario
trovare un’altra collocazione per l’installazione. Dopo aver ripo-
sizionato la bussola, riportare I compensatori in posizione orizzon-
tale neutra ed effettuare un’altra volta la correzione.
Illuminazione: viene fornito un LED di illuminazione notturna da 12
V CC. IL CONDUTTORE COLOR RAME VA COLLEGATO AL
POLO POSITIVO (+) e quello COLOR ARGENTO VA COLLEGA-
TO A MASSA. L’inversione dei collegamenti non danneggia il LED,
ma NE IMPEDISCE L’ILLUMINAZIONE.
Il circuito di illuminazione dovrebbe essere dotato di fusibili
di amperaggio corretto.
Garanzia: Garantiamo che tutti i prodotti RITCHIE sono privi di
difetti di materiali o di lavorazione. Se, entro cinque anni dalla data
di acquisto, uno strumento non operasse in modo soddisfacente,
verrà riparato o sostituito gratuitamente. Questa garanzia non si
applica in caso di rottura dovuta ad incidenti o uso scorretto. La
sostituzione o riparazione verrà effettuata una volta restituito lo
strumento ad un Distributore Autorizzato Ritchie o direttamente alla
E.S. Ritchie & Sons, Inc., 243 Oak Street, Pembroke, MA 02359,
U.S.A., spese di spedizione a carico del mittente.
*Marchio depositato del VELCRO USA, Inc
Todos los compases magnéticos son vulnerables
alas interferencias magnéticas que pueden pro-
ducir errores (desviaciones). Es responsabilidad
del propietario u operador y/o de Helmsman que
el compás sea correctamente instalado y compen-
sado mediante el uso del sistema compensador
incorporado, en caso de registrarse interferencias perma-
nentes, tales como las originadas por radios marítimas, instru-
mentos electrónicos, altavoces, motores, etc. y asimismo,
mantener el entorno del compás libre de interferencias mag-
néticas temporarias.
Instalación: Para obtener la mayor precisión y el mejor desem-
peno, seleccione un lugar fácilmente visible por el operador y que
posea la minima interferencia magnética posible. El compás debe
estar nivelado y alineado en forma paralela a la linea central del
vehiculo/barco. El soporte universal puede adaptarse a cualquier
posición. Para invertir la posición, retire los tornillos. El soporte de
montaje posee agujeros que permiten el montaje con tornillos,
tuercas o pernos para madera NO MAGNETICOS y que no nece-
siten abrir antes el agujero. Se proporciona cinta adhesiva de dos
caras. Para que adhiera adecuadamente, la superficie debe estar
limpia, seca y caliente (a 15˚ C o más).
Importante: antes de instalar el compás de modo permanente,
ajústelo en el lugar seleccionado para asegurarse de que
podrá efectuarse adecuadamente la compensación. Los
motores eléctricos, parlantes de equipos de audio y motores
de limpiaparabrisas causan a menudo interferencias magnéti-
cas.
Sugerencia: si desea poder retirar la cinta fácilmente, use cinta
Velcro*.
Ajuste: el compás RitchieSport posee un sistema de corrección
magnética incorporado. Las terminaciones con ranuras deben
estar en posición horizontal antes de comenzar el procedimiento
de ajuste.
-Neutral (horizontal)
-Máximo ajuste (vertical)
El pequeño destornillador no magnético proporcionado puede ser
utilizado durante el procedimiento de ajuste. Al efectuar ajustes,
asegúrese de que el motor del vehiculo esté encendido y de que
los accesorios se encuentren en el estado normal de operación.
Las terminaciones con ranuras deben encontrarse en posición
neutral. Para efectuar el ajuste use cursos conocidos a través de
mapas, cartas, referencias o rutas y proceda del siguiente modo:
1. Apunte al Norte. Gireel corrector lateral hasta que el compás
indique la posición Norte.
2. Apunte al Este. Gire el corrector frontal hasta que el compás
indique la posición Este.
trotz Ausführung der obigen Schritte nicht gelingt, den Kompass
zufriedenstellend einzustellen, und sich beide Entzerrer mittleweile
in der völlig magnetisierten (senkrechten) Position befinden,
müssen Sie einen neuen Standort finden. Wenn Sie diesen gefun-
den haben, stellen Sie die Korrekturschrauben auf ihre völlig ent-
magnetisierte (waagrechte) Stellung zurück und nehmen die
Einstellung nochmals von neuem vor.
Beleuchtung: Eine 12 VDC-Leuchtdiode sorgt für
Nachtbeleuchtung. Die KUPFERLEITUNG LIEGT AN +, die SIL-
BERFARBENE LEITUNG AN MASSE. Die LED wird bei Umpolen
zwar nicht beschädigt, BRENNT ABER NICHT.
Beleuchtungsschaltkreis sollte mit einer angemessenen
Sicherung versehen werden.
Garantie: Wir garantieren, daß unsere RitchieProdukte keine
Verarbeitungs-oder Materialfehler haben. Falls lhr Instrument lhnen
innerhalb von funf Jahren vom Kaufsdatum keine zufriedenstel-
lende Dienste mehr leistet, wird es kostenlos repariert oder ersetzt.
Diese Garantie gilt nicht im Fail von Unfällen oder Mißrauch. Damit
wir lhr Instrument ersetzen oder reparieren können, müssen Sie es
an ein Ritchies Authorisiertes Dienstleistungszentrum zurückgeben
oder frankiert direkt an E.S. Ritchie & Sons, Inc., 243 Oak Street,
Pembroke, MA 02359, USA, schicken.
*Eingetragenes Warenzeichen von VELCRO USA, INC.
Tutte le bussole magnetiche sono vulnerabili
all’interferenza magnetica, che causa errori
(deviazioni). Il proprietario/ timoniere ha la
responsabilità di verificare che la bussola
venga ben installata e compensata, usando il
sistema
incorporato di compensazione delle interferenze ambientali
permanenti create dagli strumenti elettronici, dalla radio rice-
trasmittente e dagli altoparlanti stereofonici, dai motori dei ter-
gicristalli, etc.; e mantenendo l’ambiente circostante la bussola
liberoda oggetti che possano causare interferenze magnetiche
temporanee.
Installazione: Per garantire la massima accuratezza d’uso e le
migliori prestazioni, scegliere per l’installazione una posizione facil-
mente visibile da parte dell’operatore e soggetta a minima inter-
ferenza magnetica. La bussola dovrebbe essere in piano ed
allineata con l’asse del veicolo/barca. La staffa universale con-
sente l’installazione in qualsiasi posizione e puó essere invertita
rimuovendo le viti. La staffa di supporto è dotata di fori per il mon-
taggio con viti autofilettanti o dadi e bulloni NON MAGNETICI.
Viene fornito un pezzo di nastro biadesivo: per farlo aderire corret-
tamente, la superficie di fissaggio deve esserepulita, ascutta ed a
temperatura di almeno 15°.
Importante: Prima di installare la bussola in modo permanente,
posizionatela nei punto prescelto in modo da essere certi che
possa essere compensata correttamente. I motori elettrici, gli
altoparlanti stereo ed I motori del tergicristallo spesso provo-
cando interferenze magnetiche.
Suggerimento: Per facilitarela rimozione della bussola, si può
usareuna nastroVELCRO.*
Compensazione: La bussola Ritchiesport X10 è dotata di un sis-
tema di correzione dei magneti compensatori. Le viti di compen-
sazione dovrebbero essere poste in posizione orizzontale prima di
iniziare la procedura di correzione.
-Neutro (orizzontale)
-Massima Regolazione (verticale)
Viene fornito un piccolo cacciavite antimegnetico da impiegarsi
per la correzione. Durante la procedura, mantenere il motore in
moto e gli accessori nelle normali condizioni di funzionamento.
Porre le viti di compensazione in posizione NEUTRA e seguire una
rotta conosciuta in base a mappe/carre, punti di riferimento o
strade. Effettuare la regolazione nel modo seguente:
1. Puntare a nord. Girare il correttore laterale fino a che la bussola
non indichi il NORD.
2. Puntare ad est. Girareil correttoreanteriorefino a che la bus-
sola non indichi l’EST.
3. Puntare a sud. Girare il correttore laterale e correggere meta
dell’erroreosservato.
4. Puntare ad ovest. Girare il correttore anteriore e correggere
metà dell’errore osservato.
N
AVISO:
RITCHIE®NAVIGATION
E. S. Ritchie & Sons, Inc.
243 Oak Street • P
.O. Box 548 • Pembroke, MA 02359
Tel (781) 826-5131 • FAX (781) 826-7336
www.ritchienavigation.com
Rev. A RS-0130 Printed in U.S.A.
3. Apunte al Sur. Gire el corrector lateral. Si observa errores, corri-
ja 1/2 del error.
4. Apunte al Oeste. Gire el corrector frontal. Si observa errores
corrija 1/2 del error.
Si desea obtener lecturas más precisas, repita los pasos de com-
pensación en el mismo orden y corrija 1/2 del error indicadon en
cada uno de los cuatro puntos del compás: N, E, S y O. Si
después de seguir estos pasos no se ha podido compensar el
compás dentro de un estándar aceptable y, los correctores se
encuentran en la posición máxima, (vertical) busque un nuevo
lugar de instalación. Una vez decidido el nuevo lugar, vuelva a
colocar los correctores en la posición neutral (horizontal) y a ajus-
tar de la manera indicada anteriormente.
Iluminación: el compás se entrega con un dispositivo para ilumi-
nación nocturna de 12 voltios de CD. El CONDUCTOR DE
COBRE ESTÁ CONECTADO AL LADO POSITIVO: (+), y el CON-
DUCTOR DE COLOR PLATEADO ESTÁ CONECTADO A TIER-
RA. Si invierte las conexiones no dañará el dispositivo de ilumi-
nación, PERO NO SE ENCENDERÁ.
El circuito de alumbrado se debe fundir adecuadamente.
Garantia: Se garantiza que todos los productos Ritchie están
libres de defecto en los materiales y la mano de obra. Si se produ-
jera un fallo en el instrumento durante los cinco años siguientes a
la fecha de compra, éste será reparado o reemplazado sin cargo
alguno. Esta garantia no cubre fallas debidas a accidentes o mal
uso. El reemplazo o reparación será efectuado si el instrumento es
devuelto a una Estación de Servicio Autorizado de Ritchie o direc-
tamente a E.S. Ritchie & Sons, Inc., 243 Oak Street, Pembroke, MA
02359, USA, con envio postal prepago.
*Marca registrada de VELCRO USA, INC.
N
ATTENZIONE:
87895 E.S. Ritchie_X-10 NEW 6/5/06 7:22 PM Page 2


