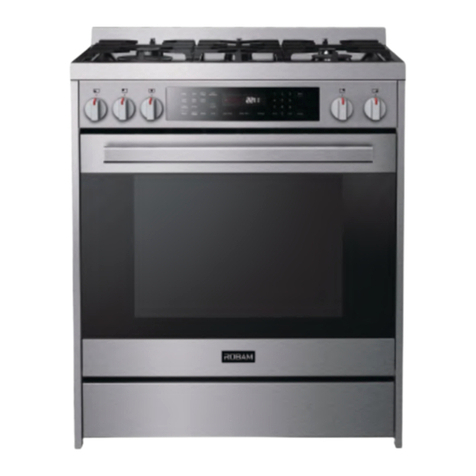
Robam JJZY-7GG10 User manual

Before operating this unit, please read the user manual completely and keep it. If the manual is lost,
User Manual
Full Gas Range
JJZ(Y/T)-7GG10


Full Gas Range
RANGE SAFETY............................................................................................... 2
Anti-tip Device........................................................................................................... 3
Important Safety Instructions ................................................................................. 5
OVERVIEW......................................................................................................9
Control Panel ............................................................................................................ 11
Clock and Timer......................................................................................................... 11
COOKTOP USE...............................................................................................14
Power Failure ............................................................................................................ 14
Cookware .................................................................................................................. 15
OVEN USE ......................................................................................................16
Functions operation................................................................................................ 16
RANGE CARE ................................................................................................ 22
Cleaning.................................................................................................................... 22
TROUBLESHOOTING .................................................................................... 25
Baking Problems...................................................................................................... 25
Cooktop Problems................................................................................................... 26
Oven Problems ........................................................................................................ 28
CORRECT DISPOSAL .................................................................................... 30
TABLE OF CONTENTS
1

Full Gas Range
WARNING
Fire Hazard
If the information in this manual is not followed exactly, a fire or explosion
may result causing property damage, personal injury or death.
-Do not store or use gasoline or other flammable vapors and liquids in the
vicinity of this or any other appliance.
-WHAT TO DO IF YOU SMELL GAS
•Do not try to light any appliance.
•Do not touch any electrical switch.
•Do not use any phone in your building.
•Clear the room, building, or area of all occupants.
•Immediately call your gas supplier from a neighbor's phone. Follow the
gas supplier's instructions.
•If you cannot reach your gas supplier, call the fire department.
-Installation and service must be performed by a qualified installer,
service agency or the gas supplier.
WARNING
Never Operate the Top Surface Cooking Section of this Appliance
Unattended.
•Failure to follow this warning statement could result in fire, explosion, or
burn hazard that could cause property damage, personal injury, or
death.
•If a fire should occur, keep away from the appliance and immediately call
your fire department.
DO NOT ATTEMPT TO EXTINGUISH AN OIL/GREASE FIRE WITH WATER
RANGE SAFETY
2

Full Gas Range
WARNING
Tip Over Hazard
•A child or adult can tip the range and be killed.
•Install anti-tip bracket to floor or wall per installation instructions.
•Slide range back so rear range foot is engaged in the slow of the anti-
top bracket.
•Re-engage the anti-tip bracket if range is moved.
•Do not operate the range without anti-tip bracket installed and
engaged.
•Failure to follow these instructions can result in death or serious burns to
children and adults.
Making sure the anti-tip bracket is installed:
•Slide range forward.
•Look for the anti-tip bracket securely attached to
floor and wall.
•Slide range back so rear range foot is under anti-
tip bracket.
WARNING: Gas leaks cannot always be detected by smell.
Gas suppliers recommend that you use a gas detector approved by UL or
CSA.
For more information, contact your gas supplier.
WARNING: Do not install a ventilation system that blows air downward
toward this cooking appliance. This type of ventilation system may cause
ignition and combustion problems with this cooking appliance resulting in
personal injury or unintended operation.
Anti-Tip
Bracket
Range
Foot
3

Full Gas Range
Your safety and the safety of others are very important.
We have provided many important safety messages in this manual and on
your appliance. Always read and obey all safety messages.
This is the safety alert symbol.
This symbol alerts you to potential hazards that can
kill or hurt you and others.
All safety messages will follow the safety alert symbol
and either the word "DANGER," "WARNING" or
"CAUTION." These words mean:
DANGER
WARNING
You can be killed or seriously
injured if you don't immediately
follow instructions.
You can be killed or seriously
injured if you don't follow
instructions.
A potentially hazardous situation
which, if not avoided, could result
in minor or moderate injury.
CAUTION
All safety messages will tell you what the potential hazard is, tell you how
to reduce the chance of injury, and tell you what can happen if the
instructions are not followed.
In the State of Massachusetts, the following installation instructions apply:
•Installations and repairs must be performed by a qualified or licensed
contractor, plumber, or gasfitter qualified or licensed by the State of
Massachusetts.
•If using a ball valve, it shall be a T-handle type.
•A flexible gas connector, when used, must not exceed 3 feet.
California Proposition 65 Warning
WARNING:
Cancer and Reproductive Harm - www.P65Warnings.ca.gov.
4

Full Gas Range
IMPORTANT SAFETY
INSTRUCTIONS
WARNING: To reduce the risk of fire, electrical shock, injury to persons, or
damage when using the range, follow basic precautions, including the
following:
•WARNING: TO REDUCE THE RISK
OF TIPPING OF THE RANGE, THE
RANGE MUST BE SECURED BY
PROPERLY INSTALLED ANTI-TIP
DEVICES. TO CHECK IF THE
DEVICES ARE INSTALLED
PROPERLY, SLIDE RANGE
COMPLETELY FORWARD, LOOK
FOR ANTI-TIP BRACKET SECURELY
ATTACHED TO THE FLOOR OR
WALL, AND SLIDE RANGE BACK
SO THE REAR RANGE FOOT IS
UNDER ANTI-TIP BRACKET.
•WARNING: NEVER use this
appliance as a space heater to
heat or warm the room. Doing so
may result in carbon monoxide
poisoning and overheating of the
oven.
•WARNING: NEVER cover any
slots, holes or passages in the
oven bottom or cover an entire
rack with materials such as
aluminum foil. Doing so blocks
airflow through the oven and
may cause carbon monoxide
poisoning. Aluminum foil linings
may also trap heat, causing a fire
hazard.
•CAUTION: Do not store items of
interest to children in cabinets
above a range or on the back
guard of a range – children
climbing on the range to reach
items could be seriously injured.
•Do Not Leave Children Alone –
Children should not be left alone
or unattended in area where
range is in use. They should never
be allowed to sit or stand on any
part of the range.
•Wear Proper Apparel – Loose-
fitting or hanging garments
should never be worn while using
the range.
•User Servicing – Do not repair or
replace any part of the range
unless specifically recommended
in the manual. All other servicing
should be referred to a qualified
technician.
•Storage in or on Range –
Flammable materials should not
be stored in an oven or near
surface units.
•This appliance is not intended for
storage.
READ AND SAVE THESE INSTRUCTIONS
5

Full Gas Range
IMPORTANT SAFETY
INSTRUCTIONS
•Do Not Use Water on Grease
Fires – Smother fire or flame or
use dry chemical or foam-type
extinguisher.
•Use Only Dry Potholders – Moist
or damp potholders on hot
surfaces may result in burns from
steam. Do not let potholder touch
hot heating elements. Do not use
a towel or other bulky cloth.
•Never Leave Surface Units
Unattended at High Heat
Settings – Boilover causes
smoking and greasy spillovers
that may ignite.
•Glazed Cooking Utensils – Only
certain types of glass,
glass/ceramic, ceramic,
earthenware, or other glazed
utensils are suitable for range-
top service without breaking due
to the sudden change in
temperature.
•Utensil Handles Should Be Turned
Inward and Not Extend Over
Adjacent Surface Units – To
reduce the risk of burns, ignition
of flammable materials, and
spillage due to unintentional
contact with the utensil, the
handle of a utensil should be
positioned so that it is turned
inward, and does not extend over
adjacent surface units.
•Disconnect power before
servicing.
•Proper Installation – The
appliance, when installed, must
be electrically grounded in
accordance with local codes, or
in the absence of local codes,
with the National Electrical Code,
ANSI/NFPA 70 or the Canadian
Electrical Code, CSA C22.1-02. In
Canada, the appliance must be
electrically grounded in
accordance with Canadian
Electrical Code. Be sure your
appliance is properly installed
and grounded by a qualified
technician.
•Injuries may result from misuse of
appliance doors or drawers such
as stepping, leaning, or sitting on
the doors or drawers.
•Maintenance – Keep range area
clear and free from combustible
materials, gasoline, and other
flammable vapors and liquids.
•Do not let cooking grease or
other flammable materials
accumulate in or near the range.
Grease in the oven or on the
cooktop may ignite.
•Top burner flame size should be
adjusted so it does not extend
beyond the edge of the cooking
utensil. This instruction is based
on safety considerations.
READ AND SAVE THESE INSTRUCTIONS
6

Full Gas Range
IMPORTANT SAFETY
INSTRUCTIONS
•Do not use replacement parts
that have not been
recommended by the
manufacturer (e.g. parts made at
home using a 3D printer).
•Clean Cooktop With Caution – If
a wet sponge or cloth is used to
wipe spills on a hot cooking area,
be careful to avoid steam burn.
Some cleaners can produce
noxious fumes if applied to a hot
surface.
•Use Care When Opening Door –
Let hot air or steam escape
before removing or replacing
food.
•Do Not Heat Unopened Food
Containers – Build-up of pressure
may cause container to burst and
result in injury.
•Keep Oven Vent Ducts
Unobstructed.
•Never broil with door open.
Open-door broiling is not
permitted due to overheating of
control knobs.
•Placement of Oven Racks –
Always place oven racks in
desired location while oven is
cool. If rack must be moved while
oven is hot, do not let potholder
contact hot heating element in
oven.
•Care must be taken to prevent
aluminum foil and meat probes
from contacting heating
elements.
•DO NOT TOUCH HEATING
ELEMENTS OR INTERIOR
SURFACES OF OVEN – Heating
elements may be hot even
though they are dark in color.
Interior surfaces of an oven
become hot enough to cause
burns. During and after use, do
not touch, or let clothing or other
flammable materials contact
heating elements or interior
surfaces of oven until they have
had sufficient time to cool. Other
surfaces of the appliance may
become hot enough to cause
burns – among these surfaces are
cooktop, burners, grates, oven
vent openings and surfaces near
these openings, oven doors,
windows of oven doors, and
crevices around the oven doors.
•Top burner flame size should be
adjusted so it does not extend
beyond the edge of the cooking
utensil.
•Have the installer show you the
location of the range gas shut-off
valve and how to turn it off if
necessary.
READ AND SAVE THESE INSTRUCTIONS
7

Full Gas Range
IMPORTANT SAFETY
INSTRUCTIONS
•Proper Disposal of Your
Appliance – Dispose of or recycle
your appliance in accordance
with Federal and Local
Regulations. Contact your local
authorities for the
environmentally safe disposal or
recycling of your appliance.
For units with ventilating hood –
•Clean Ventilating Hoods
Frequently – Grease should not
be allowed to accumulate on
hood or filter.
•When flambé cooking under the
vent hood, turn the fan on.
For self-cleaning ranges –
•Do Not Clean Door Gasket – The
door gasket is essential for a
good seal. Care should be taken
not to rub, damage, or move the
gasket.
•Do Not Use Oven Cleaners – No
commercial oven cleaner or oven
liner protective coating of any
kind should be used in or around
any part of the oven.
•Clean Only Parts Listed in
Manual.
•Before Self-Cleaning the Oven –
Remove broiler pan and other
utensils. Wipe off all excessive
spillage before initiating the
cleaning cycle.
READ AND SAVE THESE INSTRUCTIONS
8

Full Gas Range
RANGE LAYOUT
This illustration covers several different models. The range you have
purchased may have some or all of the items listed. The locations and
appearances of the features shown here may not match those of your model.
Backsplash Cast Iron Pan Rack
Semi-Rapid Burner Control Panel
Semi-Rapid Burner Oven Rack Positions
Triple Ring Burner Oven Door Window
Auxiliary Burner Anti-tip Bracket
Rapid Burner
e
b
a
c
d
f
g
h
i
j
k
d
a
b
c
e
f
k
g
h
i
j
OVERVIEW
9

Full Gas Range
WHAT'S INCLUDED
Surface Bruner Grates x3 Surface Burners and Caps
Wok Grate x1
Oven Racks x2
BURNER LAYOUT
a
b
c
d
Burner Cap
Burner Head
Electrode
Flame Failure Safety Device
(not available for some models)
a
b
c
d
10
Broiler Pan Rack x1
Broiler Pan x1
Meat Probe x1

Full Gas Range
Surface Burner
Controls
Oven
Silkscreen of knobs
/Clock/Timer
Controls
SETTING THE C
IMPORTANT: Clock must be set in order for the timed oven functions to work.
NOTE: In the event of a power failure, all settings including the clock time set
will be lost. When the power is returned, clock must be set again.
TO SET THE TIME OF DAY
When the power is connected or after a power outage, the screen will display
12.00
CONTROL PANEL
CLOCK & Timer
Clock
--:--
Press “Settings” repeatedly until the display show “ Timed”..1
Press numbers to enter the time..2
3. Press “Start” to save.
11

Full Gas Range
TO SET THE TIMER
The digital countdown timer can be set up to 11 hours and 59 minutes
maximum.
1. Press the "Timer", and press numbers to enter the length of time.
2. Press “Start” to save.
Once confirmed, the current time will be shown and the countdown will
begin. When the countdown is finished, press "timer" button to stop the
beeping.
To viewand modify the countdown time remaining, press the "timer", and
press number to modify;Tocancel the timer, follow the steps above to set the
length of time to0.00
12

Full Gas Range
TIMED COOKINGS FOR OVEN
WARNING
Food Poisoning Hazard
Do not let food sit in oven more than one hour before or after cooking.
Doing so can result in food poisoning or sickness.
Foods that can easily spoil such as milk, eggs, fish, meat or poultry, should
be chilled in the refrigerator first. Even when chilled, they should not stand
in the oven for more than 1 hour before cooking begins, and should be
removed promptly when finished cooking.
TO SET THE COOK TIME
P
length of time.
•Cook Time
Cook for the set length of time from now, then shut off the oven
automatically.
•elay tart
IMPORTANT: Clock must be set in order for the timed oven functions to work.
TO SET
cooking function and cook time firstly.
Note: The oven will start cooking from the time you set, and finish cooking when
the cooking time is over.
13

Full Gas Range
Read the instructions before installing or using this appliance.
1. This appliance shall be installed in accordance with the regulations in force
and only used in a well-ventilated space.
2. The use of a gas-cooking appliance results in the production of heat and
moisture in the room in which it is installed. Ensure that the kitchen is well
ventilated: keep natural ventilation holes open or install a mechanical
ventilation device (mechanical extractor hood).
3. Prolonged intensive use of the appliance may call for additional
ventilation, for example opening of a window, or more effective ventilation,
for example increasing the level of mechanical ventilation where present.
IGNITION AND OPERATION OF THE BURNERS
To ignite a burner, push down on the burner knob and rotate it
counterclockwise until the knob indicator is aligned with the ignite icon.
Release the knob and adjust the flame intensity by further rotating the knob
counterclockwise from MAX (maximum) to MIN (minimum).
NOTE: For models with a flame failure safety device - Once the flame is lit,
hold the knob depressed for about 3-4 seconds until the device keeps the
burner automatically lit. If the burner fails to ignite, wait one minute for the
gas to dissipate before attempting to reignite.
To turn off the burner, rotate the knob clockwise until the indicator on the
knob is aligned with OFF.
POWER FAILURE
In case of prolonged power failure, the surface burners can be lit manually.
Hold a lit match near a burner and turn knob counterclockwise until the
indicator is aligned with MAX. After the burner is lit, turn knob to desired
setting.
In the case of unintentional flame extinguishing, the safety valve intervenes
by shutting off the gas to the burners.
The electric igniter must not be actuated for longer than 15 seconds. Should
the burner not light, or should the burner be unintentionally turned off,
immediately close the burner, and wait at least 1 minute before repeating.
Once ignited, adjust the flame as desired.
COOKTOP USE
14

Full Gas Range
For lower gas consumption and a better result, use saucepans with a
diameter matching the diameter of the burner, to avoid the flame coming up
around the sides of the saucepan. See the Container Table. Use only flat-
bottomed pans.
As soon as liquid starts to boil, turn the flame down to a level sufficient to
maintain boiling.
COOKWARE
MATCH PAN DIAMETER TO FLAME SIZE
The flame should be the same size as the bottom of the pan or smaller. Do not
use small pans with high flame settings as the flames can lick up the sides of
the pan. Oversize pans that span two burners are placed front to rear, not
side to side.
USE BALANCED PANS
Pans must sit level on the cooktop grate without rocking. Center the pan over
the burner.
USE A LID THAT FITS PROPERLY
A well-fitting lid helps shorten the cooking time. Flat, heavy bottom pans
provide
CONTAINER TABLE
Burner Min Saucepan Max Saucepan
Auxiliary 3.5" (9.0 cm) 6.3" (16 cm)
Semi-rapid 5.1" (13 cm) 7.1" (18 cm)
Rapid 5.9" (15 cm) 10.2" (26 cm)
Triple ring 8.3" (21 cm) 10.2" (26 cm)
BALANCED PAN
UNBALANCED
PAN
CONVEX
(ROUNDED)
CONCAVE
(HOLLOW)
FLAME TOO LARGE
FOR PAN SIZE
USE LIDS THAT
FIT PROPERLY
15

Full Gas Range
NEVER cover any slots, holes or passages in the oven bottom or cover an
entire rack with materials such as aluminum foil. Doing so blocks airflow
through the oven and may cause carbon monoxide poisoning. Aluminum
foil linings mayalso trap heat, causing a fire hazard.
Reset all controls to the OFF position after using a programmable timing
operation. No attempt should be made to operate the appliance during
power failure.
An air curtainor other overhead range hood, which operates by blowing a
downward airflow onto a range shall not be used in conjunction with a gas
range.
WARNING
OVEN USE
Functions operation
Operating Mode
Bake 350
350 170-500
170-500
170-500
170-500
170-500 √
√
√
√
√
√
×
×
×
×
×
140-210
80-120
Lo(450) Hi(550)
100
140
325
325
450
Hi
Broil
Warm
Conv
Convect bake
Convect
Convect broil
Convect roast
Easy
1 Baked goods
2 Meats
3 Others
Self clean No Core up to
806°F (430°C)
Proof (Press for 3 seconds in
warm mode temp)
Default
temperature (°F )
Adjustable
range
Preheat
phase
16

Full Gas Range
17
Bake
Bake is usedto prepare foods such as pastries, breads and casseroles. The oven
can be programmed to bake at any temperature from 170 °F (80 °C) to 500 °F
(260 °C).The default temperature is 350 °F (175 °C).
Broil
The Broil function uses intense heat from the upper burner to cook food. Broiling
works best fortender cuts of meat, fish, and thinly cut vegetables.
WARM/PROOF
The Warm mode keeps hot, cooked foods at serving temperature. The Proof
mode prepares dough for baking by activating the yeast.
CONVECTION MODES
During convection cooking, the fan provides hot air circulation throughout
the oven. The movement of heated air around the food can help to speed up
cooking by penetrating the cooler outer surfaces. Food cooks more evenly,
browning and crisping outer surfaces while sealing moisture inside.
Note: When Convection roasting, enter your normal roasting temperature. The
roasting time should be 15-30% less than in conventional cooking.
Note: The preheating stage indicates whether real-time display of temperature
is required.
There is a preheating stage: Whentheactual oven core temperature is less than
170°F, the interface displays Lo.
When the actual core temperature of the oven is greaterthan or equal to 170°F,
the interface displays the temperature in real time.
When the actual oven core temperature reachestheset value, the interface
always displays the settemperature value.
Non-preheating stage: the set temperature value is always displayed on the
heating interface of the ovenfrom the beginning.

Full Gas Range
18
1) Select the required baking function, touch the button onthe display screen,
the interface will light up the function options, and the default temperature
and default time will appear on the display panel.
2) Click Start to Start the operation. When the actual temperature of the
furnace core is lower than 170°F, the temperature digital tube only displays
Lo. When the actual temperature of the furnace core is higher than 170°F,
the interface needsto display the current temperature in real time. When the
core temperature has reached the set value, the interface will always show
that the set value no longer changes in real time.
3) To set the temperature, you can modify the temperature by touching the
corresponding digital button. The number changes from right to left in turn.
If it exceeds the allowed setting range, an invalid sound "didi" will be emitted
when touching the Start button.
4) Set the working time, touchcook time, the time digital tube display --:--,
and blink, touch the number key, the displayed numbers change from right to
left, run the setting range (0:00-11:59), if you do not set this parameter, the oven
default 2 hours; If the value exceeds the allowed setting range, the next operation
is not allowed, and the systemmakes two invalid beeps. After the Cook time is set,
the system prompts you to enter Delay Startor touch start to start the operation.
5) To set the appointment function, touch Delay start to set the appointment. The
default time is the current clocktime. Delay start indicates when the oven starts to
work. After setting, touch the Start button, and the screenwill start the countdown
of reservation. If the countdown time exceeds 1 hour, the screen will display in the
form of hour/minute. If the countdown time is less than 1 hour, the display is
displayed in the form of minutes per second.
After touch self clean buttonSelf Clean, Self Clean icon lights up
Cooking Settings
This manual suits for next models
1
Table of contents
Other Robam Range manuals
Popular Range manuals by other brands

GE
GE 164D3333P033 owner's manual
Bakers Pride
Bakers Pride XOB-424 Installation and operating instructions
Maytag
Maytag 6898XVB owner's guide
GE
GE Profile P2S975 installation instructions
Kenmore
Kenmore 7560 30" Gas Range installation instructions

Zhongshan Guanglong Gas & Electrical Appliances
Zhongshan Guanglong Gas & Electrical Appliances 66Q0402 owner's manual
