ROBERT IRVINE K54474 User manual

AIR FRYER
USER’S GUIDE

2
Introduction
Thank you for buying this top-quality air fryer. You will now be able to cook a wide
assortment of food in a healthier manner, with little or no oil!
In combination with high-speed air circulation, the air fryer uses hot air and a top grill to
prepare your dishes quickly and easily. The ingredients are heated from all sides and there
is no need to add oil in most cases.
General description
A, D: Crisper rack
B, E: The tray
C, F: Handle
G: Top cover
H: Control panel
I: Vent windows
J: Power cord
A: Zone 1 B: Temperature plus/minus C: Timer/temperature Display
D: Timer plus/minus E: Zone 2 F: Power G: Chop H: Vegetable
I: Fish J: Shrimp K: Match Cook L: Cake M: Smart Finish N: Steak
O: Drumsticks P: Dehydrate Q: French fries R: Pre-heat S: Start

3
Important information
Please read this user manual carefully before the use of the appliance and keep it safely for
future reference.
Danger
- Never immerse the housing, which contains electrical components and the heating
elements, in water and rinse it under the tap.
- Do not let any water or other liquid enter the appliance in order to prevent electric shock.
- Always put the ingredients to be fried in the tray, so as to prevent it from coming into
contact with the heating elements.
- Do not cover the air inlet and the air exhaust openings while the appliance is operating.
- Do not fill the frying tray with oil as this may cause a fire hazard.
- Never touch the inside of the appliance while it is operating.
- Check whether the voltage indicated on the appliance corresponds to the local mains
voltage in your country before you connect the appliance.
- Do not use the appliance if the plug, the power cord or the appliance itself is damaged.
- If the power cord is damaged, you must have it replaced at a service center authorized by
similarly qualified persons in order to avoid a hazard.
- This appliance is not suitable for children or people who are either physically or mentally
handicapped or those who lack experience and knowledge. If you want anyone else to use
the appliance, that person should be properly guided on its use.
- Keep the appliance and its mains cord out of the reach of children when the appliance is
switched on or is cooling down.
- Keep the main cord away from hot surfaces.
- Do not plug in the appliance or operate the control panel with wet hands.
- Only connect the appliance to an earthed wall socket, and always make sure that the plug
is inserted into the wall socket properly.
- Never connect this appliance to an external timer switch.
- Do not place the appliance on or near combustible materials such as a tablecloth or
curtains.
- Do not place the appliance against a wall or against other appliances; Leave at least 10cm
free space at the back and sides and 10cm free space above the appliance; Do not place
anything on top of the appliance.
- Do not use the appliance for any purpose other than what described in this manual.
- Do not let the appliance have an unattended operation.
- During hot air frying, hot steam is released through the air exhaust openings; Keep your
hands and face at a safe distance from the steam and the air exhaust openings; Be careful
of hot steam and hot air when you remove the frying tray from the appliance.
- The surface below the appliance may become hot during use.
- Immediately unplug the appliance if you see dark smoke coming out of the appliance; Wait
for the smoke emission to stop before you remove the frying tray from the appliance.

4
Caution
- Place the appliance on a horizontal and stable surface.
- Always unplug the appliance after use.
- Let the appliance cool down for about 30 minutes before you handle or clean it.
- Remove burnt remnants.
- This appliance is intended for normal household use only. It is neither intended for use in
environments such as staff kitchens, offices, farms or other work environments, nor
intended to be used by clients in hotels or other similar environments.
- If the appliance is used improperly or if it is not used according to the instructions in the
user manual, the warranty becomes invalid and seller refuses any liability for any damage
that may be caused.
Prior to the first use
1. Remove all packing materials.
2. Remove any stickers or labels from the appliance, other than the rating label.
3. Thoroughly clean the frying tray, with hot water and some liquid washing soap using a
non-abrasive sponge.
Note: You can also clean these parts in the dishwasher.
4. Wipe the inside and outside of the appliance with a moist cloth.
Preparing for use
1. Place the appliance on a stable, horizontal, and heat-resistant surface.
2. Place the crisper rack in the frying tray properly.
Do not fill the frying tray with oil or any other liquid.
Do not put anything on top of the appliance. This disrupts the airflow and affects the
air-frying result.
Using the appliance
1. Power on
There is a BEEP sound when you plug the appliance in. The Power Button
will illuminate in RED.
2. Menu selection/Temperature/Time
(1) Zone1 or Zone2 works individually.

5
Plug in, press the Power Button , press Zone or Zone , then select the
cooking function. You can not only adjust the time and temperature freely by using Time +/-
and Temperature +/- button, but also press any function icon to cook different kinds of food.
Then, when you press , the unit starts to work.
Note: The + and - symbols enable you to increase or decrease cooking time. It is 1 minute
each time you press or 10 minutes if you hold the button down. Timer Control ranges from 1
to 60 minutes.
The + and - symbols enable you to increase or decrease temperature 10F at a time, and
temperature control ranges from 90F to 400F.
(2) Zone1 and Zone2 work simultaneously
1). Plug in, press the Power Button , press Zone , and select the cooking function.
You can not only adjust the time and temperature freely by using Time +/- and Temperature
+/- button, but also press any function icon to cook different kinds of food.
2). After finishing the function selection for Zone function, you can press Zone
and select the cooking function. You can not only adjust the time and temperature freely by
using Time +/- and Temperature +/- button, but also press any function icon to cook different
kinds of food.
3) . After finishing the above program, you can press Star Button , and the unit begins
to work. Every function has its own default time and temperature (see the chart program
below). Customer can adjust the time and temperature freely by using Time +/- and
Temperature +/- button.
Note: The + and - symbols enable you to increase or decrease cooking time. It is 1 minute
each time you press or 10 minutes if you hold the button down. Timer Control ranges from 1
to 60 minutes.
The + and - symbols enable you to increase or decrease temperature 10F at a time, and the
temperature control ranges from 90F to 400F.
3. Start
After selecting the function, you can set the desired time and temperature, press the Start
6
Button . Then, it will start to flicker. After BEEPS sounds, machine begins to work.
Note:
(1). During working, if you want to check the food, you can pause the cooking cycle by
pulling the Pan with Fry Tray out and pushing it back again into Air Fryer. Remaining Time
will resume.
3. End of program
Air Fryer will shut itself off at the end of the cooking time and the display will show 00 min.
You will hear 10 beeps. Fan will continue to work until it is cooled down.
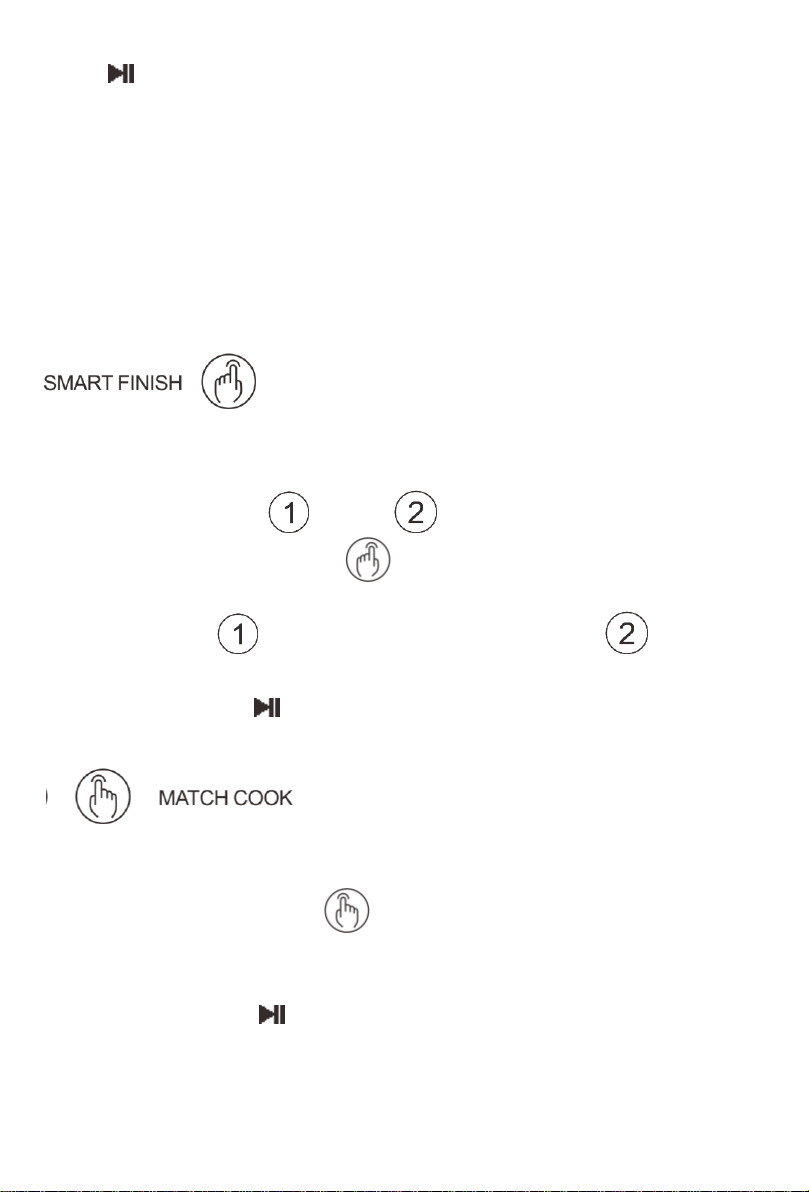
Smart Finish
If you want to finish two different kinds of food simultaneously, you can use Smart
Finish Function.
Step 1: Place food in Zone and Zone respectively.
Step2: Press the Smart Finish Button
Step 3: Press Zone , select the desired function, press Zone , and select the
function.
Step 4: Press Star Button , the unit begins cooking.
Match Cook
If you want to get two SAME foods, you can use Match Cook Function.
Step1: Press Match Cook Button
Step 2: Select the function
Step 3: Press Start Button , the unit begins cooking.

7
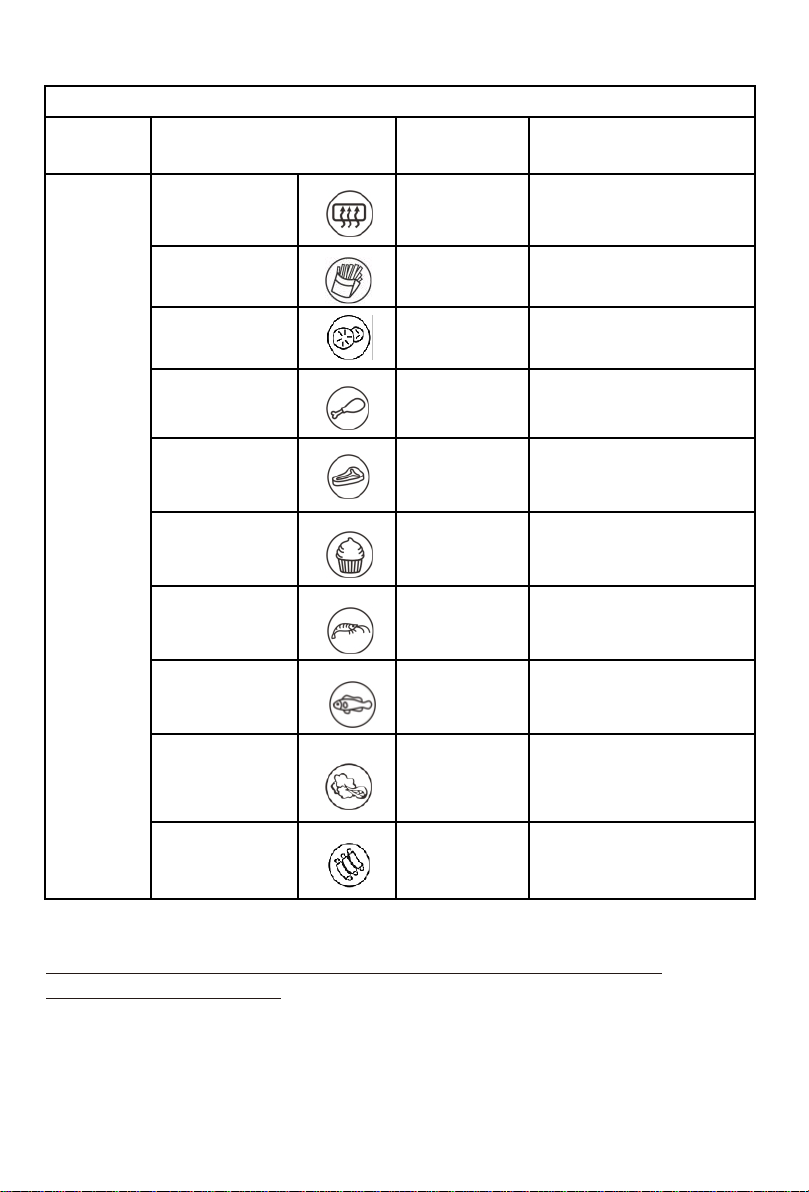
Menu table
Program logistics (When using SINGLE pot)
Menu
Default
time(min)
Default temperature
(°F )
Function
Pre-heat
3
360
French fries
15
400
Dehydration
480
90
Drumsticks
15
400
Steak
12
360
Cake
12
320
Shrimp
12
360
Fish
10
360
Vegetable
10
320
Chop
15
400
8
Program logistics (When using DUAL pot)
Menu
Default
time(min)
Default
temperature(°F )
Function
Pre-heat
3
360
French fries
18
400
Dehydration
480
90
Drumsticks
20
400
Steak
15
360
Cake
15
320
Shrimp
15
360
Fish
12
360
Vegetable
12
320
Chop
20
400
Caution: Do not touch the pan during and about 30mins after use, as it gets very hot.
Only hold the pan by the handle.

9
Operation step
1. Put the mains plug in an earthed wall socket.
2. Put the ingredients into the frying tray.
3. Put the frying tray in the right position; Choose function from menu and press
START/PAUSE to start cooking.
4. Screen display
It will show temperature and time. Temperature is the setting temperature and time is
remaining working time.
The function we have selected is flicker.
5. Some ingredients require shaking halfway through the preparation time (see section
'Settings' in this chapter). To shake the ingredients, you can pull the frying tray out of the
appliance by the handle and shake it. Then, you can slide the frying tray back into the air
fryer.
6. When you hear the timer bell, the set preparation time has elapsed. You can pull the pan
out of the appliance and place it on a heat-resistant surface.
7. Check whether the ingredients are ready.
If the ingredients are not ready yet, you can simply slide the frying tray back into the
appliance and cook it extra minutes.
8. Empty the tray into a bowl or onto a plate.
Tip: Toremove large or fragile ingredients, you can use a pair of tongs to lift the ingredients
out of the tray.
9.When a batch of ingredients is ready, the air fryer is instantly ready for preparing another
batch.
Note: When you use the Air Fryer for the first time, a slight smoke or odor
may be emitted. This is normal and will soon disappear. It is essential to
ensure that there is sufficient ventilation around the Air Fryer.
Settings
Apart from the preset menu, you also can use this air fryer to make other food by setting the
time and temperature. This table below helps you to select the basic settings for the
ingredients you want to prepare.
Note: Keep in mind that these settings are only for reference. As ingredients differ in origin,
size, shape and brand, we cannot guarantee the best setting for your ingredients.
Because the Rapid Air Technology instantly reheats the air inside the appliance, pulling the
frying tray briefly out of the appliance during hot air frying barely disturbs process.
Cooking Tips
Air Fryer and Parts will become hot during the cooking process.
Do not over fill Fry tray with foods.
Do not pack foods into Fry tray.
Using Oil

10
Adding a small amount of oil to food can make them crispier.
Oil sprays are good for applying small amounts of oil evenly to food.
Food Tips
You can air fry frozen food that can be baked in the oven.
To make cakes, hand-pies, or any foods with filling or batter, you can place foods in heat-
safe container and put that in Fry Tray.
Pat dry foods with marinades before adding to Fry Tray.
Reheating Foods
Simply set temperature to 300 F for up to 10 minutes.
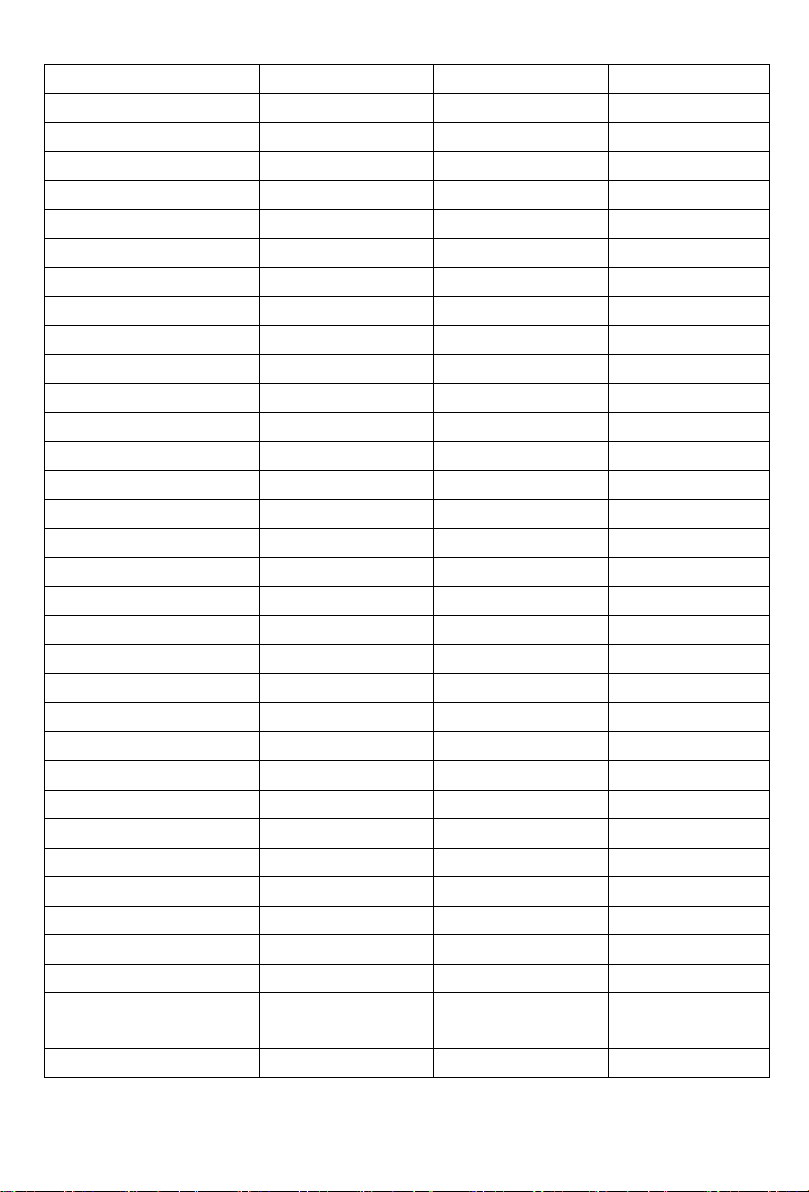
COOKING GUIDE –Note: these settings are a guide. As ingredients differ in size shape
and brand, you may need to adjust cooking times and temperatures.
FOOD
AMOUNT
Time
TEMPERATURE
CHICKEN
Breast, bone in
1.25lbs
25min
370℉
Breasts, boneless
4 oz each
12min
380℉
Drumsticks
2.5lbs
25min
380℉
Tenders
Whole
20min
360℉
Thighs, bone in
2lbs
22min
380℉
Thighs, boneless
1.5lbs
20min
380℉
Whole Chicken
6.5lbs
75min
360℉
Wings
2.5lbs
15min
380℉
BEEF
Beef eye round roast
4lbs
45-55min
390℉
Burger
4 oz each
16min
370℉
Filet Mignon
8 oz each
18min
400℉
Flank Steak
1.5lbs
12min
400℉
London Broil
2lbs
20-28min
400℉
Meatballs
1'' each
7min
380℉
Ribeye, bone in
8 oz ,1'' thick
10-18min
400℉
Sirloin Steak
12 oz ,1'' thick
9-14min
400℉
PORK AND LAMB
Loin
2 lbs
55 min
360℉
Lamb Loin Chops
1'' thick
8-12 min
400℉
Pork Chops, bone in
6.5oz ,1'' thick
12 min
400℉
Pork Chops, boneless
6.5oz ,1'' thick
10 min
360℉
11
Rack of lamb
1.5 lbs to 2 lbs
22 min
380℉
Tenderloins
1 lb
15 min
370℉
FISH AND SEAFOOD
Calamari
8 oz
4 min
400℉
Fish Fillet
8 oz ,1'' thick
10 min
400℉
Salmon
6 oz fillet
12 min
380℉
Scallops
8-10 pieces
5-7 min
400℉
Shrimp
1 lb
4 min
360℉
Tuna
6 oz steak
7-10 min
400℉
FROZEN FOODS
Breaded Shrimp
12 oz
9 min
400℉
Chicken Nuggets
12 oz
10 min
400℉
Fish Sticks
10 oz
10 min
400℉
Mozzarella Sticks
11 oz
8 min
400℉
Onion Rings
12 oz
8 min
400℉
Pot Stickers
10 oz
8 min
400℉
Thick French Fries
17 oz
18 min
400℉
Thin French Fries
20 oz
14 min
400℉
VEGETABLES
Asparagus
Slices, 1'' thick
6 min
400℉
Beets
Whole
40min
400℉
Broccoli
Florets
6 min
400℉
Brussel Sprouts
Halved
15 min
380℉
Carrots
Slices, ½'' thick
15 min
380℉
Cauliflower
Florets
12 min
400℉
Corn on the Cob
Halved
6 min
390℉
Eggplant
1 ½ '' cubes
15 min
400℉
Fennel
Quartered
15 min
370℉
Green Beans
Whole
5 min
400℉
Mushrooms
½'' slices
5 min
400℉
Parsnips
½'' cubes
15 min
380℉
Peppers
1'' chunks
15 min
400℉
Potatoes
1.5 lbs, small
baby
15 min
400℉
Potatoes
French Fries
25 min
400℉

12
Potatoes
1'' cubes
12 min
400℉
Potatoes
Whole
40 min
400℉
Squash
½'' chunks
12 min
400℉
Sweet Potato
Whole
35 min
380℉
Tomatoes
Cherry
4 min
400℉
Tomatoes
Halved
10 min
350℉
Zucchini
½'' sticks
12 min
400℉
Note: It is better to add 3 minutes to the preparation time before you start frying if the appliance is
cold

13
Cleaning
Clean the appliance after every use.
The frying tray, and the inside of the appliance have a non-stick coating. Do not use metal
kitchen utensils or abrasive cleaning materials to clean them, as this may damage the non-
stick coating.
1. Remove the mains plug from the wall socket and let the appliance cool down.
Note: Remove the frying tray to let the air fryer cool down more quickly.
2. Wipe the outside of the appliance with a moist cloth.
3. Clean the frying tray with hot water, some washing liquid soap and a non-abrasive
sponge.
You can use a washing liquid to remove any remaining dirt.
Note: The frying tray is dishwasher-proof.
Tip: If dirt is stuck to the crisper rack or at the bottom of the frying tray, you can fill the frying
tray with hot water and some washing liquid soap, put the crisper rack in the frying tray, and
let the frying tray and the crisper rack soak for approximately 10 minutes.
1. Clean the inside of the appliance with hot water and a non-abrasive sponge.
2. Clean the heating element with a cleaning brush to remove any food residues.
Storage
1. Unplug the appliance and let it cool down.
2. Make sure all parts are clean and dry.
Skewers
1. When you take it out off the package, wash in warm soapy water with a soft cloth, and
dispose of packaging materials in an environmentally friendly way.
2. The skewers are dishwasher safe, but hand washing your skewers in warm, soapy water
is always recommended.
3. Always be cautious while grilling to not attempt to pick up the skewer while on grill without
a oven mitt or other type of pot holder.

14
Troubleshooting
Problem
Possible cause
Solution
The air fryer does
not work
The appliance is not
plugged into the mains.
Put the mains plug in an earthed
wall socket.
Youhave not set the timer.
Turn the timer knob to the required
preparation time to switch on the
appliance.
Food not fully
cooked
The amount of the
ingredients in the Frying
Tray is too much.
Put smaller batches of ingredients in
the Frying Tray. Smaller batches are
fried more evenly.
The set temperature is too
low.
Turn the temperature control knob to
the required temperature setting
(see section 'Settings').
The preparation time is too
short.
Turn the timer knob to the required
preparation time (see section
'Settings').
The ingredients
are fried unevenly
in the air fryer.
Certain types of the
ingredients need to be
shaken halfway throughout
the preparation time.
Ingredients that lie on the top of or
across each other (e.g. fries) need
to be shaken halfway throughout the
preparation time (see section
'Settings').
Friedsnacks are not
crispywhen they
comeout of theair
fryer
Youuse a type of snack
meant to be prepared in a
traditional deepfryer.
Use oven snacks or lightly brush
some oil onto the snacks for a
crispier result.
Cannotslidethe
panintothe
appliance properly.
There is too much food in
the Frying Tray.
Do not fill the basket beyond the
maximum amount indicated in the
table on the earlier page.
White smoke comes
out of the appliance
Youare preparing greasy
ingredients.
Note that the temperature is well-
controlled to be under 356℉(180
℃), when you fry greasyingredients
in the air fryer.

15
Problem
Possible cause
Solution
The pan still contains
greasy residues from the
previous use.
White smoke is caused by grease
heating up in the pan. Make sure
you clean the pan properly after
each use.
Freshpotatofries
arefriedunevenly
in the airfryer.
Youdid not soak the potato
sticks properly before you
fried them.
Soak the potato sticks in a bowl of
water for at least 30 minutes; take
them out and dry them with kitchen
paper.
Youdid not use the right
potato type.
Use fresh potatoes and make sure
they stay firm during frying.
Freshpotatofries
arenotcrispy
when they come
out of the airfryer.
The crispiness of the fries
depends on the amount of
oil and water in the fries.
Make sure you dry the potato sticks
properly before you coatthemwithoil.
Cut the potato into thinner sticks for
a crispier result.
Add slightly more oil for a crispier
result.
Warranty
LIMITED 1 YEAR WARRANTY
This is the only express warranty for this product. Halex Holdings, LLC, warrants this
product to be free from defects in material and workmanship for single-family
household use for one year from the date of original purchase. Ordinary wear and tear
including damage to the coating surface is excluded. Use of product for anything other
than its intended purpose is also not warranted. We exclude liability for all
consequential damages. Your exclusive remedy is repair or replacement of the
nonconforming product, at our option. All liability is limited to purchase price. All other
warranties, including any statutory warranty or condition of merchantability or fitness
for a particular purpose, are disclaimed. You may have legal rights that vary
depending on where you live. For repair or replacement, please contact our team with
information on your product’s proof of purchase and description of the problem.
Customer Service Number: 800-459-2162
Cricket Product Labs a Div of Halex Holdings, LLC
Waltham, MA 02453
Made in China
Table of contents


