manuals.online logo
Brands
  1. Home
  2. •
  3. Brands
  4. •
  5. Roland
  6. •
  7. Synthesizer
  8. •
  9. Roland RS-50 User manual

Roland RS-50 User manual

®ÂØÒňÎ
RS-50
Synthesizer
TurboStart
TBS195 ©2003 Roland Corporation U.S.
www.RolandUS.com
Faxback #20228 Page 1
It’s a Fact…
The RS-50 allows musicians to forget about MIDI and
focus on playing. It sports an all-new collection of
CD-quality sounds, cool performance features and
simple direct-access buttons for selecting patches.
Features include:
• Affordable 61-note synthesizer with easy access
to Roland’s latest sounds
• Hundreds of new patches based on CD-quality
waveforms
• Direct-access buttons permit easy sound
selection by category
• Phrase/arpeggio generator and Multi Chord
memory
• D Beam controller for expressive realtime control
• Rhythm Guide metronome with preset patterns
and variations
Playing the Demo Songs
Use the following procedure to play the three demo
songs:
1. Press DEMO—beneath MODE—so it’s lit.
2. Use the VALUE -/+ buttons to select the song
you wish to hear.
Note: If you want to listen to all of the demo songs
played in order, select All Songs.
3. Press ENTER to begin playback.
4. Press EXIT to stop playback.
5. Press EXIT again to return to Play mode.
Selecting Patches
The RS-50 has 640 patches organized in categories
such as Piano, Guitar, Orchestra, etc. Use the
following procedure to select and audition patches:
1. Press PATCH—under MODE—so it’s lit.
2. Press 0-9 to select the desired category, as
labeled beneath the buttons.
3. Use the VALUE -/+ buttons to choose a sound
within the selected category.
4. You can:
• Play the keyboard
• Press AUDITION, under MODE, so it’s lit, to
automatically play a short sequence. Press
AUDITION again to stop playback.
Using the Phrase/Arpeggio Feature
The Phrase/Arpeggio feature plays musical motifs
and figures based on the note(s) you hold down.
1. Select a patch as previously described.
2. Press PHRASE/ARPEGGIO so it’s lit.
3. Use the VALUE -/+ buttons to select a phrase or
arpeggio.
4. Hold down one or more notes on the
keyboard—the selected phrase or arpeggio
plays.
Note: A “phrase” is a musical motif that’s triggered by
holding down a single note—“Phr” appears in the
display as it plays. An “arpeggio” requires that more
than one note be held down, and is shown as “Arp” in
the display.
5. Press PHRASE/ARPEGGIO so it’s not lit when
you’re finished.
Using the Chord Memory Feature
Chord Memory lets you play a chord by touching a
single key. You can assign all 12 notes in an octave
to play different chords, and then save them as a set.
(There are several chord sets already stored in the
RS-50 at the factory.)
1. Select a patch as previously described.
2. Press CHORD MEMORY so it’s lit.
3. Press a key on the keyboard to hear the chord it
plays.
4. Try a few keys to hear the chords they play.
5. Use the VALUE -/+ buttons to select other chord
sets.
6. Press CHORD MEMORY when you’re finished
so it’s no longer lit.
Using the D Beam Controller
The three buttons directly below the D Beam lens
select what the D Beam does—here’s how they work.
Solo Synth
1. Press SOLO SYNTH so it’s lit.
2. Hold down several notes on the
keyboard—notice they don’t yet sound—and
then move your hand over the D Beam. The
notes you’re holding down play according to your
hand movements.
®ÂØÒňÎ
RS-50
Synthesizer
TurboStart
TBS195 ©2003 Roland Corporation U.S.
www.RolandUS.com
Faxback #20228 Page 2
Active Expression
1. Press ACTIVE EXP so it’s lit.
2. Hold down several notes on the keyboard and
move your hand over the D Beam. The volume
of the notes you’re holding down varies
according to your hand movements.
Assignable
1. Press ASSIGNABLE so it’s lit.
2. Play the keyboard and move your hand over the
D Beam. The currently assigned effect is heard.
3. Use the VALUE -/+ buttons to select another
effect. This setting is automatically remembered
the next time you turn on ASSIGNABLE.
4. Press ASSIGNABLE so it’s not lit to turn off the
D Beam.
Using the Rhythm Guide
The Rhythm Guide provides an easy way to produce
great-sounding rhythm patterns:
Selecting a Rhythm Pattern
1. Press PERFORM so it’s lit.
2. Press RHYTHM GUIDE so it’s lit—the rhythm
begins playing.
3. Use the VALUE -/+ buttons to select various
rhythm patterns.
4. Press RHYTHM GUIDE again to halt playback.
Note: You can select a pattern without playing it by
holding SHIFT when you press RHYTHM GUIDE.
You can then press ENTER to start playback.
Switching Sounds
5. While the pattern is playing, press PART
SELECT so it’s lit.
6. Press the RHYTHM & SFX button so it’s lit, and
use the VALUE -/+ buttons to select a rhythm kit.
Changing the Tempo
7. Press TAP TEMPO so it’s lit—the current tempo
of the pattern is displayed in the screen.
8. Use the VALUE -/+ buttons to adjust the tempo.
9. Press EXIT to return to the previous screen.
Note: You can also press the TAP TEMPO button
three or more times to manually tap in the desired
tempo.
Splitting the Keyboard
Each patch on the RS-50 uses two tones called the
“upper tone” and the “lower tone.” The Key Mode
setting lets you determine how these two tones are
played from the keyboard. Use the following
procedure to split the keyboard and select sounds:
1. Press PATCH so it’s lit.
2. Press KEY MODE so SPLIT is lit. The upper
tone now plays in the upper part of the keyboard
and the lower tone plays in the lower part of the
keyboard.
3. Press PARAM beneath EDIT so it’s lit.
4. Press DESTINATION TONE so UPPER is lit,
and then use the VALUE -/+ buttons to select a
tone for the upper part of the keyboard.
5. Press DESTINATION TONE so LOWER is lit,
and then use the VALUE -/+ buttons to select a
tone for the lower part of the keyboard.
6. Press EXIT to return to the Patch Play screen.
Note: A good example of a split patch is Pf12: RS
Grand/Abs.
Creating a Layered Sound
Let’s set up a layer with a piano sound and a string
sound:
1. Press PATCH so it’s lit, and then press PIANO.
2. Press KEY MODE so DUAL is lit—both the
upper and lower tone play together across the
whole keyboard.
3. Press PARAM under EDIT so it’s lit.
4. Press DESTINATION TONE so UPPER is lit,
and then use the VALUE -/+ buttons to select a
piano tone.
5. Press DESTINATION TONE so LOWER is lit,
and then use the VALUE -/+ buttons to select a
string tone.
6. Press EXIT to return to the Patch Play screen.
Note: A good example of a layered sound is Pf13:
RS Grand&Pad.

Other manuals for RS-50

2

Other Roland Synthesizer manuals

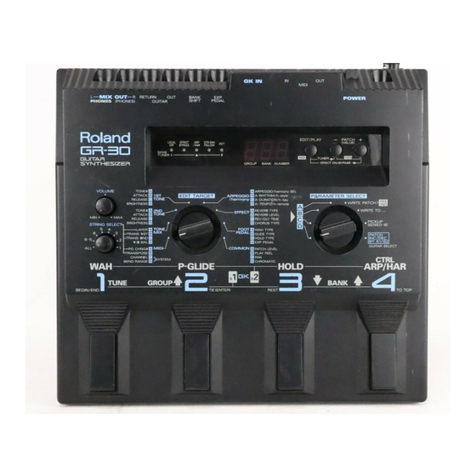
Roland GR-30 User manual

Roland

Roland GR-30 User manual

Roland XV-88 User manual

Roland

Roland XV-88 User manual

Roland V-Synth Operating and maintenance manual

Roland

Roland V-Synth Operating and maintenance manual

Roland SH-09 User manual

Roland

Roland SH-09 User manual

Roland JD-800 Operating and maintenance manual

Roland

Roland JD-800 Operating and maintenance manual

Roland JUPITER 4 User manual

Roland

Roland JUPITER 4 User manual

Roland Orchestra M-OC1 User manual

Roland

Roland Orchestra M-OC1 User manual

Roland SH-1000 User manual

Roland

Roland SH-1000 User manual

Roland juno-ds61 User manual

Roland

Roland juno-ds61 User manual

Roland XV-88 User manual

Roland

Roland XV-88 User manual

Roland JX-305 User manual

Roland

Roland JX-305 User manual

Roland GR-55 User manual

Roland

Roland GR-55 User manual

Roland JD-Xi Instructions and recipes

Roland

Roland JD-Xi Instructions and recipes

Roland GR-100 User manual

Roland

Roland GR-100 User manual

Roland E-35 User manual

Roland

Roland E-35 User manual

Roland GR-20 User manual

Roland

Roland GR-20 User manual

Roland GR-700 User manual

Roland

Roland GR-700 User manual

Roland V-Combo VR-09 Instruction manual

Roland

Roland V-Combo VR-09 Instruction manual

Roland System-100 Model-101 User manual

Roland

Roland System-100 Model-101 User manual

Roland G-800 User manual

Roland

Roland G-800 User manual

Roland JUNO-Gi User manual

Roland

Roland JUNO-Gi User manual

Roland XV-88 Operating and maintenance manual

Roland

Roland XV-88 Operating and maintenance manual

Roland JV-2080 Owner's manual

Roland

Roland JV-2080 Owner's manual

Roland Boutique JU-06 User manual

Roland

Roland Boutique JU-06 User manual

Popular Synthesizer manuals by other brands

Yamaha PF-500 Reference booklet

Yamaha

Yamaha PF-500 Reference booklet

Korg MR-16 owner's manual

Korg

Korg MR-16 owner's manual

Sequential Prophet VS manual

Sequential

Sequential Prophet VS manual

Quasimidi CYBER-6 manual

Quasimidi

Quasimidi CYBER-6 manual

Pittsburgh Modular Voltage Research Laboratory manual

Pittsburgh Modular

Pittsburgh Modular Voltage Research Laboratory manual

Bastl KASTLE v 1.5 manual

Bastl

Bastl KASTLE v 1.5 manual

Yamaha MODX6 Service manual

Yamaha

Yamaha MODX6 Service manual

Motas 6 user guide

Motas

Motas 6 user guide

Native Instruments Hypha manual

Native Instruments

Native Instruments Hypha manual

Bastl Instruments KASTLE user manual

Bastl Instruments

Bastl Instruments KASTLE user manual

Behringer CRAVE quick start guide

Behringer

Behringer CRAVE quick start guide

Korg Synthesizer/Vocoder microKORG owner's manual

Korg

Korg Synthesizer/Vocoder microKORG owner's manual

Generalmusic 271221 owner's manual

Generalmusic

Generalmusic 271221 owner's manual

Casio MA-150 user guide

Casio

Casio MA-150 user guide

Vermona uniCYCLE user guide

Vermona

Vermona uniCYCLE user guide

Casio Cosmo CZ-1 Operation manual

Casio

Casio Cosmo CZ-1 Operation manual

Arturia PROPHET-VS V user manual

Arturia

Arturia PROPHET-VS V user manual

Crumar DS1 operating manual

Crumar

Crumar DS1 operating manual

manuals.online logo
manuals.online logoBrands
  • About & Mission
  • Contact us
  • Privacy Policy
  • Terms and Conditions

Copyright 2025 Manuals.Online. All Rights Reserved.