reface Reference Manual 3
Changing detailed operator settings
Set Operators 1 to 4 as follows.
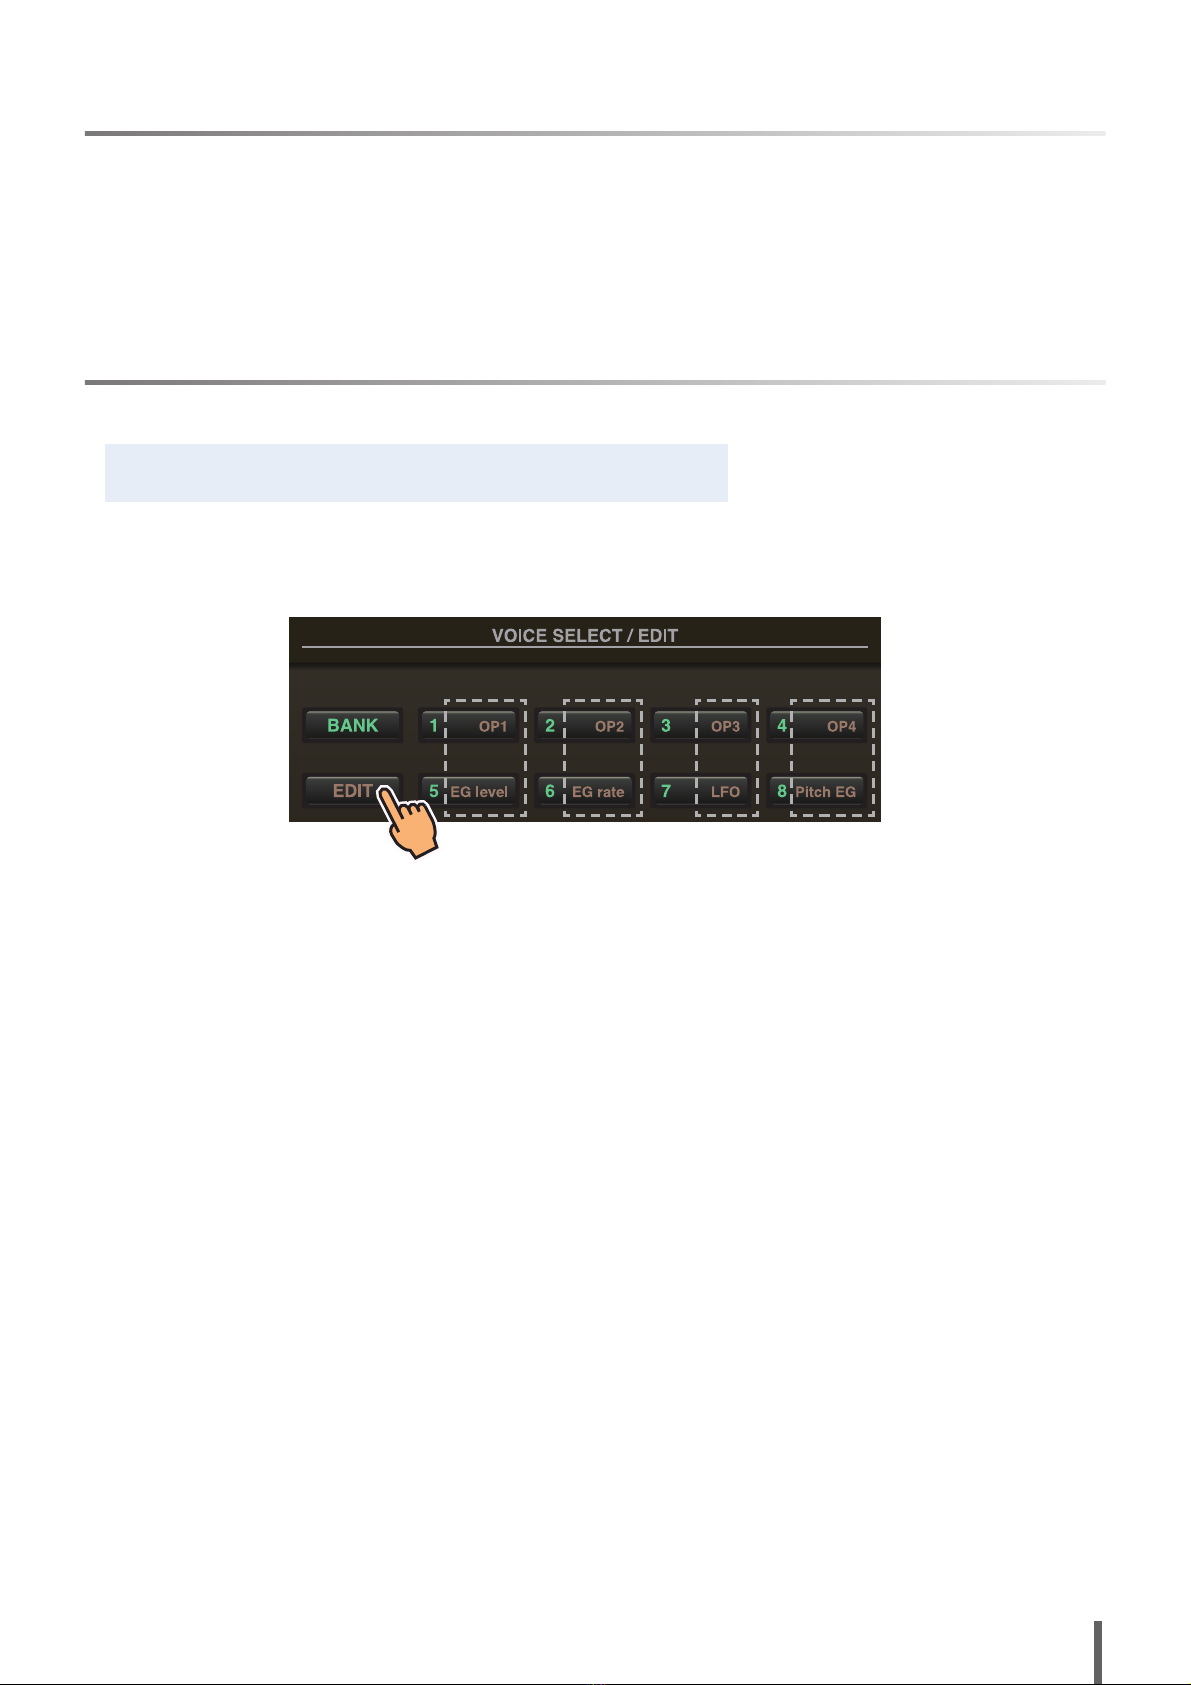
1. Press the [EDIT] button to activate Edit mode.
2. Press one of the [OP1] to [OP4] buttons to select the operator you wish to set.
The setting screen for the corresponding operator is displayed.
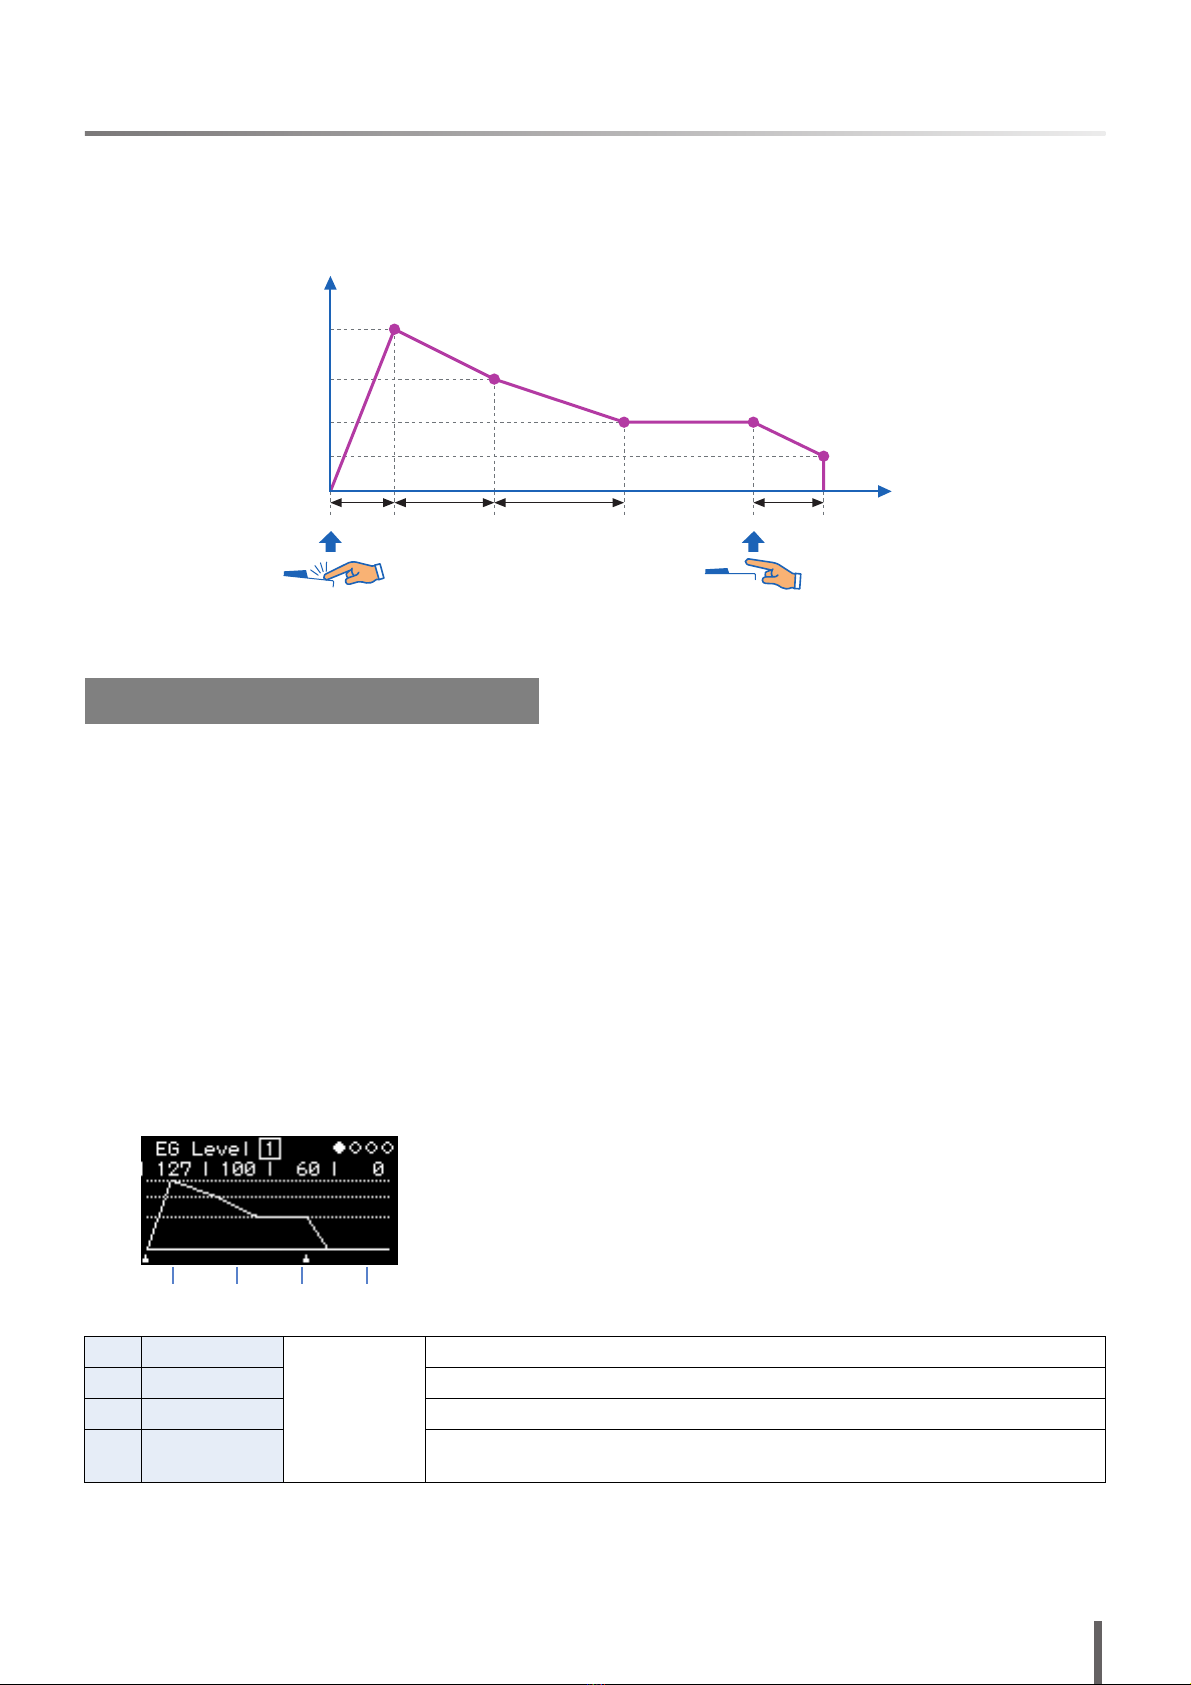
3. If necessary, press the same button several times to select the required page from the setting screen. When a setting
screen contains multiple pages, they are indicated in the form “ ” (i.e., page 1 of 3 pages).
4. Adjust the operator’s settings by using the sliders and/or switches.
5. If necessary, you can also adjust other settings at this time.
For example, if you press the [OP2] button while page 3 from the Operator 1 Settings screen is displayed, page 3 from
the Operator 2 Settings screen is displayed.
Similarly, if you press the [EG level] or [EG rate] button while the Operator 2 Settings screen is displayed, you can make
EG adjustments for Operator 2.
6. When you have finished making settings, press the [EDIT] button once again to leave Edit mode.
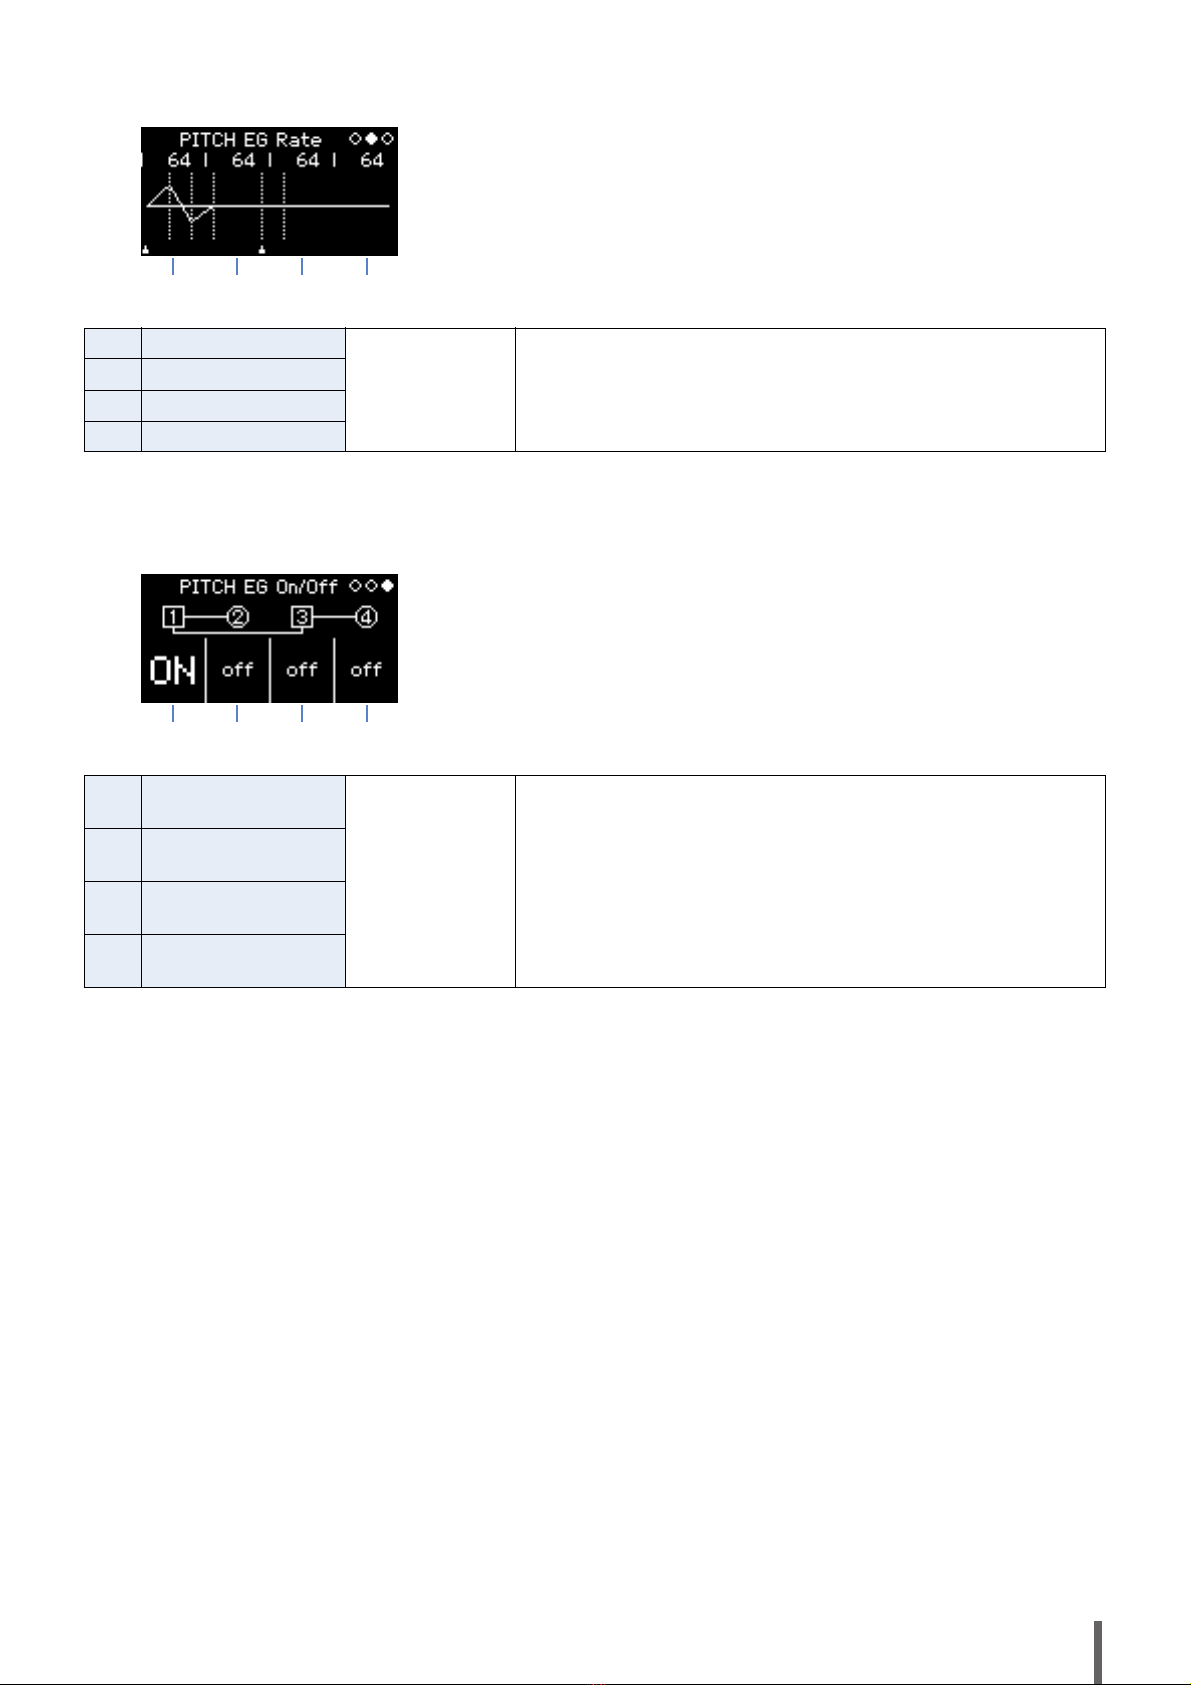
Operator Settings screen (page 1)
1OP (operator) ON or Off Turns the operator on and off.
2MODE
Selects the frequency setting method.
Ratio
The frequency is set as a ratio with respect to the standard pitch.
This frequency is also displayed as a ratio when you press the
[FREQ] button.
Fixed
The frequency is fixed, regardless of which key is played.
This frequency is also displayed in Hertz (Hz) when you press the
[FREQ] button.
3FREQ (Frequency)
Specifies the frequency by using a number.
When MODE is set to
“Ratio”: 0.500 to 31.99
Specify a value with respect to the standard
value of 1.00. When this value is doubled,
the octave increases by one; when halved,
the octave drops by one.
This value is also displayed when you press
the [FREQ] button.
When MODE is set to
“Fixed”: 1. 0 0 0 t o 9 , 7 7 2 H z
Specifies the frequency in Hertz (Hz).
This value is also displayed when you press
the [FREQ] button.
4DTUNE (Detune) -64 to 0 to +63 Detunes the frequency set with “FREQ”. Slightly detuning the fre-
quency produces a chorus-like effect.