9
|
INSTRUCCIONES
En la función frío, la lámpara LED es azul. Presione este
botón para activar el modo de enfriamiento. Nota: El modo
de inicio predeterminado es el modo de refrigeración.
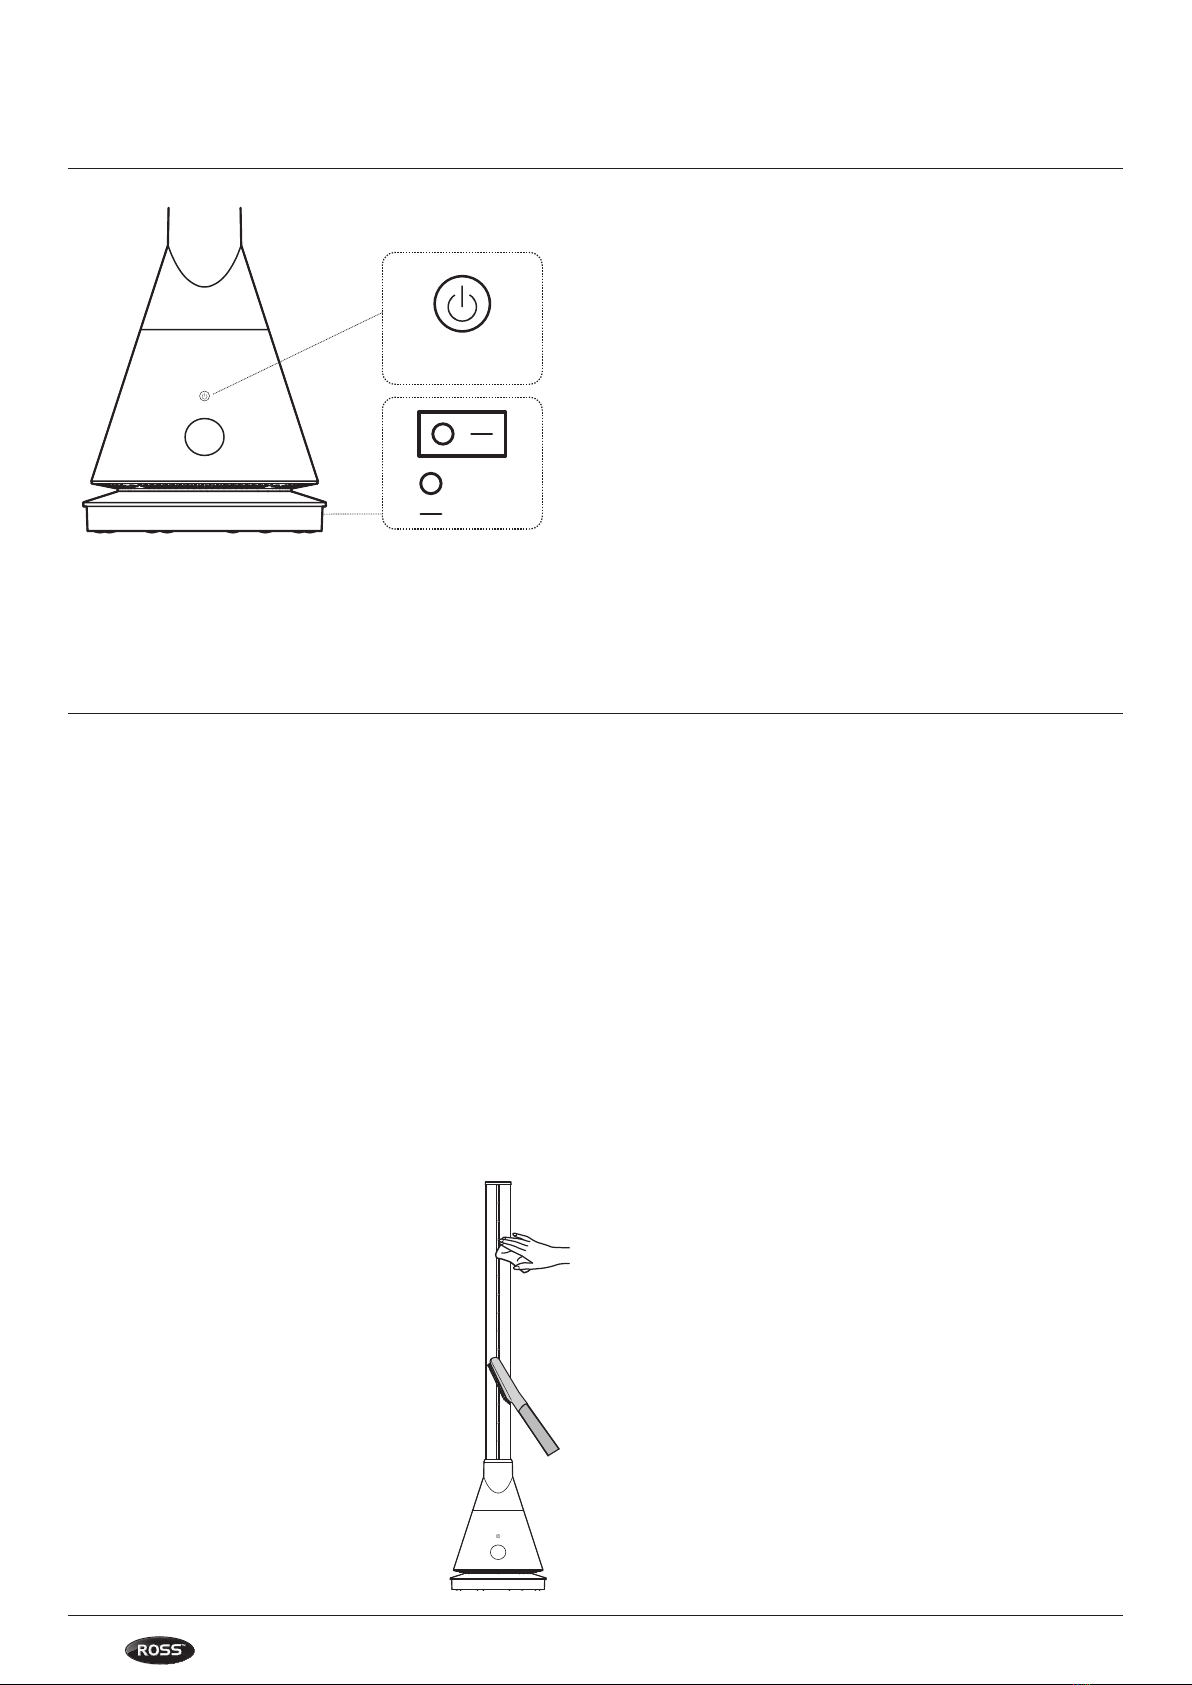
El aparato se puede conectar y desconectar con el botón
“ON & OFF”.
Press the timer button on the remote control to set 1 to 8 hours
of timing.
Press Sleepmode button on the remote control.
The display shows L and the wind speed become minimum.
Press again to exit the sleep mode.
(You can also exit the current mode by pressing the Wind Strength + button.)
Press Turbo mode button on the remote control.
The display shows H and the wind speed become max.
Press again to exit the turbo mode.
(You can also exit the current mode by pressing the Wind Strength + button.)
The device can be switched on and off by pressing the
"ON & OFF" button
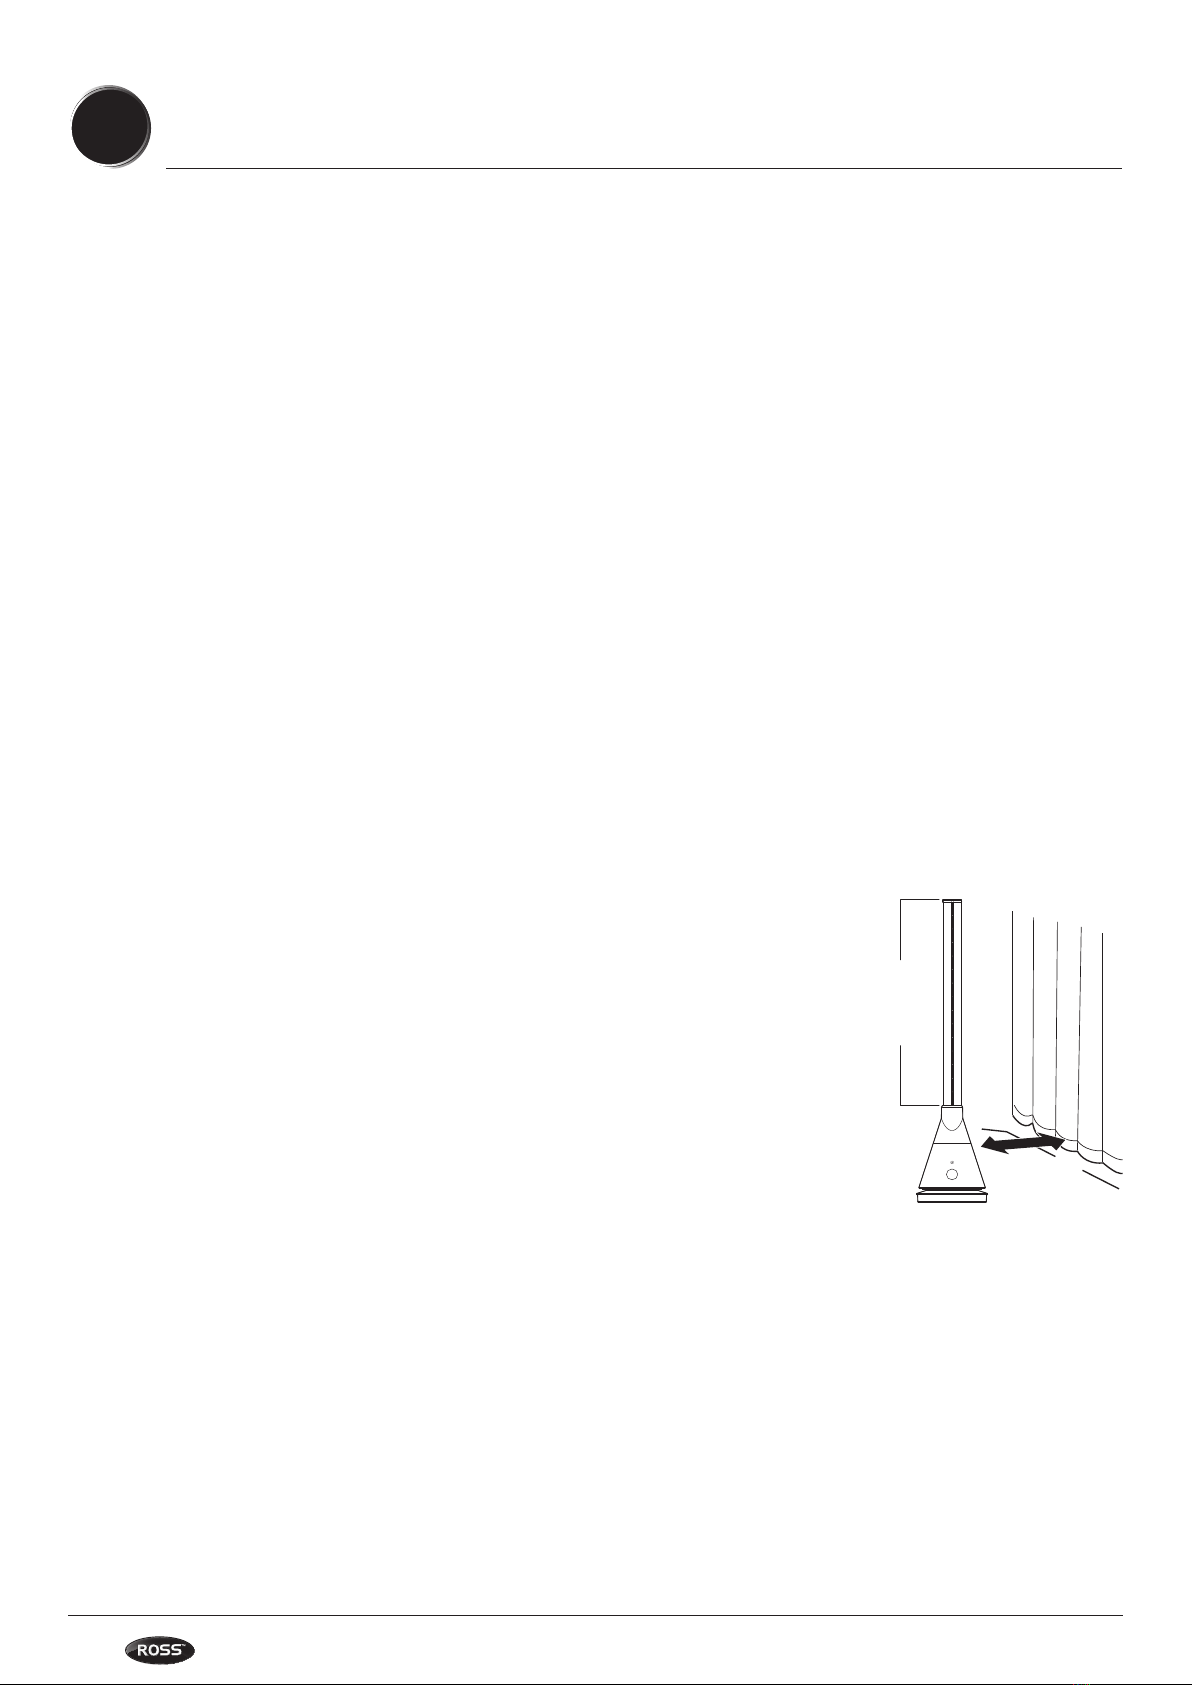
Press the Oscillation button to turn on the oscillation function.
This fan can swing left and right 80.Press this button again to
stop oscillating.
Press the "+" button on the left side of the remote control
to increase the volume of air, press the "-" button on the
left side of the remote control to decrease the airflow.
Cool mode can be used for 9-level settings,
warm mode can be set for 4 levels.
In heat mode, press the temperature button on the right side
of the remote control to set the temperature(1-30℃).
Note:this button does not work in cool mode.
The display number in heat mode is orange.
Press this button to activate the heat mode.
Note: In heat mode there is no strong mode and sleep mode.
In cooling mode, the LED lamp is blue.
Press this button to activate the cooling mode.
Note: The default start mode is the cooling mode.
Press button to turn off tone of fan.The fan cancel“didi"
sound.
Pulse el botón Modo noche del mando a distancia.
En la pantalla aparecerá LL y la velocidad del aire se
reducirá al mínimo. Púlselo de nuevo para salir del modo
de reposo.
(Únicamente disponible con la “función frío”)
(También puede salir del modo actual pulsando el botón Aumento de aire +)
Press the timer button on the remote control to set 1 to 8 hours
of timing.
Press Sleepmode button on the remote control.
The display shows L and the wind speed become minimum.
Press again to exit the sleep mode.
(You can also exit the current mode by pressing the Wind Strength + button.)
Press Turbo mode button on the remote control.
The display shows H and the wind speed become max.
Press again to exit the turbo mode.
(You can also exit the current mode by pressing the Wind Strength + button.)
The device can be switched on and off by pressing the
"ON & OFF" button
Press the Oscillation button to turn on the oscillation function.
This fan can swing left and right 80.Press this button again to
stop oscillating.
Press the "+" button on the left side of the remote control
to increase the volume of air, press the "-" button on the
left side of the remote control to decrease the airflow.
Cool mode can be used for 9-level settings,
warm mode can be set for 4 levels.
In heat mode, press the temperature button on the right side
of the remote control to set the temperature(1-30℃).
Note:this button does not work in cool mode.
The display number in heat mode is orange.
Press this button to activate the heat mode.
Note: In heat mode there is no strong mode and sleep mode.
In cooling mode, the LED lamp is blue.
Press this button to activate the cooling mode.
Note: The default start mode is the cooling mode.
Press button to turn off tone of fan.The fan cancel“didi"
sound.
Pulse el botón de modo Potencia máxima del mando a
distancia. En la pantalla aparece HH y la velocidad del
viento se convierte en máxima. Pulse de nuevo para salir
del modo turbo.
(También puede salir del modo actual pulsando el botón Aumento de aire +)
Press the timer button on the remote control to set 1 to 8 hours
of timing.
Press Sleepmode button on the remote control.
The display shows L and the wind speed become minimum.
Press again to exit the sleep mode.
(You can also exit the current mode by pressing the Wind Strength + button.)
Press Turbo mode button on the remote control.
The display shows H and the wind speed become max.
Press again to exit the turbo mode.
(You can also exit the current mode by pressing the Wind Strength + button.)
The device can be switched on and off by pressing the
"ON & OFF" button
Press the Oscillation button to turn on the oscillation function.
This fan can swing left and right 80.Press this button again to
stop oscillating.
Press the "+" button on the left side of the remote control
to increase the volume of air, press the "-" button on the
left side of the remote control to decrease the airflow.
Cool mode can be used for 9-level settings,
warm mode can be set for 4 levels.
In heat mode, press the temperature button on the right side
of the remote control to set the temperature(1-30℃).
Note:this button does not work in cool mode.
The display number in heat mode is orange.
Press this button to activate the heat mode.
Note: In heat mode there is no strong mode and sleep mode.
In cooling mode, the LED lamp is blue.
Press this button to activate the cooling mode.
Note: The default start mode is the cooling mode.
Press button to turn off tone of fan.The fan cancel“didi"
sound.
Pulsar el botón Oscilación para activar la función de
oscilación. Este ventilador puede oscilar a la izquierda y
a la derecha 80º. Pulse de nuevo este botón para dejar
de oscilar.
Press the timer button on the remote control to set 1 to 8 hours
of timing.
Press Sleepmode button on the remote control.
The display shows L and the wind speed become minimum.
Press again to exit the sleep mode.
(You can also exit the current mode by pressing the Wind Strength + button.)
Press Turbo mode button on the remote control.
The display shows H and the wind speed become max.
Press again to exit the turbo mode.
(You can also exit the current mode by pressing the Wind Strength + button.)
The device can be switched on and off by pressing the
"ON & OFF" button
Press the Oscillation button to turn on the oscillation function.
This fan can swing left and right 80.Press this button again to
stop oscillating.
Press the "+" button on the left side of the remote control
to increase the volume of air, press the "-" button on the
left side of the remote control to decrease the airflow.
Cool mode can be used for 9-level settings,
warm mode can be set for 4 levels.
In heat mode, press the temperature button on the right side
of the remote control to set the temperature(1-30℃).
Note:this button does not work in cool mode.
The display number in heat mode is orange.
Press this button to activate the heat mode.
Note: In heat mode there is no strong mode and sleep mode.
In cooling mode, the LED lamp is blue.
Press this button to activate the cooling mode.
Note: The default start mode is the cooling mode.
Press button to turn off tone of fan.The fan cancel“didi"
sound.
Tono Encendido/Apagado.
Press the timer button on the remote control to set 1 to 8 hours
of timing.
Press Sleepmode button on the remote control.
The display shows L and the wind speed become minimum.
Press again to exit the sleep mode.
(You can also exit the current mode by pressing the Wind Strength + button.)
Press Turbo mode button on the remote control.
The display shows H and the wind speed become max.
Press again to exit the turbo mode.
(You can also exit the current mode by pressing the Wind Strength + button.)
The device can be switched on and off by pressing the
"ON & OFF" button
Press the Oscillation button to turn on the oscillation function.
This fan can swing left and right 80.Press this button again to
stop oscillating.
Press the "+" button on the left side of the remote control
to increase the volume of air, press the "-" button on the
left side of the remote control to decrease the airflow.
Cool mode can be used for 9-level settings,
warm mode can be set for 4 levels.
In heat mode, press the temperature button on the right side
of the remote control to set the temperature(1-30℃).
Note:this button does not work in cool mode.
The display number in heat mode is orange.
Press this button to activate the heat mode.
Note: In heat mode there is no strong mode and sleep mode.
In cooling mode, the LED lamp is blue.
Press this button to activate the cooling mode.
Note: The default start mode is the cooling mode.
Press button to turn off tone of fan.The fan cancel“didi"
sound.
El número de la pantalla en la función calor es naranja.
Pulse este botón para activar el función calor.
Nota: En el modo calor no existe la función máxima
potencia ni la función noche.
Press the timer button on the remote control to set 1 to 8 hours
of timing.
Press Sleepmode button on the remote control.
The display shows L and the wind speed become minimum.
Press again to exit the sleep mode.
(You can also exit the current mode by pressing the Wind Strength + button.)
Press Turbo mode button on the remote control.
The display shows H and the wind speed become max.
Press again to exit the turbo mode.
(You can also exit the current mode by pressing the Wind Strength + button.)
The device can be switched on and off by pressing the
"ON & OFF" button
Press the Oscillation button to turn on the oscillation function.
This fan can swing left and right 80.Press this button again to
stop oscillating.
Press the "+" button on the left side of the remote control
to increase the volume of air, press the "-" button on the
left side of the remote control to decrease the airflow.
Cool mode can be used for 9-level settings,
warm mode can be set for 4 levels.
In heat mode, press the temperature button on the right side
of the remote control to set the temperature(1-30℃).
Note:this button does not work in cool mode.
The display number in heat mode is orange.
Press this button to activate the heat mode.
Note: In heat mode there is no strong mode and sleep mode.
In cooling mode, the LED lamp is blue.
Press this button to activate the cooling mode.
Note: The default start mode is the cooling mode.
Press button to turn off tone of fan.The fan cancel“didi"
sound.
Presione el botón del temporizador en el control remoto
para ajustar de 1 a 8 horas de temporización.
Press the timer button on the remote control to set 1 to 8 hours
of timing.
Press Sleepmode button on the remote control.
The display shows L and the wind speed become minimum.
Press again to exit the sleep mode.
(You can also exit the current mode by pressing the Wind Strength + button.)
Press Turbo mode button on the remote control.
The display shows H and the wind speed become max.
Press again to exit the turbo mode.
(You can also exit the current mode by pressing the Wind Strength + button.)
The device can be switched on and off by pressing the
"ON & OFF" button
Press the Oscillation button to turn on the oscillation function.
This fan can swing left and right 80.Press this button again to
stop oscillating.
Press the "+" button on the left side of the remote control
to increase the volume of air, press the "-" button on the
left side of the remote control to decrease the airflow.
Cool mode can be used for 9-level settings,
warm mode can be set for 4 levels.
In heat mode, press the temperature button on the right side
of the remote control to set the temperature(1-30℃).
Note:this button does not work in cool mode.
The display number in heat mode is orange.
Press this button to activate the heat mode.
Note: In heat mode there is no strong mode and sleep mode.
In cooling mode, the LED lamp is blue.
Press this button to activate the cooling mode.
Note: The default start mode is the cooling mode.
Press button to turn off tone of fan.The fan cancel“didi"
sound.
Pulse el botón “+” en el lado izquierdo del mando a
distancia para aumentar el ujo de aire, pulse el botón “-”
en el lado izquierdo del mando a distancia para disminuir
el ujo de aire. El modo de refrigeración se puede utilizar
para ajustes de 9 niveles, el modo de calentamiento se
puede ajustar para 4 niveles.
Press the timer button on the remote control to set 1 to 8 hours
of timing.
Press Sleepmode button on the remote control.
The display shows L and the wind speed become minimum.
Press again to exit the sleep mode.
(You can also exit the current mode by pressing the Wind Strength + button.)
Press Turbo mode button on the remote control.
The display shows H and the wind speed become max.
Press again to exit the turbo mode.
(You can also exit the current mode by pressing the Wind Strength + button.)
The device can be switched on and off by pressing the
"ON & OFF" button
Press the Oscillation button to turn on the oscillation function.
This fan can swing left and right 80.Press this button again to
stop oscillating.
Press the "+" button on the left side of the remote control
to increase the volume of air, press the "-" button on the
left side of the remote control to decrease the airflow.
Cool mode can be used for 9-level settings,
warm mode can be set for 4 levels.
In heat mode, press the temperature button on the right side
of the remote control to set the temperature(1-30℃).
Note:this button does not work in cool mode.
The display number in heat mode is orange.
Press this button to activate the heat mode.
Note: In heat mode there is no strong mode and sleep mode.
In cooling mode, the LED lamp is blue.
Press this button to activate the cooling mode.
Note: The default start mode is the cooling mode.
Press button to turn off tone of fan.The fan cancel“didi"
sound.
En el modo calor, pulse el botón de temperatura en el lado
derecho del mando a distancia para ajustar la temperatura
(1-30℃). Note: estos botones no funcionan en el modo frío.
Press the timer button on the remote control to set 1 to 8 hours
of timing.
Press Sleepmode button on the remote control.
The display shows L and the wind speed become minimum.
Press again to exit the sleep mode.
(You can also exit the current mode by pressing the Wind Strength + button.)
Press Turbo mode button on the remote control.
The display shows H and the wind speed become max.
Press again to exit the turbo mode.
(You can also exit the current mode by pressing the Wind Strength + button.)
The device can be switched on and off by pressing the
"ON & OFF" button
Press the Oscillation button to turn on the oscillation function.
This fan can swing left and right 80.Press this button again to
stop oscillating.
Press the "+" button on the left side of the remote control
to increase the volume of air, press the "-" button on the
left side of the remote control to decrease the airflow.
Cool mode can be used for 9-level settings,
warm mode can be set for 4 levels.
In heat mode, press the temperature button on the right side
of the remote control to set the temperature(1-30℃).
Note:this button does not work in cool mode.
The display number in heat mode is orange.
Press this button to activate the heat mode.
Note: In heat mode there is no strong mode and sleep mode.
In cooling mode, the LED lamp is blue.
Press this button to activate the cooling mode.
Note: The default start mode is the cooling mode.
Press button to turn off tone of fan.The fan cancel“didi"
sound.
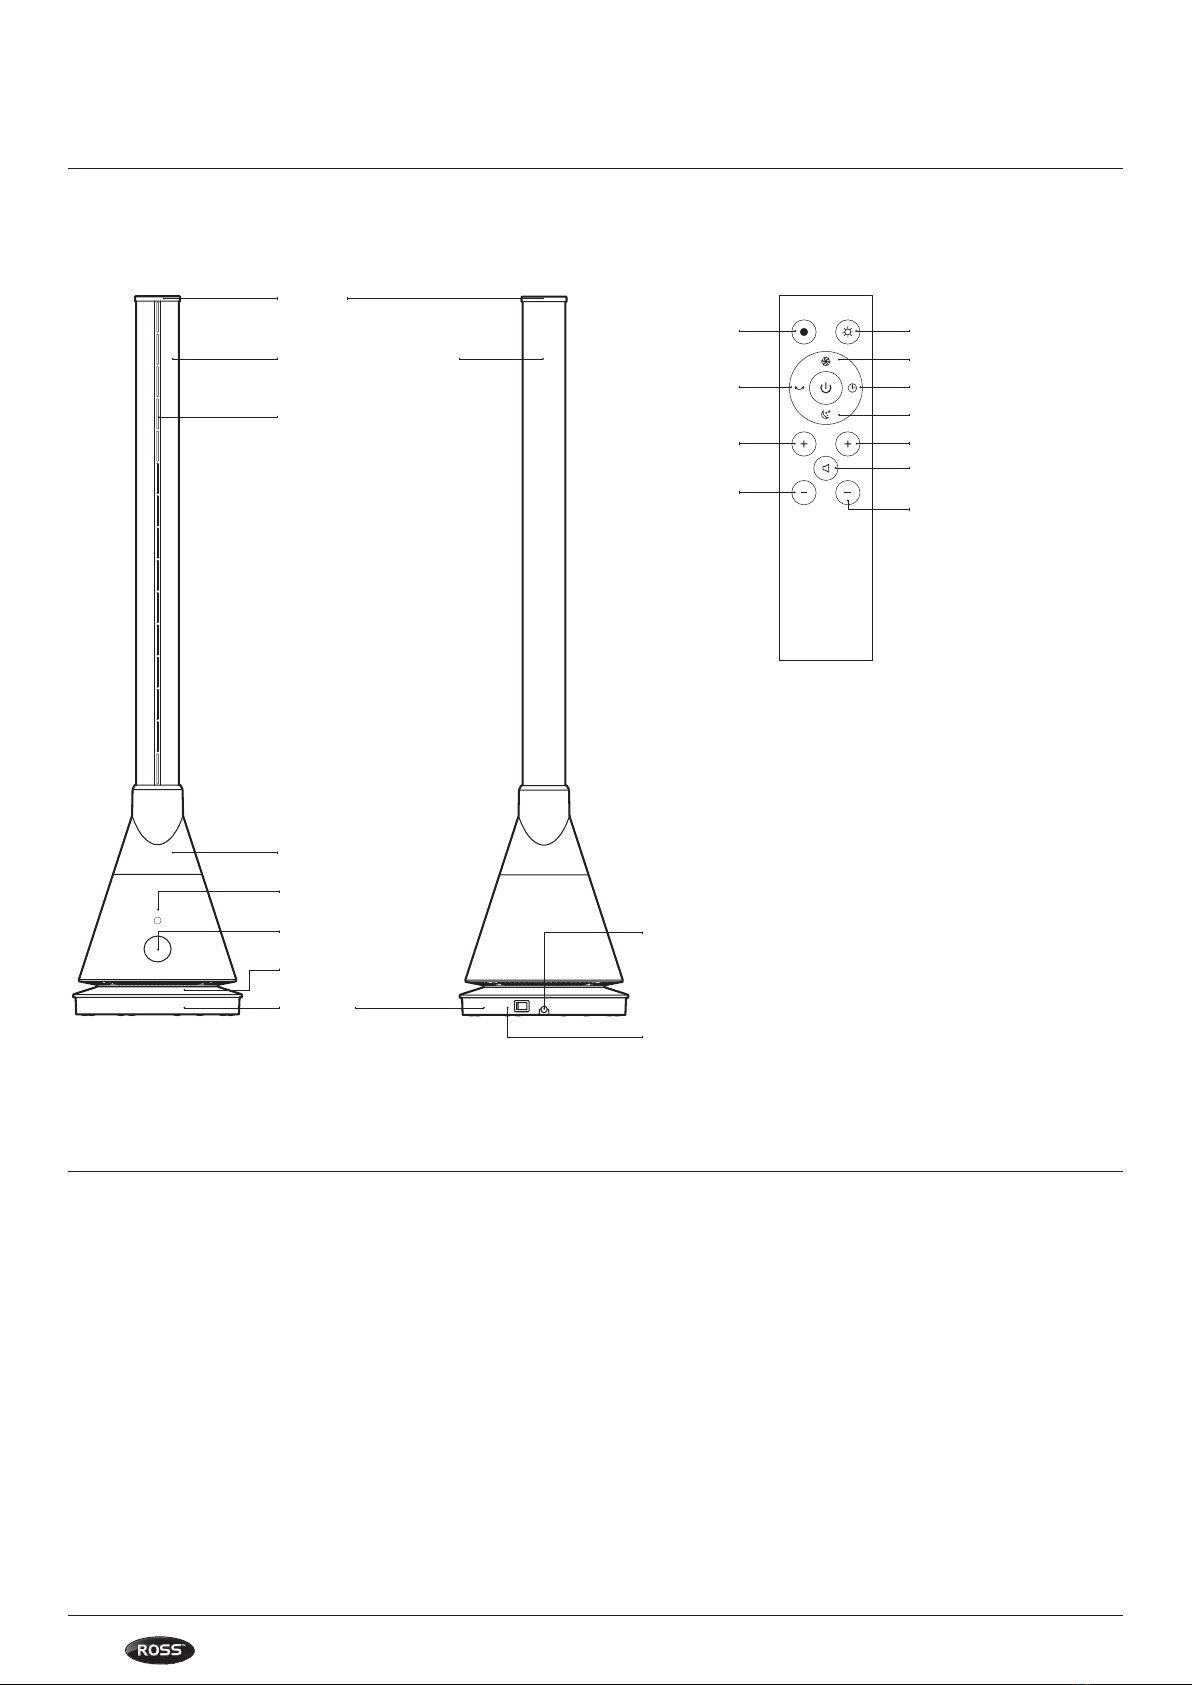
El mando a distancia debe apuntar al receptor de la señal en la pantalla
para maximizar la señal del mando a distancia.
Distancia efectiva: 5m
ADVERTENCIA!
Puede existir un fenómeno producido por la
superposición de las frecuencias del mando a distancia.
Para evitar un mal uso, por favor, opere a distancia:
1. Este ventilador puede reaccionar cuando se utiliza un
dispositivo remoto para otros aparatos.
2. Cuando se utiliza el control remoto de este ventilador,
otros aparatos eléctricos pueden reaccionar.
El interruptor del mando a distancia pondrá este
ventilador en espera, no lo apaga por completo. Utilice
el interruptor principal para apagar completamente la
unidad cuando este ventilador no esté en uso. Si este
ventilador no se utiliza durante mucho tiempo, por favor,
desenchufe el cable de alimentación.
INSTRUCCIONES DE LA FUNCIÓN CALOR
Pulse la tecla de modo caliente y la pantalla mostrará la temperatura
ambiente.
Pulse la tecla de temperatura para ajustar la temperatura y la pantalla
parpadeará digitalmente, que puede ajustarse a 1-30 °C.
La temperatura ajustada debe ser superior a la temperatura ambiente para
que la función de calefacción se active;
Cuando la temperatura ambiente alcance la temperatura ajustada, la
función de calefacción se detendrá y se convertirá en una brisa fresca;
Si la temperatura ambiente es inferior a la temperatura ajustada, la función
de calefacción se activará automáticamente.
Temperatura ajustada > temperatura ambiente: función de calefacción
activada.
Temperatura ajustada ≤ temperatura ambiente: la función de calefacción
se detiene.
NOTA: La temperatura de ajuste predeterminada es de
°C. En el modo caliente, cuando la temperatura
ambiente es inferior a °C, el display sólo muestra , no
muestra el valor de temperatura negativo. El modo de
aire caliente funciona durante horas; la máquina dejará
de funcionar automáticamente. Reinicie pulsando el
botón de encendido del ordenador central o utilizando el
mando a distancia.
MODO CALIENTE: Utilice el mando a distancia para
ajustar la temperatura, el display del aparato no
admite esta operación.
MANDO A DISTANCIA
Temperatura
ambiente
18ºC
Temperatura
de ajuste
25ºC