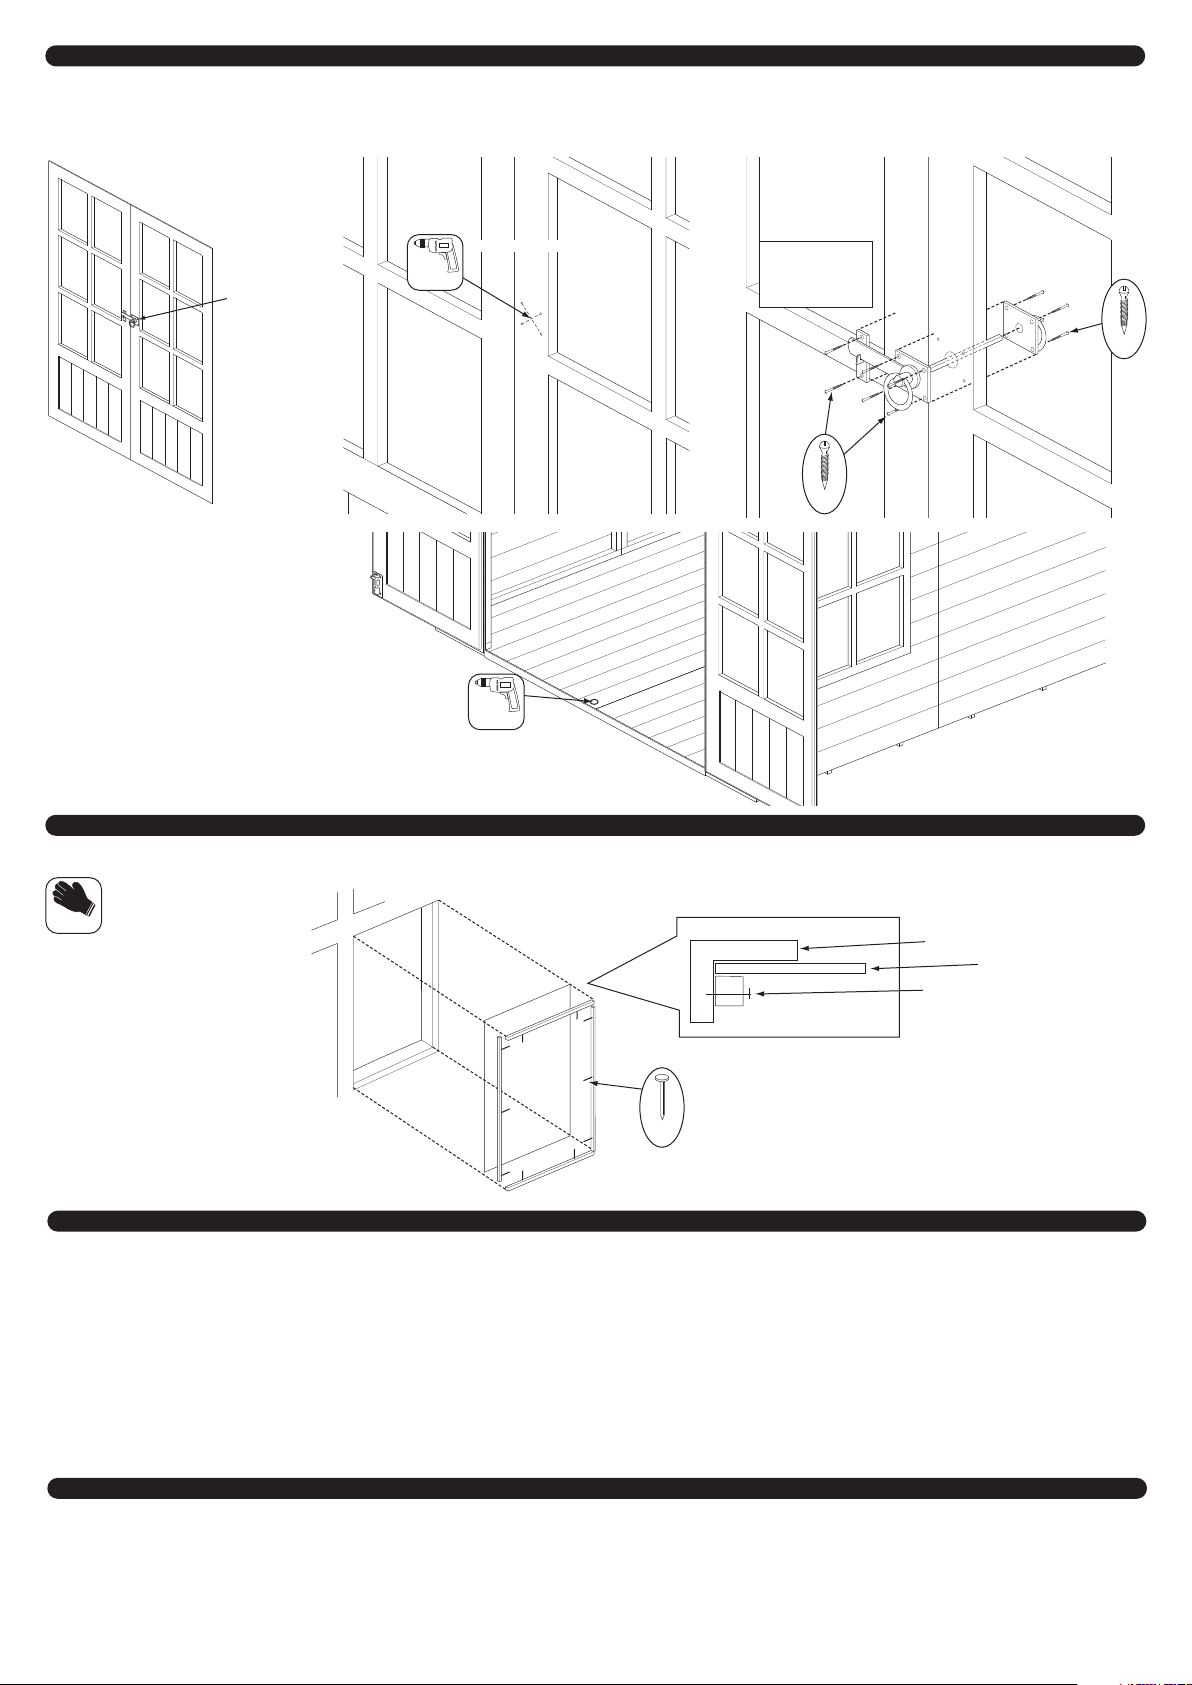
14. Glazing
It is recommended that a waterproof sealant is applied around the edge of the glazing before fitting. Place window pane on the inside of the window frame, nail the beading into
position using 3 x 25mm nails for each vertical bead and 2 x 25mm nails for each horizontal bead.
13. Latch door handle and towerbolt hole
Position the Latch door handle about half way up the door as shown in diagram. Mark the position of the holes on the door. Remove the latch and draw two lines connect-
ing opposite corners, drill a 12mm diameter hole where the two lines cross. Put the latch bar in the hole on the back of the latch, then reposition the latch (putting the bar
through the drilled hole), attach using 4 x 19mm black screws. On the other side of the door fit the inside door handle to the bar then using 4 x 19mm black screws attach
the handle to the door. On the front of the other door position the latch holder so that it holds the latch horizontal. Once in position attach to the door with 2 x 19mm black
screws. With the doors shut, drop the lower tower bolt and mark where it touches the floor. Drill a 12mm hole in the floor for the bolt to fit in.
Window frame
Window pane
Wooden beading
25mm
19mm
Drill
19mm
Drill
12mm diameter hole
Position the latch
door handle about
half way up the door
and mark the screw
holes.
12mm diameter hole
Gloves
wear protective gloves
while handling glazing.
Note
It may be necessary
to shorten the latch
bar to 60mm.
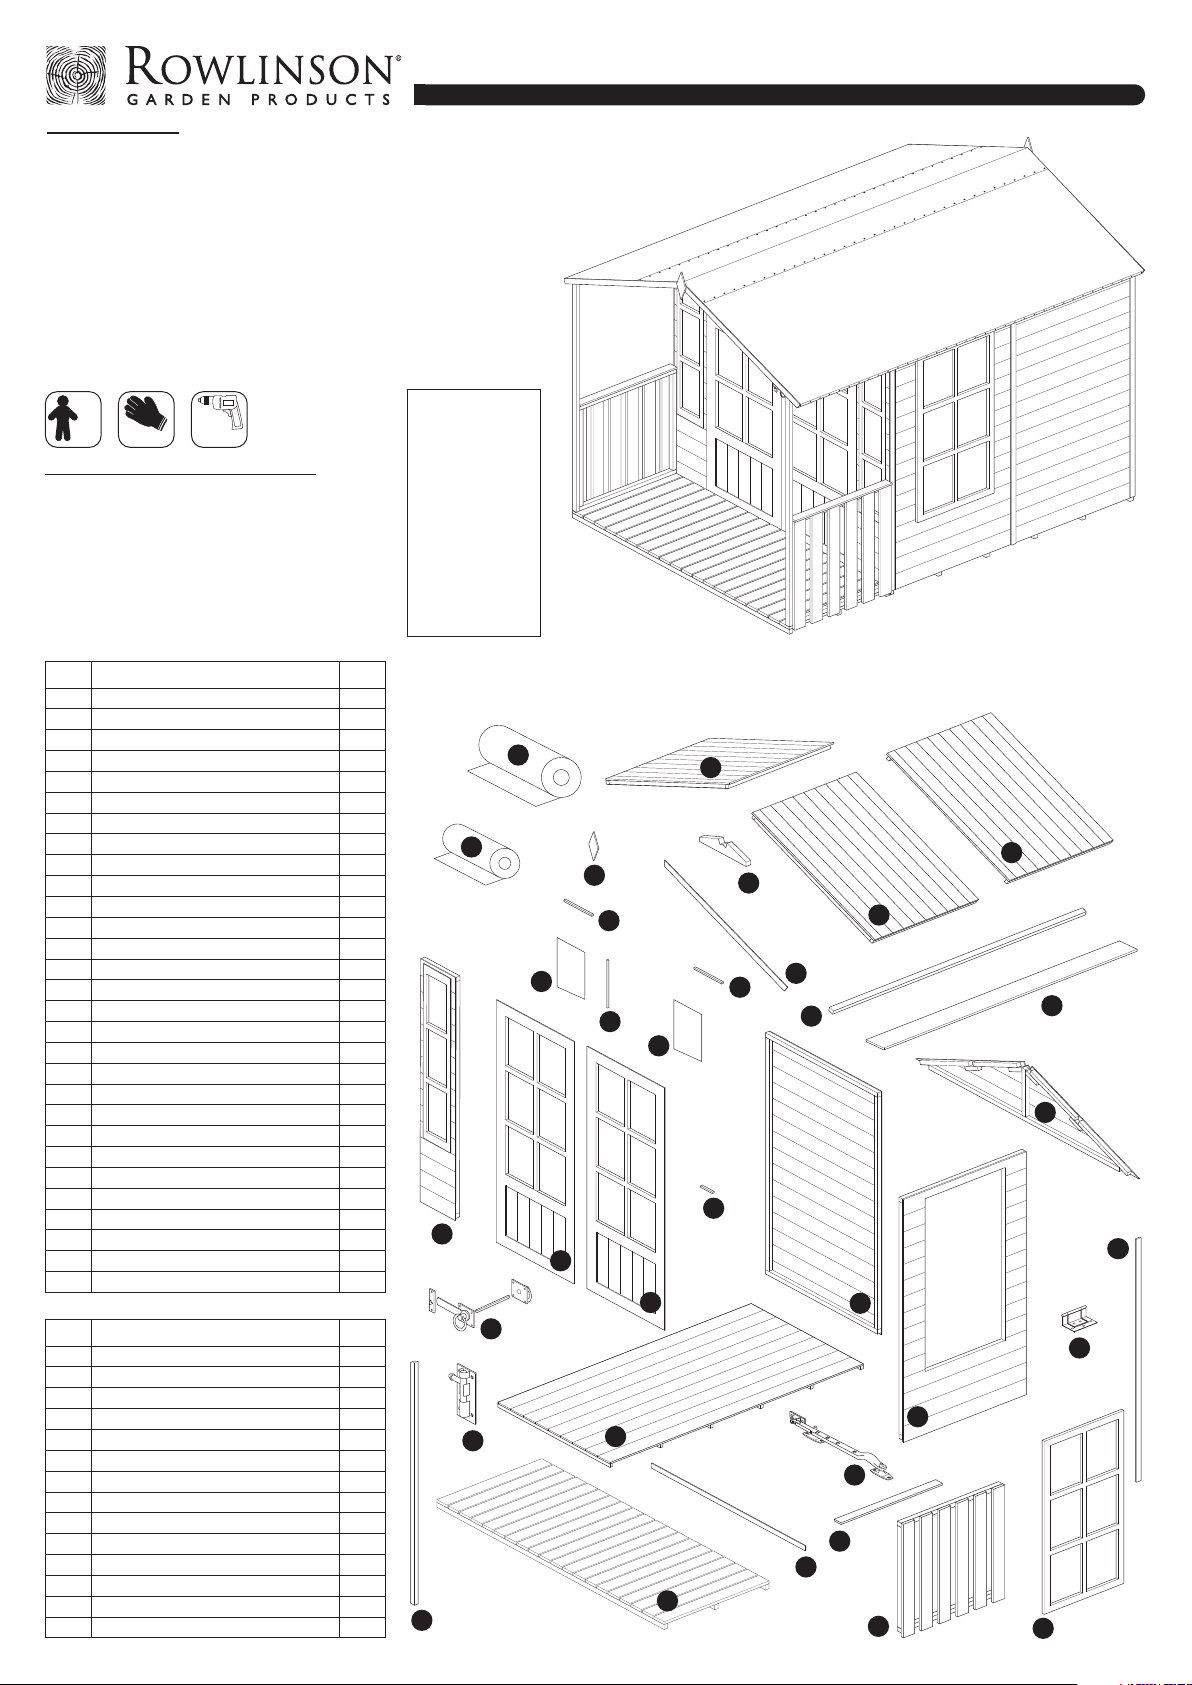
We constantly improve the quality of our products,
occasionally the components may differ from the
components shown and are only correct at time of
printing. We reserve the right to change the
specification of our products without prior notice.
If in doubt of any aspect regarding the assembly, use or safety of your building please contact us :
Help Line (Normal Office Hours) 01829 261121
ROWLINSON GARDEN PRODUCTS LIMITED
Green Lane
Wardle Nr.Nantwich
Cheshire
CW5 6BN 2011 © Rowlinson Garden Products Ltd
Important information - retain for future reference
To VALIDATE the guarantee: Shiplap buildings come ready stained but this is only a preparatory treatment. the building must be properly treated with a recognised external
wood preserver WITHIN 3 MONTHS of assembly and RE-TREATED ANNUALLY thereafter.
Adequate provision must be made to ensure ground contact is avoided and air is able to circulate underneath the building.
Placing the building on a concrete pad or slab base is acceptable provided that the building is not allowed to sit in pooled water during wet conditions.
If the building is to sit on or grass it MUST be erected on pressure treated wooden 50mm x 50mm or similar bearers (These are not supplied in the kit).
Rowlinson Garden Products recommend using pressure treated bearers with all buildings on any type of base.
Timber Information.
As timber is a natural material, there are certain weather conditions that may affect the materials properties. In times of excessive dry spells the material may lose some of
its internal moisture causing a certain degree of shrinkage on a panel and in periods of excessive rain there will be a certain amount of swelling throughout the wooden panels.
This process can not be avoided. If you have problems with certain boards shrinking in dry spells try to decrease the amount of direct sunlight on the building or the amount
of air passing over the building. During hot spells spray water directly onto the panels with the aid of a garden hose.