manuals.online logo
Brands
  1. Home
  2. •
  3. Brands
  4. •
  5. Samsung
  6. •
  7. Washer
  8. •
  9. Samsung Potomac-PJT WF393 Assembly instructions

Samsung Potomac-PJT WF393 Assembly instructions

- 1/39 -
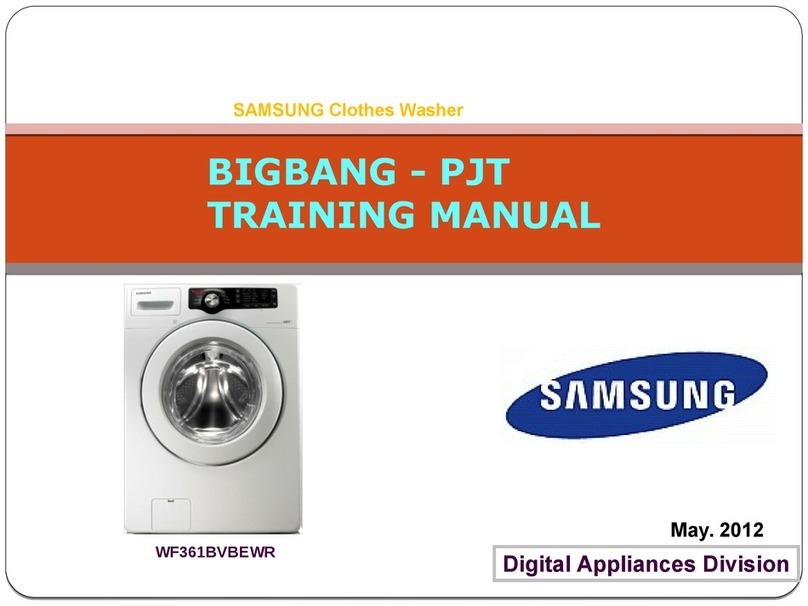
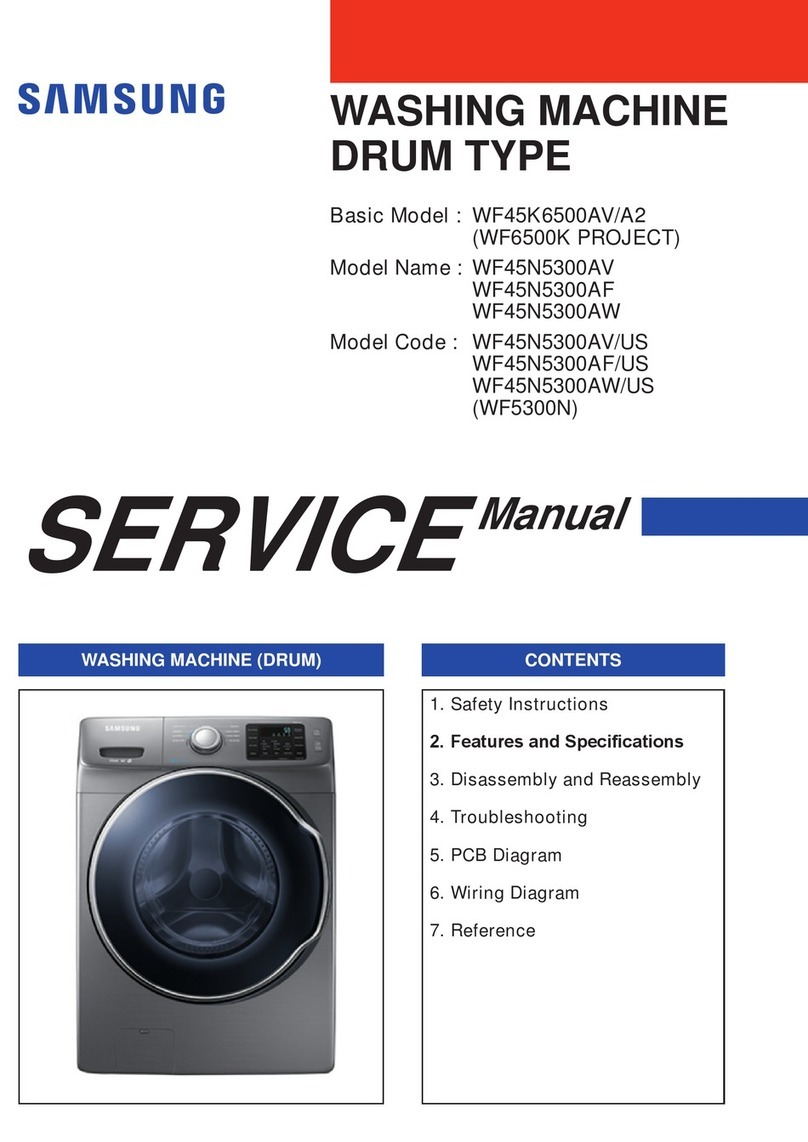
HA Repair Guide
Front-Load Washer
Potomac-PJT
WF393/WF395/WF405
- 2/39 -
•Vibration
•Noise
Vibration
& Noise
•Water Leakage
Leakage
•Water Supply
•No Power
Improper
Operation
•Error-Mode
Error-
mode
•Test mode / Diagnosis
•Circuit Diagram / PBA
Appendix
Potomac-PJT Repair Guide
[ WF393/WF395/WF405]
- 3/39 -
#1. Symptom : Vibration & Noise
1-1. Schematic diagram of Repair
Check-1
Step of Cause
Check-2
Tip
Code
Block
# 1
# 2
# 3
Set-Vibration
1.Spin-basket defect
Leg condition check
Ball-balancer oil-leakage
Weight-Balance
coupling
Spin-Basket
concentration
1-1
Balancer
Weight
Spin
concentra
tion
2.Damper defect
Diagnosis of Tub
movement noise
Hanger-Spring
separation
Damper separation
Loosening of Damper
coupling
1-2
Damper
Hanger
3.Unstable place
for installation
Floor moisture
environment
Installation in low-temp
environment
Dryer Pair installation
narrow
Rear hose interference
Floor shaking
1-3
Place of
installatio
n
Installatio
n environ
ment
4. Installation defect
Leg level installation
check
Non-Slip Pad Unattached
Moving Pad/Pan-Drain
1-3
Level
installatio
n
Non-Slip
Sheet
Installatio
n
Spin-Noise
1.Shaft & Frame
Rotor friction during
spinning mode
Tub Bearing rust
Frame friction
1-4
Motor
-Rotor
Tub-
Bearing
Frame
2.Motor defect
Spin-mode Stator check
Diagnosis of motor Coil
Hall sensor check
1-5
Motor
-Stator
Hall-S/S
3.Pump-Drain defect
Pump-Case Damage
Fixing bolt loosened
Foreign substance in
pump
Impeller Damage
1-6
Pump-
Case
Impeller
Foreign
Substanc
e
4.Wrong usage of
product
User uses moisture-
proof cloth
Wash little amount
Spin course only
1-7
Moisture-
proof
cloth
5.Product inherent
characteristics
Resonance RPM band
shaking
Shaking at the beginning
Tub Ball Noise
1-7
Resonanc
e
phenome
non
Balancer
Chassis
Project
Basic Model
Type
Drum
Potomac
WF393/395/405
Front-Load / Power Foam
- 4/39 -
Step 1
①Check deformation of Leg of Frame bottom.
- Leg-bottom Rubber is damaged.
- Right angle is not maintained due to Leg Bolt
deformation.
②Adjust level installation of leg & inspect place
of installation.
- Refer to Level Product Installation Guide Tip 1-3.
Step 2
①Check Spin mode.
- Press Soil+Signal+Power to enter the
Test mode.
- Turn knob and select “SPn” to start.
- Check if Spin reaches Extra-High LED.
②Check Unbalance Test.
- Run Spin Test with 300g placed on one side
unbalanced.
※ 300g – 2 Towels OR Jig for this purpose only
- Check for abnormal noise & Set moving.
Step 3
①Oil leakage of Balancer
- Rotate Spin-Basket to check frictional noise
between balls.
※ If the frictional noise is dull, it is regarded as OK.
②Abrasion of Weight-Balancer
- Check if Weight-Balancer shakes.
- Gap is created if the screw head of fixing bolt wears
out.
- Couple more OR replace it.
③Check the concentration of Spin-Basket.
- Check if Spin-Basket moves up and down.
- Check if Spin-Basket vibrates due to broken fixing
bolt.
※ After SVC, explain to the customer how to use it.
①Check the use condition of Customer.
- Check if moisture-proof cloth is used.
: Water–Proof Sheet, Mats, clothing
Check Point Spin-Basket / Check the user environment condition.
Tip 1-1. Frame & Spin-Basket Abnormality
- 5/39 -
Step 1
①Check Tub for abnormal noise.
- Shake the Tub back and forth to check where the
noise is coming from.
②Hanger Spring connection & Grease application
condition
- Check if grease is properly applied between
Hanger Spring and Hanger Guide friction part.
Step 2
①Check if Damper is separated or unassembled.
- If the bolts connecting damper
- If the dampers are rusted or not fastening,
☞replace.
②Check the condition of loosening of Damper
connection.
- The shape of connected part of Bottom-Plate is
defective, and thus it does not rotate properly.
- It does not rotate properly because it was
connected too much in the assembling process.
☞When it does not rotate properly, “Dda-dda-dda”
noise is generated due to friction between Damper &
Bottom-Plate. Thus, do as in ③.
③What to do when Damper connection is
loosened.
- Add Nut M10.
- Product Name: Nut-Hexagon (6021-001588)
※ Damper connecting force : 250 ~ 350kgf.㎠
Check Point Check the operating condition of Damper.
Tip 1-2. Damper & Hanger Abnormality
- 6/39 -
Step 1
①Check if there are any shipping bolts
on the back of washer.
Shipping bolts should be removed & kept.
②When installing, check the frictional relationship
with the surroundings.
- Install a pair of dryers together, causing
interferential noise when the Frame shakes
during spinning mode.
③Check the installation levelness & Floor-moving
phenomenon.
Case #1 - The levelness, which is measured with
levelness-measuring apparatus, is poor.
Case #2 –It shakes due to old floor (lumber) of
laundry room.
☞Re-installation is recommended so that it does not
influence on vibration.
Step 2
①Check if pedestal is installed properly.
- In case of old pedestal, check if all bolts
connecting washer and pedestal are
tightened properly.
②Condition of levelness of Leg installation
- If the rubber of legs is damaged, replace it.
- Lower leg is better for vibration.
Shorten the leg height and lock up the legs
after adjustment.
- Check if washer inclines to one side and
level washer again with adjustment of legs.
③Environment with slippery floor (Tile, Moisture)
- Attach on-Slip Pad.
④Material which is inappropriate for Leg floor
according to rules.
Case#1 Frictional noise of Pan Drain
Case#2 Use floor protection as sub-material for the
Leg bottom.
☞Re-installation is recommended so that it does
not influence on vibration.
Check Point Check the installation place and stability condition.
Tip 1-3. Installation Place & Installation Stability Abnormality
※ Pedestal Damage
Case
※ Installation
Error Case
- 7/39 -
Step 1
①Assembly Bolt of Washing Motor
- Check the assembly status of the bolt.
If the bolt is loose, tighten it.
②When there is abnormal noise, have the
Rotor disassembled for checking.
- When the weight sensor is operating, check
for frictional noise of washing motor while
Motor-L / Motor-R is rotating.
- Remove iron foreign substance, if any,
absorbed by Rotor Magnetic.
Step 2
①Jet Engine noise during spinning mode
- Push Soil+Signal+Power to enter the Test
mode.
- Turn knob and select “SPn” to start.
- Check if Extra-High LED of Spin is reached.
☞If the tub is rotating empty without load,
check the roaring sound during high-speed
rotation.
②In the case of abnormal noise or Bearing
abnormality, replace Tub-back.
Step 3
①Check frictional noise between parts of
Frame.
- Shake the Tub back and forth to check where
the noise is coming from.
②Inspect the main parts from which noise is
generated.
- Add sponge to frictional part of Frame-Front.
☞Add more sponge to noise-generating part.
Check Point Check the operating condition of shafting.
Tip 1-4. Shafting Abnormality
- 8/39 -
Step 1
①Rotor with your hand and check the gap
- If the gap is not the same as in the photo
right,
- it could cause noise during the spin cycle
②Check if Motor Wire Pin fell out
- photo of pin which had fallen out added
- Must check regarding contact fail caused by
the opening of Pin inside the terminal.
Step 2
①Check of Resistance motor (U-V-W).
☞The Resistance : approximately 11Ω
②Check the Hall Sensor.
- Check of ⓐ-VCC(PNK) and ⓓ-GND(ORG)
☞The Voltage : approximately 5.0V
- Check of ⓑ-U(RED)/ⓒ-V(BLU) and ⓓ-
GND(ORG)
☞The Voltage : approximately 0~1.2v Pulse
※ Rotor the slow turning by manually
☞Replace the Motor
Check Point Check the operating condition of Motor.
Tip 1-5. Motor Abnormality
ⓓ
ⓐ
※ⓑ/ⓒ:0↔1.2v
.
- 9/39 -
Step 1
①Mechanical Friction Noise
- When pump drain is operating,
it vibrates a little. If drain parts such as
drain hose are near other parts, it may
cause mechanical friction noise.
Step 2
①Foreign materials in Pump Drain
- Open debris filter and check there are
foreign materials such as coins, pins etc.
②Check pump drain impeller is broken.
Step 3
①Check if the fixing part of Pump-Case is loosened.
- Check if the two bolts fixing Frame-Plate bottom
are loosened.
- Check if the fixing part of Pump-Case front is
loosened.
☞Assemble the Pump-Case again.
②One assembly part of Pump-Case front is loosened.
- Frictional noise is generated due to vibrating up
and down.
☞Assemble Pump-Case again.
Check Point Check the condition of Pump-Drain.
Tip 1-6. Pump Noise Abnormality
- 10/39 -
Step 1
※ Explain to NDF customer.
- Check the wrong usage condition of laundry
and explain recommended usage.
- Do not use Water–Proof Sheet, Mats and
clothing.
Step 2
①Resonance phenomenon occurs in the rising
section during spinning mode.
- Resonance Frequency: 200~450rpm section
- In the resonance frequency, Tub moves.
※ It is a resonance phenomenon occurring in
the rpm rising section for water extraction at
the beginning, which is normal.
②Ball friction occurs when Spin-Basket
rotates in low speed.
- Explain that the frictional noise from the Ball,
which is the center of gravity in the Balancer,
is normal.
※ If the Ball in the Balancer makes strong
frictional noise while checking Tub, then it
means that the oil is leaking. Thus, replace
Spin-Basket.
Check Point Explain the NDF and product characteristics.
Tip 1-7. Explanation of NDF and product characteristics
Step 1 : Small Loads Case
: If loading the laundry whose weight is 1kg ±
0.5kg, it is easily inclined to one side.
☞Add more laundry to make it normal.
Step 2 : Unbalance of laundry
: Stop using Water–Proof Sheet, Mats and clothing.
☞Do not input the laundry listed above, since
water does not drain during high-speed spinning
mode, causing unbalance problems.
Step 3 : Unbalance of bedding, carpet, and etc.
: Bedding should be washed alone less than 3.5kg.
☞Solution: Roll up the bedding before putting
into washer.
※ Do not wash Cotton bedding, wool bedding
and mink blanket.
- 11/39 -
#2. Symptom : Water Leakage
2-1. Schematic Diagram of Repair
Check-1
Cause
Check-2
Tip
Code
Block
# 1
# 2
# 3
Water Supply
1. Water supply
hose connection
Tool is loose due to
over-connection.
Packing omission
Y-Joint Seal leakage
Cold water alone
installation
Wall-attached
installation
2-1
Water
supply
hose
Water
supply
valve
Y-Joint
2.Water-V/V
leakage
Foreign substance
enters pipe.
Nozzle-Connector
Body damage
Packing assembly bad
Freezing in the winter
2-2
Water
supply
valve
Water
supply
hose
Pipe
Water Leakage
1. Detergent
drawer leakage
Wrong powder used
Hose
separation/friction
Detergent drawer does
not open/close
smoothly.
2-3
Nozzle
Detergent
2.Tub-related
leakage
Heater assembled
wrong
Tub damage
Diaphragm leakage
User wrong usage
2-4
Tub
Heater
Diaphrag
m
3.Pump leakage
Pump-Drain hose
Pump-Case
Drain hose
Handle-Filter
2-5
Pump-
Case
Drain-
Hose
Installation/
NDF
1. Install & NDF
Dirty water flows
backward
Continuous drainage
2-6
Water
supply
hose
Clamp
Chassis
Project
Basic Model
Type
Drum
Potomac
WF393/395/405
Front-Load / Power Foam
- 12/39 -
Step 1
①Check the exterior of water supply valve unit.
- Check if screw head is worn out due to over-
connection using water supply hose tool.
- Check if the end of water supply valve is scratched
in the installation process.
Step 2
①Check the water supply hose unit.
- Water leaks due to loose Caulking.
- Water pressure check: Shall not exceed 8kgf.㎠max.
②Check if sub-material unit installed is defective.
- Check if internal Packing-Seal is omitted or worn
out.
- Check if water leaks from Y-Joint unit.
: Apply more Seal Taping to water-supply parts.
③If water leaks due to installation environment outside
the product, check out Step 3.
Step 3
①Hose is bent during installation.
- Since the product rear is too close to the wall, hose
is bent and friction occurs. Thus, water leaks.
- 6 in(152mm) is recommended for the distance
between the product rear and the wall is
recommended.
※ Explain to the customer after SVC.
=> Install it again such that it does not influence water
leakage and explain how to use it.
Check Point Check the condition of Water-Hose.
Tip 2-1. Water-Hose & Connection Abnormality
- 13/39 -
Step 1
①Check if water supply hose filter is clogged.
- Separate the filter with a tool.
②Filter-clogging check & cleaning
- Clean it regularly to prevent the accumulation of
foreign substance.
- Prevent the water leakage caused by oil-filled valve.
※ When foreign substance enters through pipe, clean
the pipe and recommend to the customer that
another filter be installed.
Step 2
①Check if water leaks from Nozzle-Connector.
- The valve preventing backward-flow is damaged by
outside impact. Thus, check the water leakage.
- Water leaks a little due to separation of internal
Packing.
②Check for water-leaking part of water supply valve.
- Water leaks due to continuous water supply
because foreign substance enters inside.
- Water supply valve body is damaged; and thus
water leaks.
- Packing is not connected properly, and thus water
leaks.
③If the noise or operation is not normal, check step #3.
Step 3
①Water supply valve Body Damage
- Body of water supply valve is damaged due to
outside air in the winter.
※ Explain to the customer after SVC.
Re-install it such that it is not influenced by outside
air in the winter and explain to the customer how
to use it.
Check Point Check the condition of Water-V/V & connection.
Tip 2-2. Water-V/V & Connection Abnormality
- 14/39 -
Step 1
①Check if water supply valve filter is clogged.
- Reduction in flow velocity results in clogging
from detergent residue.
②Detergent Leakage-Point
- Check if powder is used in liquid-detergent
drawer.
- Detergent dispenser is clogged due to using too
much powder, which causes front water leakage.
③Explain to the customer regarding detergent.
Step 2
①Check if hose is separated from Nozzle
connecting part.
- Check if it is separated when hand-pulled.
- Make connection after washing the oil substance
out the hose.
②Abrasion of detergent U-trap hose
- Make the hose ring connecting part located at
the end.
③Check for jamming phenomenon when
opening/closing detergent drawer.
- When jamming occurs during opening/closing,
Siphon phenomenon of fabric softener occurs
due to impact.
- Check if rear projection is separated and insert
Hook.
Check Point Check the condition of Detergent & Bleach.
Tip 2-3. Detergent & Bleach Abnormality
※ Detergent residue
due to powder input
※ Clogging due to
Too much Powder
- 15/39 -
Step 1
①Check if water leaks from the Heater.
- Water leakage due to unconnected heater
- Water leaks a little due to incomplete heater
connection.
☞Connection Spec : Shall maintain 4~8mm.
If washing heater is not assembled properly,
water leaks from bottom as soon as water
is supplied.
Check it and if needed, re-assemble it
tightening the nut with M10 tool.
②Check for water leakage due to tub damage.
Step 2
①Check for the water leakage of Diaphragm.
- Adhesion reduces due to one-sided
connection of Diaphragm.
②Order of Door water leakage check
. Check if the rear shipping bolts are
removed.
. Check after running 3 cycles in normal
course.
. Remove wire from the front Diaphragm and
re-assemble.
Step 3
①Water leaks from the Diaphragm of Door
bottom.
Case#1 –Water leaks due to hair & lint.
Case#2 –Damage due to pet dog & sharp
accessories
Case#3 –Jamming when laundry is put in.
②Check the customer usage condition and
explain how to use it.
Check Point Check the condition of Tub & Diaphragm.
Tip 2-4. Tub Abnormality
※ Clean hair. ※ Clean Door-Glass.
※ Water leakage
Due to unassembled
Heater.
- 16/39 -
Step 1
①Hose Between Tub & Pump Drain
- Check for the connection of hose drain
connecting tub and pump drain.
- Check if water leaks due to damaged Hose
Drain.
②Pump-Case Damage
- Check for the connection
between tub & pump.
- Check if water leaks from pump of Case
- All hoses connecting to pump should
be checked.
③Drain-Hose Damage
- Check if there are holes on drain hose.
- Check for any leaks in the drain hose.
☞Check for the environment which causes
drain hose friction due to appliance vibration
at the rear.
Step 2
①Check if there is leakage at the debris filter
and the drain cap.
②Check parting lines and crack on pump case.
Check Point Check the condition of Pump & Hose.
Tip 2-5. Pump Connection Abnormality
- 17/39 -
Step 1
①Waste water flows back into the washer.
②Drain hose is installed deep into the pipe of
product which is installed in the basement.
Thus, waste water discharged from first floor
flows back into the product.
③As in photo, distance the drain hose so that
drain hose may not go back to the upper
part of U-trap.
Step 2
①Water drains during washing mode.
②If drain hose is installed after loosening the
fixing part, then water drains continuously.
③As in the warning label, re-install it without
disassembling the drain hose fixing part.
Then, explain how to use it.
Step 3
①Drain filter is not assembled properly when
opening/closing it.
②Sand & tiny foreign substance, etc. in laundry
accumulate in drain filter; thus, water is not
drained.
③Water leaks when opening/closing the Handle-
Filter because it is not assembled properly.
☞Explain how to assemble filter when
opening/closing it for cleaning.
Check Point Check the condition of Install & NDF.
Tip 2-6. Install & NDF Connection Abnormality
Re-install the drain hose which
flows back to the U-Trap pipe.
※ Filter assembled wrong
- 18/39 -
#3. Symptom : Improper Operation
3-1. Schematic Diagram of Repair
Check-1
Step
Check-2
Tip
Code
Block
# 1
# 2
# 3
No -
Operation
1. No power
Power-Cord breaks.
Fuse breaks.
EMI-Filter breaks.
Main-Harness defect
3-1
Power-
Cord
EMI-Filter
Harness
2. No-Spin
Moisture-proof cloth
usage condition
Laundry recommended
use
Loose motor terminal
Hall sensor Pulse check
3-2
Laundry
Motor
Hall
Sensor
Washing
feature
1. No Water supply
Wall-attached installation
Water supply valve check
Wrong installation of
Cold/Hot water
Clean foreign substance
in Pipe filter
3-3
Water
supply
hose
installation
Filter
Water
supply
valve
2. Weight sensing
defect
Weight sensing course
Motor unit constraint
Laundry
3-4
Washing
motor
Hall센서
PBA
3. Water level
sensing defect
Water level hose
Puncture
Water level hose
clogging
Water level sensor
breaks.
Water level frequency
check
3-5
Water
level
hose
Water
level
sensor
Detergent
feature
1. Detergent residue
Water remains.
Detergent residue
Gel, highly-enriched
detergent
3-6
Detergent
Rinse
Bleach
2. Course water
supply check
Detergent, softener,
Bleach
Fast time Down check
3-7
PBA
Water-
V/V
Chassis
Project
Basic Model
Type
Drum
Potomac
WF393/395/405
Front-Load / Power Foam
- 19/39 -
Step 1
①No-Power does not turn on.
- Measure the electric power of socket and
check if it is the rated one.
Step 2
①Measure the voltages of both ends of EMI-
Filter.
☞Input voltage measurement - AC120V NG :
Replace the Power-Cord.
☞Output voltage measurement - AC120V NG :
Replace the EMI-Filter.
Step 3
①Check AC power supplied to Main PBA.
- Measure AC voltages of Power Relay#1-d②
(WHT) & CN#6-①(BLU) terminals: AC 120V
☞OK -> Replace PBA.
☞NG -> Check the voltage of Sub PBA.
①Check DC power supplied to Sub-PBA.
- Measure AC voltages of CN#7-⑤(ORG) &
CN#7-⑥(BLK) terminals: AC 120V
☞OK -> Replace the Harness.
☞NG -> Replace the Sub PBA.
Check Point Check the condition of Power Cord/Fuse/EMI-Filter.
Tip 3-1. No Power Abnormality
※ Input voltage
measurement
※ Output voltage
measurement
- 20/39 -
Step 1
※ Explain to NDF customers how to use it.
- Check the wrong usage condition of laundry
and explain the recommended use.
- Do not use Water–Proof Sheet, Mats, and
clothing.
Step 2
①Check if Motor Wire Pin
- photo of pin which had fallen out added
- Must check for contact fail due to opening of
Pin in the terminal.
②Hall sensor check
- Check of ⓑ(RED)/ⓒ(BLU) and ⓓ-GND(ORG)
☞The Voltage : approximately 0~1.2v Pulse
※ Rotor the slow turning by manually
Check Point Check the user usage/install condition for Unbalance and the motor condition.
Tip 3-2. No-Spin Abnormality
ⓓ
ⓐ
※ⓑ/ⓒ:0↔1.2v
.
Step 1 : Small Loads Case
: If loading the laundry whose weight is 1kg ±
0.5kg, it is easily inclined to one side.
☞Add more laundry to make it normal.
Step 2 : Unbalance of laundry
: Stop using Water–Proof Sheet, Mats and clothing.
☞Do not input the laundry listed above, since
water does not drain during high-speed spinning
mode, causing unbalance problems.
Step 3 : Unbalance of bedding, carpet, and etc.
: Bedding should be washed alone less than 3.5kg.
☞Solution: Roll up the bedding before putting
into washer.
※ Do not wash Cotton bedding, wool bedding
and mink blanket.

This manual suits for next models

2

Other Samsung Washer manuals

Samsung WF330ANW/XAA Operating instructions

Samsung

Samsung WF330ANW/XAA Operating instructions

Samsung WF42H5200AW User manual

Samsung

Samsung WF42H5200AW User manual

Samsung WT14J4200MB/AP User manual

Samsung

Samsung WT14J4200MB/AP User manual

Samsung WF7450S6 User manual

Samsung

Samsung WF7450S6 User manual

Samsung WF328AAG User guide

Samsung

Samsung WF328AAG User guide

Samsung SWE-1000 User manual

Samsung

Samsung SWE-1000 User manual

Samsung WA40J3000AW User manual

Samsung

Samsung WA40J3000AW User manual

Samsung WD95J5 Series User manual

Samsung

Samsung WD95J5 Series User manual

Samsung SWM-1000 User manual

Samsung

Samsung SWM-1000 User manual

Samsung Washing machine User manual

Samsung

Samsung Washing machine User manual

Samsung WA8585D1 User manual

Samsung

Samsung WA8585D1 User manual

Samsung WF8604AH User manual

Samsung

Samsung WF8604AH User manual

Samsung WW90H5200E Series User manual

Samsung

Samsung WW90H5200E Series User manual

Samsung WA54R7200A Series User manual

Samsung

Samsung WA54R7200A Series User manual

Samsung WA476DSHASU/A1 Manual

Samsung

Samsung WA476DSHASU/A1 Manual

Samsung WD-B1265C User manual

Samsung

Samsung WD-B1265C User manual

Samsung WW75J4 series User manual

Samsung

Samsung WW75J4 series User manual

Samsung SWT65D2 User manual

Samsung

Samsung SWT65D2 User manual

Samsung WW80T3040 Series User manual

Samsung

Samsung WW80T3040 Series User manual

Samsung WF0804W8E 8kg 1400rpm Ecobubble Washing... User manual

Samsung

Samsung WF0804W8E 8kg 1400rpm Ecobubble Washing... User manual

Samsung WW6 J4 Series User manual

Samsung

Samsung WW6 J4 Series User manual

Samsung WA120S Instruction Manual

Samsung

Samsung WA120S Instruction Manual

Samsung WA15J673 Series User manual

Samsung

Samsung WA15J673 Series User manual

Samsung WF1114XBD User manual

Samsung

Samsung WF1114XBD User manual

Popular Washer manuals by other brands

Tricity Bendix De Luxe 7001 Installation and operating instructions

Tricity Bendix

Tricity Bendix De Luxe 7001 Installation and operating instructions

Bush WMNSN612W Installation & user's instructions

Bush

Bush WMNSN612W Installation & user's instructions

Arctic WUE 7512 XWW user manual

Arctic

Arctic WUE 7512 XWW user manual

Whirlpool 859991538480 Quick installation guide

Whirlpool

Whirlpool 859991538480 Quick installation guide

Bosch WAE20060UC installation instructions

Bosch

Bosch WAE20060UC installation instructions

Gaggenau WM260164 User manual and installation instructions

Gaggenau

Gaggenau WM260164 User manual and installation instructions

mabe WMA06DXESXS owner's manual

mabe

mabe WMA06DXESXS owner's manual

Ariston AW 125 user guide

Ariston

Ariston AW 125 user guide

LG WM4270H Service manual

LG

LG WM4270H Service manual

Crosley Conservator CAWX629JQ1 Use and care guide

Crosley

Crosley Conservator CAWX629JQ1 Use and care guide

Haier HWM100-99VGS user manual

Haier

Haier HWM100-99VGS user manual

Whirlpool 4LA9300XT Use & care guide

Whirlpool

Whirlpool 4LA9300XT Use & care guide

Midea MFH180-G1302DS F01E-US Technical service guide

Midea

Midea MFH180-G1302DS F01E-US Technical service guide

Maytag MVWB450WQ - Bravos 5.0 cu. Ft. IEC Capacity... Use and care guide

Maytag

Maytag MVWB450WQ - Bravos 5.0 cu. Ft. IEC Capacity... Use and care guide

Haier HWM65-0523K user manual

Haier

Haier HWM65-0523K user manual

Beko WMA510 manual

Beko

Beko WMA510 manual

Bosch WUU24T7XES User manual and assembly instructions

Bosch

Bosch WUU24T7XES User manual and assembly instructions

Zanussi ZWH 7160 AP user manual

Zanussi

Zanussi ZWH 7160 AP user manual

manuals.online logo
manuals.online logoBrands
  • About & Mission
  • Contact us
  • Privacy Policy
  • Terms and Conditions

Copyright 2025 Manuals.Online. All Rights Reserved.