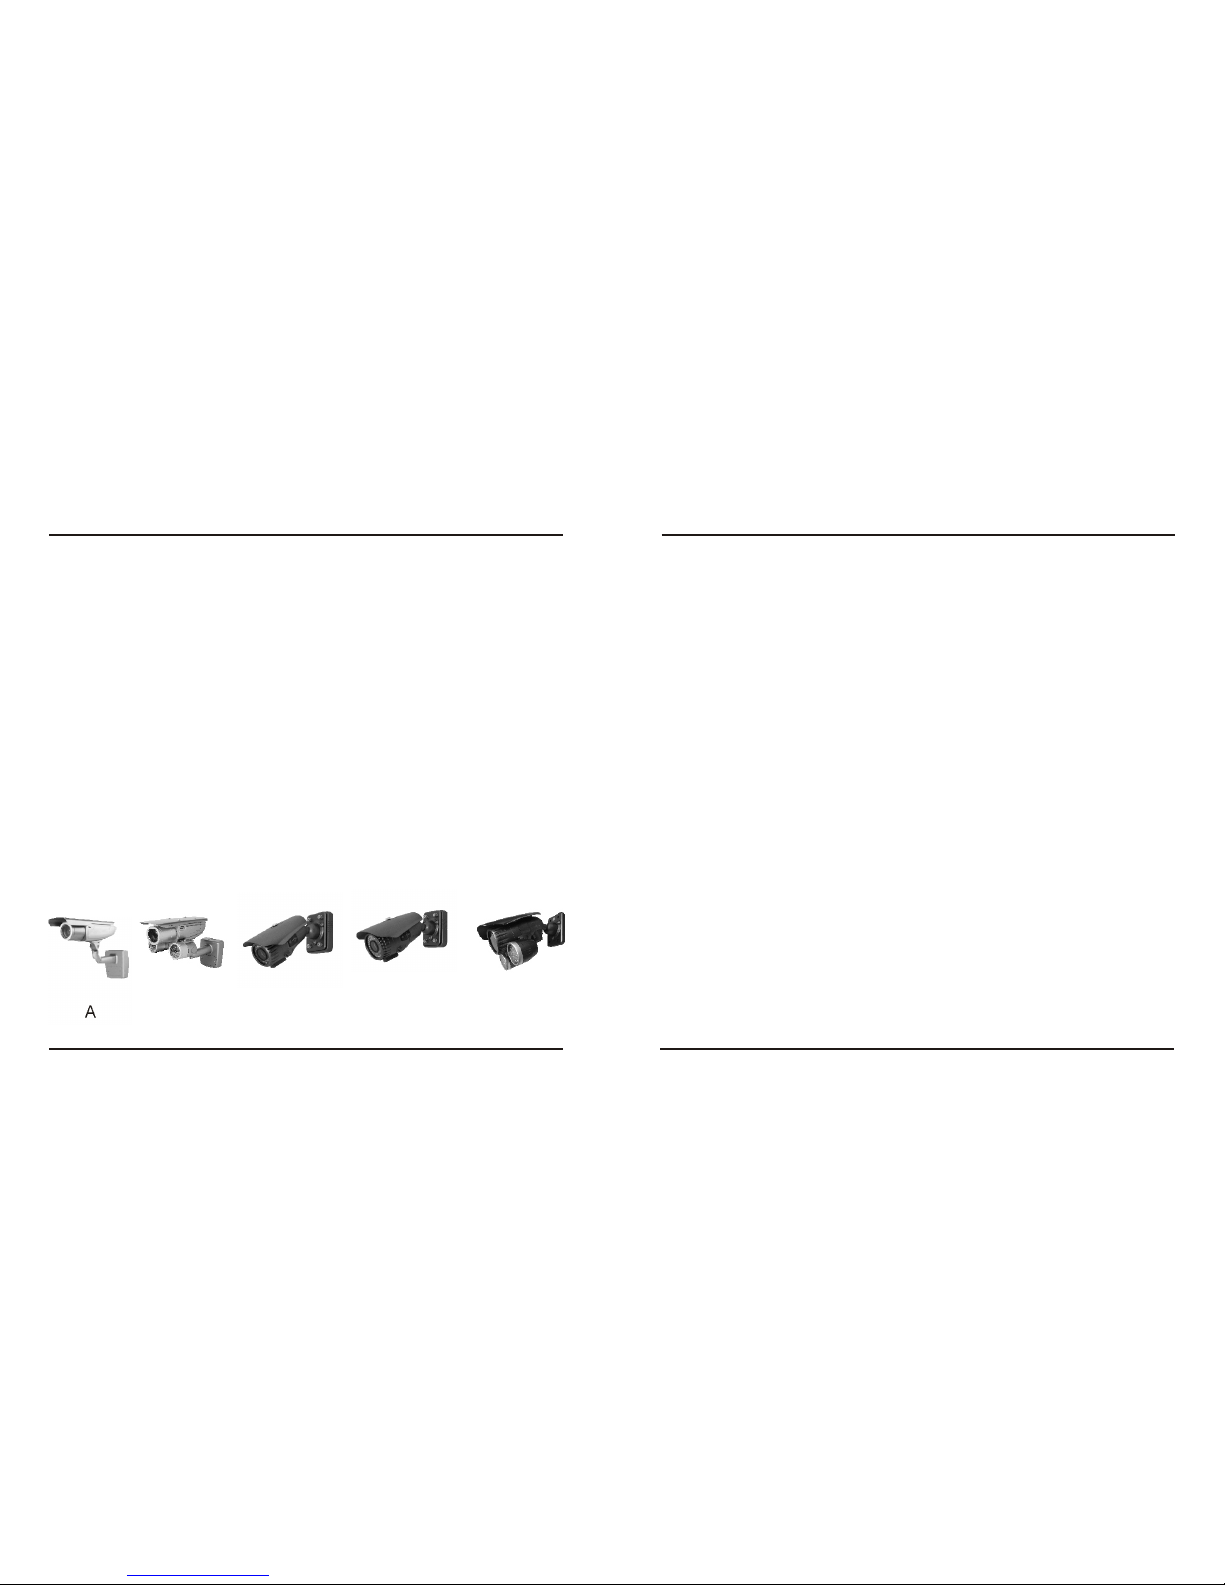
Sanan SA-1518P User manual

Ultra Wide Dynamic (IR Water-proof) Camera
User's Manual

SA series Ultra
1. Overview
ACD
BE
1
2.Notes
2
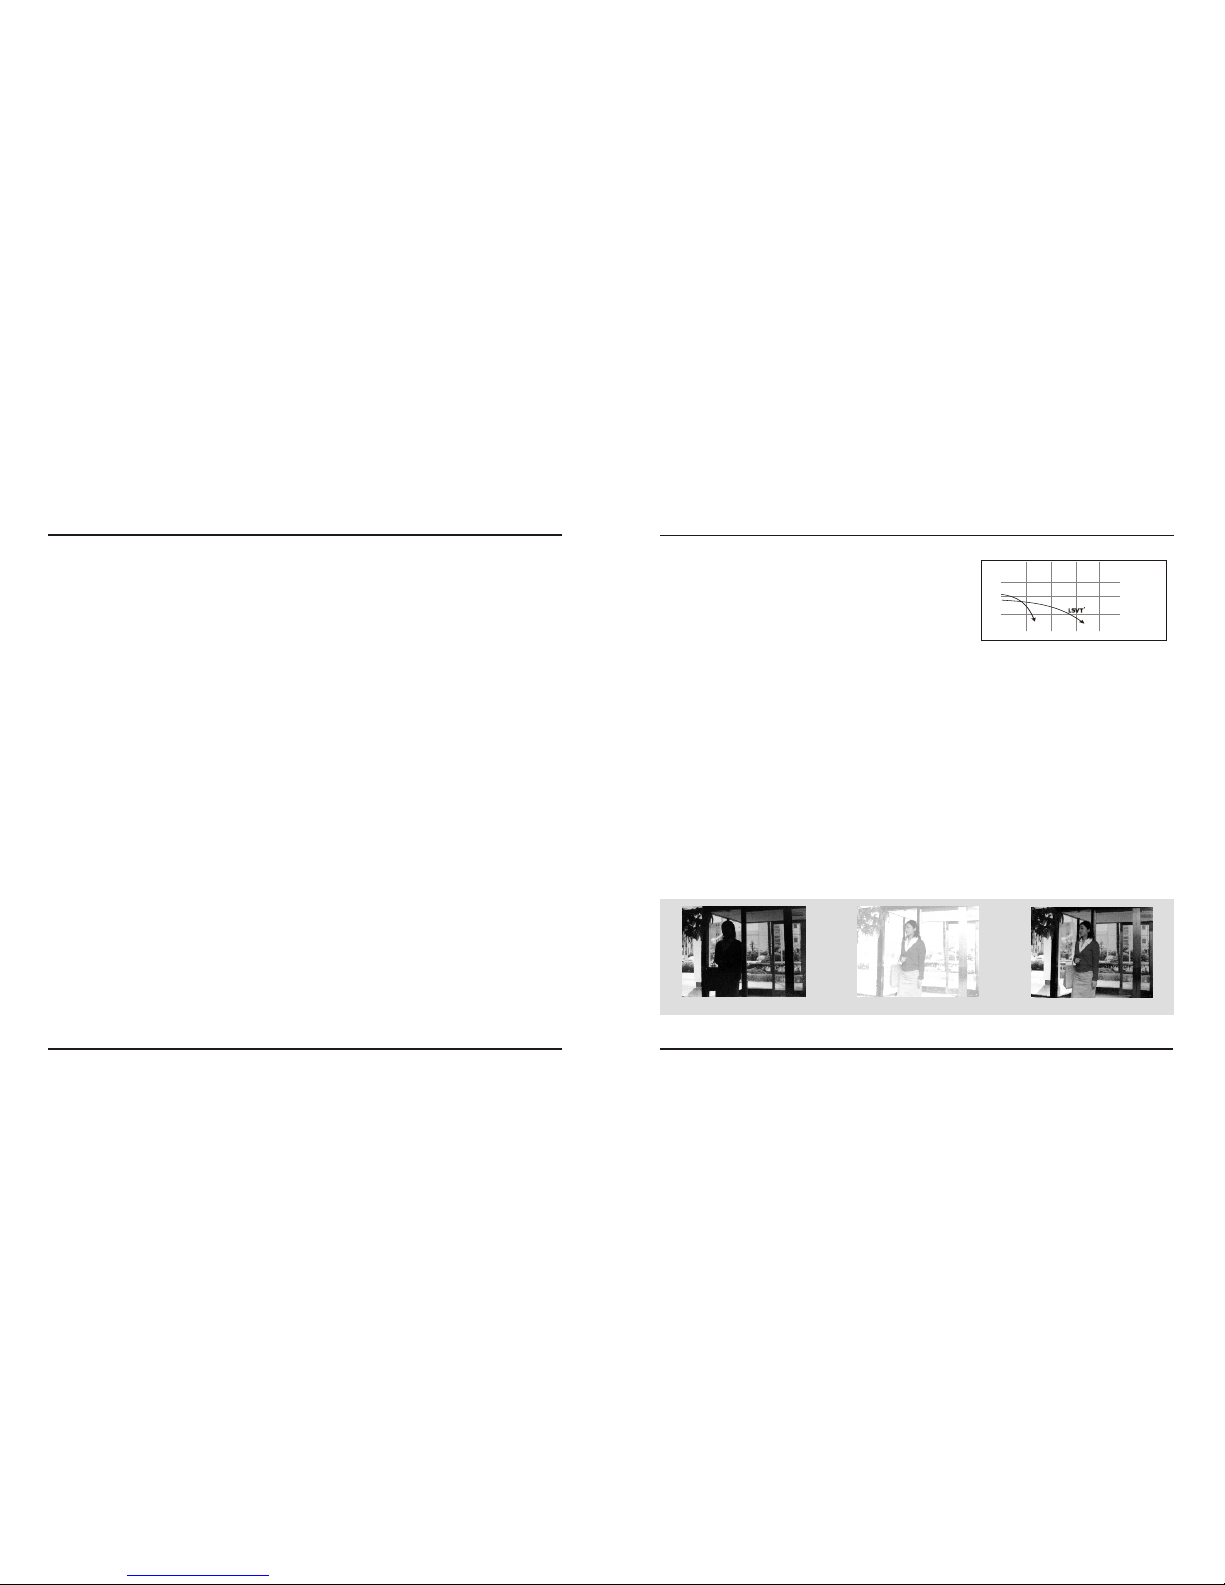
WDR cameras are new, CCTV cameras which adopt Pixim's
innovative “SEAWOLF”image sensor chip based on Digital Pixel System ®
technology. The resolution is up to 690TVL-E and the industry-leading wide
dynamic range is up to 120dB. This WDR ensures brilliant image quality under any
lighting environment. The image and color quality is also excellent in low
illumination environments. Thiscamera series is a ultra wide dynamic range camera
in the real sense using digital sampling which can't be paralleled by average wide
dynamic range cameras using older generation CCD imagers. The application of 3D
digital noise reduction technology ensures higher S/N, which efficiently reduces the
digital storage and transmission data saving system cost. Fashionable and
professional exterior design and special all-in-one all directional bracket, makes
round-the-clock surveillance easyand convenient.
1. Use theappropriate power supply
The input power willbe AC24Vor DC12V/AC24V dual-power. Be sureto connect
it to theappropriate power.Wrong connectionmay cause malfunctionand/or damage
to the camera.
2. Do notattempt to disassemblethe camera.
Toavoid electric shock,do not remove screws or camera housing. There areno user
serviceable parts inside.Ask aqualified service personfor servicing.
3. Handle thecamera with care.
Do not abuse thecamera. Avoid striking, shaking,etc. The cameracould be damaged
by improper handlingor storage.
4. Do noteuse strong orabrasive detergents when cleaning the camera body.
Use a dry clothto clean thecamera when it is dirty.In case thedirt is hard to remove,
use a milddetergent and wipegently.
5. Do notattempt to aimthe camera atthe sun.
Do not attemptto aim thecamera at thesun or otherextremely bright objectsthat
cause smear toappear irrespective ofwhether the camerais operating ornot. This
could damage the .DPS Sensor

3.Features
3
Bracket
Elegant and solid combined type bracket, with video and power cable built-in.
makes installation convenientand reliable.
Motion Detection
Motion detection function,blue highlight LEDflickers automatically,very
good warning function.
OSD Menu
Powerful OSD menuoperation function, allowsfor setting ofvarious paramters and
pre-sets.
Comparison of Wide Dynamic Range camera and averagecamera
Average camerawith BLC off Average camerawith BLC on Ultra Wide DynamicRange camera
4
Ultra Wide Dynamic Range
The captured widedynamic range is102dB typical andcan reach 120dBmaximum.
Long-effective IR LightSource Design
Adopts high performance IR LED and heat balance
design, effectively extendsthe service life of LED.
High Effective Resolution
Image resolution ashigh as 690TVL-E,offering enhanced horizontaland vertical
resolution useable inexisting as wellas new CCTVsystems.
3D Noise EliminatingTechnology
Adopts Pixim fully digitalized 3D noise reduction technology to minimize noise,
extending DVR storageby 30%+.
Lower Illumination
0.1Lux low illumination(IR OFF)
IR CUT
Built-in filter switch-overdevice, ensures thecameras work properlyboth in dayand
night.
This camera adopts innovative DPS(Digital Pixel System) image sensor and image
processing technology. The sensor picks up details from each pixel based on
hundreds of samples per video frame. vs CCD's limited exposures, to ensure wider
dynamic range than is possible with analog CCD. Theimage quality iseven brilliant
under extreme lightingconditions.
"SEAWOLF"Image Sensor
Long-life IR LED
IR Sensnsitivity
LED service life
Other brands
1yr 2yr 3yr 4yr

5
Menu Right
Left
Up
Down
Rear Cover Fixing Screws
Elevation Locking Screws
(Allen Screws)
Horizontal Locking Screws
(Allen Screws)
6
Camera Installation
1.Open the distributionbox lid, takeoff the bracketinstalling subpanel from the
camera, select aposition to installthe camera andthen fix thebracket installing
subpanel to thewall with screws.
2.Fix the camerato the bracketsubpanel
Camera Connection
1. Open thedistribution box lid,connect the videooutput plug tomonitor or other
settings using coaxor other cables.
2.Please select theappropriate power supplyand connect itto the powerinput terminal.
3.Connect video cableand power cable,and then selectthe bracket's bottomor top
outgoing line wayand put backthe distribution boxlid and fixit.
Lens Adjustment
1.Twist off camera's front cover, adjust zooming adjustment leverto the focallength
you need.
2.Then adjust focusingadjustment lever toget a clearpicture.
1.Hold the camera,unscrew the horizontallylocking screws, movethe camera
horizontally, andthen adjust camera s horizontal angle.
2. Hold thecamera, unscrew theelevation locking screws,and move thecamera
vertically, andthen adjust camera s elevation angle.
3. Fasten theelevation and horizontalLocking Screws.
1.Camera Main Body
2.Sun Shade Cover
3.Lens
4.Front Cover
5.IR LED
6.Distribution Box Lid
7.Power Input
8.Video Output
9.Bracket
10.Bracket Installing Subpanel
11.Bottom Outgoing LineHole
12.Top OutgoingLine Hole
13.Rear Cover
22
44
33
5566778899
1010
1111111212
1313
AB
4.Parts
5. Dimension(Unit: mm)
OSD MenuAdjustment
1.Unscrew the rearcover fixing screwand take offthe rear cover.
2.Set menu withfive menu buttons.
3.Take backthe rear cover and fasten it after setting.

7
CDE
Bracket Installation Plate
12
34
Camera Installation andAdjustment
Bracket Installation Plate
Cardan Shaft
Camera Fixing Screw
Cardan Shaft Fixing Screw
Lens Adjustment
Camera Main
Body
Parts
8
1111
1. Sunshader Screw
2 Sunshade Cover
3 Lens
4 IR LED
5 Lens Adjustment Botton
6 Menu Botton
7 Cooling Fan
8. Cardan Shaft
9 Bracket Installation Plate
10 Cardan Shaft Fixing Screw
11 Camera Fixing Screw
1 Set the camerainstallation location andfix the bracketinstallation plate with
expansion boit.
2 Fix the cameramain frame tobracket installation platewith screws.
3 Turn the cardan shaft and settle the camera at the required angle and thenfix the
cardan shat tightly.
4 Set OSD menuand adjust lens.
Dimension(Unit: mm)

9
ENTER: Enter orexit menu
Mov e up an d dow n by Up and Down button
Move horizontally ormodifyparameter byLeft andRight button
OSD Menu Setup
6. Menu Operation
WDR Control:
Press Enter toshow the menu,move the cursorto WDR Control,set MEDIUM,
NORMAL, LOW, HIGH by left and right button; choose the setting for WDR in
accordance with thelighting condition, setHigh in stronglighting contrast torealize
higher quality image.
WDR ZONE SELECT:WD NROMAL/SAFE AREA/ATM/LOW1/3.
10
BLC:
move to BLCby Up andDown button, setBLC by Leftand Right button:On and Off.
WHITE BALANCE:
Move to WhiteBalance by Up and Down button, set White balance by Left and Right
button: AWB: Auto White Balance; ATW: AutoTracking White Balance. The color's
temperature are differentin different lightingcondition, The color'stemperature
changes in differentlighting condition, so the white color in video image changes if
the lighting conditionchanges. AWB means camerascan compensate color
temperature automatically.In some special environment, in order to keep the same
color temperature ,ATW setting cankeep a fixed color temperature
AGC:
Move cursor toAGC byUp and Downbutton, setAGC by Leftand Right Buttonas :
NORMAL, LOW andHIGH. Setting AGC is better for cameras to work in wider
lighting range, ifthe illumination islow, canset AGChigh to rise the sensitivity of
cameras.
ATW
MEDIUM
OFF
NORMAL
OFF
DC
AUTO
ENGLISH
DEFAULT
WDR CONTROL
BLC
WHITE BALANCE
LENS SELECT
D/N CONTROL
LANGAGE SELECT
AGC
FLUORESCENT
SAVE
(ATW/AWB)
(LOW/NORMAL/MEDIUM/HIGH)
(OFF/ON)
(LOW/NORMAL/HIGH)
(OFF/CRR/CRR2)
(MANUAL/DC)
(OFF/AUTO/GPIO)
(ENGLISH/CHINESE)
(CANCEL)
CAMERA SETUP
WD NROMAL
SAVE
PRESETS
PRE
WDR ZONE SELECT:
NORMAL METERPRESETS
WD NROMAL/SAFE AREA/ATM/LOW1/3
CANCEL
*Specialists press "Left,Right, Left, Right,Down" button enter superior menu.

11
7. Technical parameter:
Model
Sensor
Video Format
SYNC Mode
Resolution
S/N Ratio
Mini illumination
AGC
White
Balance
BLC
WDR control
Voltage
Current
Lens
Working Temperature
IR Range
Size
Weight
Mode
Range
1/3 DPS Sersor
PAL/NTSC
INTERNAL
690HTVL-E
0Lux (IRON)
normal, low, high
ON, OFF
Medium, normal, low,high
5-50mm
>50dB AGC OFF
Automatic Tracking WhiteBalance (ATW)
2200~10000 KAuto White Balance
A
-10 C ~50 C
D/N
OFF, External Control, Auto; ON
Sensor Menu Control Power
100m
*Specification is subjectto change withoutprior notice
B
0.1Lux
<200mA
IR CUT Auto Switchover
395*245*130
2100g
395*245*145
2600g
AC24V
5-50mm
<1000mA
12
LENS SELECT:
Move cursor toLENS SELECT, set LENSSELECT by Rightand Left button as :
MANUAL,DC:DC Automatically. MANUALFOR MANUAL IRIS LENS, DC for
AUTO IRIS LENS.
FLUORESCENT:
Move cursor to FLUORESCENT by Up and Down button, set by Left and Rightbutton
as: OFF, CRR2: ColorRolling Restrain. Cameras output color roll ing image under
fluorescent lamp, CRRcan restrain colorrolling,keep the imagestable.
D/N Control:
Move cursor toD/N Control byUp and Downbutton, set D/Nby Left andRight button
as: OFF;Auto;GPIO: External Control; On. The illumination isvery low atnight, so
we need torise the sensitivityand improveimaging quality, then we can get better
image quality.Set D/N in accordance with differentactual need.
SAVE&EXIT:
Move cursor toSAVE&EXIT by Up and Down button, set by Left and Right button
as :SAVE&EXIT;DEFAULT,CANCEL.
LANGAGE SELECT:
Move cursor toLANGAGE SELECT byUp and Down button, set by Left and Right
button as :ENGLISH;CHINESE.

Technical parameter:
Model
Sensor
Video Format
SYNC Mode
Resolution
S/N Ratio
Mini illumination
AGC
White
Balance
BLC
WDR control
Voltage
Current
Lens
Working Temperature
IR Range
Size
Weight
Mode
Range
1/3 DPS Sersor
PAL/NTSC
INTERNAL
690HTVL-E
0Lux (IR ON)
normal, low, high
ON, OFF
Medium, normal, low,high
DC12V/AC24V
>50dB AGC OFF
Automatic Tracking WhiteBalance (ATW)
2200~10000 KAuto White Balance
-10 C ~50 C
D/N
OFF, External Control, Auto; ON
Sensor Menu Control Power
*Specification is subjectto change withoutprior notice
IR CUT Auto Switchover
C-1 C-2
4-9mm Auto iris
30m
<400mA
275 * 85* 110
900g
13
DC12V/AC24V
4-9mm Fix iris
Technical parameter:
Model
Sensor
Video Format
SYNC Mode
Resolution
S/N Ratio
Mini illumination
AGC
White
Balance
BLC
WDR control
Voltage
Current
Lens
Working Temperature
IR Range
Size
Weight
Mode
Range
1/3 DPS Sersor
PAL/NTSC
INTERNAL
690HTVL-E
0Lux (IR ON)
normal, low, high
ON, OFF
Medium, normal, low,high
DC12V/AC24V
>50dB AGC OFF
Automatic Tracking WhiteBalance (ATW)
2200~10000 KAuto White Balance
-10 C ~50 C
D/N
OFF, External Control, Auto; ON
Sensor Menu Control Power
*Specification is subjectto change withoutprior notice
IR CUT Auto Switchover
D-1 D-2
2.8-12mm Auto iris
50m
<550mA
285 * 96* 125
1100g
14
DC12V/AC24V
6-15mm Auto iris
D-3
DC12V
2.8-12mm Fix iris
Auto Switchover
<600mA <600mA

Technical parameter:
Model
Sensor
Video Format
SYNC Mode
Resolution
S/N Ratio
Mini illumination
AGC
White
Balance
BLC
WDR control
Voltage
Current
Lens
Working Temperature
IR Range
Size
Weight
Mode
Range
1/3 DPS Sersor
PAL/NTSC
INTERNAL
690HTVL-E
0Lux (IR ON)
normal, low, high
ON, OFF
Medium, normal, low,high
DC12V/AC24V
>50dB AGC OFF
Automatic Tracking WhiteBalance (ATW)
2200~10000 KAuto White Balance
-10 C ~50 C
D/N
OFF, External Control, Auto; ON
Sensor Menu Control Power
*Specification is subjectto change withoutprior notice
IR CUT Auto Switchover
E-1 E-2
2.8-12mm Auto iris
60m
<700mA
275 * 85* 110
1400g
15
6-15mm Auto iris
E-3
DC12V
2.8-12mm Fix iris
Auto Switchover
<750mA <750mA
This manual suits for next models
3
Table of contents