Sandberg SoundExperience 5.1 User manual

[Item no. 125-13] Rev. 18.01.06
Sandberg
SoundExperience
5.1
System requirements
• 5.1 sound card or DVD player supporting 5.1 surround sound
DANSKNORSKSVENSKASUOMI ENGLISH

2
Introduction
The Sandberg SoundExperience 5.1, hereinafter referred to as the “speaker set”, has impres-
sive sound output and a smart design. Connect it to your computer’s 5.1 audio outputs
for a fantastic sound experience in games and films with real surround sound that puts
you at the heart of the action. The speaker set is easy to connect, as all the jacks are
clearly marked. The subwoofer is built into a sturdy wooden cabinet for high quality and
optimal durability. The volume is shown on the subwoofer display and the master volume
or individual speaker volumes can be adjusted using the remote control supplied. The
Sandberg SoundExperience 5.1 can also be connected to a DVD player so you can create
your own home cinema.
Setting up the speakers
Before setting up the speakers, mount the four narrow front and rear speakers on the
feet provided.
To achieve the optimal experience with the Sandberg SoundExperience 5.1, it is recom-
mended to place the speakers as shown in Fig. 1, surrounding and facing the listener.
The two front speakers and the centre speaker go in front of the listener and the two
rear speakers behind. The letter code for each speaker is printed on the brown jack on
the speaker cable.
The best effect is achieved by placing the subwoofer on the floor half-way between the
two front speakers. To ensure sufficient ventilation, there must be a minimum gap of
30 cm behind the subwoofer and the aperture on the back must not be covered.
ENGLISH
FL FR
CEN
RR
RL
Fig. 1 – Speaker placement around the listener

3
Fig. 3 – Connecting to the mains
Connecting the speakers
The speakers must be connected to the output section on the rear of the subwoofer as shown in
Fig. 2. Every jack on the speaker cables is marked with letter codes in the same way as the
jack you need to connect to the back of the subwoofer.
Connect the power cable for the subwoofer to a mains outlet as shown in Fig. 3. Ensure that
the Power button is off when you connect the speaker set.
ENGLISH
F.R R.R
R.L
CEN
F.L
Fig. 2 – Connecting the speakers

4
Fig. 5 – Connecting to a stereo sound card
Normal jack Phono jack
Fig. 4
Connecting to your Computer
Below are details of the most common ways to connect the speaker set to a computer.
Note that the names on the audio outputs may vary depending on the sound card. Fig. 4
shows the two types of jack used when connecting the speaker set.
Stereo sound card
If the sound card only has a single output, it is a stereo sound card. Connect the cable
with the green jack as shown in Fig. 5. Note that the sound card outputs may be marked
with different symbols than shown. On most sound cards, the Speaker output is typi-
cally green.
NB: When connecting to a stereo sound card, you cannot obtain surround sound. To
enjoy surround sound, the speaker set must be connected to a 5.1 sound card, e.g.
Sandberg product code 130-18.
ENGLISH

5
Fig. 6 – Connecting to a 5.1 sound card
5.1 sound card
If the sound card has three outputs (typically green, black and orange), it is a 5.1 soundcard.
Connect the cable phono jacks to the subwoofer as shown in Fig. 6 so that their letter codes
match the audio inputs on the subwoofer. The jacks are coloured as follows:
G = Green
B = Black
O = Orange
Connect these to the sound card outputs, which are usually the same colours.
Connecting to other sound sources
Alternatively, the speaker set can be connected to a DVD player, TV, Discman or Mp3 player.
To ensure that the speaker set receives a correct-strength signal, we recommend that you turn
down the volume before connecting the speaker set. You can then adjust the volume after con-
necting the speakers.
ENGLISH

6
Fig. 8 – Connecting to a DVD player
Fig. 7 – Connecting to a Discman or Mp3 player
Connecting to a Discman or Mp3 player
Connect the player as shown in Fig. 7. Use the cable with the green jack. Connect the
phono jack marked F/R to the FR input on the subwoofer, and the phono jack marked
F/L to the FL input on the subwoofer. Connect the green jack to the player’s audio out-
put.
NB: You cannot obtain surround sound with this connection.
Connecting to a DVD player
Connect the phono jacks, matching their letter codes with those of the audio inputs on
the subwoofer. See Fig 8. Connect the normal jacks to the DVD player using the jack-to-
phono adapters provided. Note that the DVD player’s audio outputs may be named dif-
ferently than in the figure.
NB: Not all DVD players support connection to a 5.1 speaker set.
ENGLISH

7
Fig. 9 – Connecting to a TV
Connecting to a TV
Connect a phono-to-jack adapter to the TV’s audio output as shown in Fig. 9. Connect the
green jack to the adapter and the other end of the cable to the subwoofer, matching the letter
codes.
NB: You cannot obtain surround sound with this connection.
ENGLISH

8
Display
Standby
Mute
Mode
Volume +
Volume -
Input
Fig. 10 – Overview of operating buttons
Operating the speaker set
The subwoofer has a range of operating buttons to control the set’s functions. These
buttons are explained here. See Fig. 10.
Display Displays the current volume.
Standby Turns the system on and off.
Mute Turns off all sound.
Mode Selects which speakers’ volume is controlled by the volume buttons:
Front – Front speaker volume can be adjusted from -10 to 10
Rear – Rear speaker volume can be adjusted from -10 to 10
Sub – Subwoofer volume can be adjusted from -10 to 10
Centre – Centre speaker volume can be adjusted from -10 to 10
Master – The overall volume for the whole set can be adjusted from
0 to 79
Volume + Turns up the volume
Volume - Turns down the volume
Indput Selects either 5.1 (surround) or stereo input. Select 5.1 if the audio
source is a 5.1 sound card or other surround-sound device.
ENGLISH

9
On/off
Mute on/off
Adjust rear speaker volume
Select 5.1 input
Adjust front speaker volume
Adjust master volume
Adjust centre speaker volume
Adjust subwoofer volume
Select stereo input
Fig. 12 – Overview of remote control functions
Fig. 11 – Inserting the battery
ENGLISH
Operating the speaker set using the remote control
The remote control provided can be used to operate the speaker set remotely. Insert the bat-
tery in the remote control as shown in Fig. 11. See Fig. 12 for an overview of the remote con-
trol’s functions.

10
Configuring the sound card in Windows
It may be necessary to adjust the audio settings in Windows to ensure that the correct
sound card is configured to play sound. Here is a guide to how this is done in the various
versions of Windows.
Setup in Windows®XP
1. Click “Start”, “Control Panel” then “Sounds, Speech and Audio Devices”.
2. Click the “Sounds and Audio Devices” icon.
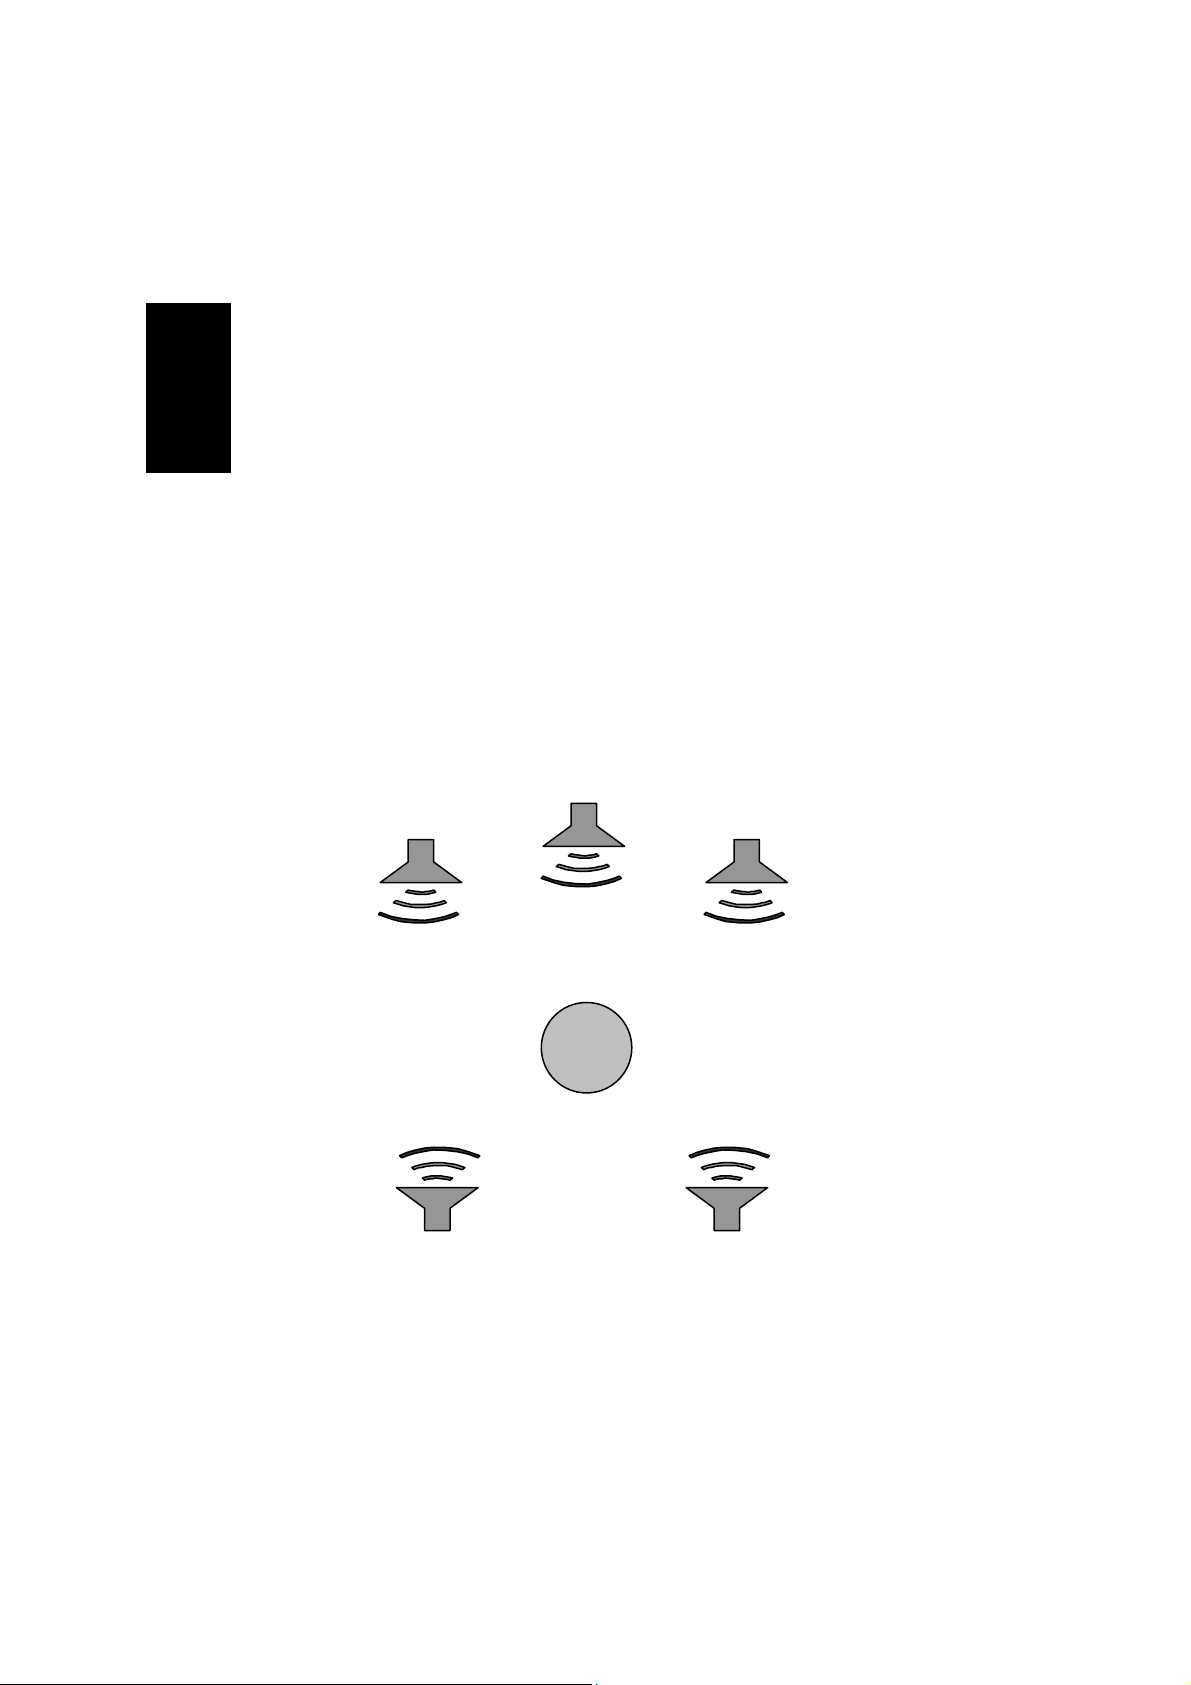
3. Click the “Advanced…” button under “Speaker settings”. Select your preferred
speaker setup. See Fig. 1 on page 2.
4. Click the “Audio” tab.
5. Ensure that the “Default device” under “Sound Playback” refers to the device/sound
card you have connected your speaker set to.
6. Click the “Volume” button under “Sound Playback” to adjust the speaker volume.
Setup in Windows®2000
1. Click “Start”, “Settings” and “Control Panel”.
2. Double-click the “Multimedia” icon and select the “Audio Devices” tab.
3. Click the “Advanced” button under “Sound Playback”. Select your preferred speaker
setup. See Fig. 1 on page 2. Click “OK”.
4. Ensure that the “Preferred device” under “Sound Playback” refers to the device/sound
card you have connected your speaker set to.
5. Click the “Volume” button under “Sound Playback” to adjust the speaker volume.
Setup in Windows®Me
1. Click “Start”, “Settings” and “Control Panel”.
2. Double-click the “Multimedia” icon and select the “Audio” tab.
3. Click the “Advanced” button under “Sound Playback”. Select your preferred speaker
setup. See Fig. 1 on page 2. Click “OK”.
4. Ensure that the “Preferred device” under “Sound Playback” refers to the device/sound
card you have connected your speaker set to.
5. Click the “Volume” button under “Sound Playback” to adjust the speaker volume.
Setup in Windows®98SE
1. Click “Start”, “Settings” and “Control Panel”.
2. Double-click the “Multimedia” icon.
3. Click the “Audio Devices” button under “Advanced Properties”. Select your preferred
speaker setup. See Fig. 1 on page 2. Click “OK”.
4. Ensure that the “Preferred device” under “Playback” refers to the device/sound card
you have connected your speaker set to. Click the “Playback” icon to adjust the
speaker volume.
ENGLISH

11
ENGLISH
Troubleshooting
• If there is noise or distortion of the sound from the speaker set:
− This may be because the speakers are overloaded. Avoid turning the volume up too high,
both on the actual speakers and on the device you have connected the speaker set to.
The optimal solution is to turn the volume right up on the connected audio device, then
regulate the volume using the volume controls on the subwoofer or remote control.
• If the speaker set is correctly connected to a surround-sound device but does not render
surround sound:
− Check that the speaker set is configured for 5.1 mode. The symbol 5.1CH displays on the
subwoofer if this function is enabled. The 5.1CH button on the remote control or the
Input button on the subwoofer can be used to switch between 5.1 and stereo.
− If the speaker set is connected to a computer, the application playing the sound must
support surround sound. Not all games support this, and in some applications, you have
to change the application’s sound settings to activate surround sound. See the user guide
for the application for details.
− If the speaker set is connected to a DVD player, it may need to be configured to play
surround sound. With many DVD films, this can be done from the menu that appears
when the film is played. Note that not all films feature 5.1 sound.
• If there is no sound, or the sound comes from the wrong side:
− Check that all the cables are correctly connected.
− Check that the speakers are correctly placed. See Fig. 1.
If you need further help or assistance in connection with your Sandberg product, you can see
details about this on the last but one page of these instructions.
Enjoy your Sandberg SoundExperience 5.1 speaker set.

12
Introduktion
Sandberg SoundExperience 5.1, herefter kaldet ”højttalersættet”, giver dig imponerende
lyd og et lækkert design. Ved tilslutning til din computers 5.1 lydudgange er du sikret en
fantastisk lydoplevelse i dine spil og film med ægte surround sound, der bringer dig i
centrum af begivenhederne. Højttalersættet er nemt at tilslutte, da det på alle stik er
tydeligt markeret, hvor de skal tilsluttes. Subwooferen er bygget i et solidt trækabinet,
der sikrer høj kvalitet og optimal holdbarhed. Lydstyrken, der vises i subwooferens dis-
play, kan reguleres samlet eller individuelt for hver højttaler med den medfølgende fjern-
betjening. Sandberg SoundExperience 5.1 kan også tilsluttes en DVD afspiller, så du kan
lave din egen hjemmebiograf.
Opsætning af højttalere
Før opsætning monteres de fire smalle højttalere, som er front- og baghøjttalere, på de
medfølgende fødder.
For at få den bedst mulige oplevelse ud af Sandberg SoundExperience 5.1, anbefales det
at placere højttalerne som på Fig. 1, så de omgiver og peger imod lytteren. De to front-
højttalere og centerhøjttaleren foran lytteren og de to baghøjttalere bag ved. Hver højt-
talers bogstavkode er trykt på det brune stik på højttalerens kabel.
Den bedste effekt opnås ved at placere subwooferen på gulvet, så den står midt mellem
de to fronthøjttalere. For at sikre ordentlig ventilation, skal der være minimum 30 cm luft
bagved subwooferen, og hullet på bagsiden må ikke være tildækket.
DANSK
FL FR
CEN
RR
RL
Fig. 1 – Placering af højttalere i forhold til lytteren

13
Tilslutning af højttalere
Højttalerne skal tilsluttes output sektionen bag på subwooferen som på Fig. 2. Hvert stik på
højttalerkablerne er mærket med bogstavkoder, på samme måde som det stik det skal tilsluttes
bag på subwooferen.
Subwooferens strømkabel tilsluttes en stikkontakt som vist på Fig. 3. Sørg for at Power knap-
pen er slukket, mens højttalersættet tilsluttes.
DANSK
Fig. 3 – Tilslutning til el nettet
F.R R.R
R.L
CEN
F.L
Fig. 2 – Tilslutning af højttalere

14
Jackstik Phonostik
Fig. 4
Fig. 5 – Tilslutning til stereo lydkort
Tilslutning til computer
Herunder er en gennemgang af de mest almindelige måder, hvorpå højttalersættet kan
tilsluttes en computer. Bemærk at navnene på lydudgangene kan variere alt efter hvilket
lydkort der er tale om. Fig. 4 viser de to stiktyper der anvendes ved tilslutning af højtta-
lersættet.
Stereolydkort
Har lydkortet kun én udgang, er det et stereolydkort. Kablet med det grønne jackstik
tilsluttes som på Fig. 5. Bemærk at lydkortets udgange kan være mærket med andre
symboler end på billedet. På de fleste lydkort vil Speaker udgangen typisk være grøn.
BEMÆRK: Ved tilslutning til stereolydkort kan du ikke opnå surround sound. For at få
glæde af surround sound skal højttalersættet tilsluttes et 5.1 lydkort, f.eks. Sandberg
varenr. 130-18.
DANSK

15
Fig. 6 – Tilslutning til 5.1 lydkort
5.1 lydkort
Har lydkortet tre udgange (oftest en grøn, en sort og en orange), er det et 5.1 lydkort. Kabler-
nes phonostik tilsluttes subwooferen som på Fig. 6, så deres bogstavkoder passer sammen
med lydindgangene på subwooferen. Jackstikkenes farver er som følger:
G = Grøn
B = Sort
O = Orange
Disse tilsluttes lydkortets udgange, der oftest har samme farver.
Tilslutning til andre lydkilder
Højttalersættet kan alternativt tilsluttes DVD afspiller, TV, Discman eller Mp3-afspiller
For at sikre en korrekt signalstyrke til højttalersættet, anbefales det at skrue ned for enhedens
lydstyrke, inden højttalersættet tilsluttes. Lydstyrken kan herefter indstilles til det ønskede
niveau.
DANSK

16
Fig. 7 – Tilslutning til Discman eller Mp3 afspiller
Fig. 8 – Tilslutning til DVD afspiller
Tilslutning til Discman eller Mp3 afspiller
Tilslut afspilleren som på Fig. 7. Anvend kablet med det grønne jackstik. Tilslut pho-
nostikket mærket F/R til indgangen FR på subwooferen, og phonostikket mærket F/L til
indgangen FL på subwooferen. Tilslut det grønne jackstik til afspillerens lydudgang.
BEMÆRK: Du opnår ikke surround sound ved denne tilslutning.
Tilslutning til DVD afspiller
Phonostikkene tilsluttes så deres bogstavkoder passer sammen med lydindgangene på
subwooferen. Se Fig 8. Jackstikkene tilsluttes DVD afspilleren ved hjælp af de medføl-
gende jack til phono adaptere. Bemærk at DVD afspillerens lydudgange kan være be-
nævnt anderledes end på figuren.
Bemærk: Ikke alle DVD afspillere understøtter tilslutning af et 5.1 højttalersæt.
DANSK

17
Fig. 9 – Tilslutning til TV
Tilslutning til TV
En phono til jack adapter tilsluttes TV’ets lydudgang som vist på Fig 9. Det grønne jackstik
tilsluttes adapteren, og den anden ende af kablet tilsluttes subwooferen, så bogstavkoderne
passer sammen.
BEMÆRK: Du opnår ikke surround sound ved denne tilslutning.
DANSK

18
Display
Standby
Mute
Mode
Volume +
Volume -
Input
Fig. 10 – Oversigt over betjeningsknapper
Betjening af højttalersættet
Subwooferen har en række betjeningsknapper til at styre sættets funktioner. Disse knap-
per er forklaret her . Se Fig. 10.
Display Viser den aktuelle lydstyrke.
Standby Tænder og slukker systemet
Mute Slår al lyd fra
Mode Vælger for hvilke højttalere lydstyrken skal justeres med volume
knapperne:
Front – Fronthøjttalernes lydstyrke kan justeres fra -10 til 10
Rear – Baghøjttalernes lydstyrke kan justeres fra -10 til 10
Sub – Subwooferens lydstyrke kan justeres fra -10 til 10
Center – Centerhøjttalerens lydstyrke kan justeres fra -10 til 10
Master – Den overordnede lydstyrke for hele sættet kan justeres fra
0 til 79
Volume + Skruer op for lyden
Volume - Skruer ned for lyden
Indput Vælger mellem 5.1 (surround) og stereo input. Vælg 5.1 hvis lydkilden et
5.1 lydkort eller andet surroundudstyr.
DANSK

19
Fig. 11 – Isætning af batteri
DANSK
Betjening af højttalersættet med fjernbetjening
Med den medfølgende fjernbetjening kan højttalersættet betjenes på afstand. Isæt batteriet i
fjernbetjeningen, som vist på Fig. 11. Se Fig. 12 for en oversigt over fjernbetjeningens funkti-
oner.
On/off
Mute on/off
Adjust rear speaker volume
Select 5.1 input
Adjust front speaker volume
Adjust master volume
Adjust centre speaker volume
Adjust subwoofer volume
Select stereo input
Fig. 12 – Oversigt over fjernbetjeningens funktioner

20
Opsætning af lydkort i Windows
Det kan være nødvendigt at justere lydindstillingerne i Windows, så det er det korrekte
lydkort, der er sat op til at afspille lyd. Her er en guide til, hvordan dette gøres i de for-
skellige versioner af Windows.
Opsætning i Windows®XP
1. Klik ”Start”, ”Kontrolpanel” og ”Lyd, tale og lydenheder”.
2. Klik på ikonet ”Lyde og lydenheder”.
3. Vælg knappen ”Avanceret…” under ”højttalerindstillinger”. Vælg den højttalerop-
sætning du foretrækker. Se Fig. 1 på side 12.
4. Vælg fanebladet ”Lydenheder”.
5. Du skal sikre dig, at ”Standard enhed” under ”Afspilning af lyd” er den enhed/det
lydkort, du har sluttet dit højttalersæt til.
6. Klik på knappen ”Lydstyrke” under ”Afspilning af lyd” for at justere lydniveauet for
højttalerne.
Opsætning i Windows® 2000
1. Klik ”Start”, ”Indstillinger” og ”Kontrolpanel”.
2. Dobbeltklik på ikonet ”Multimedier” og vælg fanebladet ”Lydenheder”.
3. Vælg knappen ”Avanceret” under ”Afspilning af lyd”. Vælg den højttaleropsætning
du foretrækker. Se Fig. 1 på side 12. Tryk ’OK’.
4. Du skal sikre dig, at ”Foretrukken enhed” under ”Afspilning af lyd” er den enhed/det
lydkort, du har sluttet dit højttalersæt til.
5. Klik på knappen ”Lydstyrke” under ”Afspilning af lyd” for at justere lydniveauet for
højttalerne.
Opsætning i Windows®Me
1. Klik ”Start”, ”Indstillinger” og ”Kontrolpanel”.
2. Dobbeltklik på ikonet ”Multimedier” og vælg fanebladet ”Lyd”.
3. Vælg knappen ”Avanceret” under ”Afspilning af lyd”. Vælg den højttaleropsætning
du foretrækker. Se Fig. 1 på side 12. Tryk ’OK’.
4. Du skal sikre dig, at ”Foretrukken enhed” under ”Afspilning af lyd” er den enhed/det
lydkort, du har sluttet dit højttalersæt til.
5. Klik på knappen ”Lydstyrke” under ”Afspilning af lyd” for at justere lydniveauet for
højttalerne.
Opsætning i Windows®98SE
1. Klik ”Start”, ”Indstillinger” og ”Kontrolpanel”.
2. Dobbeltklik på ikonet ”Multimedier”.
3. Vælg knappen ”Lydenheder” under ”Avancerede egenskaber”. Vælg den højttalerop-
sætning du foretrækker. Se Fig. 1 på side 12. Tryk ’OK’.
4. Du skal sikre dig, at ”Foretrukken enhed” under ”Afspilning” er den enhed/det lydkort,
du har sluttet dit højttalersæt til. Klik på ikonet for ”Afspilning” for at justere lydni-
veauet for højttalerne.
DANSK
This manual suits for next models
1
Table of contents
Languages:
Other Sandberg Speakers System manuals