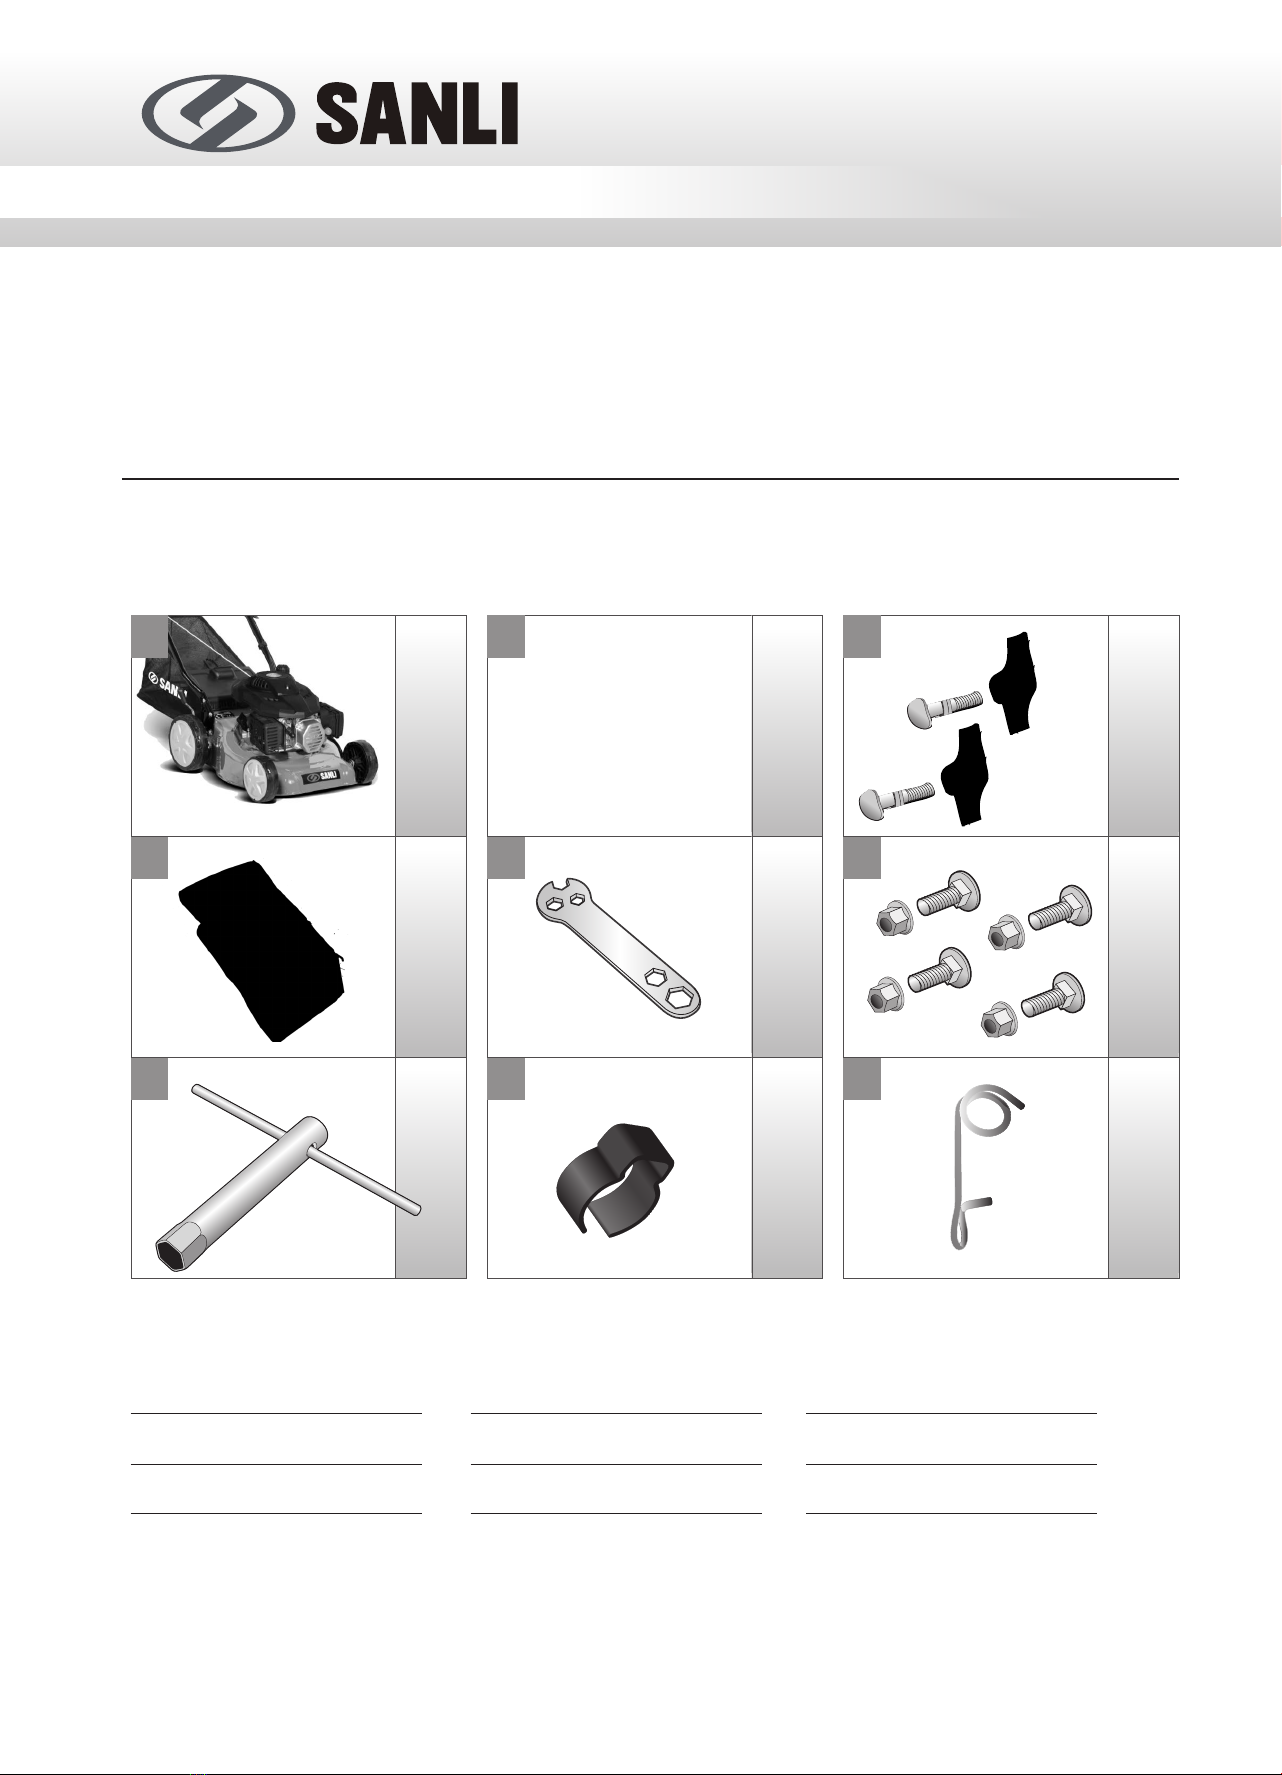
PAGE 10
INSTRUCTION MANUAL
MAINTENANCE SCHEDULE
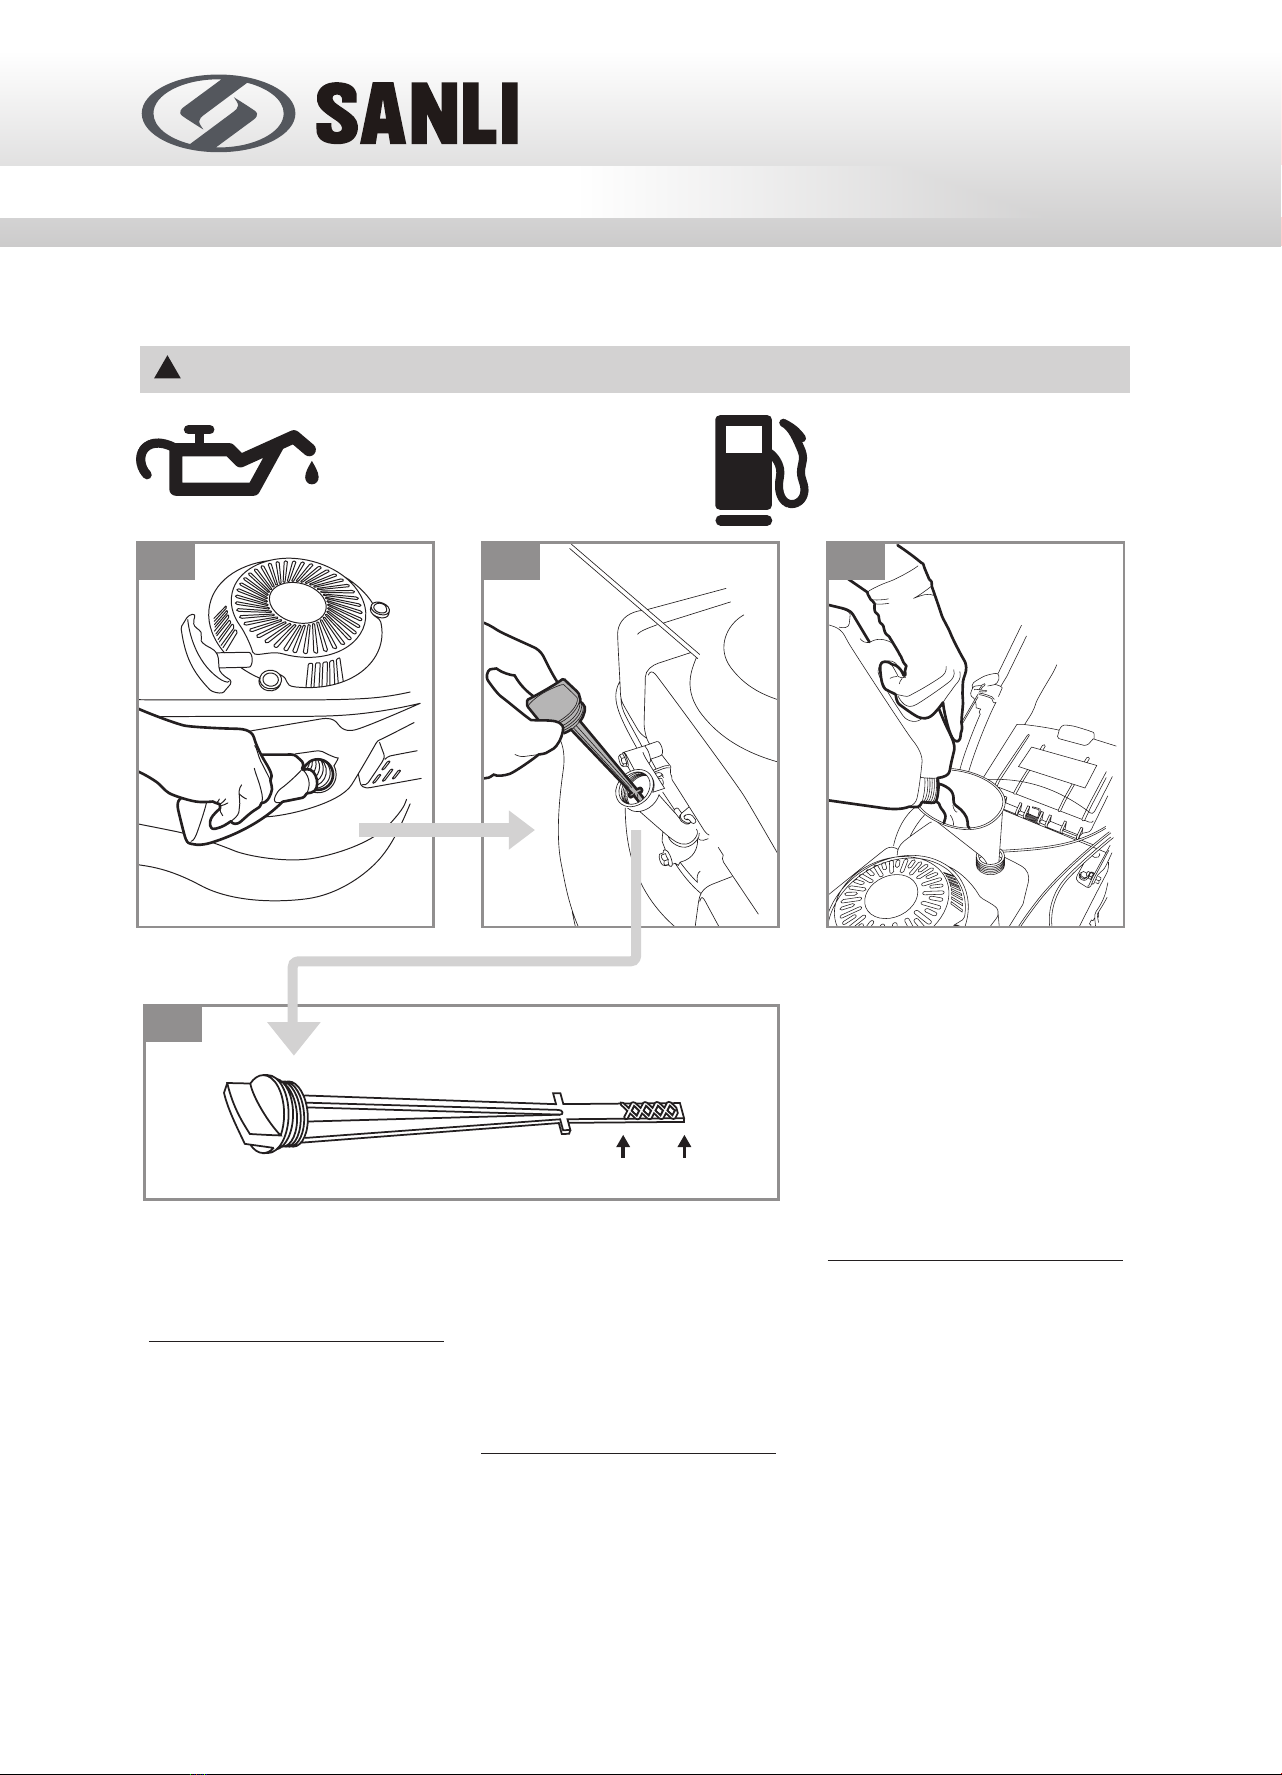
WARNING! The following procedures must be carried out before you start the engine of your lawnmower.
!
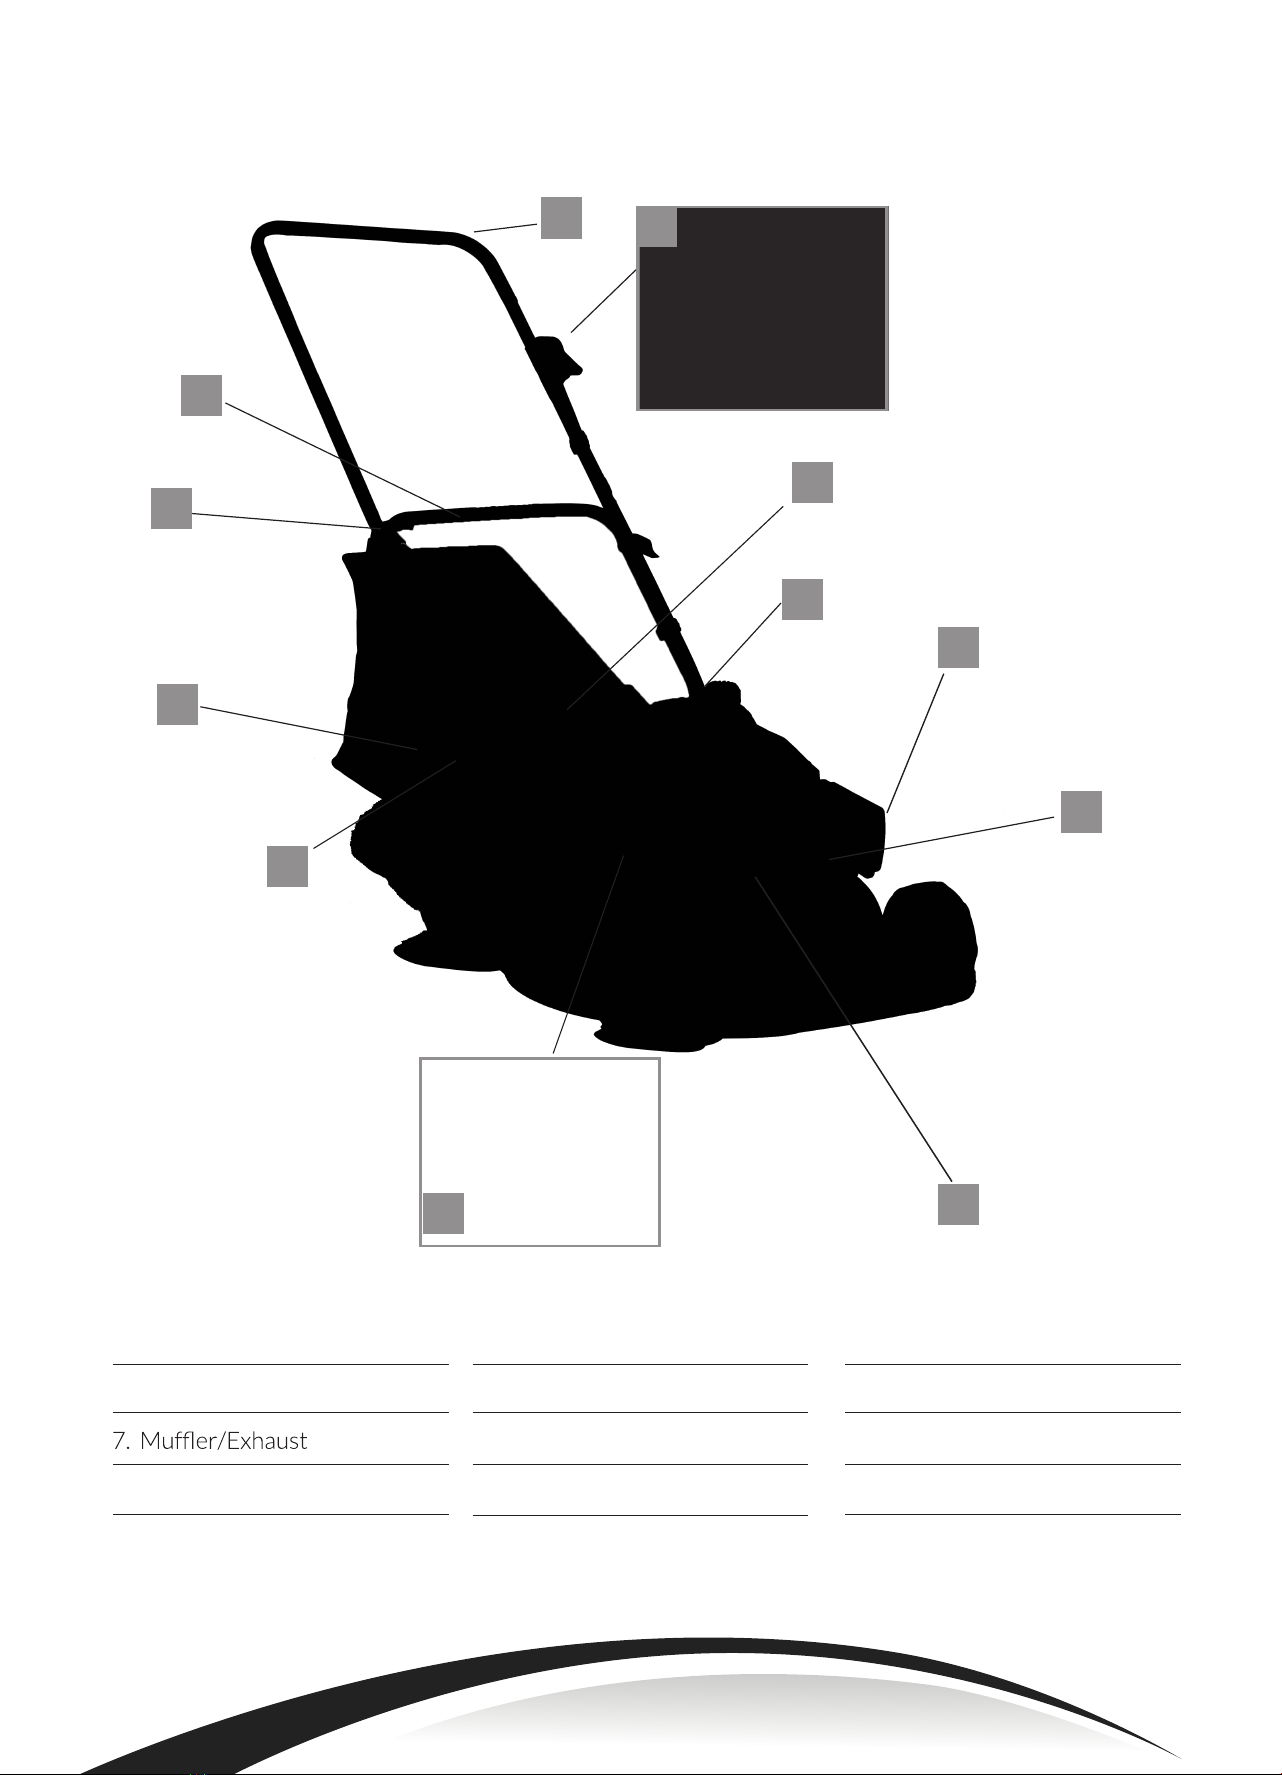
SUMMARY OF REGULAR MAINTENANCE
REQUIRED BY THE MOWER
Before each
mowing After 5 hours Every 25 hours or once a year
minimum before winter lay-up
Cutting system Check and verify
its condition
Sharpen and balance blade.
Replace worn or damaged blade.
Spark plug Check
Clean and check the clearance
of the electrodes. Replace if
necessary.
Air Filter Check Clean the lter. Replace if
necessary.
Oil Check the level Drain and
renew Drain and renew.
OUT
IN
Frequency
Components
Cutting System
Before and after each mowing
session, check that the blade, its
attachment bolts and drive shaft
are not damaged or excessively
worn. Never try to straighten a
bent blade. Replace a damaged,
worn or bent blade as soon as
possible. Use only genuine SANLI
parts or those approved by SANLI.
Excessive vibration when mowing
is a good indication of a problem
with the cutting system.
!WARNING!
Vibration from a bent or
damaged blade can cause
costly damage to the mower.
Working with an excessively
worn blade wastes fuel and
can lead to injury if the blade
becomes detached from the
machine.
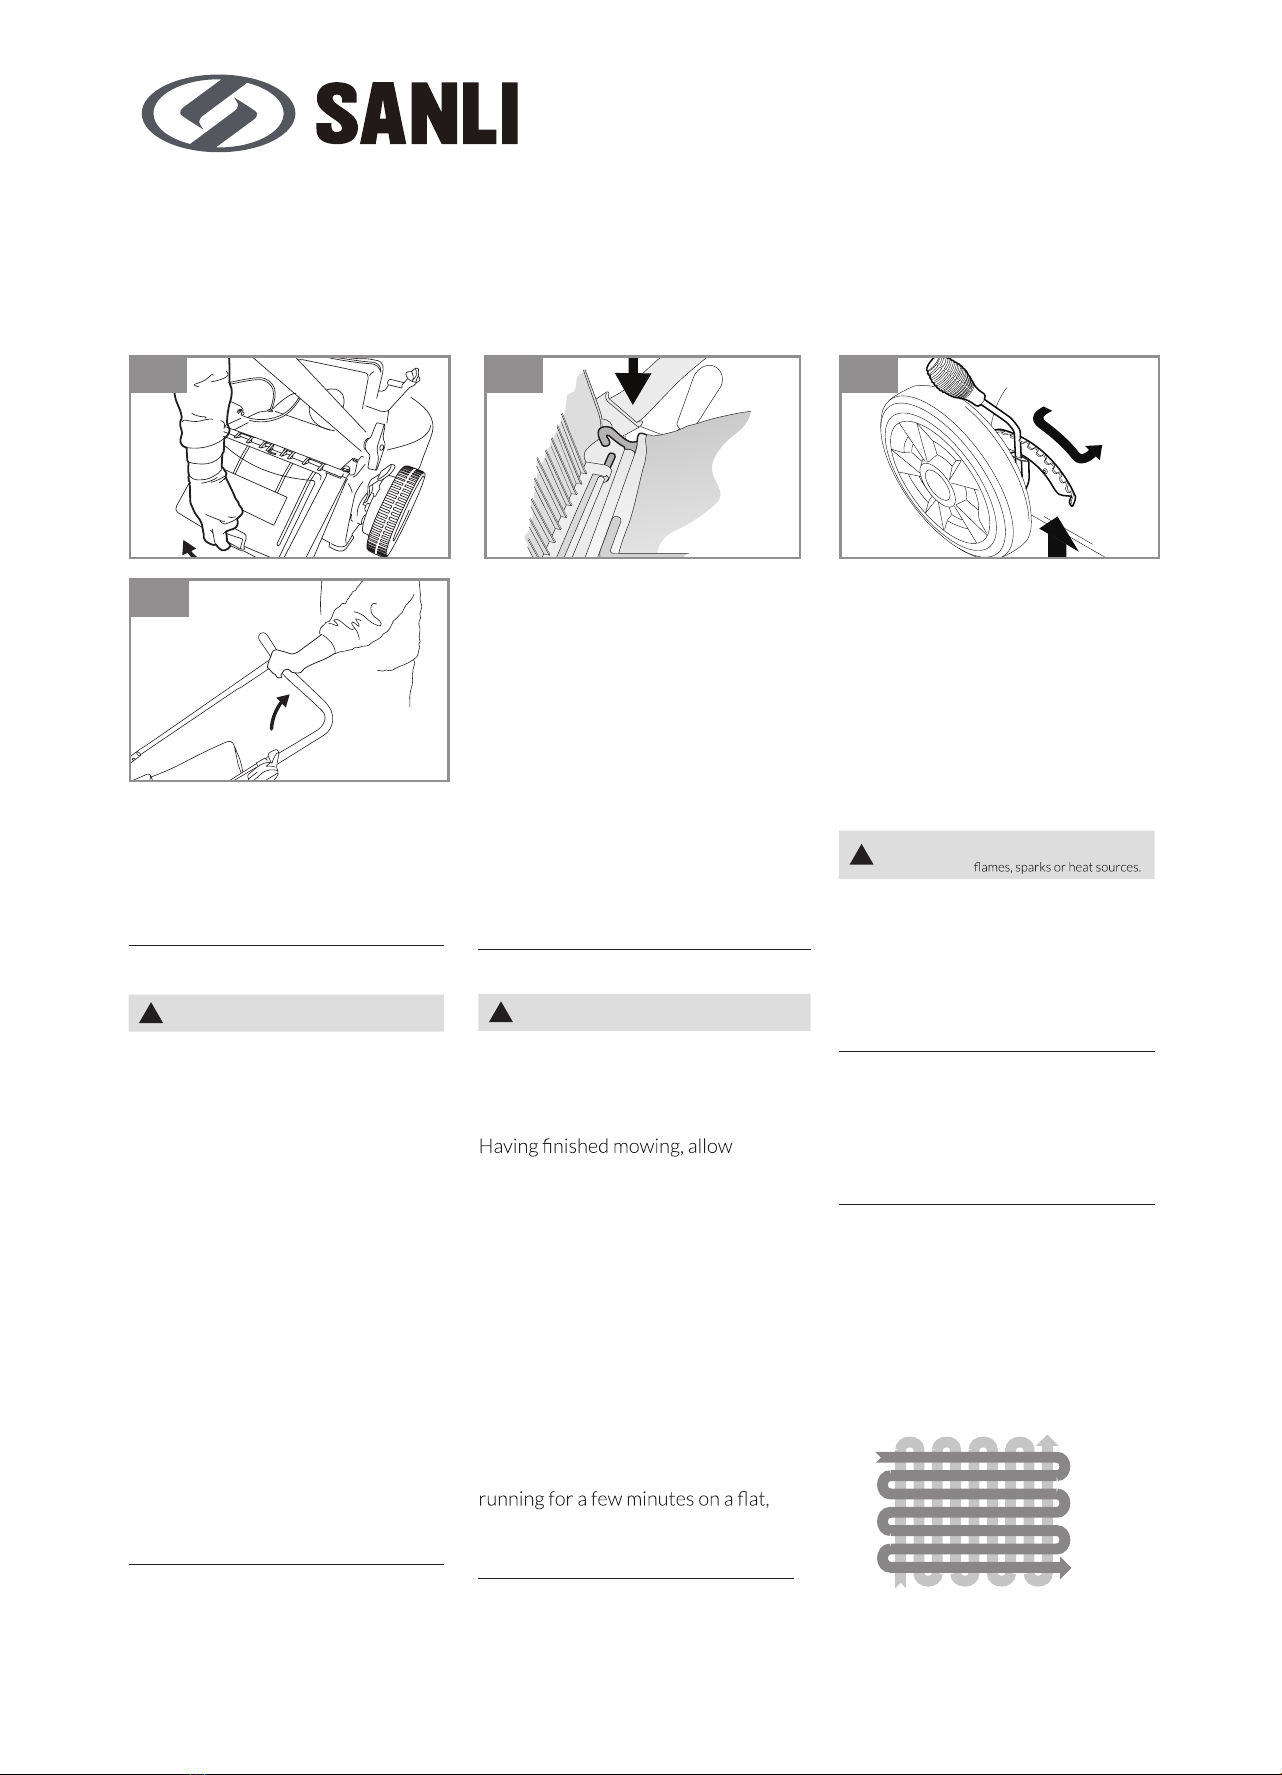
Removing the blade
Wear appropriate protective
gloves to prevent possible
injury when handling the blade.
Disconnect the spark plug cap and
tilt the mower on its side with air
lter and carburettor side up.
Holding the blade rmly in one
hand, use a spanner or socket to
loosen the blade screw.
Sharpening the blade
For best mowing results, have the
edges sharpened and the blade
balanced at least once a year by a
specialist service dealer or agent.
Mounting the blade
Wear appropriate protective gloves
to prevent possible injury when
handling the blade. Disconnect the
spark plug cap and tilt the mower on
its side with air lter side up.
Check that all components (the
blade, key, blade holder, screws and
washers) are present, clean and in
good condition.
Position the blade on its support
with the cooling ns facing the
engine.
Tighten the screws connecting all of
the components. Make a nal visual
check that all parts are present and
aligned before tightening the xing
bolt very rmly with a wrench while
holding the blade tightly in one hand
(NB wear suitable gloves).
Spark Plug
Check the spark plug initially after
the rst ve hours of mower use.
Thereafter, maintenance of the spark
plug should take place every 25 hours.
Remove the spark plug cap (Fig.14)
using a rotary motion and then
remove the spark plug with the
wrench provided (Fig.15).
Clean off any carbon deposits using a
copper brush and check the electrode
gap with a feeler gauge (the gap should
be ≈ 0.7 mm). Replace and tighten the
serviced spark plug and replace the
cap.
If the spark plug is worn or damaged,
replace with a new spark plug of the
same or suitable type for the engine.
We recommend to use NGK BPR6ES
or Torch F6RTC for Sanli mowers.
If in doubt, contact your point of
purchase or local dealer.
LAWN MOWER BBP400
Fig14
Fig15