GETTING STARTED
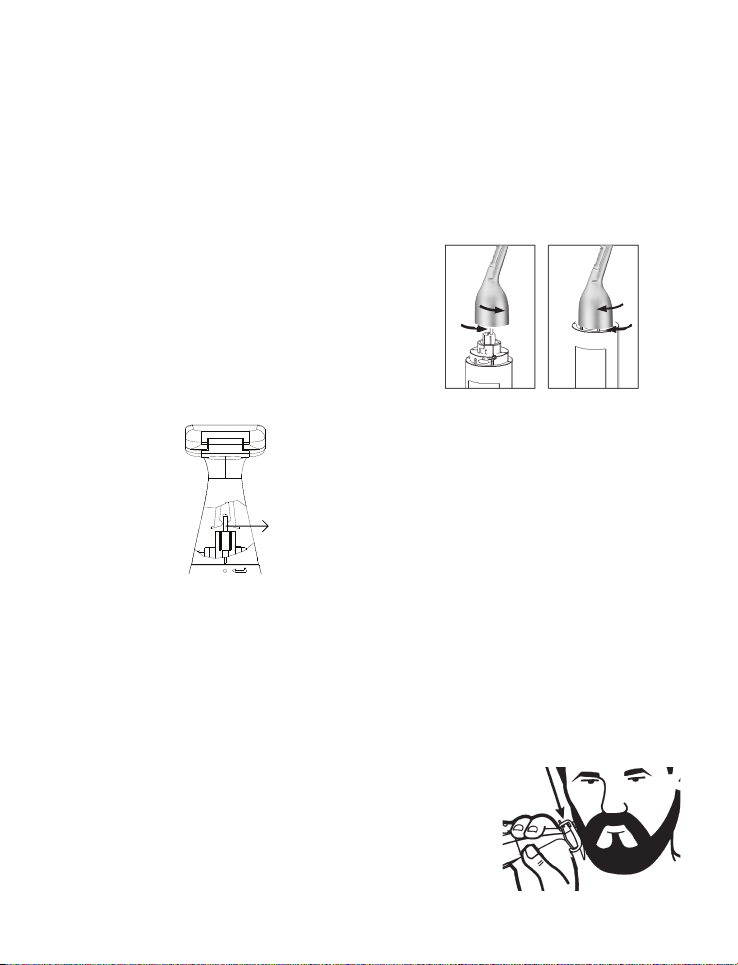
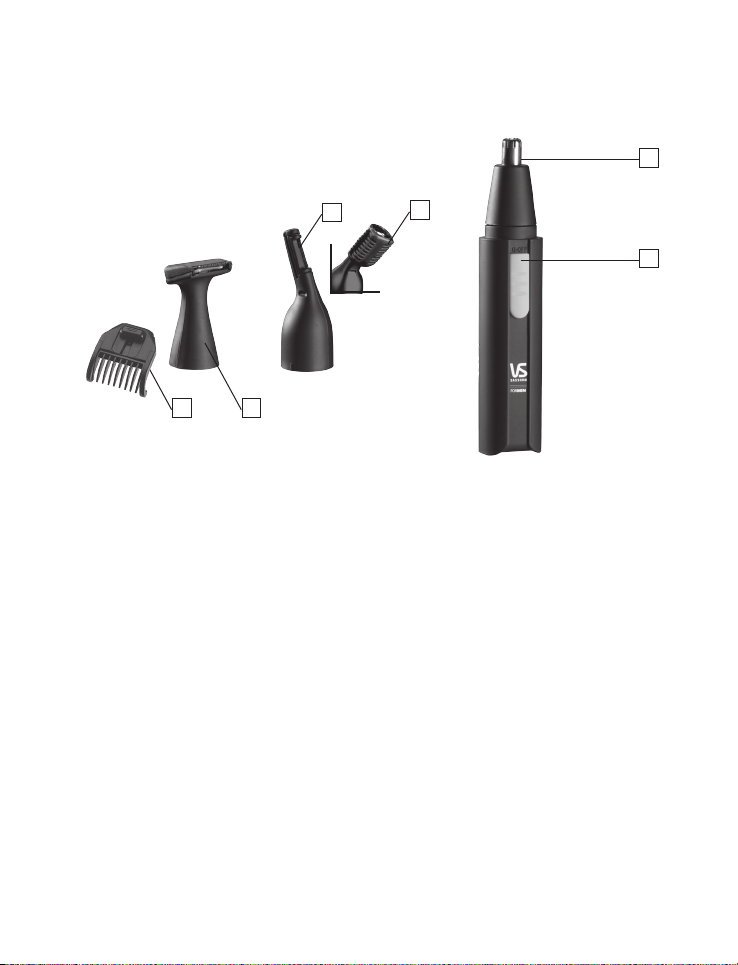
TO SWITCH TRIMMER HEADS
Hold the handle of the trimmer while turning the trimmer head
counterclockwise until the “I” mark is aligned properly with the “arrow”
mark (Fig. 2).
At this point you should be able to
easily lift the nose/ear trimmer head
from the handle. To use a new trimmer
head on the u nit, properly install the
head into position making sure the
“I” mark is aligned with the “arrow”
mark, turn clockwise until the “I” and
“circle” marks are aligned (Fig. 3) and
lock into position.
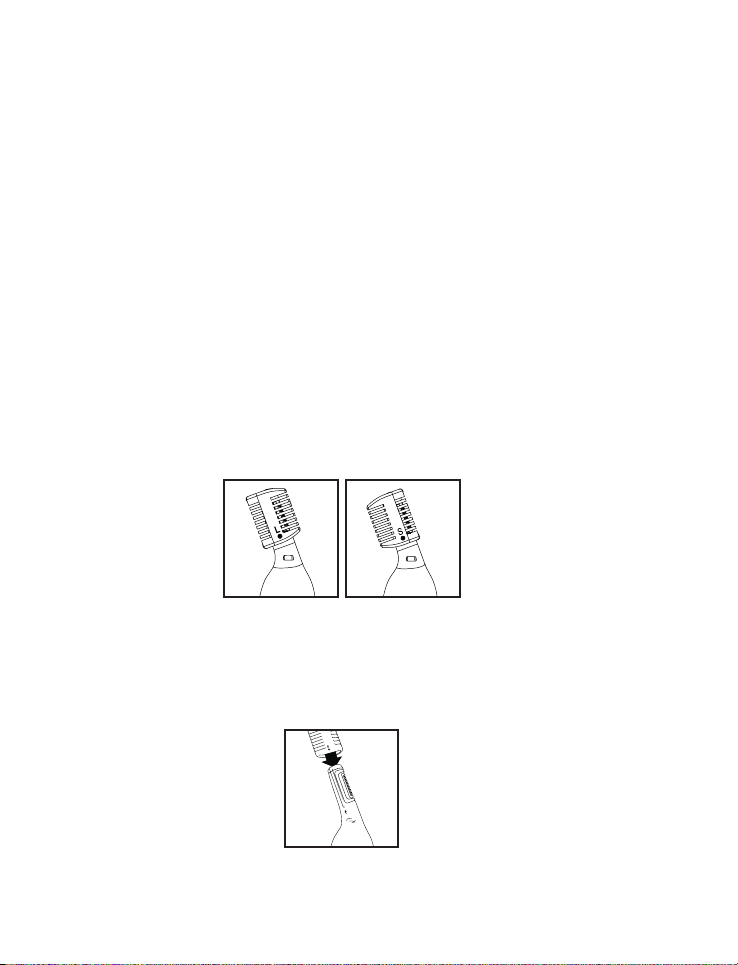
TO TRIM YOUR NECKLINE & SIDEBURNS
Attach the ¾” neckline/sideburn trimmer head to the trimmer handle.
Hold the trimmer blade against the skin at the length desired and move
the trimmer downward.
OUTLINING YOUR BEARD/GOATEE
After having combed through your beard in the
direction of growth, outline the desired shape,
starting under your jawline. Work backwards on
each side of your face toward your ears. Then
dene the upper outline of your beard across
your cheeks, past your sideburns and toward
your hairline.
Fig.2 Fig.3
2. Insert 1xAA alkaline battery, negative end rst, into the battery
compartment. (Alkaline batteries will ensure the best performance
and longest life for your appliance). If you are not going to use the
unit for a long period of time, or if the battery has run down, remove
the battery from the unit. This will increase the life of your trimmer.
3. To replace the battery compartment cover, line up the small mark
located on the bottom section of the trimmer with the spot and push
the bottom section onto the top section as far as it will go. Twist the
bottom section of the trimmer in a clockwise direction until it locks into
place, a soft click will be heard.
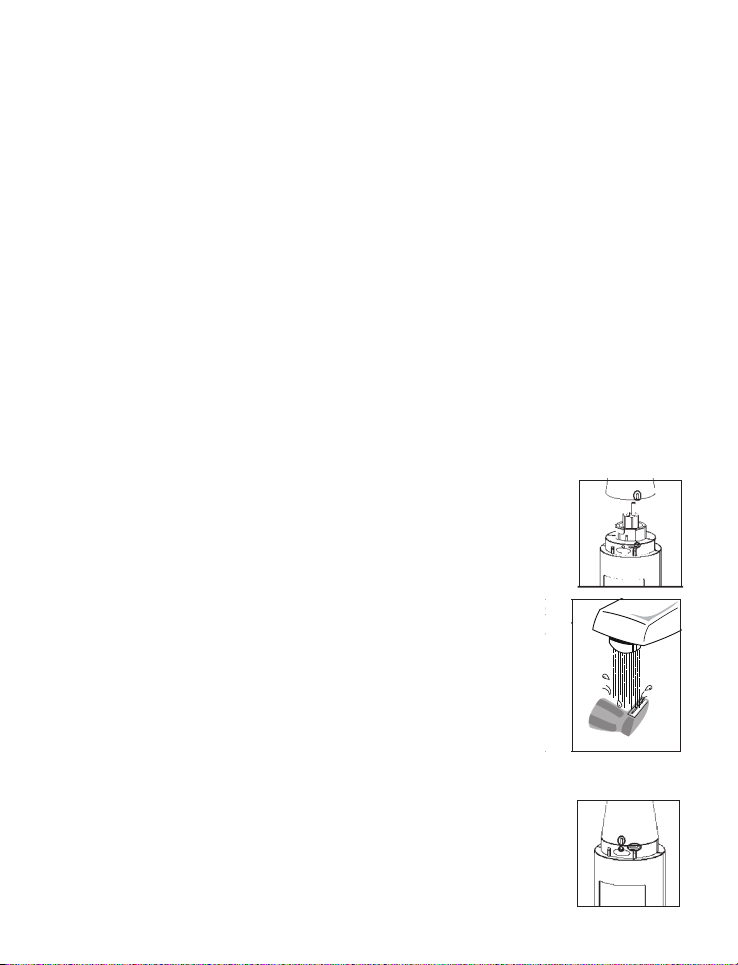
Switching the Trimmer Heads
1. Ensure that the trimmer is turned off before switching the heads.
2. With the trimmer head in the locked position hold the handle of the
trimmer and turn the trimmer head anti-clockwise until the line on the
top section lines up with the beginning of the arrow. (Fig.1)
3. Lift the trimmer head from the handle.
4. To replace the trimmer head align the line on the top section with the
beginning of the arrow . Push the trimmer onto the handle. Turn in a
clockwise direction until the line is aligned with the spot on the handle.
Note: make sure the motor spindle is in the actuator arm after
reassembling the head (Fig. 3)
Fig. 3
Motor spindle in actuator arm
7040DU IB-12/156.indd 5 4/10/12 3:55 PM