DVT1012S page 5
DVT1012S page 4
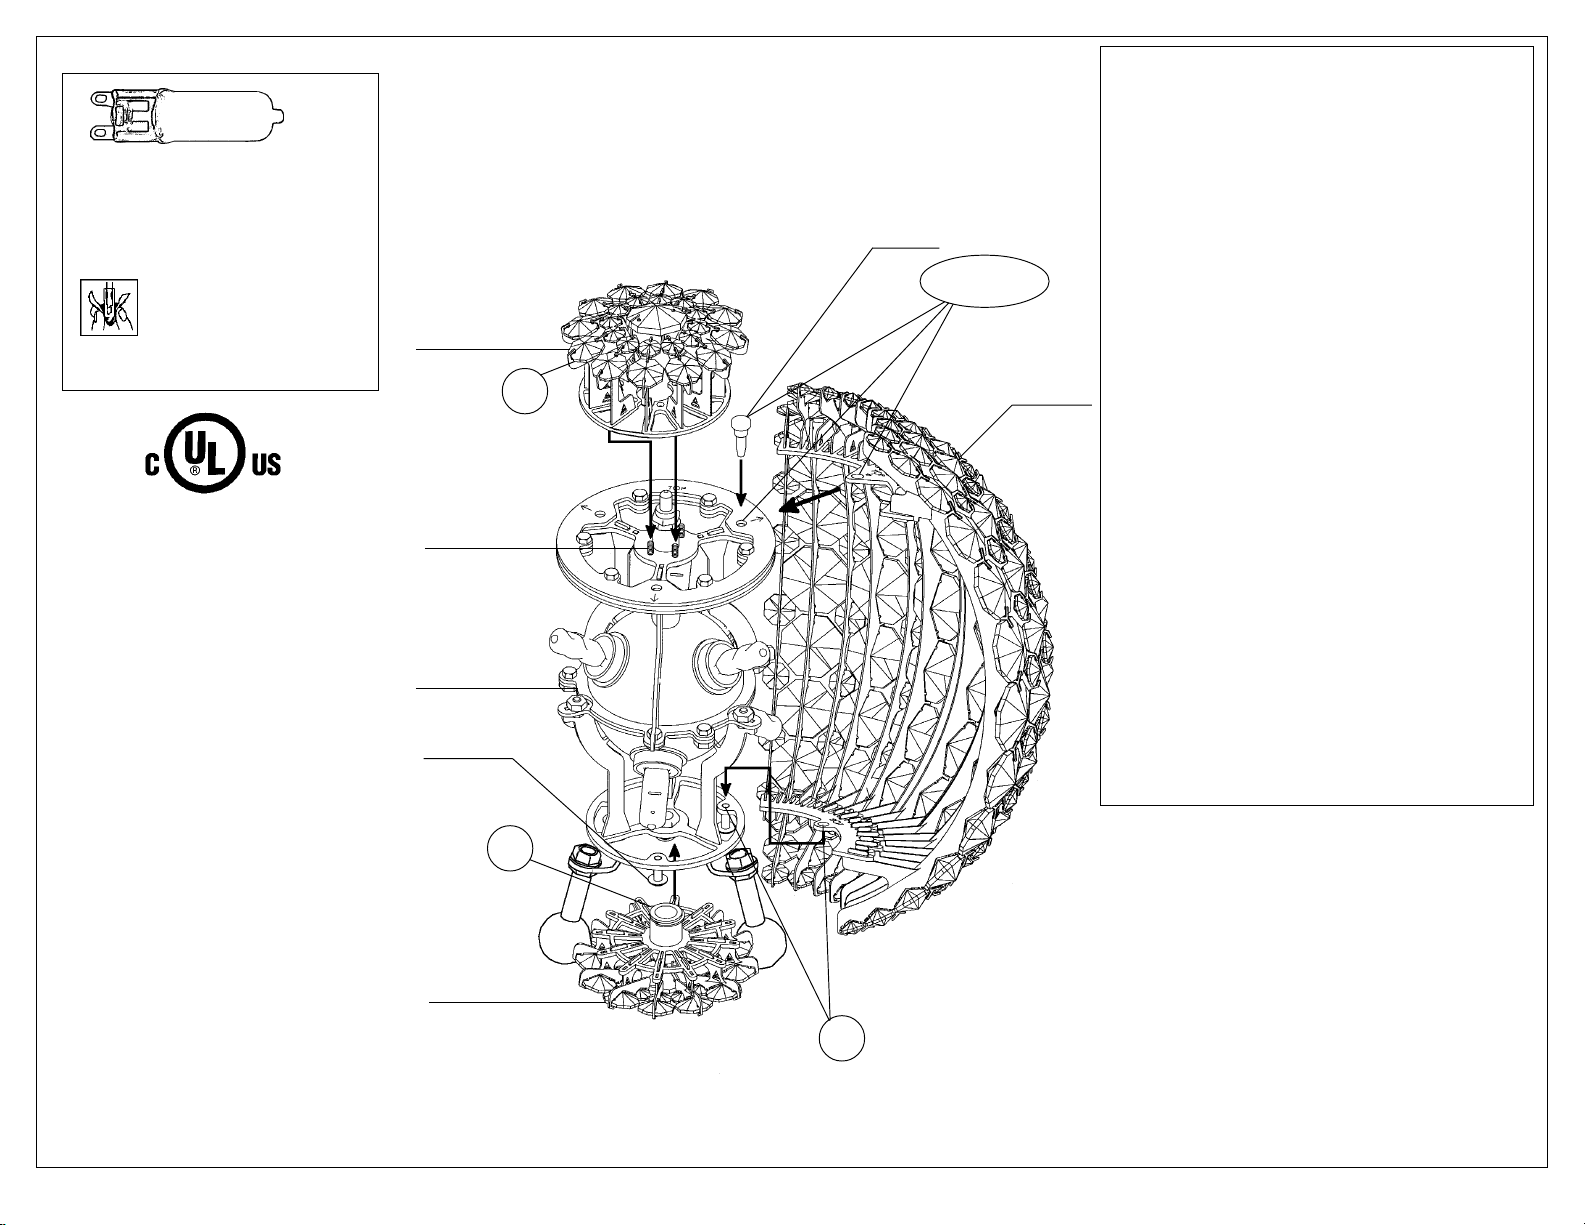
How to Assemble Your
Da Vinci Lamp:
Put on white cotton gloves to handle
crystal.
3Align arrows at top of one crystal
section of the sphere (labeled "TOP").
4Slide guide tab into slot to line up holes
for locking pin.
5To secure the crystal section, slide pin
into hole. Push pin in until it seats.
HOLD ON SECURELY TO CRYSTAL
SECTION UNTIL YOU ARE SURE PIN IS
ENGAGED.
6Align holes on the bottom of crystal
section with the screw on the bottom of
the frame (labeled "BOT"). Tighten screw.
Repeat steps 3 - 6 with other two crystal
sections.
7Assemble top by dropping in the crystal
circle by aligning the (4) holes in crystal
circle bottom plate with the (4) locating
studs on top of frame.
8Assemble bottom by screwing in bottom
circle of crystal.
6 - G9 JCD
(Supplied - Schonbek #JCD-G9-40)
40 Watts Max
Install bulbs and be sure to test
fixture BEFORE assembly.
To avoid damaging, do
NOT touch bulb with bare
hands. Install bulb with
clean cloth or tissue.
How to take apart your Da
Vinci for changing bulbs or
washing:
1Remove top crystal circle.
2Remove bottom by unscrewing large bottom
crystal octagon.
3 Once the bottom crystal is completely
unscrewed, remove the entire bottom circle of
crystal. Da Vinci comes apart like an orange, in
three sections.
4Locate and remove screws on the bottom of
the ball. Do NOT discard screws, they are
required for reassembly.
5Locate the locking pin inside the top of the
ball.
6While holding one section of the ball,
remove the pin by pulling it up. The crystal
section can then be removed.
7Remove the other two crystal sections in the
same manner, so that all that remains is the
frame with bulbs.
8Replace necessary bulbs.
If you are cleaning your Da Vinci, all crystal
parts can now be placed in the dishwasher.
See page 7 for cleaning instructions
7
FRAME
8
6
BOTTOM
TOP
CRYSTAL
CIRCLE
BOTTOM
CIRCLE OF
CRYSTAL
SCREWS
3, 4 & 5
#11068
CRYSTAL
SECTION
LOCATING
STUD