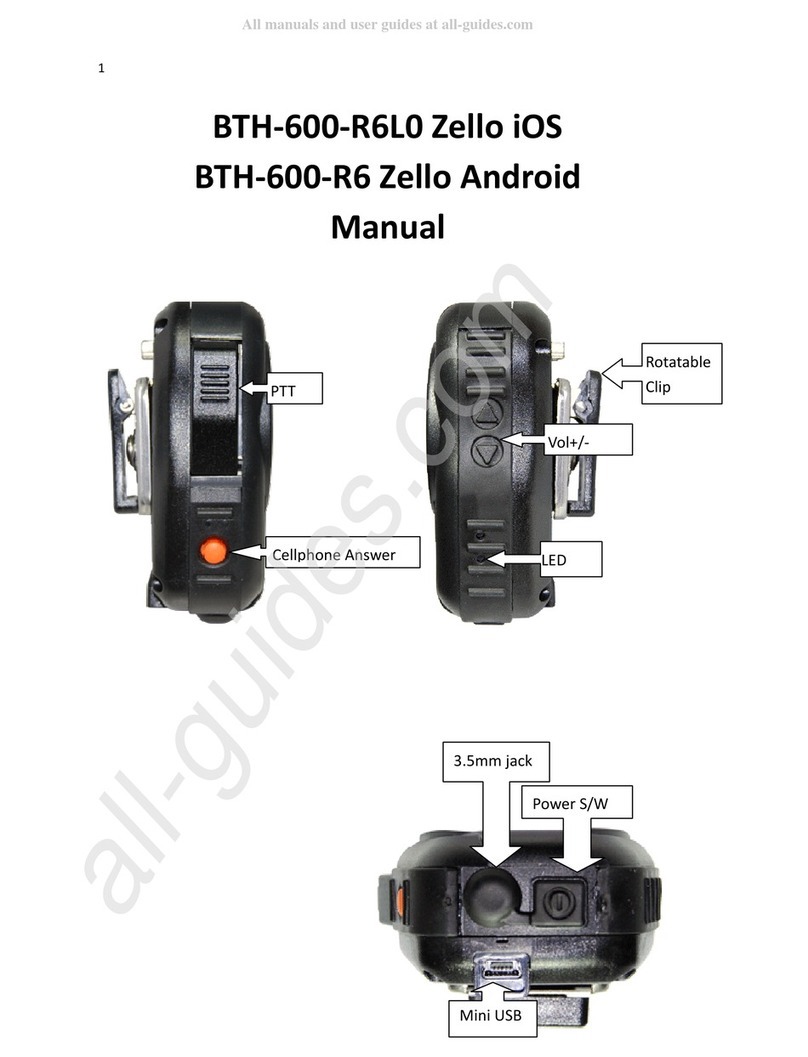
ScorpionExo EXO-COM User manual

Powered by
USER MANUAL
POWERED BY
4-Rider DynaMESH Intercom
Intercom Range: Up to 0.8KM
(.5 mile) per person
Dual Boomless Microphones

1
INDEX
PACKAGE CONTENTS 2
LED INDICATOR
SPEAKER/MIC INSTALLATION
CONTROLLER INSTALLATION
BATTERY INSTALLATION
WIRE STORAGE
PAIRING EXO-COM TO APP
ACTIVATE PHONE PAIRING
BASIC CONTROL
MUSIC
INTERCOM GROUP PAIRING SETUP
INTERCOM CONTROL
INTERCOM PAIRING SETUP (OTHER BRAND)
IMPORTANT NOTICES & WARRANTY INFO
9
10
ACTIVATE SIRI/GOOGLE ASSISTANT 10
11
12
RESET 12
13
MUSIC SHARING 14-15
BATTERY RECHARGE 15
VOICE PROMPT LANGUAGE SETTING 16-18
MOUNTING ADAPTER 22
MOUNTING ADAPTER ASSEMBLE 23-24
25-34
FIRMWARE UPDATE 19-21
3
4
5
5
6
7
8
USER MANUAL

2
Package
Contents
UP button
DOWN button
QUICK ACCESS (Google/Siri)
MIC/SPEAKER
USB-C CABLE
BATTERY
VELCRO
QUICK START GUIDE
POWER button
LED light
2 x Circular Velcro for Speaker/Mic,
3 x Capsule Velcro for wire management
- EN, FR, DE, ES, IT
Mounting Adapter for
EXO-COM controller
Mounting Adapter for
EXO-COM battery
MOUNTING ADAPTER
RETAIL PACKAGE ONLY

3
LED
Indicator
BLUE RED
PURPLE
GREEN
BLUE/RED
Blinking - Power on state
Double Blink - Phone call in progress
Music Playing
Blinking - Intercom Pairing Mode
Blinking - Intercom connecteed
Alternate - Bluetooth phone pairing mode
Blinking - Music Share Pairing, Incoming call
Blinking - Powering off
Battery low

4
Mic/Speaker
Installation
1. INSTALLING CIRCLE VELCRO
Circle Velcro may need to be attached to
the speaker pockets first to fix the
mic/speaker.
1) Remove the liner completely referring
to helmet manual.
2) Find the speaker pockets on EPS, peel
off the sticker paper on Velcro, and put
one of each circle Velcro inside them.
2. MIC/SPEAKER INSTALLATION
After the Velcro sits properly
on the speaker pocket, peel
off the sticker paper on the
Fabric (that was paired to
Velcro), and attach it to the
back of mic/speaker.
Attach the mic/speaker to the
Velcro. Make sure the mic is
positioned at bottom, and mic
hole is facing front (for best
position to accept voices).
Put the mic/speaker cable on the back of bottom EPS referring
to the above picture. You can tidy it up by fixing it with Ellipse
Velcro.
Make sure the male connector (3a) is properly positioned to be
paired with female connector (3A) in the Controller.
3a
3a

5
Controller
Installation
Battery
Installation
Push up the Locking Lever (1) to remove EXO-COM
Controller Cover (2), and put Mic/Speaker Female
Connector (3A) into the hole first, and then Battery Pack
Male Connector (3B) referring to the above picture.
Install the EXO-COM Controller (4), and make sure it is
properly positioned by sitting on two bumps (5) at the
bottom.
Connect the mic/speaker’s female connector (3A) to its
male connector (3a).
Reverse the process to remove the EXO-COM.
1. Remove the Battery Pack Cover from the
back/bottom side of the helmet.
2. Assemble it to the Battery Pack.
3. Plug the Battery Pack male connector (3B) to
the Battery Pack referring to the above picture.
Mic/Speaker
Female
Connector
Battery Pack
Male Connector
1
2
4
3A
3B
5
5
Battery Pack
Male Connector
12
3
3B
Male connector

6
Wire
Storage
4. Put the Battery Pack back to the slot where the Battery Pack
Cover is originally positioned.
Make sure the EXO-COM Controller, the Battery Pack Assembly,
Mic/Speaker and its wire are all properly set.
To find detailed information about using the EXO-COM Controller,
refer to the EXO-COM Quick Start Guide, or User’s Manual by
scanning QR code in the EXO-COM Quick Start Guide.
4
Put the wires into the pocket of left cheek pad.
It will help you ride comfortably.
NOTE: WHEN YOU RE-INSTALL THE LINER, CHECK IF
ANY PART OF EXO-COM WIRE IS ON THE LINER SNAP
HOLE. IT MAY CAUSE WIRE DISCONNECTION IF THE
SNAP STRONGLY PUSHES THE WIRE.

7
Activate
Phone Pairing ►Pick up Incoming Call
►End / Reject Incoming Call
►Last Number Redial
►Swap Call
Hold UP+DOWN 2 sec.
Press POWER once, or just say “Hello”
Hold POWER 2 sec.
Hold POWER+UP 2 sec.
Press POWER once
1
2
3
Bluetooth List
Available Device
EXO-COM
Bluetooth List
EXO-COM
Connected
Once paired, LED turns blue.
Device is ready for calls and
media streaming.
Find EXO-Com in your phone's
Bluetooth device list, and tap
the name to pair the device.
LED blinking

8
EXO-COM 1
12
Homepage Connect EXO-Com
3Device Information
Easy firmware update: Click update button on
EXO-COM app, and follow on-screen instructions.
Firmware update via PC: Visit www.uclear.eu
or www.ucleardigital.com (North Amercia)
Firmware Update
4Configuration
Pairing EXO-COM
to App
1. Turn on the EXO-Com, and pair it to the phone first.
2. Press POWER once.
3. Now it is ready to connect to the app.

9
Basic
Control
Hold POWER 2 sec. Hold POWER 5 sec.
Press UP once. Press DOWN once.
On Off
Volume Up Volume Down
Press Press Twice Hold 2 sec.
Hold 5 sec. Hold until light changes

10
Music
►Play
►► Skip track
◄◄ Backtrack
Press UP x 2 times.
Press DOWN x 2 times.
Press POWER x 2 times
Pause
Press POWER once
Activate
Siri/Google Assistant
Press QUICK ACCESS twice, wait for tone
Product Support &
Manual Download
SCORPIONSPORTS.EU (EU)
SCORPIONUSA.COM (USA)

11
Intercom Group
Pairing Setup
Power ON Status
1
Press and hold QUICK ACCESS
for 5 secs until LED blinks purple.
Verify all units to be paired are
blinking purple before next step.
2
The last unit to pair continues to blink purple
for 15 secs before system ends the pairing process.
Optional: Press POWER once on the last unit blinking
purple to end pairing manually.
4
Press POWER on one EXO-COM device to initiate
pairing process. The units will blink green once
they are connected.
3
The initial setup

12
Reset
Intercom
Control
Reset
Press UP+POWER+DOWN together once
Hold DOWN 2 sec.
After initial setup
►Intercom Disconnect
Hold UP 2 sec.
►Intercom Connect
Press POWER 3 times
►Microphone Mute/Unmute
To manually reboot EXO-COM devices, use the 3-button
reset (does not erase your settings).
Press & hold POWER + UP + DOWN at the same for a
few seconds.
Afterwards, power the unit back on. If the unit does
not power on, try resetting again while it is plugged
into its charger.
If you experience further problems, please contact
UCLEAR Support.
NOTE: 3-Button reset is a clearing/reboot
process. It will NOT reset your EXO-COM device
to factory defaults, or erase settings or pairings.

13
Intercom Pairing
Setup (Other Brand)
Intercom Pairing (Other Brand) Setup
2
13
4
If the LED is purple, take off
your hand from the device,
and wait until LED turns green.
If the LED is green, you are
succesfully connected. If the
LED is purple, go back to step 1.
Set up other brand in "Phone Pairing mode”
(please refer to other brand user
manual)
From OFF MODE,
Press POWER until LED turns
to purple (about 15 sec.)

14
Music Sharing
EXO-Com A
- Power ON state.
- Press Power and Down twice quickly.
- LED indicator will blink blue and red
EXO-Com B
- Power ON state.
- Press Power and Up twice quickly.
- LED indicator will blink blue and red
1 2
- Primary unit is the device paired to
the phone that is playing the music
- Play/pause commands on Primary
unit will affect both devices.
- Secondary unit will receive the music shared
by primary unit.
- Play/pause commands on Secondary unit
will not affect Primary unit.

15
To charge the battery,
we recommend using
the USB-C cable included
into the package.
LED turns red while charging.
LED turns blue when fully charged.
EXO-Com A & B
- Both EXO-COM units will start blinking
blue when pairing completes.
- Control music playback and volume as
shown on ‘Music’
Example: Press POWER twice to start music play.
Press POWER once to pause music.
3
Battery Recharge

16
Voice Prompt
Language Setting
7 Languages are prepared :
- English, French, German, Spanish,
Italian, Chinese, Korean
English and French are default setting.
If you need to change the voice
prompt setting, you can change it
via PC or APP(iOS, Android)
2-3 min. via PC update
10 min. via App(Andorid)
4 hrs. via App(Apple iOS)
Select CONFIGURATION
1Select VOICE PROMPT
2
We recommend using PC or Android
rather than Apple iOS as Apple iOS
only supports a slow
BLE data transmission.

17
Select Language
3Confirm Download
4Download and Firmware
Update
5
Select Language and
Update Firmware

18
Update Firmware
6Update the Language
and Reboot
7Complete the Update
8

19
Firmware
Update
Method 1. EXO-COM Mobile App
Method 2. PC or Mac
2-3 min. via PC update
10 min. via App(Andorid)
4 hrs. via App(Apple iOS)
We recommend using PC or Android
rather than Apple iOS as Apple iOS
only supports a slow
BLE data transmission.
Update Firmware
Connect device to EXO-COM Mobile App
as shown on pages 7-8. Tap ‘UPDATE FIRMWARE’
and follow on-screen instructions.
Firmware Update can be done via
Firmware Update via Android/Apple iOS
Method 1
Table of contents
