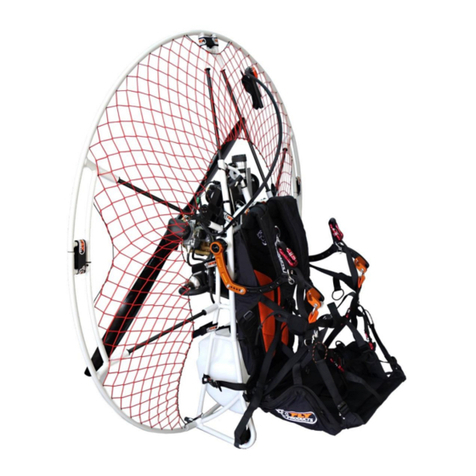
Scout Carbon Paramotor User manual

1
User manual.
User manual.
Proudly designed and manufactured in Slovakia. (www.scoutparamotor.com)

2
User manual.
1 A big thank You.
Dear SCOUT pilot. Thank you very much for choosing the SCOUT.
We believe that the SCOUT is the most innovative paramotor. We have are fully engage in
research an evelopment to ensure the best flight characteristics, maximize safety an to
eliver the pure joy of flying. The paramotor has been ma e in Slovakia an has passe
strict quality checks before expe ite to You.
Please, o not hesitate to contact your ealer on me irectly, shoul you nee any help or
a vice.
We woul also like to get your fee back an impressions about SCOUT for further research
an evelopment.
Fly safe an enjoy
Miroslav Svec, SCOUT lea esigner.
+421 907 561 083 (direct mobile pho e, UTC+1)
Proudly designed and manufactured in Slovakia. (www.scoutparamotor.com)

3
User manual.
2 Important notice.
The user is not authorize to make any mo ifications on the paramotor, that woul iffer from
original specifications an characteristics. Shoul the user perform such mo ifications, this
may cause loss of varanty.
This instruction manual is not a substitute for training nor obtaining vali pilot license!
To fly the SCOUT paramotor, pilot is require to have proper training an gain skills. Always
obey rules in your country.
Your engine was was not broken-in! 1
Every SCOUT paramotor is c ecked before s ipping. We only do a few test starts to test wiring of kill
switc , SafeStart and t e PPG meter. Please do t e brake-in according to t e manual supplied by t e
engine manufacturer.
1 unless stated differently on next page.
Proudly designed and manufactured in Slovakia. (www.scoutparamotor.com)
Powered paragliding involves risks:
Read this ma ual carefully before usi g the SCOUT paramotor!
Keep i mi d that you will be usi g SCOUT paramotor at your ow risk. Si ce flyi g powered paragliders is
a risky sport, whether with a paramotor SCOUT or a y other, warra ty does ot cover accide ts, bodily
i jury a d / or death. Make sure that you have completed all the ecessary checks o paramotor a d
paraglider before every flight. Never fly with the SCOUT paramotor, if you fi d a y malfu ctio or damage.

4
User manual.
3 Your paramotor
Basic data
Unit type Propulsion unit for powered paragliding
Name SCOUT paramotor
Manufacturer SCOUT aviation s.r.o.
Hadovská cesta 870 Komárno 945 01 Slovenská Republika
IČO: 47 507 292
contact: Ing. Miroslav Švec
Tel: +421 0907 561 083
Email: [email protected]
www.scoutpatamotor.com
Date of assembly
Frame serial. number
Engine /manufacturer
Engine serial. number
Engine break-in has to be done by user
Total engine hours on
the date of first sale
Basic technical specifications
Weight
Dimensions Cage diameter 1484 mm. Suitable for propeller up to 1320mm
Fuel tank 12 litres
Equipment
SafeStart Yes
Hook-in type weight-shift bars with medium position (standard)
hybrid low hook-in system for enhanced weight-shift
Throttle controll
Vittorazi V-throttle (right or left hand)
Polini throtthe for electric start
Propeller fixed-pitch 1320 mm carbon
fixed-pitch 1320 mm fiberglass
adjustable 1320 mm carbon
other:
Cage bags yes
no
Travel bag yes
no
Proudly designed and manufactured in Slovakia. (www.scoutparamotor.com)

5
User manual.
4 Records of owners
1. owner
Name:
Address:
Tel
Email
Date from
Date to
Modifications on paramotor:
2. owner
Name:
Address:
Tel
Email
Date from
Date to
Modifications on paramotor:
3. owner
Name:
Address:
Tel
Email
Date from
Date to
Modifications on paramotor:
4. owner
Name:
Address:
Tel
Email
Date from
Date to
Modifications on paramotor:
Proudly designed and manufactured in Slovakia. (www.scoutparamotor.com)

6
User manual.
5 Paramotor assemb y
Tips for cage assembly
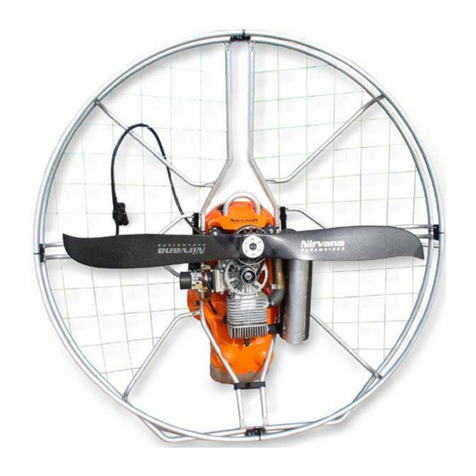
SCOUT paramotor comes completely assemble an pilot only nee s to install the cage an
propeller. For assembly, please follow these steps:
1. lay the paramotor own, engine facing own
2. Insert the Enduro stand by pusing the
brass pins, make sure the pins pop out.
You will regret later if you forget this now
:-)
3. Now your can flip your parmaotor in the
normal stan ing position.
4. install first Carbon DTC spar on to the main
frame. Start with the right bottom one, the
one that is near the fuel tank cap.
5. install the low ring section
6. Step on the stan , push the main frame
away from you still hol ing the stan with
your foot to make room for the ball joint to
enter in the bottom hoop CNC machine
hole.
7. install all other carbon spars like on this
picture (secon picture)
8. Take the 5 ring sections out of the bag,
keep them fol e together.
9. Keep the carabiner locke throughout the
whole process - this prevents the netting
from tangling.
10. Look at the INNER ring section an fin out
which si e it fits.
11. Approach the paramotor from front so that
the netting stays in front of the arms.
12. Place the inner ring section on to the lower
arm on respective si e whi e sti keeping
a fo ded ring sections together. .
13. Leave the other end of the first ring
section free. Leave the free end of the
section on the OUTER side.
14. While the first section is in place, "unfol " the
remaining four an place the inner section on
the next arm (3 or 9 o'clock).
15. Repeat with all other sections
16. It may be necessary to unlock t e
carabiner on t e netting to be able to put
t e last ring section in place
17. At t is point you s ould end up wit all
sections pus ed alf-way only wit one
end.
18. Now finis t e assembly of t e cage by
pus ing t e section onto t e arms until
Proudly designed and manufactured in Slovakia. (www.scoutparamotor.com)
7
User manual.
t e pins click. sometimes you ave to work wit t e joint a little as we tried to
make it maybe too precise.
19. You will need to press ard w en connecting t e last joint.
20. Now, unlock t e carabiner on t e netting and place t e longer end of t e line
be ind t e arness and THROUGH t e ring on t e tensioning strap be ind t e
arness
21. Connect t e carabiner onto t e SECOND knot on t e line.
22. Tensioning: wit one and press t e line down and simultaneously pull t e
tensioning strap.
23. Make two steps back and look at your beautiful carbon fiber paramotor.
Gorgeous.
Disassembly is basically the reversed process:
1. Loosen the tensioning strap
2. Unlock the carabiner on the tensioning line.
3. Take the longer en out an place it in front of the harness an lock the carabiner on
the first knot. This will prevent tangling of the netting.
4. Unlock the first joint on the ring, whichever you want. Yes, this requires some power.
5. Unlock ONLY ONE en of each ring section only. Leave the free en s on the outer
si e. use small continuous movements. This makes it easier an prevent a large
su en impact when the joint lets go.
6. Then unlock the other en of each ring section but keep it half-way on so that each
section is still in place. This prevents the ring sections from falling or hanging an
tangling aroun .
7. Take one low ring section an fol it forwar an place it ON TOP of the next section.
8. Take the two together an fol them on the thir
9. fol all of the cage parts an put into the bag
Mounting the fixed-pitch
propeller:
1. Put the two propeller bla es together. The joint is asymmetric, so if the surfaces of
two bla es are not aligne , you have put the bla es together in wrong way.
2. Place the prop on engine.
3. Place the orange isc/ flange on the prop an put the bolts in.
4. Use 12 Nm torque to screw the bolts.
Han le the propeller with care.
Never use it to hol the paramotor.
Never fly with a amage propeller. Let the manufacturer or authorize personnel repair the
propeller.
Shoul unusual vibrations occur, o not fly with the propeller an contact the manufacturer.
Proudly designed and manufactured in Slovakia. (www.scoutparamotor.com)
IMPORTANT: Do ot start the e gi e without prop!

8
User manual.
Reserve parachute
SCOUT paramotor is equippe with a container for reserve parachute, but the reserve
parachute is not inclu e !
Installing the reserve parachute into the
container un er the seat is easy. Make sure
that the reserve bri le is always on the outer
si e an nothing prevents throwing of the
reserve. Consult your ealer or instructor if you o not feel confi ent in proper installation.
Check our website (www.scoutparamotor.com) for a reserve parachute installation vi eo
tutorial .
6 Motor break-in
The paramotor comes with bran new engine if not specifie otherwise.
7 Harness setting
Hang-point setting
Do the harness adjustment and hang test before first f ight.
The best position is 0-5 egrees recline as measure on the propeller hub. Being recline
more may be angerous an makes paramotor less efficient. Being incline forwar may be
angerous as paragli er brake toggles may get very close to propeller.
There are 4 holes on the stan ar weight-
shift bars. These holes are use for straps
that the main carabineers are attache with.
For pilots of aroun 85kg the best position is
to use the secon an thir hole, that is in the
mi le.
Lighter pilots will nee to move the hang
points to back, i.e. through the thir hole, ore
thir an fourth. Very light pilots may use the
fourth only.
Heavier pilots may nee to move the hang
points to front, through the first an the
secon for example.
There are 7 settings possible.
Picture on next page shows the position
of the holes on the bars.
Proudly designed and manufactured in Slovakia. (www.scoutparamotor.com)
Make sure that the bri le is always on the outer si e an
nothing prevents throwing of the reserve.
Do the e gi e break-i accordi g to user ma ual provided
by e gi e ma ufacturer.
Never f y without testing the setting.
Do the hang test on ground!.

9
User manual.
Use same setting on both si es.
Straps adjustment
Set the straps on groun to match your bo y size. Do your hang test to make sure the
harness is comfortable in flight.
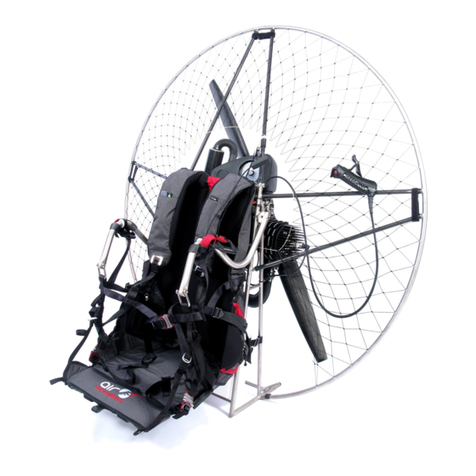
There are two relatively short straps that fix the harness to the frame below the tank.
These straps shall be attache in an X pattern:
Left strap to the center-right vertical tube on the frame.
Right strap to the center-left vertical tube.
Proudly designed and manufactured in Slovakia. (www.scoutparamotor.com)
1
234

10
User manual.
Make sure these are loose (at least 12-14 cm free length).
If you set them too short, the seat will be pulle back an you will feel like the harness
is too small for you.
If you set them too long, it will let the bars get too high while seate .
Make sure you re-tighten the tank strap after checking or mo ifying the harness settings.
We recommen tightening the rucksack straps a little before launch an lan ing.
We recommen loosening the rucksack strap after take-off to enable better bo y-motion an
weight-shift.
Proudly designed and manufactured in Slovakia. (www.scoutparamotor.com)
11
User manual.
8 Pre-f ight check
Before every flight, make visual check:
Cage and frame No cracks or amage
all pins an safety catches are in place
netting without amages an properly tensione
free up/ own movement of the bars without motion to the si es
Harness Straps without amage
Harness attachement to the frame without amage or wear
Prope er No cracks or broken material
Bolts tight
Sufficient clearence form cage an fuel tank
Fue tank Cap in place, no leaking fuel
No cracks or holes
Strap tight
Engine Rubber mounts without amage
Exhaust an silencer without amage, all joints tight, springs in place
Belt correctly tightene
Reserve chute Hooks in place, visible through transparent material on the container
Han le not loose, hel in place with velcro
Engine test Warm-up the engine, run i le, acceleration to full power, i le again -
motor has to run smoothly in all regimes
Test the kill switch
DO NOT FLY IN ANY CASE OF MALFUNCTION.
LET EXPERTS DO THE REPAIR.
Perform the same check after each flight.
9 Genera safety ru es
We expect you to have proper training, skills an qualification/license to fly a paramotor.
Make sure it is safe to start the paramotor an give necessary safety instructions to people
nearby.
Make sure con itions are suitable for flight. You are responsible to make qualifie ju gment
on weather con itions, terrain, airspace regulation an other con itions.
Be cautious an responsible.
Always maintain sufficient altitu e an clearance to obstacles to make a safe lan ing in case
of a malfunction of the paragli er or paramotor.
Proudly designed and manufactured in Slovakia. (www.scoutparamotor.com)
12
User manual.
10 Maintenance
Do the maintenance of engine according to manufacturer's manua .
Every 30 hours or 12 months do fo owing maintenance:
1. clean, check an grease the sli e joints of the moving bars
2. uninstall the harness an check the straps that the harness is attache to frame with
3. replace fuel lines an fuel filter, check the tightness of the valve in the fuel bulb
4. replace the batteries in the SafeStart evice every 12 months
Use lukewarm soap solution to clean the harness. The harness must not be cleane by any
chemical agent or washe in the washing machine! Using hot water or chemicals may
weaken or amage the material. Dry the harness after cleaning, avoi irect sunlight.
Harness must be store in a ark, well-ventilate room, an also must be protecte from
temperature fluctuations. Harness must not be store in a room with thinner or other
aggressive chemical agents.
11 Warranty
Warranty is 24 months from the ate of sale. The warranty applies to material an structural
efects. The warranty oes not cover amage cause by careless, improper treatment.
Failure to follow operating restrictions an instructions for maintenance an inspection will
cause warranty en ing on the ate of the last inspection. Warranty oes not cover repairs
ma e to other entities than the manufacturer or an authorize service technician. In the event
of any interference with the paramotor, which will be con ucte by the manufacturer or
authorize person will voi warranty.
Spare parts, accessories an components are thoroughly teste by the manufacturer to meet
the eman ing requirements for reliable an safe operation of the paramotor . Use only
original parts, accessories an components. If other parts, accessories an components as
supplie by the manufacturer are use , paramotor manufacturer cannot guarantee proper
functioning an safety of operation an paramotor warranty is voi .
Any amage or resulting efect that prevents the use of the paramotor must be reporte to
the manufacturer. After examining the extent of the amage, or to i entify the cause glitches
manufacturer shall etermine necessary repairs. The manufacturer may authorize a
responsible person to carry out repairs.
Proudly designed and manufactured in Slovakia. (www.scoutparamotor.com)
We reserve the right to modify i structio s for use.
Table of contents