Sears Craftsman 358.351560 User manual

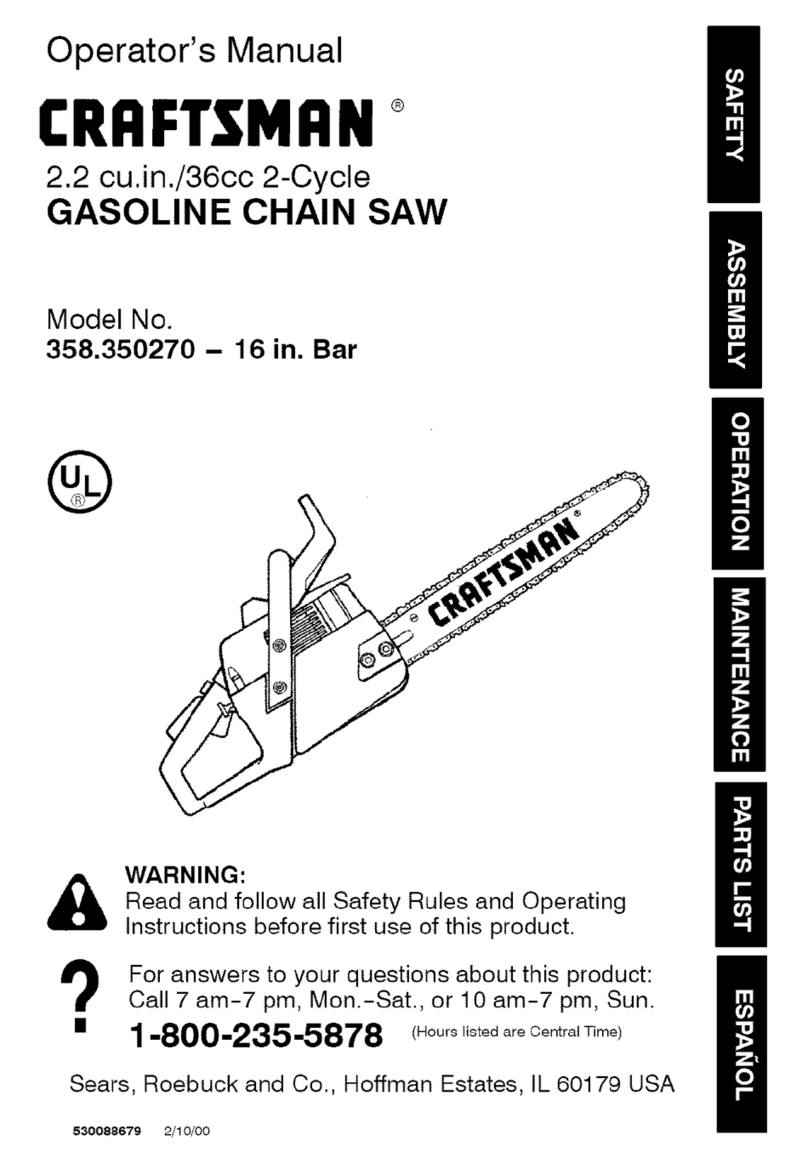
Operator's Manual
CRRFTSMRN
2.2 cu.in./36cc 2-Cycle
GASOLINE CHAIN SAW
Model No.
358.351560 - 16in. Bar
@
WARNING:
Read and follow all Safety Rules and Operating
Instructions before first use of this product.
For answers to your questions about this product:
Call 7 am--7 pm, Mon.-Sat., or 10 arn--7 pm, Sun.
•1-800-235-5878 (.o..,=_=_._m.)
I
'S_s, Roebuck and Co., Hoffman Estates, IL 60179 USA
530087619 06/08/98
All manuals and user guides at all-guides.com
all-guides.com

!saW_e_n_/ules
:_mb)
)Operation
Maintenance
Service and Adjustments
Storage 16
Trouble ShootingChart 17
Pads List 20
Spanish 24
11 ,Pads & Ordering Back
14
FULL ONE YEAR WARRANTY ON CRAFTSMAN ®GAS
CHAIN SAW
For one year fromthe date of purchase, when this Craftsman Gas Chain Saw is
maintained, lubdcated and tuned upaccordingtothe owner's manual, Sears will
repair,free ofcharge, any defect in matedai or wodornanship.
This warranty excludes the bar,chain, spark plug and air filter,which are
expendable parts, and become wom dudng normalusa.
Ifthis Gas Chain Saw isused forcommercialor rentalpurposes,this warranty
appliesfor 30 days fromthe date of purchase.
WARRANTY SERVICE IS AVAILABLEBY RETURNING THIS CHAIN SAW TO
THE NEAREST SEARS SERVICE CENTER IN THE UNITED STATES.
This warranty gives you specificlegal dghts,and you may alsohave other dghts
which vary from state to state.
Sears, Roebuck and Co., D/817 WA, Hoffman Estet_'s,:lL 60179
WARNING: Always disconnectspark
plugwire when making repairs except
forcarburetor adjustments.Because a
chain saw is a high-speed woodcutting
tool,careless or improperuse ofthis
toolcan cause sedous injury.
PLAN AHEAD
•Reetdctthe use of your saw to adult
users who understandand can follow
the safety rules,precautions,and op-
-erating Instructionsfound inthis
manual.
Snug
Firing _Heavy Duty
Clothing Gloves
Safety
Shoes jChaps
\NM
,_Wear protectivegear. Always use
steef-toed safety f_twear with non-
slipsoles; snug-fittingclothing;heavy-
duty,non-slipgloves; eye protection
suchas non-fogging,vented goggles
or face screen;an approved safety
hard hat; and sound barriers (ear
plugsor mufflers)to protectyour
hsadng. Regular usersshould have
headng checked regularlyas chain
saw noisecan damage hearing. Se-
cure hair above shoulderlength.
•Keep aimpartsof your body away from
the chainwhen the engine is running.
•Keep chgdrsn,bystanders, and ani-
mals at least 30 feet (10 meters)
away from the work area when start-
ing and usingthe saw.
•Do nothandle or operate a chainsaw
when you are fatigued, ill, or upset, or
ifyou have taken alcohol,drugs, or
medication.You mustbe in good
physicalconditionand mentallyalert.
Ifyou have any conditionthat might
be aggra.vatedby strenuous work,
check with doctorbefore operating.
•Do notstert cuttinguntilyou have a
clear work area, securefooting, and
especiallyif you are felling atree, a
retreatpath.
2
All manuals and user guides at all-guides.com

OPERATEYOUR SAW SAFELY
• Donotoperatewithonehand Seri-
ousinjurytotheoperator,helpers,or
bystandersmayresultfromone-
handedoperation.Achainsawisin-
tendedfortwo-h.andeduse.
•Operate the ch_unsaQwonly-ine,well-
ventilated outdoorarea.
•Do not operate saw from a ladder or
in a tree, unless you are specifically
trainedto do co.
•Make surethe chain willnot make
contactwith any object whgestarting
the engine NeverW tostartthe saw
whenthe guidebarisina cut.
• Do notput pressure onthe saw, es-
peoiailyat the end of the cut. Doing
so can cause you to lose control
when the cut iscompleted.
•Stopengine before seffing saw down.
•Hand carrysaw onlywhen engine is
stopped.Carry with muffleraway from
body;,guidebar & chain projectingbe-
hindyou; guide bar preferably cov-
ered with a scabbard.
•Storethe unitand fuel in a cool,dry
well ventilatedspace where fuel va-
porscannot reach sparksor open
flames fromwater heaters, electric
motorsor switches,furnaces, etc.
GUARD AGAINST KICKBACK
Followallsafety rulesto help.avoid
kickbackand otherforces which can
resultinssdous injury.
k Path
AvoidObstructions
Qear TheWoddngArea
WARNING: RotationalKickback can
occurwhen the moving chain contacts
an object at the upper portion of the tip
MAINTAIN YOUR SAW IN GOOD ofthe guidebar.Contactat theupper
WORKING ORDER
•Have all chain saw service performed
by a qualifiedservice dealer except
the items listedin the maintenance
section ofthis manual.
•Make certain the saw chain stops
movingwhen the throttletrigger is re-
leased. Forcorrection, refer to"Car-
buretorAdjustments."
•Keep the handles dry, Clean, and free
from oilor fuel mixture.
•Keep caps and fasteners securely
tightened.
•Use only Craftsman accassodes and
replacement partsas recommended.
Ne'ger modifyyour saw.
HANDLE FUEL WITH CAUTION
•Do not smokewhile handling fuel or
while operatingthe saw.
•Eliminatsallsourcssofsparksor ltame
inareeswherefusl ismixed or psured.
• Mix and pourfuel in an outdoorarea
and usean approved, marked con-
tainer for allfuel purposes.Wipe up
allfuel spillsbefore starting saw.
•Move at least 10 feet (3 meters) from
fueling site before starting.
•Turn the engine off and let saw cool in
'a-nt)rPcombustiblearea, noton dry
leaves, straw, paper, etc. Slowly re-
move fuel cap and refuelunit.
portion ofth6'tip ofthe guide bar can
cause the cl'_ainto dig intothe object,
whichstops the chainfor an instant.The
resultis a lightningfast, reverse reaction
whichkicks the guide bar up and back
toward the operator.
Pinch-K]ckhackand Pull-Inoccur when
the chain is suddenly stopped by being
pinched, caught, or by contacting a for-
eign object inthe wood. This sudden
stopping ofthe chain resultsin a rever-
sal of the chain force used to cut wood
and causes the saw to move in the op-
positedirectionofthe chain rotation.
Pinch-Kickbackdrivesthe saw straight
back toward the operator. Pull-In pulls
the saw away fromthe operator.
REDUCE THE CHANCE OF
KICKBACK
•R_ thatkickbackcan
With a basicunden_mding 1ofkiddoeck,
happen.
you can reducethe elementof surprise
which conlrbutesto eccidents.
• Never let the moving chaincontact
any objectat the tipofthe guide bar.
• Keep workingarea free fromoi0struc-
tionssuch as other trees, branches,
rocks,fences, stump, et_. Eliminate
or avoid any obstructionthat your saw
chain couldhit while cutting.
•Keep saw chain sharpand propedy
tensioned. A loose or dullchain can
All manuals and user guides at all-guides.com

increase the chance of kickback. Fol-
lowmanufacturer's chain sherpenlng
and maintenance instructions.Check
tension at regular intervals, but never
with engine running. Make sure bar
clamp nuts are securelytightened.
•Begin and continue cuttin_lat full
speed. Ifthe chain _movmg at a
slowerspeed, there _sgreeter chance
of kickbackoccurring.
• Use extreme caution when reentering
a cuL
•Do not attempt cuts startingwith the
tipofthe bar(plunge cuts).
•Watch for shifting logsor oti_erforces
thatcould dose a cut and pinch orfall
intochain.
•Use the specified Reduced-Kiokback
Guide Bar and Low-KiokbackChain.
Avoid Pinch-Kickback:
•Be extremely swam of situations or
obstructionsthat can cause matedal
to pincl_,the top of or otherwisestop
the chron.
•Do not cut more than one log at e
time.
•Do not twist saw as bar iswithdrawn
from an undercut when bucking.
Avoid PulHn:
•Alwaysbegin cuttingwith the engine
at full speed and the saw housing
against wood.
•Use wedges made of plastic or wood.
Never usa metal to holdthe cut open.
MAINTAIN CONTROL
Stand to the leftofthe saw
Thumbon
underside
of handlebar
I
iElbow
\ locked
Neverreverse han@podtJons
• A good, firm grip onthe saw with both
hands will help ,youmaintaincontrol.
Don't let go. Gdp the rear handle with
your dght hand whether you are dght
or left handed. Wrap the tingem of
your left hand over and around the
front handlebar, and your left thumb
under the fiord handlebar. Keep your
left arm straightwith the elbow locked.
•Positionyour !eft hand on the front
handlebar so it isin astraightline with
your dght hand on the rear handle
when making bucking cuts. Stand
slightlyto the left side of the saw to
keep your body from being in a direct
line with'the cuffingchain.
• Stand with,your walght evenly bal-
anced on both feet.
•Do not overreach.You could be drawn
or thrown offbalance and lose control.
• Do notcut above shoulderheight. It Is
difficultto maintain control of saw
'above shoulderheight.
KICKBACK SAFETY FEATURES
WARNING: The followingfeatures are
included onyour saw to help reduce
hazard of kickback;however, such fea-
tures willnot totally eliminatethis dan-
ger. Do notrely only onsafety devices.
•Handguard: designed to reduce the
chance of your left hand contacting
the chain ifyour hand slipsoff the
front handlebar.
•Positionof front and rear handlebars:
designed _distance between han-
dles and ",n-line"with each other.The
spread and."in-line" position ofthe
hands prodded by this design work
together to give balance and rasm-
tance in controlling the pivot ofthe
saw back toward the operator if kick-
back occum.
•Reduced-I_ckback Guide Bar:.de-
signedwith asmall radius tip which
reduces the size of the kickback dan-
_er zone. This type b.mhas been
emonstrated to significantlyreduce
the number and sedousness of kick-
backs when tested inaccordance with
ANSI B175.1.
Small Radius
Tip Guide Bar
•Low-KickbackChain:hasmet kickback
performance r_jui_ whentested
on a represent_ve sample of chain
saws below3.8 cubic inch
displacementspecifiedinANSI B175.1.
Low-_ckbackChain
ContouredDepth Gauge
_longsted GuardLink
Deflects
ForceAnd Allows
Wood ToGrsdu_
Ride IntoCutter
SAFETY NOTICE: Exposure to.
_"mations through prolonged use of
gasoline powared hand tools could
cause blood vessel or nerve damage in
the fingers, hands, and joints of people
4
All manuals and user guides at all-guides.com

pronetocirculationdisorders or n_.er and spark arre_ s_rsan
abnormalswelling. Prolonged use in whichmeets the re remanteof
coldweather has been linkedto blood CaliforniaCodes 4442 and 4443. All
vesseldamage in otherwisehealthy U.S. forest land and the slates of
people. If symptoms occur such as Califomia, Idaho, Maine, Minnesota,
numbness,10am,lossof strpng__,_New Jersey, Oregon, and Washington
change in.sldncolor o'ttextu-re,or_require by law that many internal
of fee._. m the fingers, hands,'orjoints, combustion engines be equipped with a
discontinuethe use of th=stool and spark arrestorscreen. Ifyou operate a
seek medical attention. An
anti-vibrationsystem does not
guaranteethe avoidance ofthese
problems.Users who operate power
toolsona continual and regular baszs
mustcloselymonitortheir physical.
cond_on and the condrdionof thzstooL
chainsawina stateorlocaleW,hem
n_oonr_llationse.xi_,youare legally
•for m=,nteiningthe
operatingcondition ofthese pads.
Failure to do so is a viola_on ofthe law.
Refer to Customer Responsibilities
CHAIN BRAKE If this saw isto be used chartin the MAINTENANCEsection.
forcommerciallogging,you must order
and installa chain brake to comply with
FederalOSHA Regulations for Com-
merciaiLogging.Contact your Sears
ServiceCenter or call 1-800-235-5878. Saws Safety Requirements (ANSI
SPARK ARRESTOR: Yoursaw is B175.11-t_1991).
equipped with a tempomtum limiting
STANDARDS."This chain saw is listed
by UndenmitersLaboratories, Inc. in
accordancewith American National
Standards forGasoline-Powered Chain
CARTON CONTENTS
Check cation contents against the fol-
lowinglist.
Model 358.351560
•ChainSaw (fully assembled)
• Bartool
•2-cycleengine oil
•Examineparis for damage. Do not
usedamaged parts.
•If you need assistanceor find that
partsare missing or damaged, please
call 1-800-235-5878.
NOTE: It is normalto hear the fuel filter .
rattleinan empty fuel tank.
Your unithasbeen factorytested and
the carburetorprecisely a_usted. As a
resultyou may smell gasoSneorflnd a
dropof oil/fuelresidue onthe muffler
when you unpackthe unit.
ASSEMBLY
Yoursaw is fullyassembled;no
assamUyle
All manuals and user guides at all-guides.com

KNOW YOUR SAW
READ THIS OPERATOR'S MANUAL AND SAFETY RULES BEFORE OPERAT-
ING YOUR CHAIN SAW. Compare the illustrationswith your unitto familiadze
yourseffwiththe _ocation of_thevadous controlsand adjustments. Save this
manual for future reference. '
Bar Tool FrontHandle
Starter Rope
OWSTOP
CRRFT3MRN"
Bar Oil RII Cap Housing
CylinderCover
Fast Idle
Fuel Mix RII Cap
Lockout Adjus_ng Ct_n
Screw Direction
Rear ofTravel
Handle
Throttle Choke
Tdgger Knob BarClarnp Chain Bar Clamp Nuts GuideBar
Catcher
ON/STOP SWITCH
The ON/STOP Switch is used to stop
the engine.
THROTTLE TRIGGER
The throttletdgger controlsengine
speed.
THROTTLE LOCKOUT
The throttlelockoutmust be pressed
before you can squeeze the throttletrig-
ger.This feature prevents you fromac-
cidentallysqueezing the tdgger.
F_ IDLE LOCK
The fast idlelockholdsthe throttle tdg-
ger in the startingposition.Activate the
fast idle lock by pressing the throttle
lockoutand squeezing the throttle tfig-
_e_. With the throttle rigger squeezed,
press the fast idle lock. Release the
thmffie lockoutand tdgger while holding
the fast idle lockbutton.
CHOKE KNOB
The Choke Knob activates the choke to
provideadditionalfuel to the engine
duringcoldstarting.
PRIMER BULB
The Pdmer Bulb circulates fuel to the
carburetor to provide quicker starting.
CHAIN TENSION
Itis normal fora new chain to stretch
dudngfirst30 minutesof operation.You
shouldcheckyour chain tensionfre-
quent. See Chain Tensionunder the
enaca and Adjustmentssection.
6
All manuals and user guides at all-guides.com
all-guides.com

BEFORE STARTING ENGINE
WARNING: Be sureto read the fuel
handlinginformationin the safety rules
section ofthis manuel before you begin.
If you do not understand the fuel hen-
dlinginformationdo net attempttofuel
your unit.Seek helpfrom someone that
does understandthe informationor cell
the customerassistance help line at
1-800-235-5878.
GUIDE BAR AND CHAIN OIL
The chain oilerprovidescontinuouslu-
bricationto the chain and guide bar. Be
sureto fillthe bar o01.tankwhen you fill
the fuel tank (Capacity = 6.8 ft. oz.).
Formaximum guidebar and chain life,
we recommendyou use Craftsman
chainsaw bar oil. If Craftsmen bar oil is
notavailable, you may use a good
grade SAE 30 oiluntilyou are able to
obtainCraftsmen brand. The oil output
isautomatically metered during opera-
tion. Your saw willuse approximately
onetank of bar oilfor every tank offuel
mix.Always fillthe bar oil tank when
you flilthe fuel tank.
FUELING ENGINE
This engine is certifiedto operate on
unleaded gasoline.Before operation,
gasoline must be mixedwith a good
quality2-cycle air-ccoled ehgine oil.We
recommend Craftsman brand o,1.Mix
gasoline and oil at a ratio of 40:1 (A
4_.1 ratio is ob_nsd by mixing3_.
ounces of oil with 1 gallonof unleaded
gasoline). DO NOTUSEautomotive oil
or boat oil.These oilswill cause engine
damage. When mbdngfuel follow the
instructionspdntedonthe container.
Once.oilisaddedtothegasoline,
shakecontainer momentarilyto assure
that the fuel isthorougldymlxed.
Alwaysread and followthe safetyrules
relatingto fuel before fueling your unit.
IMPORTANT
ExpedenceindicaWsthatelcohoiblanded
(ce,edgasoh¢or or
mathenoi)cen atirad moielurewhich
lesdsto eepar_on and_of
linesand catouratorare emply. Use fresh
fuel nsxt ssason.See STORAGEk_'truc-
tions for edd_x_ informa_on.
Never use engine or carburetor deener
products inthe fuel tank or permanent
damage may occur.
See the STORAGEsection for additional
information.
STOPPING YOUR ENGINE
• MoveOn/Stopswitchto STOP.
• Ifenginedoesnotstop,pullchoke
knoboutfully.
STARTING YOUR ENGINE
COLD ENGINE OR WARM ENGINE
AFTER RUNNING OUT OF FUEL
• Fuel engine with 40:.1fuel mix.
•Fillbar oiltenk with bar oil.
•Prime engine by pressing primerbulb
six times.
•Move On/Stop switch to ON.
PrimerBulb
t •
•Full
•Acluate choke by pulling choke knob
fully ouL
•Set saw on the ground. Grip front
handle with your left hand and place
rightfootthrough mar handle.
Starter Rope Handle
LeJtHand
on Front
Handle
adds duringstorage.Addio gas can
RearHandle
• Set fast idleby depressing the throUle
lock with your right hand. Then,
squeeze end holdthrottie trigger.With
whdd_,_ethe fuel systemof an engine your thumb, press the fast idle lock
storage. ,down and hold. Next, release the
To_Q_-engine problems,the fuel sys- throttie _gger.
tem shouldbe emplbd beforestoragefor • .DONOTsqueeze throttie triggerdur-
30claysor longer.Dlain the gas tank, ing starling;othelwise, it will be nec-
staxtthe engine and letit run unffithe fuel essary to msot the fast Idle iock.
All manuals and user guides at all-guides.com

NOTE: When pullingthe starter rope, OPERATING TIPS
do not use the full extent of the rope. • Check chain tendon before first use
Do not let stinter rope snap bad_ Hold and aftor,1 minute of operation. See
handle. Let rope rewind slowly. Chain Tension in the Maintenance
• Pullmiter rope handlefirmly and
quicklywith your righthand untl"lthe
engineattemptsto start or 5pulls.
Then pushtl_ chokeknob fully in.
Resume pullinghandleuntil engi0e
starts. See Igustration.
• Above 40°F, allow engine to runfor
approximately5 seconds. Push the
choke knob in tothe OFF position;
then squeeze and release throttle trig.
ger to allow engineto idte.
•Below 40°F, allow engine to warm up
for 30 saconds to 1 mirnJte.Push
choke knob in 1/2 way;,then squeeze
and release throffie tdgger to allow
engine to idle.
• To stopengine, move On/Stop switch
to the STOPposition.
STARTING A WARM ENGINE
DO NOT use the choke to start a warm
engine or floodingandhard starting
may occur.
•Move On/Stop switchto ON.
•Set fast idle lock.
•Be sure choke is in the OFF position.
• With saw on ground,gdp front handle
with left hand and place your dght foot
through rear handle.
•Pullstarter ropehandle untilengine
starts.
•Squeeze and releasethrottle trigger
to returnengineto idlespeed.
DIFFICULT STARTING OR
STARTING A FLOODED ENGINE
The engine may be flooded if ithas not
started after 10 pulls.Flooded engines
;can be cleared of excessfuel with the
followingprocedure:
•Engagethe fast idl_lock.
•Verifythat the On/Stop switch ls inthe
ON position.
Pushchoke knob to the OFF position.
•"With saw on ground,gnpfront handle
with left hand and place dght foot
through rear handle.
•Pull starter rope handle until engine
starts.
• Starting could require many pulls de-
pending on how badly the unit is
_ flooded, if en_ne stillfails to start, re-
-fer to the TROUBLESHOOTING chart or
call 1-800-235-5878.
8eotJon.
•Cut woed only.Do not out metsl, plas-
tics, masonry,non-wood buildingrna-
tedab, etc;
•Stop the saw ifthe chatn atnlcsea for-
eign object.Inspectthe saw and re-
pairpaits as .r.r._.:
•Keep the chain out of dirt and sand.
Even a smallamount of dirtwillquick.
blYduliachainandincreasethepossl-
llHyofidcid:)ask.
• Practicecuttingafew small logsusing
the foflowingsteps. This wil helpyou
get the "feet"of usingyour saw before
you begina majorsawing operaSon.
•Squeeze the throttle _gger andal-
lowtheenginetoreachfullspeed
beforecutting.
•Begincuttingwiththe saw frame
againstthe log
•Keep the engineat full speed the
enbretimeyou are cutting.
• AJIowthe chain to cut for you. Exert
onlylightdownward pressure.
•Release the throttletdgger as soon
as the cutis completed, allowingthe
engineto idle. Ifyou runthe saw at
full throttle withouta cuffingload,
unnecessarywear can occur.
•To avoidlosingcontrol when cut is
complete, do not put pressureon
saw at end ofcut.
•Stopenginebeforesettingsawdown.
TREE FELUNG TECHNIQUES
WARNING: Check for broken or dead
brancheswhichcan fall while cutting
ca_ing serious.injury.DO notcut near
buddingeorelectricalwires if you do not
know the directionof tree fall, norcut at
nightsinceyou will not be able tosee
well, nordudngbad weather suchas
rain, snow,or strongwinds, etc.
•Carefullyplanyour sawing operation
in advance.
•Clear the workarea. You need a dear
area allaroundthe tree so you can
have securefooting.
•Studythe naturalconditions thatcan
_usa the treeto fall in a partbular
direction.These conditions include:
•The wind directionand speed.
•The lean of the tree. The lean ofa
tree mightnotbe apparent due to
uneven or sloping terrain. Usea
8
All manuals and user guides at all-guides.com

plumborleveltodeterminethedi-
rectionoftreelean.
• Weightendbranchesononeside.
•Surroundingtrees end obstacles.
•Lookfor decay and roL If the trunk is
rotted,itcan snap end fall toward the
operator. *
•Make sure there is enough room for
the tree to fall. Maintain a distance of
2-1/2tree lengthsfrom the nearest
personor other objects. Engine noise
can drown out awarning call.
•Remove dirt, stones, loose bark,
nails, staples, end wire from the tree
where cuts are to be made.
Planadear retreatpath
=r onof
FELUNG' LARGE TREES
(6 inches in diameter or larger)
The notchmethod is used to fell large
trees. A notchiscut onthe side of the
tree inthe desired directionof fall. After
a fellingcut is made on the opposite
side of tree, the tree will tend to fall in
the directionofthe notch.
NOTE: Iftree has large buttress roots,
removethem before rnaldngthe notch.
Rrstcut
Notch_
NOTCH CUT AND FELUNG TREE
•Make notchcut by cuffingthe top of
the notchfirst.CUtthrough 1/3 ofthe
diameter of the tree. Next complete
the notchby cuttingthe bottom. See
illustration.Once the notch is cut, re-
movethe wedge ofwood from tree.
RnaJcuthere
& .
•Afterremoving the wood, make the
fellingcut on the oppositeside ofthe
notch.Thisisdonebymakingacut
abg_-two incheshigher than the cen-
ter of the notch. This will leave
enough uncutwood between the fell-
ing cut and the notch to form a hinge.
This hingewill help preventthe tree
from inthe wrong direction.
HingeholdsYeson
stumpandhelps
controlfall
NOTE: Beforefallingcut iscomplete,
use wedges to open the cut wben
neceesaw to controlthe directionoffall.
avoid klcld)ack end
To _n damage,
use wood or plasticwedges, but never
steel or ironwedges.
• Be alert to signsthat the tree is ready
tofall: crackingsounds,wideningof
the fellingcut, or movementin the up-
per branches.
•As tree startsto fall,st.opsaw, put it
down, and get away quicklyon your
plannedretreat path.
•Be extremely cautious with partially
fallen trees that may be poorlysup-
ported. When a tree doesn'tfall corn-
pletely,seLthe saw aside and pull
downthe tree_vitha cable winch,
block and tackle, or tractor.Do not
use your saw to cut down a partially
fallentree.
CUTTING A FALLEN TREE
(BUCKING)
Buckingisthe term used forcuttinga
fallen treeto the desiredlog s'rTe.
WARNING: Do not standon the log
being cut. Any porlJoncan rollcausing
loss of footingend control.Do not stand
downhillofthe log being cut.
IMPORTANT POINTS
•Cut onlyone logat a time.
•Cut shatteredwood very carefully;,
sharp pieces of woodcould be flung
toward operator.
• Use a sawhorse to cut small logs.
Never allow anotherperson to hold
the log while cuffingend never hold
the logwith your leg or fooL
•Do notcut in enaree where logs,
,mb endroo mtanCecLDrog
intoadeer en)a beforecultJngthem.
BUCKING TECHNIQUES
WARNING: Ifsaw becomes pinched
or hungin a log, don'ttry to force It out.
You can losecontrol ofthe saw result-
ing in injury end/or damage to the saw.
Stop the saw, drive a wedge of plastic
All manuals and user guides at all-guides.com

orwood intothe cut unt_the saw can be
rernovndeasily.Rsstartsaw and carefulty
reenterthe cut. Do notusaa mstal
wedge.Donotattampttorestartyour
saw when it ispinchedor hung Ina log.
Use a wedge to mrnove pinchedsaw
Turn.sawORFandusaspisstJcor
wcoaenwedgeto forcecutogen.
Overcutting begins on the top side of
the log with the bottomof the saw
against the log.When overcuttJnguse
lightdownward pressure.
Ovemuttlng Undercutting
Undercutting involvescuttingon the
undersideof the log with top ofsaw
against the log.When undercuttinguse
lightupward pressure. Hold saw firmly
and maintaincontrol.The saw will tend
to push back toward you.
WARNING: Never turnsaw upside
down to undercut.The saw cannot be
controlledin thisposition.
Always make your firstcut on the
compression side of the log.
Rrst cut on common side of log
_ 2
-P Second cut
Rrst cut on compression side of log
BUCKING WITHOUT A SUPPORT
• Overcut through 1/3ofthe diameter of
the log.
•Roll the log over and finishwith a sac-
ond overcut.
•-Watch for logswith a compresion
side. See ,lustratlon above for cutting
logswith a compression side.
•UMngs log ,..,__
for support _.,._ut,_,
..... .._
_1_ INjt
o
_ ._ la_
_O" -£-- ---"
_.4_ql:_ __ "1_1'
BUCKING USING A LOG OR
SUPPORT STAND
•Remember your firstcut is always on
the compression side of the log. (Re-
fer to the illustrationbelow foryour
firstand second cut).
•Yourfirstcut should extend 1/3of the
diameterof the log.
•Finishwith your second cut.
Using a support stand 2ndCut
1stCut
L
2_Cut
LIMBING AND PRUNING
WARNING: Never climbintoa tree to
limbor prune. Do notstand onladders,
platforms,a log, or inany position
whichcan cause you to lose your bal-
ance or controlof the saw.
IMPORTANT POINTS
•Watch outfor spfingpoles.
Springpolesare small size limbs
which can whip toward you, or pull
you offbalance. Use extreme cautmn
when cuttingsmall size limbs.
•Be alert forspdngback.Watch out for
branchesthat are bent or under pres-
sure. Avoidbeing struckby the
branchor the saw when the tension in
the woodfibers is released.
•Frequentlyclear branches out of the
way toavoid tdppingover them.
10
All manuals and user guides at all-guides.com

UMBING def.Getaprofessionaltodothejob.
• Limbatreeonlyafterit iscutdown. branchesarehigherthanyourshoul-
•Leave the larger limbs underneath the • Make yourfirstcut 1/3of the way
felledtree to supportthe tree as you through the bottom ofthe limb.
work.
•Start at the base of the felled tree and
worktoward the top, _uttingbranches
and limbs. Remove small limbswith
one cut.
•Keep the tree between you and the
chain.
•Remove larger,supportingbranches
withthe 1/3,2/3 cuttingtechniques de-
scdbsd in the bucldngsection.
•Alwaysuse an overcut to cut small
and freely hanging limbs. Undercut-
tingcouldcause limbsto fall and
pinchthe saw.
PRUNING
WARNING: Limit pruningto limbs
shoulder height or below. Do not cut it
CUSTOMER RESPONSIBILITIES
•Next make a second cut ell the way
through the limb.
•Rnish the pruningoperation by using
an overcutso thatthe stump of the
limb protrudesI to 2 inchesfrom the
trunk ofthe tree.
Secondcut
Rrst cut
1/3 ofway
3rd cut I to 2 in.
fromtrunkoftree
Fillin dates as you complete Before After Ever_ Every
regularservice Use Use 5 hrS. 25 hrs
Check for damaged/wom parts p,,
Check for loose fasteners/parts _,
Check chain tension 11
Check chainsharpness p-
Check guide bar p,,
Clean unit& labels p,,
Clean airfilter _'
ClaaNiuspect spark arrestor
sqr_rL& inspect muffler _"
Replace spark plug _'
Yearly Service
Dates
GENERAL RECOMMENDATIONS
The warrantyon this unitdoes notcov-
er itemsthat have been subjectedto
operator abuse or negligence. To re-
calve fullvalue fromthe warranty,the
operatormust maintain unitas instruct-
ed inthis manual. Variousadjustments
willneed to be made periodicallyto
propadymaintain your unit.
•Once a year, replace the spark plug,
air filterelement, and checl_ guide bar
• _"€:_a-'infor wear. A new spark plug
and airfilter element assures proper
alr-fual mixture and helpsyour engine
runbetter and lastlonger.
WARNING: Disconnectthe spark plug
before performingmaintenance except
forcarburetor adjustments.
LUBRICATION
1 Bar
Sn,_L._, 2 Bar Oil
-'_---, R"Ca0 'j_
1 Usesprocketlubd_tion =" "_
2 Use Craftsmanchain saw bar oil
44
All manuals and user guides at all-guides.com
all-guides.com

CHECK FOR DAMAGED OR
WORN PARTS
Replacement of damaged_om parts
shouldbe referred to your _ears _er-
vice Center.
NOTE: Itis normalfor a smallamount
of oilto appear underthe saw after en-
gine stops. Do ndtconfusethis with a
laaidng oiltank.
•On/Stop Switch- Ensure On/Stop
switchfunctionsproperly_by moving
the switchto the "Stop position.
Make sure engine stops; then restart
engineand continue.
•Fuel Tank- Do not use saw if fuel
tank showssignsof damage,or leaks.
• OilTank- Do not use saw if oiltank
showssignsof damage or leaks.
CHECK FOR LOOSE
FASTENERS AND PARTS
•Bar Clamp Nut
•Chain
•Muffler
•Cylinder Shield
•Air Filter
•ClutchDrum/Sprocket
•Handle Screws
• VibrationMounts
•Starter Housing
• Handguard
CHECK CHAIN TENSION
•Use the screwdriver end ofthe bar
toolto move chainaround guide bar
to ensure kinksdo notexist. The
chainshould rotate freely.
BarClampNuts
• Looser bar clamp nuts untilthey are
finger tight againstthe bar damp.
•Tum adjustingscrew untilchain bare-
_ytouchesthe bottom ofguide bar.
•bettool around
har to ensure_ links ere In bet groove.
• Liftuptip Qfguide bar to check for
sag. Release tip of guide bar,then
turnadjustingscrew untilsag does
note_st.
•While liftingtip of.guide bar, tighten
,bardamp.nuts with the bar tool.
Torqueto 10-15 ft-lhs.
•Usa the screwdriver end ofthe bar
toolto move chain around guide bar.
•If chaindoes not rotate, itistoo tight.
Slightlyloosen bar clamp nuts and
loosenchainby turningthe adjusting
screw.Rstightanbar clamp nuts.
•If chain istoo loose, it wiltsag below
the guide bar. DO NOT operate the
saw if the chainisloose.
CHECK CHAIN SHARPNESS
A sharpchain makes wood chips. A
dullchain mitkes a sawdust powder
and cutsslowly.
CHAIN SHARPENING
Chain sharpening requiresspecial
tools.You can purchasesharpening
toolsat Sears or go toa professional
chainsharpener.
CHECK GUIDE BAR
Concrdionswhich requireguide bar
maintenance:
•Saw cutsto one side or at an angle.
•Saw hasto be forcedthrough the cut.
•Inadequatesupplyof oilto bar/cheln.
Check the condifionof guide bar each
time chainissharpened. A worn guide
bar willdamage the chain and make
cuttingdifficult.To maintain guide bar.
•Move On/Stop switchto "Stop."
•Remove bar and chain fromsaw.
•Clean all sawdust and any other
debrisfromthe guide bar grooveand
sprockethole after each use.
Remove Sawdust From IJ =
GuideBarGroove __
ysp=k.t, .
12
All manuals and user guides at all-guides.com

•Add lubricantto sprocket hole after
each use.
•Burringof guide bar mils isa normal
processof railwear. Remove these
burrswith a fiat file.
•When railtop is uneven, use a flat file
to restoresquare edges _sides.
FileEdgesand
sidesSquare
WomGroove CorrectGroove
Replace guide bar when the groove is
wom, the guide bar is bent or cracked,
or when excess heating or burringof
the railsoccurs, if replacement isnec-
essary, use onlythe guide bar specified
foryour saw in the repair parts listor on
the decal located on the chainsaw.
CLEAN UNIT & LABELS
•Clean the unitusinga damp clothwith
a milddetergent.
•Wipe offunitwith a clean dry cloth.
CLEAN AIR FILTER
A dirtyairfilter decreases the lifeand
performance ofthe engine and in-
creases fuel consumptionand harmful
emissions.Always clean your airfilter
after 15 tanks offuel or 5 hours of op-
eration,whichever comes first. Clean
more frequently in dusty conditions.A
used air filter can never be completely
cleaned. Itisadvisable to replace your
air filterwith a new one after every 50
hoursof operation, or annually, which-
ever comes first.Toclean filter:.
•Loosen3 screws on cylindercover.
•Remove cylindercover.
•Remove air filter.
•Cleanthe air filter using hotsoapy
water. Rinsewith clean coolwater.
Airdry completely before reinstalling.
•Lightlyoilair filter before installingto
improvethe efficiencyof eir filter.Use
2-cycle engine oil or motoroil (SAE
30). Squeeze excess oil from filter.
•Reinstallair filter.
•Reinstallcylindercover and 3 screws
(15-20 in-lbs.). CylinderCover
AirFilter Screws
INSPECT MUFFLER AND SPARK
ARRESTOR SCREEN
As the unit isused, carbondeposits
build upon the mufflerand spark
arrestorscreen, and must be removed
to avoid creating a fire hazardor affect-
ing engine performance.
Replace the spark arrestor screen if
breaks occur.
MufflerDiffuser
Muffler
Cover
Screws
Body MufflerCover
CLEANING THE SPARK
ARRESTOR SCREEN
Cleaning isr_qtJiredevery 25 hoursof
operationor anhually, whichever comes
fireL
•Loosenand removethe 2muffler cov-
er screws
•Remove the mufflercover (cover
snaps off muffler body).
• Remove mufflerdiffuserand spark
arrestorscreen assembly.Notice the
orientationof these parts forreassem-
bling.
•Clean thespark arrestorscreen witha
wire brush. Replace screen if breaks
are found.
•Replace any brokenor cracked muf-
fler parts.
•Reinstalldiffuserand sparkarrestor
screen assemblywith roundholes
facingup.
•Reinstallmufflercover and 2screws
(7.8ft-bs).
REPLACE SPARK PLUG
The spark plug shouldbe replaced
each year to ensure the enginestarts
eesBr and runs better. Ignitiontiming is
fixedand nonadjustable.
•Loosen 3screws oncylindercover.
•Remove the cylindercover.
Pulloffthe spark plug beoL.
• Remove spark plug from cyl,nderand
discard.
All manuals and user guides at all-guides.com

• ReplacewithChampionRCJ7Yspark
plugandtightenwitha 3/4inchsocket
wrench(10-12ft-lbs).Sparkpluggap
shouldbe.025in.
•Reinstallthe spark plug boot.
•Reinstallthe cylindercover and 3
screws (15-20 in-lbs). Spark
Rug
Cylinder
Cover
CHAIN REPLACEMENT
CAUTION: Wear protective gloves
when handlingchain. The chain is
sharp and can cut you even when it is
not moving.
Itisnormal fora new chalntostrstchdur-
ing •eflint"15minutes of operation.You
shouldrecheckyourchaintensionfre-
quentlyandadjustthachaintensionas
required.See Chain Tensionsection.
•Move On/Stop switchto the Stop
position.
• Replace the old chain when it be-
comes worn or damaged.
•Use only the Low-Kickbackreplace-
ment chain specifiedin the repair
partslist. The correct replacement bar
and chain is also specifiedon a decal
located on the chain saw.
•See your Sears Sen_ce Center to re-
place and sharpen individualcutters
onyour chain.
•Remove bar clamp nuts.
• Remove bar clamp.
•Remove the old chain.
Bar
Clamp
•Slidethe guide bar rearward until it
stops againstthe sprocket.
•Carefullyremove new chainfrom
package. Hold cha,nwiththe drive
linksas shown.
Culters Dep_ Gauge
DriveUn_
•Place chain overand behind clutch.
•Fit the bottamof the drive linksbe-
tween the:teethin the sprocketnose.
•Fitchaindrive linksinto bar groove.
•Pullguide bar forward untilthe chain
issnug inthe guide bar groove.
•Installthe bar clamp.
•Installbar clamp nuts;finger'tighten
only.Do nottightenany furtherat this
point.
Bar
Clamp Nuts
•Tum adjustingscrew on bar to move
the tensioning rackas far as itwillgo
towardthe front ofthe bar.
TenslonlngRack
BarClampNuts
CHAIN ADJUSTMENT
See "Chain Tension"in Maintenance
section.
14
All manuals and user guides at all-guides.com

CLEAN FUEL FILTER
Toclean fuel filter,drain your unitby
runningdry offuel, remove fuel cap/re-
tainerassembly fromtank. Pullfilter
fromtank and remove from line. Clean
with milddetergent and rinse..Dry.thor-
oughly,reassemble. •
CARBURETOR ADJUSTMENT
WARNING: The chain will be moving
duringmostof this procedure. Wear
your protectiveequipment and observe
allsafety precautions.During the low
speed mixture adjustment recheck idle
speed after each tum of the screw.The
chain mustnot move at idlespeed.
Carburetor adjustment isc_ and if
done improperlycan permanently dam-
age the engine as well as the carbure-
tor. Ifyou requirefurther assistance or
are unsureabout performing this proce-
dure, call our customer assistance help
lineat 1-800-235-5878.
Old fuel, a dirtyair filter,dirtyfuel filler,
or floodingmay give the impressionof
an improperlyadjustedcarburetor.
Check these conditionsbefore adjust-
ingthe carburetor.
The carburetor has been carefully set at
the factory.Adjustments may be neces-
sary ifyou noticeany ofthe following
conditions:
•Chain moves at idle. See "idle Speed"
underadjustingprocedure.
•Saw will notidle. See "Idle Speed"
and "LowSpeed Mixture'under ad-
justingprocedure.
• Engine dies or hesitates when it
shouldaccelerate. Sea "Acceleration
Check"under adjusting procedure.
•Lossof cuffingpower. See "High
Speed Mixture H" under adju_ng
procedure.
There are three adjustmentscrews on
the carburetor. They are labeled H, L,
and T. They are located in the area just
above the primerbulb.
CARBURETOR PRESETS
When making adjustments,do notforce
the plastic limitercaps beyond the
stops or damage will occur.
If carburetor presets are not needed,
proceed to "Idle Spead-T."
•Tum beth mixturescrews,counter-
.ql_o_wiea untilthey stop.
• TdrWthe idlespeed screw clockwise
untilit stops. Now tum counterclock-
wise 4-1/2full turns.
Start motor,let it runfor 3 minutes, and
proceedtothe adjustmentsection. If
engine does notstart, refer totrouble-
shootingchartor call 1-800-235-5878.
If engine performance isacceptable at
the preset positionsand there is no
chainmovement at idle, nofurther ad-
justmentis necessary.
ADJUSTING PROCEDURE,
Idle Speed-T
Allowengineto idle. Adjustspeed until
engine runswithout chainmovement or
stalling.
•Turn clockwiseto increase engine
speed if engine stalls or dies.
•Tum counterclockwiseto decrease
speed.
No furtheradjustments are necessary if
chain does notmove at idlespeed and
ifperformanceis satisfactory.
Low Speed Mixtura-L
Allowengineto idle. Then accelerate
the engineand noteperformance. If en-
gine hesitates, bogs down, or smokes
during acceleration, tum mixturescrew
clockwisein 1/16-turnincrementsuntil
perforrnsncs_s_,atisfactory. Repeat this
procedure as necessary for properad-
justment.Aftercompletingadjustments,
check foraccelerationand chain move-
ment at idle. Reset if necessary.
High Speed Mixture-H
DO NOT operate engineat full throttle
for prolongedperiods while maidng ad-
justments. Damage to the engine can
occur.Make a test cut. Based on per-
formance ofthe saw while cutting,ad-
just the highspeed mixturesetting in
1/16-tumincrementsas follows:
•Ckx::kwiseuntilsaw has gcodpower in
tha cutwithno _. Do notadjust
bysoundorspee butj.dgebyhow
weUthe sew performs inthe cut.
•Counterclockwiseifthe saw has
speed, butdies in the cut or lacks
power inthe cut.
Aftercompletingadjustments,checkfor
accelerationand chain movement at
idle. Resetif necessary.
Acceleration Check
Ifthe ongins dissor hedlatss instsadof
sccelarating, turnthe lowspesd mixture
adj_nt counterdcclodseuntilyou
have smoothaccela_ with no chain
movementat idle.Recheckand adjust as
necessa_ foracceptableperformance.
All manuals and user guides at all-guides.com

Prepare your unitforstorage at the end
ofthe season or if if will not be used for
30 days or more.
WARNING:
•Allow the engir_ to c_01,'_mdSecure
the unit before storingor.t_an_.. rig.
•Store chain saw and fuel Jnawell
ventilatedarea where fuel vapors
cannot reach sparks or open flames
fromwater heaters, electric motors or
switches,fumeces, etc.
•Store chainsaw with all guards in
place and positionchainsaw so that
any sharp objectcannot accidentally
cause injury.
• Store chain saw well outof the reach
ofchildren.
EXTERNAL SURFACES
If yourchain saw isto be stored for a
pedod oftime, clean itthoroughlybe-
fore storage. Store in a clean dry area.
•Lightlyoil external metal surfacesand
guide bar.
•Oilthe chain and wrap it in heavy pa-
per or cloth.
FUELSYSTEM
Under Fueling Engine in the Operating
Sectionof this manual, see message
labeled IMPORTANTregardingthe use
ofgasohol in your chain saw.
Fuel stabilizer isan acceptable altema-
tive in minimizingthe formationoffuel
gum depositsdudng storage. Add stabi-
lizer tothe gasoline in the fuel tank or
fuel storagesontainer. Followthe mix
instructions-foundon stabilizercontain-
ers. Run engineat least 5 minutes after
adding stabilizer.
CRAFTSMAN 40:1, 2-cycle engine oil
(air cooled) is especiallyblended with
fuel stabilizer.Ifyou do notuse this
Sears oil,you can add afuel stabilizer
to your fuel tank.
ENGINE
•Remove spark plugand pour 1 tea-
spoon of 40:1, 2-cycle engine oil(air
cooled)throughthe spark plug open°
ing.Slowly pullthe starter rope8 to
10 times to distr_ute oil.
•Replace spark plug with new one of
recommendedtype and heat range.
•Clean airtilter.
•Check entire unitfor loose screws,
nuts, and bolts. Replace any dam-
aged, broken, or worn parts.
•At the beginningof the next season,
use onlyfreshfuel havingthe proper
gasolineto oil ratio.
OTHER
•Do notstore gasolinefromone sea-
son to another.
•Replace your gasolinecan ifitstarts
to rust.
16
All manuals and user guides at all-guides.com
all-guides.com

TROUBLE SHOOTING CHART
TROUBLE
Enginewill not
start orwillrun
only a few
seconds after
starting.
Enginewill not
idle property.
Engine will not
accelerate,
lacks power,
or dies under
a load.
Enginesmokes
excessively.
Engine runs
hot.
Oilinadequate
for bar and
chain
lubrication.
CAUSE
• Ignitionswitchoff.
iEqgine flooded.
FuSl tank-er_ty.
Spark plug notfidng.
• Fuel notreaching
carburetor.
•Carburetor requires
adjustment.
•None ofthe above.
•Idle speed set too high
or too low.
•Low Speed Mixture
requiresadjustment.
•Crankshaft seals wom.
•Compression low.
•None ofthe above.
: Air filterdirty.
Spark plugfouled.
•Carburetor requires
adjustment.
• Exhaust ports or muf-
fler outlets plugged.
•Compression low.
•None ofthe above.
• Choke partiallyon.
•Fuel mixtureincorrect.
• Air filter dirty.
•High Spee_l Mixture
reqmres adjustment.
'. Crankcase leak.
•Fuel mixture incorrecL
• Spark plug incorrect.
•High Speed Mixture
set too lean.
• Exhaust ports or muf-
fler-outletsplugged.
•Carbon build-upon
muffleroutletecmen.
• Fan housing/cyUnder
fins dirty.
•None of the above.
: Oil tank empty.
Oil pomp or oilfilter
dogged.
•Guide bar oilhole
bleck .
REMEDY
•Move Ignitionswitchto ON.
•See "StartingInstnJctions."
•RII tank with correct fuel mixture.
•Installnew spark plug.
Check fordirtyfuel filte_ replace.
Check forIdnked or splitfuel line;
repairor replace.
•See "CarburetorAdjustments,"
•ContactSears Service.
•See "CarburetorAdjustments."
•See "CarburetorAdjustments.•
• Contact Sears Service.
• Contact Sears Service,
• Contact Sears Service.
•Clean or replace air filter.
•Clean or replace plug
and regal}.
• See "CarburetorAdjustments."
•Contact,6ears Service.
•?:
•Contact Sears Service.
•Adjustchoke.
•Emptyfuel tank and refillwith
correct fuel mixture.
•Clean or replace air filter.
•See "CarburetorAdjustments."
•Contact Sears Service.
•See =Fuel_g Your Unit."
• Replace with correct plug.
•See "CarburetorAdjustments."
• Contact Sears Service.
• Clean spark arrestorscreen.
•Clean area.
• Contect Seers Service.
•Filloiltank.
•Contect Seare Service.
•Remove bar and dean.
.i,,- P
All manuals and user guides at all-guides.com

TROUBLE SHOOTING CHART- Continued
TROUBLE CAUSE REMEDY
1
Chain moves • Idle speed requires • See "CarburetorAdjustments."
at idle speed.
Chain does
notmove
when engine
isaccelerated.
Chain clatters
or cuts roughly
Chain stops
withinthe cut.
Chain cuts at
an angle.
adjustment.
• Clutch requiresrepair.
==Chaintension too
tight.
•Carburetor requires
adjustment.
• Guide bar roils
pinched.
•Clutchslipping.
•Chain tension incorrect.
•Cutters damaged.
•Chain worn.
•Cutters dull,improperly
sharpened, or depth
gauges too high.
•Sprocketworn.
• Chain installed
backwards.
•Chain cutter topsnot
filedfiat.
•Guide bar burredor
bent; roilsuneven.
•Clutchslipping
•Cutters damaged on
one side.
•Chain dull onone side.
•Guide bar bent or wom.
•ContactSears Service.
•See "ChainTension."
•See "CarburatorAdjustments."
•Repairor replace.
• Contact Sears Service.
• See "Chain Tension."
• Contact Sears Service.
•Rssharpen or replacechain.
•See "SharpeningChain."
• Contact Sears Service.
•Install chain in fight direction.
•See "Sharpening Chain."
•Repair or replace guide bar.
;
•Cont;=ctSears Service.
•See "SharpeningChain."
•See -sharpening Chain."
•Replace guide bar.
If situationsoccurwhichare notcovered in this manual, use cars and good
judgemenL If you need assistance, contactSears Service or the CUSTOMER
ASSISTANCEBELPUNEat 1-800-235-5878.
U. S. EPA/CALIFORNIA maintenance of your lawn and garden
equipmentengine.
EMISSION CONTROL Your emission control system includes
WARRANTY STATEMENT partssuchasthecarbure-torandtheigni-
tionsystem.
Where a warrantable condition exits,
""_6UR WARRANTY RIGHTS AND SEARS will repairyour lawnand garden
equipment engineat nocostto you. Ex-
OBLIGATIONS penses covered under warranty include
The U. S. Environmental Protection dlagnosis,partsand labor.
Agency/Cailfomia Air Resources Board
and SEARS, ROEBUCKAND CO., USA MANUFACTURER'S WARRANTY
are pleased to explain the emissions COVERAGE--
control system warranty on your lawn If any emissionsrelated partonyour en-
and garden equipment engine. All new gine (as listed under EmissionsControl
utility and lawn and garden equipment Warranty Parts USt) isdefectiveor ade-
engines must be designed, built, a.nd fact in the materials or wofio'oanshipof
equipped to meet the stringent anti- the engine causes the failure ofsuch an
smog standards. SEARS must warrant emissionre ated part, the partwill be re-
theemisaioncontrolsystemonyourlawn paired or replaced by SEARS. "
,amlgardene.g,ulprnsntengineforthepe- OWNER'SWARRANTY RESPON-
"_of time I,stedbelow pmwded there SIBILITIES --
has been no abuse, neglect,or improper As the lawn and garden equipment en-
18
All manuals and user guides at all-guides.com

gineowner,youare responsiblefor the shallbe warranted forthe period
performance of the require.amalnte-, oftime up-tothe firstscheduled replace-
nance listed in your Owners ManuaJ. ment pointforth at part.
SEARS recommends that you retain all DIAGNOSIS - -
receipts covering maintenance on your The owner shall notbe chargedfor diag-
lawn and garden equipment engine, out noatic labor which leads to the dater-
SEARS cannot deny wan_ solely for minationthat a warrantedpart
the lack of receipts or foryour failure to isdefectiveifthe diagnosticwork is per-
ensurethe performance ofallscheduled formed at an approvedSEARS servicing
maintenance.
As the lawn and garden equipment en- center, ,_
glne owner, you should be aware that CONSEQUENTIAL DAMAGES-
SEARS may deny you warranty cover- SEARSmaybeliablefordamagasto?th-
age ifyour lawn and garden equipmant erangine componants causedbythe lalb
engine or a part of R has failed due to ureof awarrantedpartstillundarwar-
abuse, neglect, improper maintenance, ranty.
unapproved modifications,or the use of
parts notmade or approved by the origb WHAT IS NOT COVERED - -
nal equipment manufacturer. Allfailures caused by abuse, neglect, or
You are responsible for presentingyour impropermaintenanceare notcovered.
lawn and garden equ=pmentengineto a ADD-ON OR MODIFIED PARTS --
SEARS authorizedrepaircenterassoon The use of edd-on or _p=ts can
as a problem exists. Warranty repairs I_, .__go_bfor (tsalicwing awananty
should be completed in areasonable _1€1_IL oF-J._r'to
amountoftime, not to exceed 30 days. isnotliabletocoverfailuresofwarranted
If youhave any questionsregardingyour partsoausedbythe useofadd-on or mo-
warranty rightsand responsibilities,you difiedparts.
should contact your nearest authorized
service center or call SEARS at HOW TOFILEACLAIM -
1-800-473-7247. If
WARRANTY COMMENCEMENT warrant,
DATE - -
The warranty period beduinson the date
thelawnand garden equipmentengineis
purchased.
LENGTH OF COVERAGE --
This warrantyshall be fora period oftwo
years fromthe initial date ofpurchase.
WHAT IS COVERED --
service center or call SEARS at
1-800-473-7247.
WHERE TO GET
SERVICE --
servicecenters.
MAINTENANCE,
REPAIR OR REPLACEMENT AND REPAIR OF EMISSION RE-
OF PARTS -- LATED PARTS--
Reg_r or replacement of any warranted Any SEARS approved replacement part
par_Willbeperformed at no chargeto.the used inthe performance ofany warranty
owner at an approved_SE/_RSservicing maintenance or repair on emise=onre-
center, lated parts wiU be provided without
Ifyouhaveanyquestionsre_ardingyour charge to the owner ifthe part is under
warranty rightsand responsibilities,you warranty.
should contact your nearest aumorlzed
service center or call SEARS at EMISSION CONTROL WARRAN-
1-800-473-7247. TY PARTS LIST--
WARRANTY PERIOD-- 1. Carburetor
Any warranted part which is not sched. 2. IgnitionSystem
a. Spark Plug,covered upto
uledforreplacement as requiredmalnte- maintenanceschedule.
nance, orwhichisscheduledonlyfor reg- b. IgnitionModule
ularinspectionto the effect,of "repair or
replay_as necessary" shall be war- MAINTENANCE STATEMENT--
rarfft_ for 2 years. Any The owner is responsiblefor the perfor-
warmntedpartwhichlescheduledform- mance of all required maintenance as
placement as required maintenance defined in the owner'smanual.
All manuals and user guides at all-guides.com

REPAIR PARTS
I
5O
51
5
19 23 18 17
3O
2. 530_6119
3. S300378_
7. _
10. 530047061
11. 530015611 '
12. 530O14949
13. S30_8227
14. 530016149
15. 5300_264
16. 530015922
17. s300_geso
18. 5.30015814
19. 530015907
20. 71-3_9
21. 71-36596
Pem'_lon
"rdggw& i.od_ Kit
Ct_k Vldve
W1m-Tltmt_
CMch CO_
Nut- BarMoum_
CIx_ Lev_
Gmmma-.C;_ Knob
Clut_ DramAN'y._
w/Brg. + :
W_h_" - Clutch
Q,t=h/u_'y.
Sw_:h Lev_
Sw_ s_
P,_p-B_zeVent
NUt
_ln C_cher
_w
Nuhw-Thmst
EW_-lS"
DustSeal
BxrMoumlr_ PIm
I_f Pall No.
24. 53O0712._
28. 53ooloe46
28. 53oo16oeo
29. 53oo16o64
30. 53oolg2o6
31. 530049477
32. 530038373
33. 53oo3"/_1
34. 53o_o18_
35. 530015775
i
; 38. 5300471_;
40, 530016133
41. 530047663
4_ 530O1602O
43. 5300181_2
44. _0015O14
45. S300_/_>0
48. 5O0015_0
47. 53003"/7'_
48. S300_4
ozP.mp_t
Ond.5O,$1&4S)
Screw
Se_I Block
Bbow.-O_Pk:k.p
PIdPUpO_er
Oi Rter
Plug-OiF_w
F_l.lne I_
Fuel Cap Au'y.
w/Retldner
Bolt-Bar
Screw
Screw
Won_ Gur Sp_)
8crow
FrontHandle
Ref. Part No.
49. 530015940
50. 530037485
51. 530068232
5P, 5300158_
83. 53004,g_
54. 530027531
845, 5300_817
$6. 5300_1209
57. 530015127
58. 530016134
Not Shown
83OO87619
530058_4
530053819
D_crlptlon
Screw
St_r_ H4mdk_
Rope_t
;crew
Fan Housk_
S_,x P,_y
Ass_
l_mll,.-IFlm Hou_
2O
All manuals and user guides at all-guides.com
Table of contents
Other Sears Chainsaw manuals

Sears
Sears CRAFTSMAN 358.350870 User manual

Sears
Sears 944.414420 Use and care manual

Sears
Sears Craftsman 358.352320 User manual

Sears
Sears Craftsman 358.34030 User manual

Sears
Sears Craftsman 358.356091 Operating manual

Sears
Sears Craftsman 358.352030 User manual

Sears
Sears Craftsman 917.353771 User manual

Sears
Sears 358.155063 User manual

Sears
Sears 358.356090-3.7/20" User manual