4
Basic components.................. 6
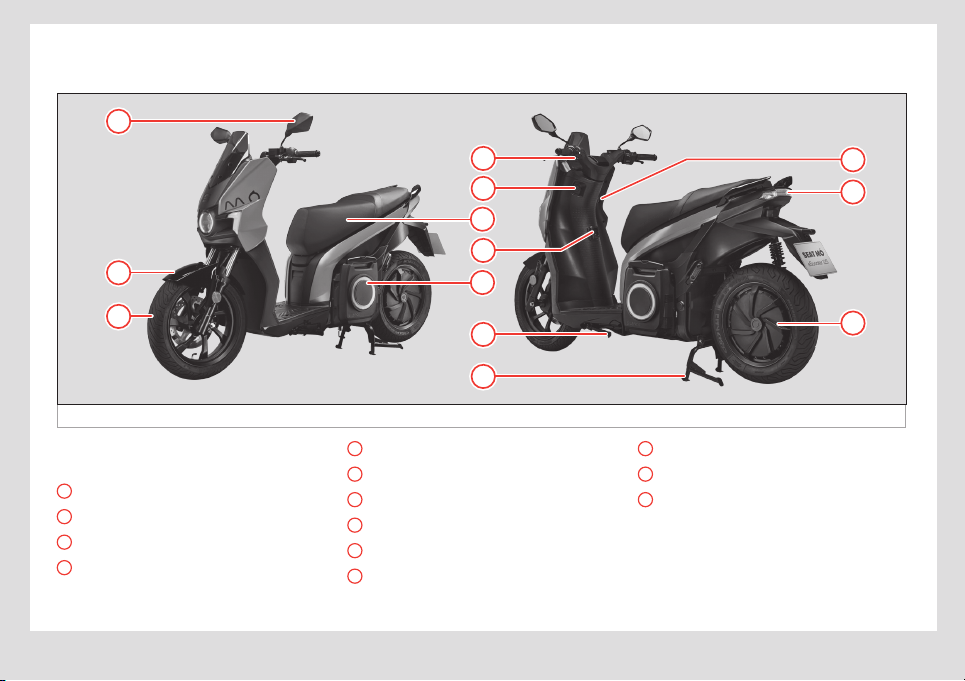
eScooter controls and driving ... 7
Safety
Safe driving.......................... 8
Safety first! ............................. 8
Use and maintenance .................. 8
Clothing and protection ................ 9
Load.................................... 10
Accessories and modifications ......... 10
Checks before driving................. 10
Charge level............................ 10
Lights and indicators.................... 10
Stands.................................. 10
Tyres.................................... 10
Mirrors.................................. 11
Brakes.................................. 11
Brake fluid .............................. 11
Front brake ............................. 11
Rear brake.............................. 11
Brake lever.............................. 12
Adjustment of the brake lever ........... 12
Emergencies
Self-help ............................. 13
First aid ................................. 13
Fire protection .......................... 13
Fuses................................... 13
Changing a fuse........................ 13
Operation
Start-up .............................. 14
Steps to follow.......................... 14
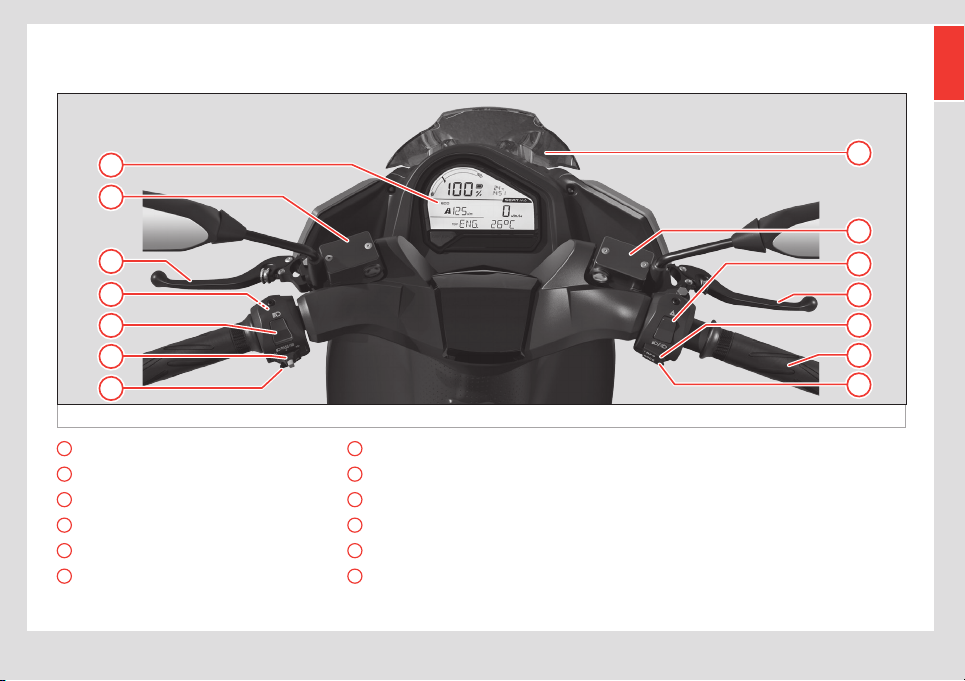
Control instruments and
warning lamps ...................... 15
Instrument panel........................ 15
Instrument cluster operation.......... 16
LCD screen ............................. 16
“SET” / “INFO” buttons.................. 18
Warning lights .......................... 19
eScooter controls and driving ... 21
Controls on the left side of the
handlebar .............................. 21
Controls on the right side of the
handlebar .............................. 22
Combined brake and regenerative
brake ................................... 23
Ignition.................................. 24
Lights and visibility ................. 25
Lights ................................... 25
Saddle................................ 26
Open and close seat ................... 26
Seat interior ............................ 26
Stands ................................ 27
Side stand .............................. 27
Centre stand ........................... 27
Motor ................................. 27
Motor (rear wheel) ...................... 27
Battery
Battery pack......................... 28
Introduction............................. 28
Safety instructions ...................... 28
Battery Pack Components.............. 29
Removing the Battery Pack ............. 31
Connector.............................. 32
Connecting charging unit............... 32
Temperature............................ 33
State of charge indicator in % (SoC).... 34
Range .................................. 34
Power Battery Pack Useful Life.......... 34
Battery and charger specifications ..... 35
Table of Contents