seeger SAC9000S User manual

SAC9000S-B SAC9000HSSAC9000S
EN Smart mobile air conditioner
User manual
NL Mobiele airconditioner Smart
Gebruikershandleiding
DE Mobile Klimaanlage Smart
Gebrauchsanweisung
FR Climatiseur Smart Mobile
Mode d’emploi
ES Aire acondicionado móvil smart
Manual del usario
4
21
38
55
72
2

3
4
1. INTENDED USE
The air conditioner is intended for cooling and removing moisture.
5 Read the manual carefully before the first use.
2. SAFETY
2.1 Labels in this manual
WARNING A warning means that injury is possible if the instructions are not obeyed.
CAUTION A caution means that damage to the equipment is possible.
A note gives additional information, e.g. for a procedure.
2.2 Safety features
Automati defrost
hen frost builds up on the evaporation filter, the appliance starts defrosting. The power
button blinks.
Overload prote tion
In the event of a power loss, the overload protection switches the appliance off. The
appliance switches on after 3 minutes.
2.3 General safety instru tions
General
To prevent damage or malfunctions: Please take time and read the general safety
instructions. This will avoid fire, explosions, electric shocks or other hazards that may
result in damage to property and/or severe or fatal injuries.
The manufacturer is not liable for cases of material damage or personal injury caused
by incorrect handling or non compliance with the safety instructions. In such cases, the
warranty will be voided.
WARNING
This product can be used by children aged from 8 years and above and persons with
reduced physical, sensory or mental capabilities or lack of experience and knowledge
if they have been given supervision or instruction concerning use of the product in a
safe way and understand the hazards involved. Children shall not play with the product.
Cleaning and user maintenance shall not be done by children without supervision.
Do not open the refrigerant loop.
If the refrigerant leaks, immediately evacuate all persons in the room. Ventilate the room
and contact the local fire department to inform them about the propane leakage. Do not
enter the room until a qualified technician declares the room safe. Do not use a lighter,
cigarette or other flamable item near the room.
Only use R-290 (propane) gas as the refrigerant.
Do not get refrigerant in your eyes, on your skin or on your clothing.
Do not put force on the appliance.
ENG

5
Always check that the mains voltage corresponds to the voltage on the rating plate.
Only use original accessories from the manufacturer.
Do not spill any liquid on the appliance.
Never leave children unattended with the packaging material. The packaging material
represents a danger of suffocation. Children frequently underestimate the danger.
Always keep children away from the packaging material.
It is not permitted to open the product yourself or to have it opened, neither is it
permitted to repair the product yourself or to have it repaired. This will void the
warranties. Let any maintenance be carried out by certified maintenance personnel.
Do not block the ventilation holes.
Do not insert any objects in the ventilation holes.
Power cords should be placed so that they cannot be walked on and they cannot easily
become trapped due to items resting on or against them. Pay particular attention to the
power cords at plugs, sockets, and points where the cords exit the product.
Disconnect the appliance from the power source during service or when not in use.
Do not operate the appliance with wet hands.
Do not leave the appliance unattended.
Do not unplug the appliance during operation.
Do not operate the appliance when damaged.
CAUTION
Do not place the appliance near a heat source. This could damage the appliance.
Place the appliance on a horizontal flat surface.
Remarks
e recommend that you retain the original carton and packaging materials in case it
ever becomes necessary to return your product for service. This is the only way to safely
protect the product against damage in transit. If you do dispose of the carton and the
pa kaging materials, please remember to re y le with due are to the environment.
ENG

6
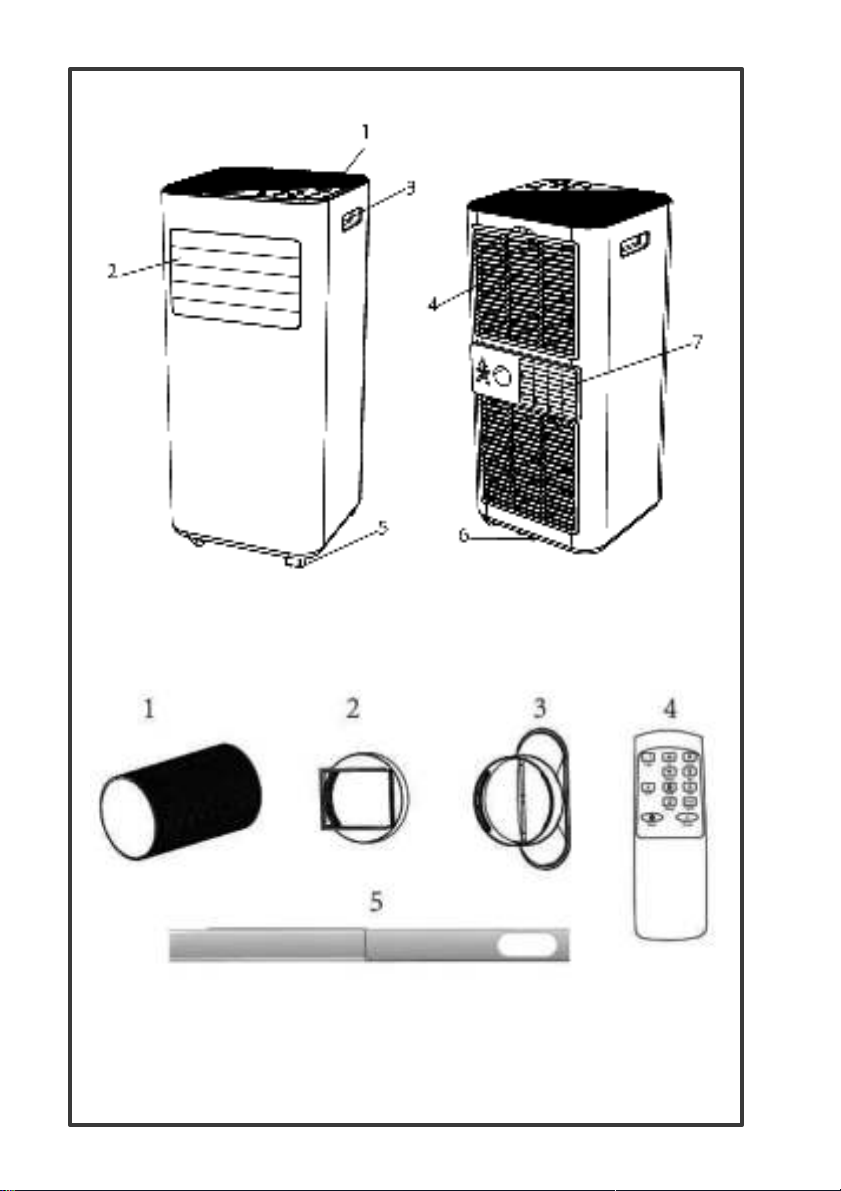
3. PRODUCT OVERVIEW
1 Control Panel 4 Air inlet with air
filter 6 Drainage hole
2 Air outlet with
adjustable louver 5 Caster 7 Air Exhaust
3 Handle
Note: A earance is for reference only. Refer to the actual roduct for detailed
information.
ENG
7
4. INSTALLATION
4.1 UNPACKING
Un ack the box and take out the device and accessories.
Verify that the device is not damaged or scratched
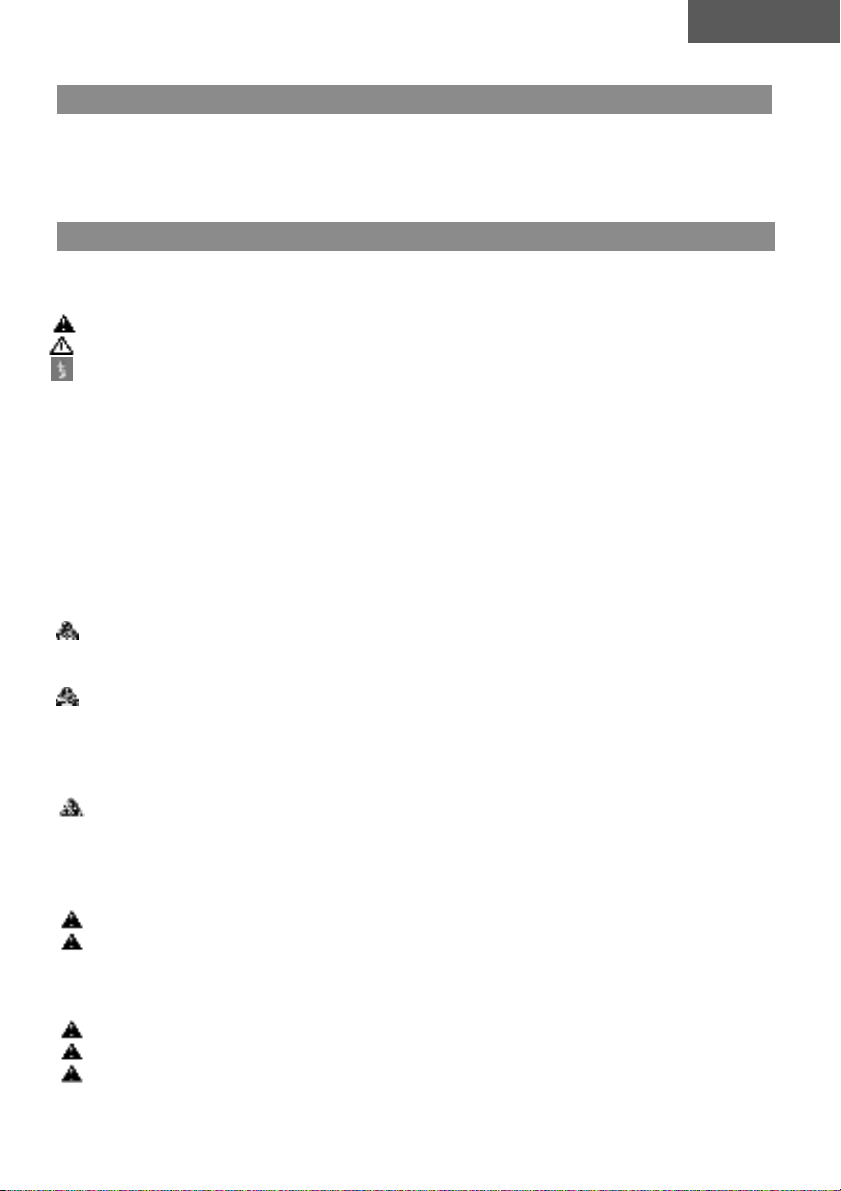
Accessories:
1. Accessories
2. Pi e connection
3. Window Kit Ada ter
4. Remote control
5. Window kit
4.2 PLACE OF INSTALLATION
• If the device has been ti ed down or laid
down during trans ort, let it sit vertically for
at least 24 hours before use.
• Place the device on a solid, flat surface with
at least 50 cm of free s ace to allow air
circulation.
• Do not use the device in the vicinity of walls,
curtains or other objects that may block the
entry and exit of air.
• Never install the unit in the laces where it
will be dis layed in: Heat sources such as
radiators, heaters or other roducts that roduce heat.
Direct sunlight
Mechanical vibration or shock
Excessive dust
Lack of ventilation
Mechanical vibration or shock
ENG

8
Uneven surface
ATTENTION
Install the device in rooms of at least 9 m².
Do not install the device in a place where there are flammable gases.
NOTE!
The manufacturer may provide other appropriate examples or
additional information on the smell of the refrigerant.
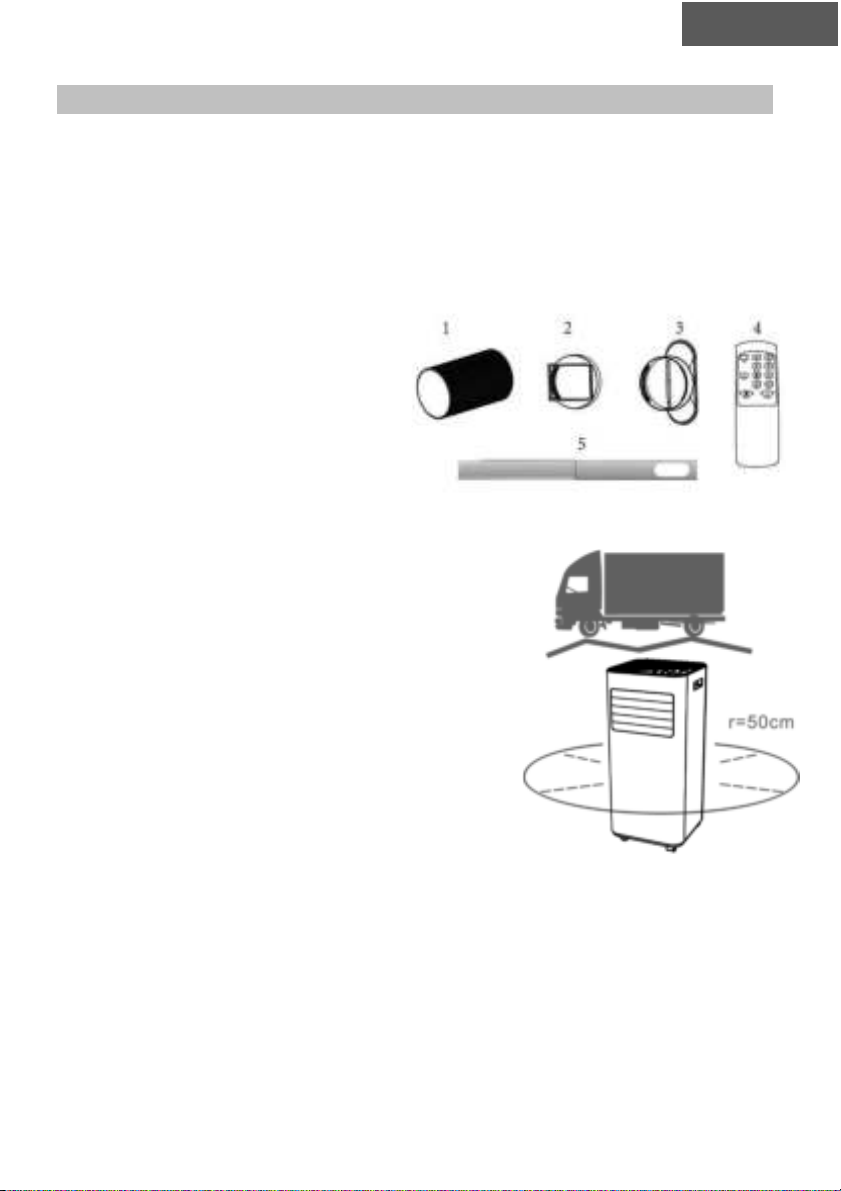
4.3 EXHAUST PIPE FIXATION
The air conditioner must be connected to the outside through a duct so that the return
air can escape from the room, which contains the waste heat and moisture of the unit.
Step 1: onnect the pipe connector to the end of the return air hose.
Step 2: onnect the window adapter to the other end of the exhaust pipe.
ENG
9
Step 3: Extend the adjustable window kit by the length of your window. Connect the
air outlet tube to the window kit.
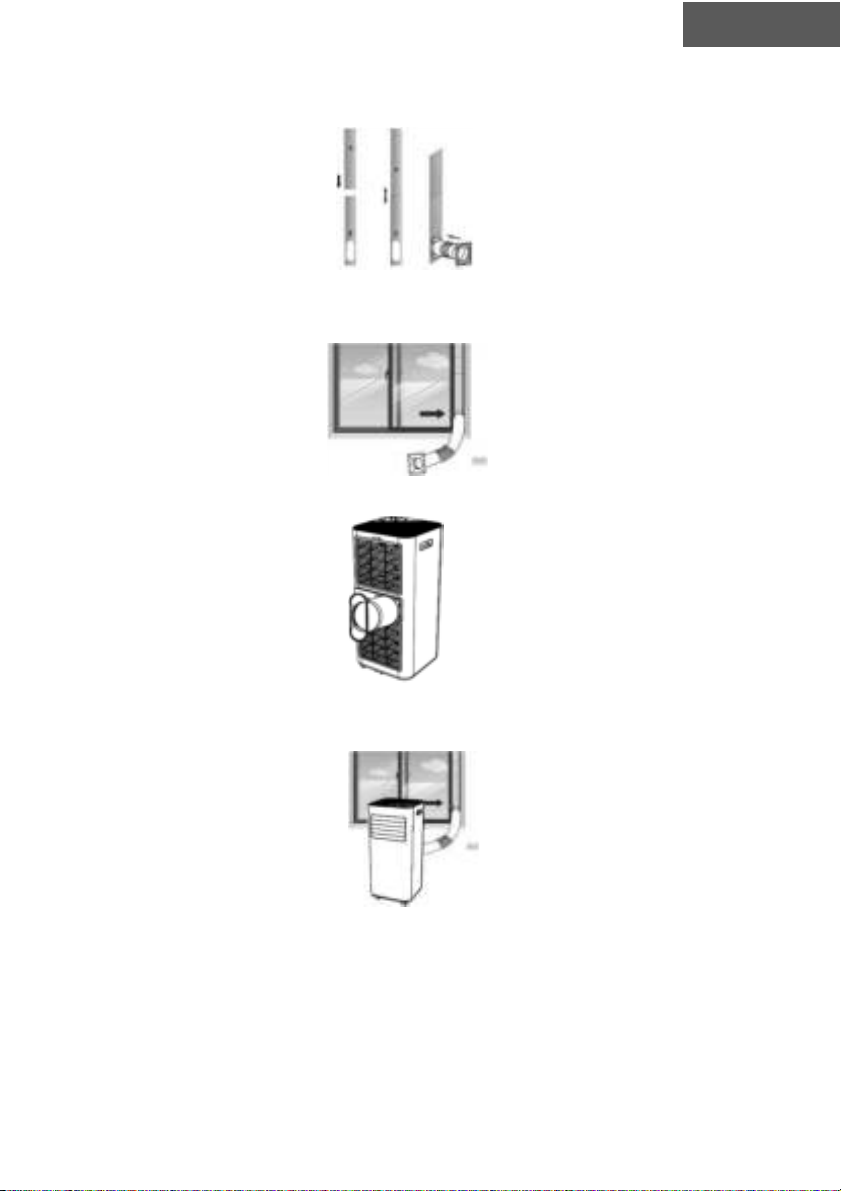
Step 4: Close the window so that the sealant stays in lace. It is recommended to seal
the s ace between the ada ter and the sides of the window for maximum efficiency. .
Step 5: Connect the hose connector to the out ut of the device.
Step 6: Adjust the length of the flexible exhaust i e and avoid bending it. Make sure it
is near a ower outlet.
Step 7: Adjust the air outlet grille and then turn on the device.
ENG

10
5. OPERATION
5.1 CONTROL PANEL AND DISPLAY
1.
POWER Button ON/OFF
2.
MODE Mode selection: Cooling, Dehumidification, Ventilation,
Heating (heating only SAC9000HS).
3.
SPEED Ventilation S eed: High/Low
4.
Fan speed
indicator Fan s eed dis lay
5.
DOWN Lower the tem erature (16° - 32°)
ENG

11
5.2 INFORMATION APPLICATION Smart Life
The "Smart Li e" a is available for Android and iOs.
Scan the QR code to go directly to the download. .
How to use the "Smart Li e" app.
This device allows you to control the device through your home network.
We recommend that you disconnect the device from the mains when you are out to
revent it from accidentally turning on while traveling.
Using the app
1.Install the "Smart Life" a . Create a customer account.
2.Enable the WLAN feature in your device's settings.
3.Place the device at a distance of about 5m from your router.
4.As while the device is turned on, the WiFi light will flash. After 3 minutes, the
connection will be disconnected if there is no network configuration and the LED is off. If
you need to reconnect the WLAN, ress the "Timer" button for 5 seconds to start the
network setu . The WLAN LED flashes again.
5.When the Wi-Fi light flashes, select "Add Device" - "Large Home A liance”" -
"Portable Air
6.
MODE Indicator Dis lay mode: cooling, dehumidification, ventilation,
heating (heating only with SAC9000HS)
7.
UP Increase the tem erature (16° - 32°)
8.
Digital display Timer and ambient tem erature dis lay
9.
TIMER Set the time when the device should turn on or off
automatically.
10.
TIMER/POWER
indicator Timer/Power Status Dis lay
11.
WIFI indicator WiFi status dis lay
ENG
12
Conditioner" and follow the on-screen instructions. Check the status of the Wi-Fi indicator
and select the correct one. If the WiFi indicator flashes quickly, a direct connection can
be established. If the WiFi indicator flashes slowly, ress "Go to connect" to connect to the
WLAN called "SmartLife-XXXX".
6.Once the device connects successfully, the Wi-Fi light will turn on. You can now control
the device from the a . Press and hold the timer button for about 5 seconds, the device
will disconnect, and the Wi-Fi light will light u .
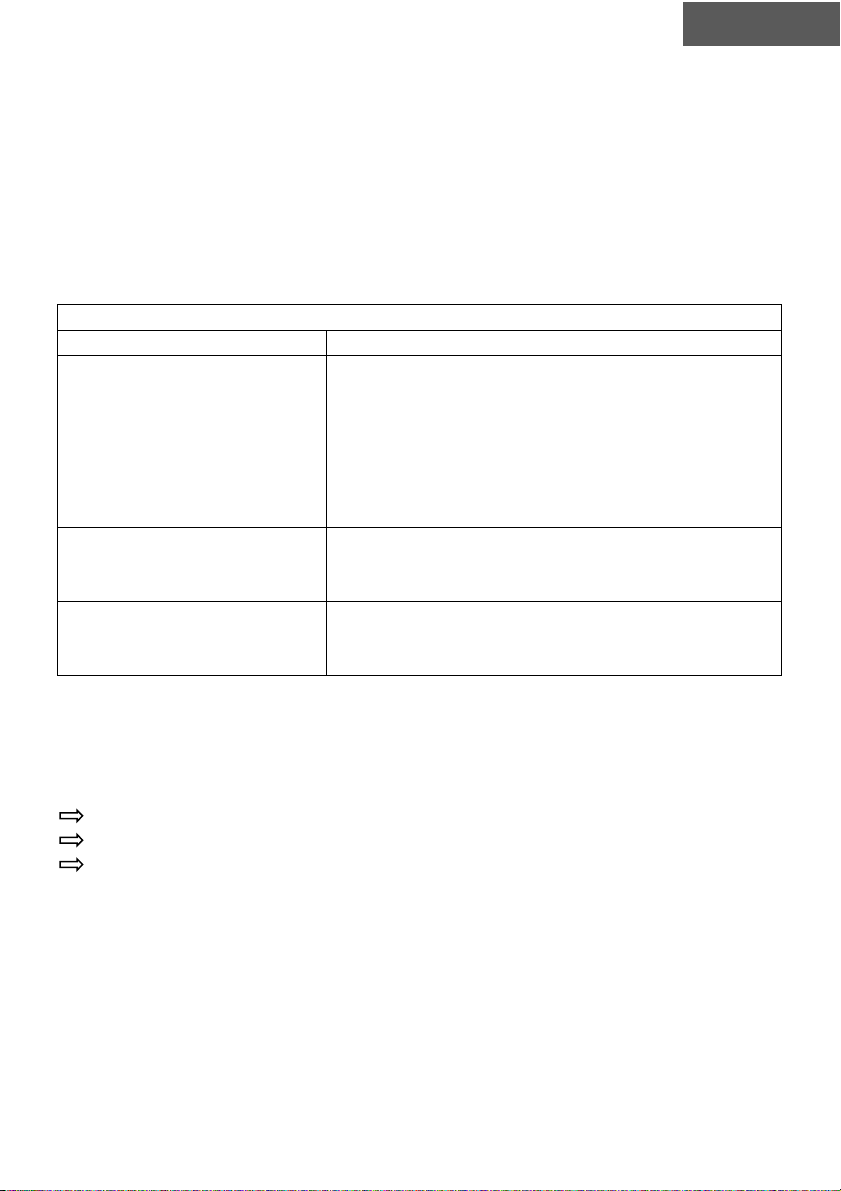
TROUBLESHOOTING
Problem Solution
Network connection timeout
1. The WLAN LED flashes slowly: Check if you have
selected the WLAN with the name "SmartLife-xxx".
2. The WLAN LED flashes slowly: Verify that you have
selected the WLAN with the name "SmartLife-xxx".
Turn off the device, disconnect it from the ower
su ly, and lug it back in after 10 seconds. Call the
a again to establish a connection.
WiFi screen off
Press and hold the timer button or turn off the
device, remove the lug from the ower outlet and
lug it back in after 10 seconds.
The WLAN access oint
disa ears and the WLAN LED
flashes.
Turn off the device, un lug the ower cord, and lug
it back in after 10 seconds.
5.3 PARAMETERS
5.3.1 Start and Stop
Press POWER to turn on the device.
Press MODE to select the desired mode.
Press the POWER button to turn off the device.
5.3.2 Operating mode
The device has 5 or 4 operating modes: cooling, dehumidification, ventilation,
repetition, heating.
Note: Heating mode is only applicable to SA 9000HS.
ENG

13
Cooling
Select the "Cool" osition to reduce the tem erature:
Press the MODE button until the "Cool" indicator comes on.
Press the u /down button to select the tem erature dis layed on the screen (16°C
and 32°C)
Press the SPEED button until the desired ventilation s eed is turned on.
To adjust the direction of airflow horizontally, manually adjust the ai fla .
To adjust the direction of airflow horizontally, manually adjust the air fin. Note: The air
conditioner automatically turns off when the ambient tem erature is below the selected
tem erature.
Heating (only SAC9000HS)
Press the MODE button until the "Heating" indicator illuminates.
Press the u /down button to set a tem erature above the ambient tem erature.
The fan s eed can also be adjusted.
Note: For continuous o eration, the drain i e must be connected to the devise.
Ventilation
Press the MODE button until the "Fan" indicator turns on.
In ventilation mode, the ambient air is changed and not cooled.
Press the SPEED button to select the desired s eed level.
Drying/Dehumidi ication
Press the MODE button on the control anel, the dry light will light u . Unable to select
fan s eed. The user must connect the i e to the drain at the bottom of the device. In
this mode, the fan s eed is set to low and cannot be adjusted.
Sleep mode (this function can only be selected by the remote control).
Standby mode can be activated in cooling mode and heating mode.
- In cooling mode:
After 1 hour, the reset tem erature is increased by 1 ° C, after another hour by 1 ° C
again, etc.
- In heating mode (only SAC9000HS):
After an hour, the reset tem erature is reduced by 1 ° C, then again by 1 ° C after
ENG

14
another hour. Then the tem erature remains constant for 10 hours. The screen is
dimmed. The fan s eed is set to the lowest level for quiet o eration and is not
adjustable.
5.3.3 Timer adjustment (1 -24 hours):
Deactivate
(Unit in)
Light
(Output unit)
Erase
5.3.4 Automatic de rosting
At low ambient tem erature, frost can form in the eva orator during o eration. The
device automatically starts to thaw and the on/off light flashes. The defrosting sequence
is as follows:
A. When the unit is o erating in cooling or drying mode, the ambient tem erature
sensor detects that the tem erature of the eva orator coil is below -1 ° C. Once
the com ressor has been turned off for 10 minutes or the battery tem erature has
reached 7°C, the device will return to cooling mode.
B. When the unit is o erating in heating or drying mode, as soon as the eva orator
tem erature sensor detects a tem erature below 40 ° C and the tem erature
difference between the eva orator tem erature and the ambient tem erature is
less than 19 ° C, after the com ressor has been running for 20 minutes, the unit
begins to thaw for 5 minutes and the o erating light flashes.
Press Hours to
activate the timer
function.
Press Hours to turn off
the timer feature.
.
Press Up/Down to set
the downtime.
Press Up / Down to
set the AN time.
Press the Up/Down key re eatedly until the LED shows "00".
Note: Pressing the POWER key also com letes the timer
setting.
ENG

15
5.3.5 Overload protection
In case of a ower outage, to rotect the com ressor, there is a delay of 3 minutes until
the com ressor restarts.
5.4 DRAINAGE
Manuel drainage
The machine sto s automatically when the water tank is full. Remove the lug from the
ower outlet.
Note: Move the device carefully to revent water from flowing.
Place a water tank under the water outlet on the side of the box.
Remove the lid and the water will automatically drain into the container.
Note 1:
1. Kee the drain lug in a safe lace.
2. The box can be tilted slightly back when draining.
3. Make sure the collection tray is large enough to collect the contents.
4. When the water has drained com letely, ut the lid and drain hatch back in lace.
Continuous drainage
The self-eva oration system uses the collected water to cool the condenser banks for
better erformance. The condensate tank does not need to be em tied in cooling mode.
Note that it should be em tied in heating and drying mode and in case of high humidity.
Condensation water eva orates into the condenser and is evacuated through the
exhaust i e. For continuous or unattended o eration in drying and heating mode,
connect the su lied drain hose to the unit.
ENG

16
Turn off the device.
Remove the drain lug
Connect the drain i e safely and
tightly, making sure it is not bent and
there is no obstruction.
Place the end of the i e over a drain or
bucket and let the water flow freely
from the device.
Do not immerse the end of the i e in
water, otherwise an "airlock" could form
in the i e.
Prevent water damage:
• Since the under ressure of the condensation tank is high, you need to tilt
the drain i e towards the ground. The angle of inclination should be greater
than 20 degrees.
• Straighten the hose to avoid bending it.
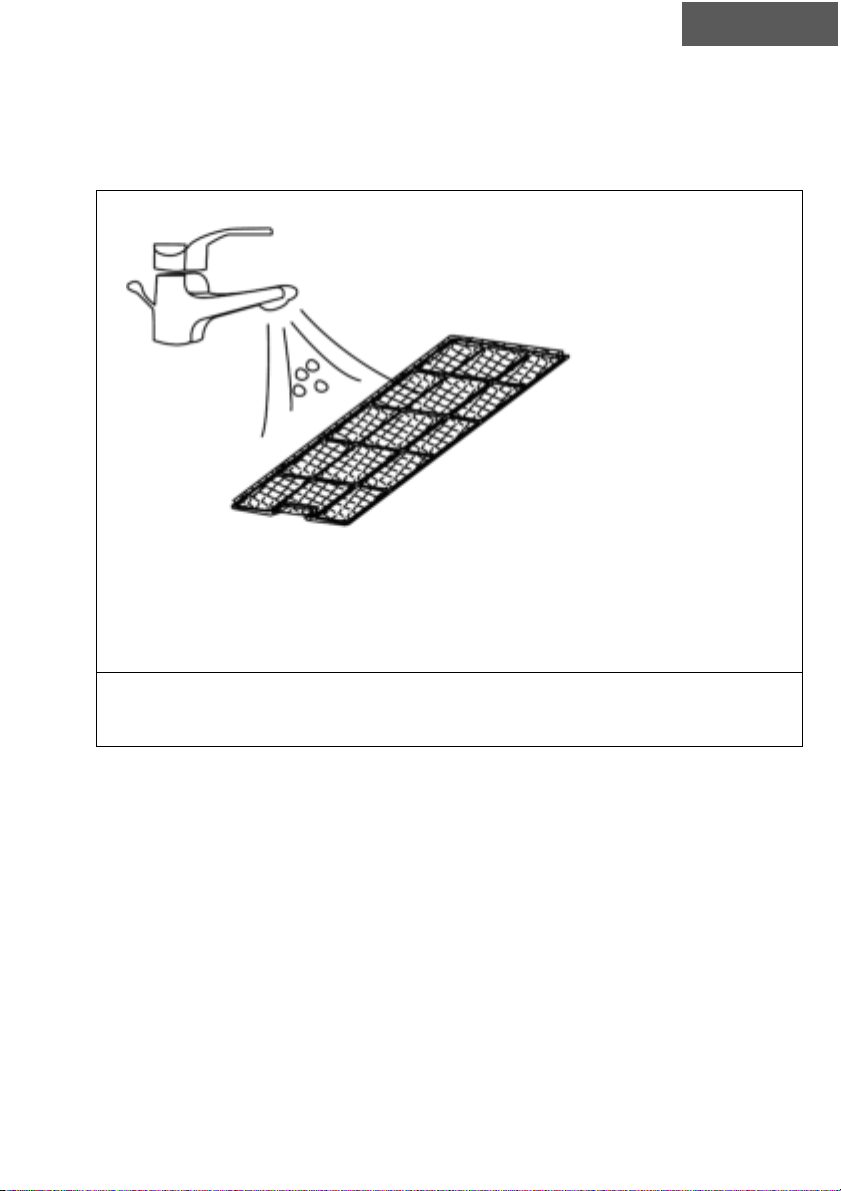
6. CLEANING AND MAINTENANCE
6.1. CLEAN THE AIR FILTER (ever two weeks)
Dust collects in the filter and obstructs the airflow. Restricted airflow reduces the
efficiency of the system and if it is blocked, the unit can be damaged.
The air filter should be cleaned regularly. The air filter is removable for easy cleaning.
Do not use the device without the air filter, otherwise the eva orator may become
clogged.
1.
Press the POWER button to turn off the device and un lug it from the mains.
2.
Remove the filter from the device.
3.
Use a vacuum cleaner to easily remove coarse dust from the filter.
ENG
17
4.
Turn the filter and rinse the air filter under running water. Let the water flow
5.
through the filter in the o osite direction to the airflow. Let it dry com letely
outdoors before utting it back in lace.
Turn off the device and remove the air filters.
Rinse the air filter under running water.
WARNING!
Do not touch the surface of the va orizer with bare hands, risk of injury!
ENG

18
7. DEMONTAGE
Long-term storage: If you don't use the device for a long time, clean it and dry it
completely. Store your device by following these steps:
Do not dispose of the product in household waste. The product must be disposed of at
the designated disposal center
Dispose of the product at designated collection points for electrical and electronic
equipment. For more information, please contact your dealer or local authorities.
Refrigerants must be removed by a qualified specialist prior to disposal and disposed of
in accordance with national and local regulations.
Please dispose of batteries in an environmentally friendly manner. Do not throw
batteries in household waste.
Use your community's return and collection systems or contact the retailer from whom
the product was purchased
1. Remove the plug from the outlet and remove the exhaust pipe, including the
window assembly.
2. Remove the remaining water from the appliance and dry it in ventilation mode
for half a day to prevent mold growth and protect the internal parts.
3. Clean the filter and let it dry completely.
4. Replace the filter.
5. The device should be stored upright.
6. Store the device in a well-ventilated, dry, and safe place.
8.DISPOSAL
ENG
19
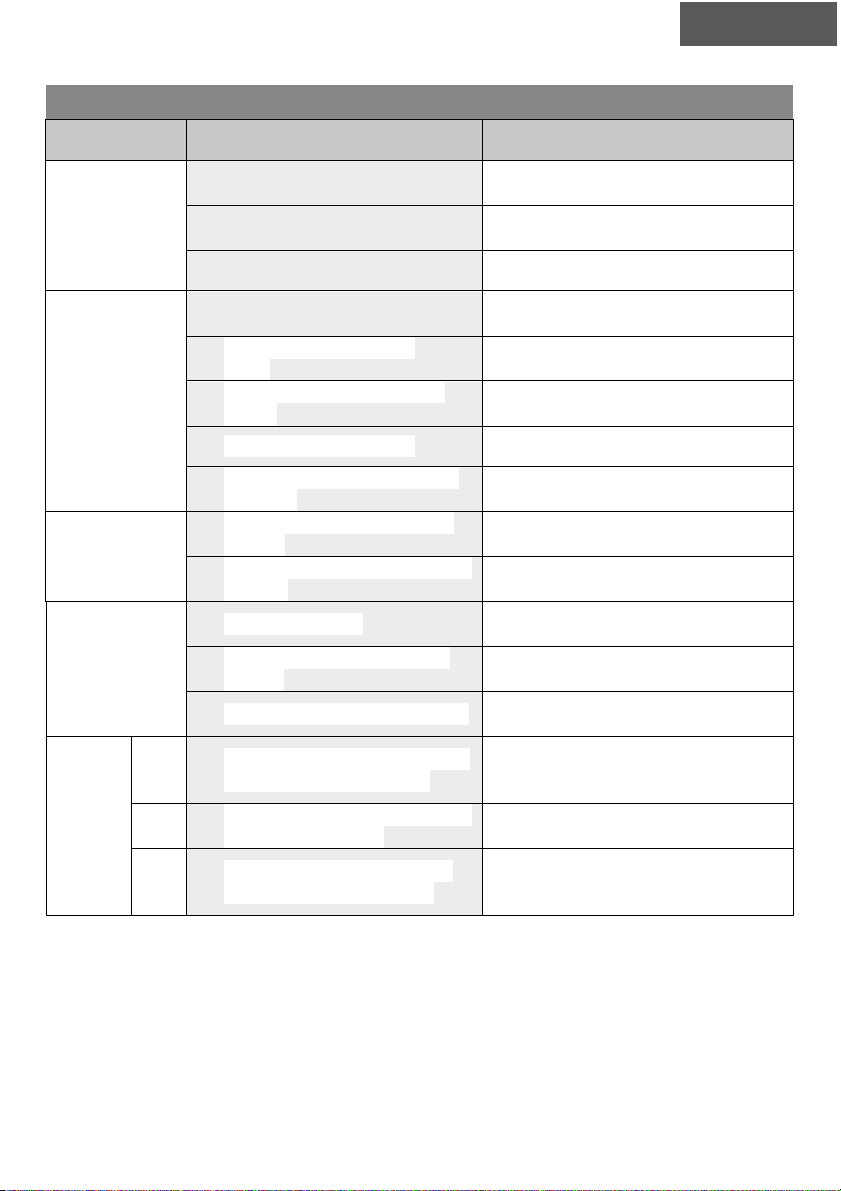
9. TROUBLESHOOTING
Problem Possible cause Solution
The roduct
does not start
Is the power suppl
connected correctl ?
Properl plug the power cord
into the power outlet.
Is the water level indicator
activated?
Empt the water tank.
Room temperature?
Ambient temperature 5
-
35°C.
Insufficient
cooling
Has the air filter been
changed?
Dirt air filter
Insufficient ventilation?
Taking care of
the environmental
distance.
O en door, window in the
room?
Close the window/door.
Correct mode assembly Set the desired mode
Connected/clogged exhaust
air hose?
Successfully connect/remove the
obstruction.
Water leakage
Overflow when moving the
device?
Em ty the water tank before
trans ort
Check if the drain i e is bent
or bent.
Straighten the i e to revent a
fall.
Unusual
sounds
Leveled roduct?
Place the roduct on a flat,
horizontal surface.
Does the roduct touch an
object?
Does
the roduct touch an
object?
Is the sound of water audible?
The coolant circulates, it's a
normal sound.
Error
Code
E0 Communication between the
header and the billboard.
Put the roduct to rest, un lug
the ower cord and lug it back
in.
E1
Interference with the ambient
tem erature sensor
Ambient tem erature sensor
defect
E2 Defects in the tem erature
sensor of the ignition coil.
Put the roduct to rest, un lug
the ower cord and lug it back
in.
ENG
20
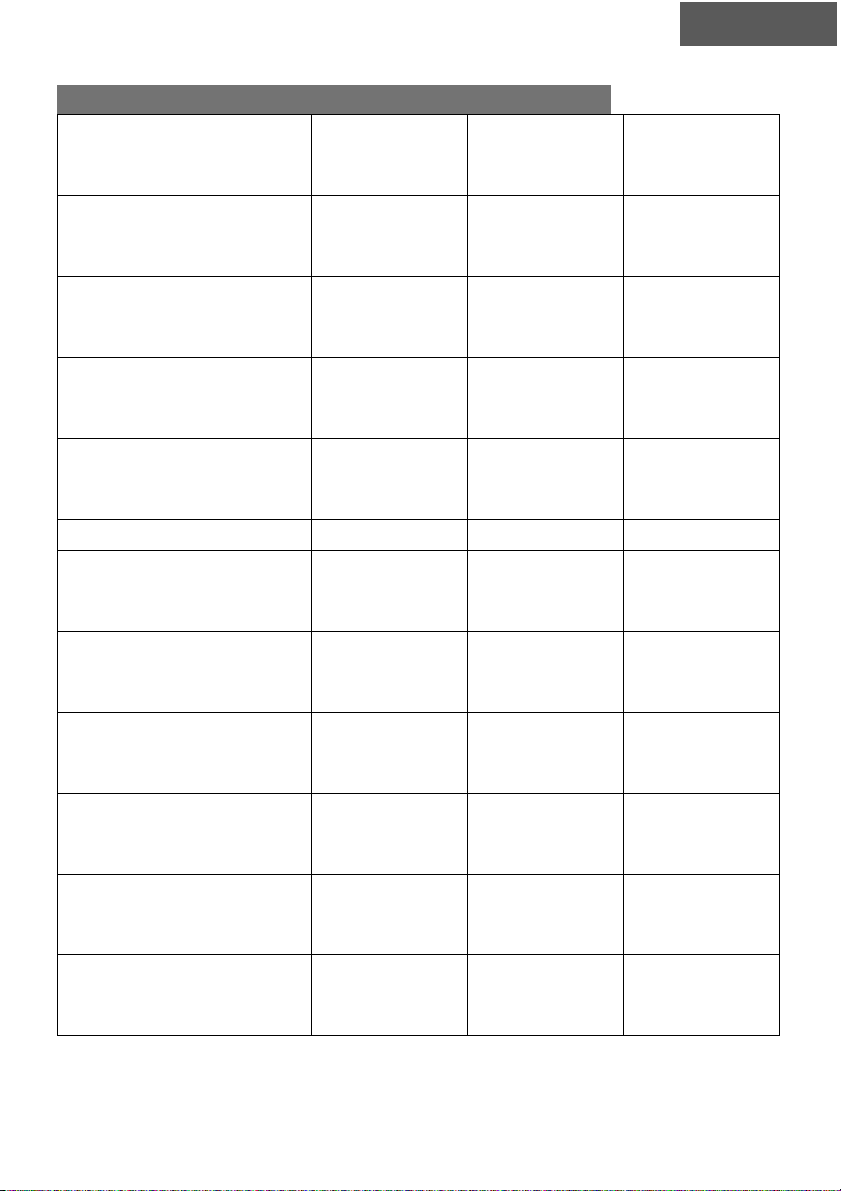
10. TECHNICAL SPECIFICATIONS
Speci ication / Model
Number
SAC9000S
SAC9000S-B SAC9000HS
Cooling ca acity 9000 BTU 9000 BTU 9000 BTU
Power su ly
220-240V/ 50 Hz 220-240V/ 50 Hz 220-240V/ 50 Hz
Nominal ca acity for
cooling in kW 2,6 2,6 2,6
EERrated 2,6 2,6 2,6
Sound ower ≤65 dB ≤65 dB ≤65 dB
Energy consum tion er
hour in kWh 1,0 1,0 1,0
Energy efficiency a lication
class A A A
Nominal heating out ut in
kW N/A N/A 2,1
COPrated N/A N/A 2,4
Energy consum tion er
hour in kWh er 60 minutes,
for heating N/A N/A 0,8
A lication Energy efficiency
class, Heating N/A N/A One
ENG
This manual suits for next models
2
Table of contents
Languages:
Other seeger Air Conditioner manuals


Popular Air Conditioner manuals by other brands

Daikin
Daikin R-410A Technical manual

Daikin
Daikin FDA125A5VEB Installer and user reference guide

Daikin
Daikin FXLQ20MAVE Operation manual

Mitsubishi Electric
Mitsubishi Electric PUZ-ZM200YKA2-ET Service manual

Haier
Haier AB052MAERA Operation & installation manual

OMAS
OMAS Air-Fi AFT7 Installer and User Instruction Manual


