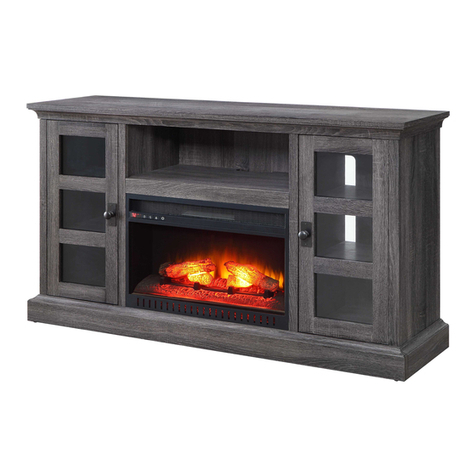
Sekey Home 3002 User manual


Contents
USER MANUAL 01-16
BENUTZERHANDBUCH 17-33
MANUEL DE L'UTILISATEUR 34-50
MANUAL DE USUARIO 68-84
MANUALE D’USO 51-67

1
EN
Dear customer:Thank you very much for choosing our products, it’s our
pleasure to offer you our products and service. Please read the user manual
carefully and follow its instructions to operate the appliance in order to prevent
fire or other accidental danger. Keep this manual in a safe place for future
reference. If there is any understanding problem related to this manual, please
contact your dealer.
Electric Fireplace
USER MANUAL

2
Guide for Quick Reference
I. Please ensure the following points before installation:
Circuit breaker is open or not (Please follow up the instruction strictly).
II. The heater of the electric fireplace may give off a little harmless odor
for the first time, which is normal when the heating unit is first used. It
will disappear afterwards.
III. Regarding the fireplace related information, please check the rating
label at the back of the fireplace. The rated voltage and power supply of
the electric fireplace shall be the same.
IIII. In case that the fireplace fails to heat, please ensure the heating
switch is in the correct position before making further treatment. For
detailed information, please refer to the section of operation in the
specification.
Contents
Page 3 IMPORTANT SATETY INSTRUCTIONS
Page 6 TECHNICAL SPECIFICATIONS
Page 6 DIMENSIONS
Page 7 ELECTRIC FIREPLACE INSTALLATION
Page 8 OPERATING INSTRUCTIONS
Page 18 CLEANING AND MAINTENANCE

3
IMPORTANT SAFETY INSTRUCTIONS
When using electrical appliances, basic precautions should always be
followed to reduce the risk of fire, electric shock and injury to people,
including:
1. Read all instructions before using this appliance.
2. This appliance is hot when in use. To avoid burns, DO NOT let bare skin touch
the hot surface. The grill at the top of this heater will become hot when the heater is
active. Keep combustible materials, such as furniture, pillows, bedding, papers,
clothes, and curtains at least 3 feet (0.9m) from the front of the heater, and keep
them away from the sides and rear. Take special care not to block the air intake or
exhaust vents. Use handles when moving this heater.
3. Extreme caution is necessary when the heater is used by children or near
children and disabled people, and whenever the heater is left unattended.
4. Do not operate the appliance in the following cases: the power cord or plug has
been damaged, the heater has been damaged or malfunctioned in any way. Take
the appliance to authorized service facilities for examination, electrical or
mechanical adjustment or repair.
CAUTION
RISK OF ELECTRIC SHOCK
DO NOT OPEN
NO USER-SERVICEABLE PARTS INSIDE
5. Do not use it outdoors.
6. Do not use the appliance in bathrooms, laundry rooms, or any other places
where there is water or the heater can become damp.
7. Do not run the power cord under carpets. Do not cover the power cord with throw
rugs or similar coverings. Do not place the power cord under furniture or appliances.
Place the power cord away from traffic areas to avoid tripping.
8. To disconnect the appliance, turn all controls “OFF”, then unplug it from the
outlet.
9. This appliance has a polarized plug (one blade is wider than the other). This plug
can only be fully plugged into the outlet in one way. If the plug cannot be fully
inserted in the outlet, reverse the plug. If it still does not fit, contact a qualified
electrician to install a proper outlet. Do not change the plug in any way.
10. Do not insert or allow foreign objects to enter any ventilation or exhaust opening
as this may cause an electric shock or fire, or damage the appliance.
11. To prevent a possible fire, do not block air intakes or exhaust in any manner. Do
not use it on soft surfaces like a bed, where openings may be blocked.
Warning: Any use of this appliance other than recommended by the manufacturer in
this user manual may cause fire, burns, electric shock and/or other serious injuries

4
12. The heater has hot and arcing or sparking parts inside. DO NOT use it where
there is gasoline, paint, or flammable liquids.
13. Use this heater only as described in this manual. Any other use not
recommended by the manufacturer may cause fire, electric shock or injury.
14. Always plug heaters directly into a wall outlet/receptacle. Never use it with an
extension cord or reloadable power tap.
15. Do not burn wood or other materials in this heater.
16. Do not strike the glass of the fireplace.
17. The installation of circuit and socket shall be conducted by certificated
electrician.
18. When transporting or storing the heater, take care to keep both the unit and
power cord/plug dry. Keep it free from excessive vibration and away from heat
sources.
19. This appliance is equipped with an overheat protection safety device. Should
the appliance begin to overheat for any reason, it will automatically turn off all
heater functions. The appliance must be reset before using it again. To reset the
overheat protection safety device, turn off all controls, replug the appliance in 15
minutes and turn it on.
20. Please use a socket with a good fuse and ground electrode.
21. Please ensure the earth leakage protection is always connected in accordance
with the electrical circuitry code.
22. Please pull out the power plug when cleaning, maintaining or moving the
fireplace.
23. In order to avoid overheating, do not cover the heater.
SAVE THIS MANUAL
You will need this manual for safety instructions, operation procedures,
and warranty. Put it and the original invoice in a safe, dry place for future
reference.
Reminder :Please pay attention to the operation steps and technical
specifications.
Warning:Operating instructions shall be followed strictly; otherwise, the
fireplace may be damaged.
Warning: Operating instructions shall be followed strictly; otherwise, it
may cause fire, serious injury, disease or dead.

5
Note:A 10AMP, 230V circuit is required to operate this appliance. Dedicated circuit
is preferred but not essential in all cases. A dedicated circuit will be required i f the
circuit breaker trips or the fuse periodically blows while the heater is running after
installation. Using other equipment on the same circuit may exceed the rated
current of the circuit breaker.
TECHNICAL SPECIFICATIONS
Rated voltage
AC 230V,50Hz
Rated Power
1800W
Power of The Heating Apparatus
900W/1800W
Flame Power
4W
DIMENSIONS

6
WARNING
1. Make sure to unplug the power cord when not in use to reduce the risk of
fire, electric shock or injury. Avoid the power cord from being squeezed or
scratched by sharp objects. And make sure to store or secure the power cord
correctly to avoid being tripped.
2. The construction and electrical outlet wiring must comply with local building
codes and other applicable regulations to reduce the risk of fire, electric shock
and injury to people.
3. Do not wire the outlets or circuits on your own. To reduce the risk of fire,
electric shock or injury, always ask a licensed electrician to make the
installation
INSTALLATION
1. Please confirm the power is off when you start the installation.
2. Connect the unit to the power source, the power should be no less than
10Amp/230V AC. If the power cord is not long enough, you can use an
extension cord with a power of not less than 2000W.
Note:
When placing the fireplace or building the wall structure, please place the core in
dry, safe and clean places.
1. If there is no satisfactory socket near the selected position, please ask a
professional electrician to install the socket behind or near the frame as
requirements.

7
Control Panel:
Main Power Switch (A)
Open the cover and push button A down (I) to “ON” position.
ON/OFF(B)
Press button B (ON/OFF) to start the flame effect.
Default interface displays as follows:
There are two short high-pitched beeps when turned on, and three low-pitched beeps
when turned off.
When switched on, the heating level, set temperature and clock icon will display. The
display will disappear when there is no operation for 60 seconds. Press any button to
display again.
Lock the Buttons(C)
Press and hold button C (OK) for more than 6 seconds to lock or unlock the buttons,
LOC displays and indicates that the buttons are locked. Once it’s locked, LOC will flash
for 6 seconds and then disappear. Press any button and LOC will flash again. Long
press button C (OK) for 6 seconds to unlock the buttons.
Please note the button B (ON/OFF) is never locked.
OPERATING INSTRUCTIONS
A
B
C
D
E
F
It will display the heating icon and start heating when
the room temperature is lower than the default setting
(10°C), on the contrary, it will not display the icon or
heat.
The clock icon will flash when the time is not set yet.
Please follow the steps in “Time Setting” to set the
time.

8
Heating ON/OFF
Quick Start of Heating Mode
Press button E (+) or F (-) to quick start the heat setting (Even though it’s in the weekly
program) as follows:
a. Press either button E (+) or F (-) to see the current temperature on the screen.
b. Press button E (+) or F (-) to adjust the temperature as desired. Press button C (OK)
to validate the setting. If the set temperature is higher than the room temperature
detected by appliance, it starts hearing. And it will not heat when the room temperature
is higher than the set temperature.
NOTE:The settable temperature ranges from 10°C to 30°C. OFF means no heating
and ON for continuous heating.
LOW/HIGH HEATING & TEMPERATURE SETTING
High Heating
On the default interface, press button D (MENU) to display H and flashing heating icon
as follows:
Press OK button to set the temperature. The default temperature is 10°C (50°F). It’s
displayed as follows:
Press button E (+) or F (-) to adjust the temperature. If the set temperature is higher
than the room temperature detected by appliance, it starts hearing. And it will not heat
when the room temperature is higher than the set temperature.
Low Heating
At default interface, press the button D(MENU) twice to display L and flashing heating
icon as shown below:
Press OK button to set temperature. The default temperature is 10°C(50°F). It’s
displayed as shown below:

9
Press the button E(+) or F(-) to adjust temperature. If the set temperature is higher
than the room temperature detected by appliance, the heating starts. The heating will
not start if the set temperature is lower than the room temperature.
Celcius/Fahrenheit Setting:
The default temperature readout is Celcius. Long press button D(MENU) for 3 seconds
then press the button E(+) or F(-) to change the temperature readout from Celsius to
Fahrenheit.
Brightness Control
Brightness Control is to select the desired flame brightness level.
At the default interface, Press and hold button D(MENU) to select Brightness Control,
it’s displayed “bri” and flashing light bulb icon as shown below:
Press OK button to start the brightness setting. Press button E(+) or F(-) to select the
brightness level.
5 brightness levels are selectable. The default setting is 3. 5. The highest level as
shown as shown below:
Regular Timer
At the default interface, Press and hold button D(MENU) to select the regular timer, it’s
displayed “Hour” and flashing timer icon as shown below:
Press OK button to start the regular timer setting.
Press the button E(+) or F(-) to select the desired time.
The time sequence will read 00-30min, 1H, 2H, 3H, 4H, 5H, 6H, 7H, 8H and 9H. The
default setting is 00 as shown below:

10
Down Light
At the default interface, Press and hold the button D(MENU) to select the down light,
it’s displayed “doLi” as shown below.
Press OK button to start the down light setting.
Press the button E(+) or F(-) to select the down light levels. Levels include
D1/D2/D3/D4/OFF.
D1 is the brightness level, OFF is no down light.
NOTE: This appliance doesn’t have down light feature.
NOTE: If no operation is performed on the control panel or remote control after 15
seconds, the display will return to the default interface.
Mode Selection(Secondary Menu)
At the default interface, Press and hold the button D(MENU) to select Mode Selection,
it’s displayed “Mode” as shown below:
Press OK button to access Mode menu.
Press the button E(+) or F(-) to select the desired mode.
1) Open Window Detection Mode
Press and hold button D(MENU) to select Mode menu.
Press OK to validate, then E(+) or F(-) to enter the Open Window Detection Mode. The
screen displays "OPEN" as shown below:
Press OK to validate, then button E(+) or F(-) to select ON or OFF. Press the OK
button to turn on or off the Open Window Detection Mode.
After activating the Open Window Detection, the appliance will automatically shut off
the heating when it detects the room temperature decreased more than 4°C within 10

11
minutes and keep the temperature dropped for no less than 20 minutes.
To restart the heating, adjust the set temperature then press the OK button to validate
the setting. The Open Window Detection Mode will be OFF after reset the temperature.
2) Time Setting
Press and hold the button D(MENU) to select Mode menu.
Press OK to validate, then button E(+) or F(-) to enter Time Setting. It’s displayed
“TIME” as shown below:
Press OK to validate, then press the button E(+) or F(-) to select day. D1 for Monday,
D2 for Tuesday, D3 for Wednesday, D4 for Thursday, D5 for Friday, D6 for Saturday
and D7 for Sunday.
Press OK to validate the day, then button E(+) or F(-) to set the time(hour).
Press OK to validate the hour, then button E(+) or F(-) to set the time(minute).
Press OK to validate the time setting.
To exit the setting during operation, press the button D(MENU).
If icon permanently flashes, this indicates that the time is offset following a power
cut. It’s flashing as a time has not been set.
3) Weekly Programming
The time must be set before any programming.
3 pre-set programs are available. Each program includes a time period or several time
periods during which the electric fireplace is under heating mode. Outside of the time
periods, the electric fireplace is non-heating.
The time period of one program may overlap the time period of another.
Program Definition:
P1 as Program 1:
Monday to Friday from 05:15 for 4 hours high heating, and Saturday to Sunday from
06:20 for 4 hours low heating.

12
P2 as Program 2:
Monday to Friday from 17:45 for 4 hours high heating, and Saturday to Sunday from
16:30 for 4 hours low heating.
P3 as Program 3:
Saturday to Sunday from 08:15 for 4 hours high heating.
Press and hold the button D(MENU) to select Mode menu.
Press OK to validate, then button E(+) or F(-) to access Weekly Programming, it’s
displayed “ProG” as shown below:
Press the button + or - to select “ON” or “OFF” to turn on or off the weekly program.
Press OK to validate.
To exit the setting during operation, press the button D(MENU).
To cancel an existing weekly program, select OFF to turn off the weekly program.
Manual Setting for Weekly Programming
Press and hold the button D(MENU) to select Mode menu.
Press OK to validate, then press the button E(+) or F(-) to access the Manual Setting,
it’s displayed “MANU” as shown below:
Press the button E(+) or F(-) to select the day(s) of program activation or inactivation.
Press + or – to select the activation day first, and press OK to validate; then press + or
– to select the inactivation day, and press OK to validate.
The following example for selecting Monday as activation day and Sunday as
inactivation day.

13
Press the button E(+) or F(-) to select the heating level. H for high heating and L for low
heating. Press Ok to validate.
Press the button E(+) or F(-) to set your desired temperature. Press OK to validate.
Press the button E(+) or F(-) to set the hour of the activation time. Press OK to
validate.
Press the button E(+) or F(-) to set the minutes of the activation time. Press OK to
validate.
Please note that the minute setting is accumulated by 5 minutes each time.
Press the button E(+) or F(-) to set the duration of the time period. Press OK to
validate.
Please note that the duration time setting is accumulated by 30 minutes each time.
Now the 1st time period of program is completed. It’s displayed as “CON” (confirm).
NOTE: The program cannot run into the next day. Therefore, the maximum duration
cannot exceed midnight (for example, if the start time is 20:30, the maximum duration
displayed is 4 hours and the real maximum duration is 3 hours and 30 minutes).
To continue the setting for the 2nd time period, press OK to continue so that the screen
will return to the interface of day selection for the 2nd time period.

14
To finish the setting, press the button E(+) or F(-) to find “FINSH”, then press OK to
finish the setting.
Multi time periods could be used for one day.
Same time period could be used for multiple days.
NOTE:
For the settings under Mode Selection (Secondary Menu), always remember to press
the button C(OK) to validate the setting.
Maximum 8 time periods could be used for one program.
After the weekly program is manually set, the relevant program has been manually set,
and the default program settings will be updated accordingly.
Restore Factory Defaults
Unplug the device from the power source for no less than 5 seconds, and then plug it
in to restore the factory default settings.
Using the Remote Control
This heater includes a remote control. To use the remote control to operate the device,
the Master Power Switch (A) must be in the “ON” position.
All the buttons on the remote control have exactly the same functions as those on the
control panel.

15
Battery Replacement
1.The protective plastic tab of the battery must be removed when using it for the
first time.
2.For the remote control battery replacement, use a Lithium Cell CR2025 3V battery.
WARNING: Do not cover the outlet when the appliance is working. Unplug
the power cord when you leave the appliance for a long time.
Turn off the appliance, unplug and let cool for at least 10 minutes before
attempting to service. Only a qualified professional should attempt to service
or repair the appliance.
WARNING: TO AVOID FIRE, ELECTRIC SHOCK, PERSONAL INJURED,
CLEANING AND MAINTENACE SHOULD BE DONE ONLY WHILE THE
ELECTRICAL HEATER IS DISCONNECTED FROM THE POWER SUPPLY.
Glass cleaning:
Over time, the front glass panel may become dirty or dusty. Dust can be
removed by lightly rubbing the glass surface with a clean lint-free cloth or paper
towel. To remove fingerprints or other marks, use a soft, damp, lint-free cloth
with a good quality household glass cleaner. The front glass panel should always
be completely dried with a lint-free cloth or paper towel.
Cleaning and Maintenance
WARNING: AN AUTHORIZED SERVICE REPRESENTATIVE SHOULD PERFORM
ANY OTHER SERVICING.
Remote control

16
When not in use, unplug the unit from the power supply and store it in a dry,
dust-free location.
STORAGE
CAUTION: DO NOT USE ABRASIVE CLEANERS ON THE GLASS PANEL!
DO NOT SPRAY LIQUIDS DIRECTLY ONTO ANY SURFACE OF THE UNIT!
WARNING: AN AUTHORIZED SERVICE REPRESENTATIVE SHOULD
PERFORM ANY OTHER SERVICING.

17
DE
Elektrischer Kamin
BENUTZERHANDBUCH
Sehr geehrter Kunde: Vielen Dank, dass Sie sich für unser Produkt
entschieden haben. Es ist uns eine Freude, Ihnen unsere Produkte und
unseren Service anzubieten. Bitte lesen Sie die Bedienungsanleitung
sorgfältig durch und befolgen Sie die Anweisungen zum Bedienen des
Gerätes, um versehentliche Gefahren zu vermeiden. Bewahren Sie dieses
Handbuch zum späteren Nachschlagen an einem sicheren Ort auf. Wenn Sie
Probleme mit dem Verständnis dieses Handbuchs haben, wenden Sie sich
bitte an Ihren Händler.
Table of contents
Languages:
Other Sekey Home Indoor Fireplace manuals
Popular Indoor Fireplace manuals by other brands

Nordica
Nordica INSERTO 70 WIDE user manual

CHAD-O-CHEF
CHAD-O-CHEF VFG 700-N Installation & operating instruction manual

Town & Country Fireplaces
Town & Country Fireplaces TCWS.38CE3 Installation and operating instructions

Dimplex
Dimplex SYMPHONY SF5598 Parts & service manual

Regency
Regency CC40LE-NG Owners & installation manual

Ortech
Ortech OD23-52A instruction manual