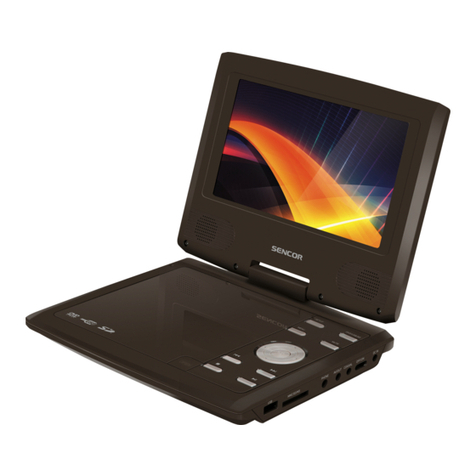
Sencor SPV 7766TD User manual

USER’S MANUAL
NÁVOD K OBSLUZE
NÁVOD NA OBSLUHU
HASZNÁLATI ÚTMUTATÓ
INSTRUKCJA OBSŁUGI
РУКОВОДСТВО ПОЛЬЗОВАТЕЛЯ
NAUDOTOJO VADOVAS
SPV 7766TD
PORTABLE DVD (2 PANELS)
PŘENOSNÝ DVD PŘEHRÁVAČ (2 PANELY)
PRENOSNÝ DVD PREHRÁVAČ (2 PANELY)
HORDOZHATÓ DVD LEJÁTSZÓ (2 PANEL)
PRZENOŚNY ODTWARZACZ DVD (2 PANELE)
ПОРТАТИВНЫЙ DVD ПЛЕЕР (С 2 ПАНЕЛЯМИ)
NEŠIOJAMASIS DVD GROTUVAS (2 VALDYMO SKYDAI)

Safety Precautions ............................................................................3
Before Use..........................................................................................5
Identification of Controls..................................................................7
Main Unit......................................................................................7
Slaver...........................................................................................7
Insert the battery..........................................................................8
Remote control ............................................................................9
SETUP Menu Setting .......................................................................11
System Setup Page ...................................................................11
Language Setup Page ...............................................................12
Video Setup Page......................................................................12
DVB Operation.................................................................................13
Slaver LCD Setup menu..................................................................19
Parameters and specifications.......................................................20
Troubleshooting tips.......................................................................21
Contents
EN
Before connecting, operating or adjusting this product, please read this user’s manual carefully and completely – contains important information
for safe and optimal use of all features and functions. Store the user’s manual in case you need it again.

EN 1
Appendix to LCD TV Instruction Manual

2 EN
WARNING
RISK OF ELECTRIC SHOCK
DO NOT OPEN
Safety Precautions

EN 3
Safety Precautions
THE DEVICE’S CONNECTOR IS USED AS
A DISCONNECTING DEVICE, WHICH MUST FOR
THIS REASON REMAIN EASILY ACCESSIBLE.
REMEMBER TO ALWAYS DISCONNECT THE POWER
PLUG FROM THE POWER SOCKET BEFORE
DISCONNECTING THE POWER CABLE FROM
THE BACK SIDE OF THE DEVICE.
AN OPEN FLAME MUST NOT BE PLACED ON THE DEVICE,
E.G. A BURNING CANDLE.
PAY SPECIAL ATTENTION TO THE BATTERIES USED
AS REGARDS TO THE ENVIRONMENT.
THE VENTILATION MUST NOT BE IMPEDED BY COVERING
THE VENTILATION OPENINGS WITH OBJECTS SUCH
AS NEWSPAPERS, TABLECLOTHS, CURTAINS, ETC.
IMPORTANT SAFETY INSTRUCTIONS:
THE POWER PLUG IS USED AS A DISCONNECTING
DEVICE, WHICH MUST FOR THIS REASON REMAIN
EASILY ACCESSIBLE.
DO NOT EXPOSE THE DEVICE TO THE EFFECTS
OF DRIPPING OR SPRAYING WATER AND DO NOT
PLACE THE DEVICE ON OBJECTS FILLED WITH A LIQUID
(E.G. VASES).

4 EN
Safety Precautions
This item incorporates copy protection technology that is
protected by U.S. patents and other intellectual property rights
of Rovi Corporation. Reverse engineering and disassembly
are prohibited.
Due to wide offer of USB devices on the market,
we do not guarantee full compatibitity of the device with
all types USB sticks.
charge strong impact over heat 40 °C

EN 5
The user’s manual contains information and instructions
for the correct installation, connection, setup, operation and service
of this device.
• The identification of buttons, connectors, and other control
and connection elements of the player are described using
CAPITAL LETTERS in the user’s manual.
• For all text information displayed on the screen of the player
or on the screen of the connected television the user’s manual
uses bold letters.
This manual provides information on the operation and maintenance
of your DVD player. Should the unit require service, contact an
authorized service location.
Symbol Used in this Manual
The lightning flash symbol alerts you to the presence
of dangerous voltage within the product enclosure that may
constitute a risk of electric shock
The exclamation point alerts you to the presence of important
operating and maintenance/servicing instructions
Indicates hazards likely to cause harm to the unit itself
or other material damage
Note:
Indicates special notes and operating features.
Tip:
Indicates tips and hints for making the task easier. A section whose
title has one of the following symbols is applicable only to the disc
represented by the symbol:
DVD DVD and finalized DVD+R/RW
VCD Video CDs VCD
CD Audio CDs CD
MP3 MP3 Discs MP3
WMA WMA Discs WMA
JPEG JPEG Discs JPEG
DIVX Divx Discs DIVX
About the Symbol Display
This symbol means that the function included in the user‘s
manual cannot be carried out because it is forbidden by
the software of the disc being played back.
Notes about disks
Handling discs
• Do not touch the surface of the disc where there is no label
and where the recording is stored. When handling the disc,
hold it by its edges, or by the edge and the centre disc opening.
Do not stick labels on to the discs - to label a disc use soft tip
markers specially designed for this purpose, mark the side
of the disc with the label.
After playback return the disc into its cover, where it is protected
against scratching. Do not leave discs in direct sunlight or near
a heat source, do not leave discs in closed motor vehicles
parked in direct sunlight. Risk of deformation of the disc.
Before Use

6 EN
Before Use
Cleaning of discs
• Fingerprints and dust affect the quality of the image while playing
the recording from the disc. To remove this before playing
the disc, clean with a soft lint-free cloth. When cleaning a disc
proceed from the centre of the disc directly towards the edge
(not using circular motion).
• For cleaning, do not use anti-static sprays for vinyl records,
petrol, spirits or other solvents or thinners.
Types of Playable Discs
DVD (8 cm/12 cm disc)
Video CD (VCD) (8 cm/12 cm disc)
Audio CD (8 cm/12 cm disc)
Apart from the above mentioned disc types it is possible to play
DVD+/-R, DVD+/-RW, Kodak Picture CD, SVCD, CD-R with
recordings in CD format (CD audio copy), CD-R with compressed
music files in formats MP3 or WMA, CD-R with image files in
the format JPEG and CD-R with video recordings in the DivX format.
Playing of disc types not mentioned here is not guaranteed.
RW
C0MPATIBLE
This indicates a product feature that is capable
of playing DVD-RW discs recorded with Video
Recording format.
Poznámky:
1. Depending on the recording media, recording method
(used PC program used for the disc recording) and its
finalisation, it is possible that it will not be possible to play some
CD-R or DVD+/-RW/R discs.
2. Do not attach any seal or label to either side (the labeled side
or the recorded side) of a disc.
3. Use the player to play only circular discs - when playing irregular
shaped discs there is a risk of damaging the disc or the player.
4. Some playback operations of DVDs and Video CDs may
be intentionally programmed by software manufacturers.
This unit plays DVDS and Video CDs according to disc content
designed by the software manufacturer, therefore some playback
features may not be available or other functions may be added.
• Region code
This DVD player is designed and manufactured
for playback of region „2“encoded DVD software.
This unit can play only DVD discs labeled „2“ or „ALL“.
2
Notes on Region Codes
Most DVD discs have a globe with one or more numbers in
it clearly visible on the cover. This number must match your DVD
player‘s region code or the disc cannot play. If you try to play
a DVD with a different region code from your player, the message
„Check region Code“ appears on the TV screen.
EN 7
Identification of Controls
Main Unit
2
1
3
4
5
6
7
8
9
10
11
12
13
20
17
18
19
14
15
16
30
27
28
29
25
22
23
24
33
32
35
34
26
21
MONI TO R
36
37
38
39
40
41
31
1. SD/MS/MMC
2. USB
3. AV OUT
4. HEADPHONE OUT JACKS
5. Volume adjust
6. DC OUT 9–12V
7. DC IN 9–12V
8. POWER ON/OFF
9. MUTE
10. SOURCE (DVD/CARD/
USB)
11.
12. SETUP
13.
14. MENU
15. TITLE
16. OK
17. (UP)
18. (RIGHT)
19. (DOWN)
20. (LEFT)
Slaver
2
1
3
4
5
6
7
8
9
10
11
12
13
20
17
18
19
14
15
16
30
27
28
29
25
22
23
24
33
32
35
34
26
21
MONI TO R
36
37
38
39
40
41
31
22. SOURCE
23. MODE
24. SCAN
25. EXIT
26. OK
27. (UP)
28. (RIGHT)
29. (DOWN)
30. (LEFT)
31. VIDEO AUDIO OUT
32. VIDEO AUDIO IN
33. HEADPHONE OUT JACKS
34. DC IN 9–12V
35. POWER ON/OFF
36. SETUP
37. EPG
38. TTX
39. USB
40. SD/MS/MMC
41. ANT

8 EN
Insert the battery
Insert the battery
1. Open the battery door.
2
1
3
4
5
6
7
8
9
10
11
12
13
20
17
18
19
14
15
16
30
27
28
29
25
22
23
24
33
32
35
34
26
21
MONI TO R
36
37
38
39
40
41
31
hole
2. Insert two AAA size batteries.
2
1
3
4
5
6
7
8
9
10
11
12
13
20
17
18
19
14
15
16
30
27
28
29
25
22
23
24
33
32
35
34
26
21
MONI TO R
36
37
38
39
40
41
31
To control the device using the remote control point the remote control
at the device and then press the button with the required function.
The maximum range of the remote control is about 5 meters with
a deviation of up to +/- 30° from the perpendicular direction to the
reception sensor of the remote control on the front side of the device.
The falling capacity of the batteries gradually reduces the remote
control range.
There must be no solid obstacles in the area between the remote
control and the device when the remote control is being used.
During standard use the lifetime of batteries in the remote control
is about 1 year. When the effective ranges of the remote control is
substantially reduced or when there are problems with its use, change
both the batteries in the remote control.
If you will not be using the remote control for a longer period of time,
take out both batteries from it - in this way you will prevent potential
damage caused by their leakage.
Pay special attention to the batteries used as regards to the
environment. The batteries must not be exposed to excessive heat,
such as sun radiation, fire, etc.
The incorrect use of batteries may cause the leakage of the
electrolyte and corrosion. To ensure that the remote control works
correctly, proceed according to the instructions below:
- Do not insert the batteries in the wrong direction.
- Do not recharge, heat, open or short the batteries.
- Do not throw batteries into a fire.
- Do not leave discharged batteries in the remote control.
- Do not combine various types of batteries or new
and old batteries.
- If you are not using the remote control for a longer period of time,
remove the batteries to prevent potential damage caused
by a subsequent battery leakage.
- If the remote control is not working correctly or its operational
range is reduced, change all batteries for new ones.
- If electrolyte leaks out from the batteries, have the remote control
cleaned by an authorised service centre.

EN 9
Remote control
Remote control
1234
5678
90
10+
ANG LE
/TTX
PBC
/EPG
REPEAT
GO TO
SOURCE
TITLE
/FAV
ENTER
SLOW
/MODE
SUBTITLE
M EN U AUDIO
SETUP
TV/RADIO
DISP LAY
MUTE
DVD
/CARD
/USB
PRO G
/EX IT
STEP
OSD
/SCAN
Z OO M
11 9
16
5
18
8
14
21
1
2
6
7
22
23
12
20
19
13
4
3
24
15
17
10
25
26 27
28
1. PLAY/PAUSE
Press PLAY/PAUSE once to pause playback, pressing
PLAY/PAUSE second time will resume the playback.
2. STOP
When this button is pressed once, the unit records the stopped
point, from where playback will resume if ENTER button is
pressed afterwards. But if STOP button is pressed again instead
of ENTER button, there will be no resume function.
3. Reverse Skip
Go to previous chapter/ track to the beginning.
4. Forward Skip
Go to next chapter/ track.
5. ANGLE/TTX
Press ANGLE will change the view angle, on DVDs that support
this feature.
In DVB, show the TTX.
6. REPEAT
Press REPEAT during playback to select a desired repeat mode.
Most of the functions can be controlled by remote control unit.Most of the functions can be controlled by remote control unit.
DVD : you can play a chapter/title/all on a disc.
Most of the functions can be controlled by remote control unit.Most of the functions can be controlled by remote control unit.
VCD CD : you can play a track/all on a disc.
MP3 WMA : you can select Repeat one/Repeat folder play
mode on a disc.
7. TV-RADIO
In DVD, to repeat a segment: press AB once to set the starting
point for repeat segment. Press it again to set an end point;
the player will repeat the segment from the start to the end point.
In DVB, switch TV and RADIO.
8. PROG/EXIT
Place a track on the program list in DVD mode. Exit current
page in DVB mode.
9. MUTE
Disable Audio output.
10. TITLE/FAV
Return to DVD title menu; Show favourite program in DVB mode.
11. STEP
In DVD, press STEP once to pause playback. From this station
press STEP to advance one video frame.
12. 0–9 NUMBER BUTTONS
Selects numbered items in a menu.
13. ENTER
Confirms menu selection.

10 EN
Remote control
14. PBC/EPG
In DVD mode, PBC on/off switch. Only for VCD, for other discs,
the function is invalid.
In DVD mode, show the EPG information.
15. DISPLAY
To display the playtime and status information.
16. SUBTITLE
Press SUBTITLE repeatedly during playback to hear a different
subtitle languages.
17. ZOOM
Use ZOOM to enlarge or shrink the video image.
18. MENU
Accesses menu on DVD disc.
19. SETUP
Accesses or removes setup menu.
20. 10+ BUTTON
In order to select a track 10 or greater, first press 10+;
for example: select a track 12, first press 10+, and then
press number 2 button.
21. OSD/SCAN
In DVD, select OSD language. Scan program in DVB mode.
22. BUTTON
Press button to skip back at 5-level speed (X2 ->X4 ->X8
->X20), press ENTER button to return to normal playback.
23. BUTTON
Press button to skip ahead at 5-level speed (X2 ->X4 ->X8
->20), press ENTER button to return to normal playback.
24. AUDIO
Most of the functions can be controlled by remote control unit.Most of the functions can be controlled by remote control unit.
DVD : Press AUDIO repeatedly during playback to hear
a different audio language or audio track, if available.
MP3 CD
Most of the functions can be controlled by remote control unit.Most of the functions can be controlled by remote control unit.
VCD : Press AUDIO repeatedly during playback to
hear a different audio channel (Stereo, Left, or Right).
In DVB mode, select program audio.
25. SLOW/MODE
Press SLOW button repeatedly to enter slow playback, and cycle
between different speeds. The speeds are 1/2, 1/3, 1/4, 1/5, 1/6,
1/7 and normal.
It should be enter DVB TFT menu to adjust TFT.
26. GO TO/SOURCE
In DVD, go to time point, title or chapter you want. In DVB,
switch DVB and AV IN.
27. DVD/CARD/USB
28. COLOR KEYS (RED/GREEN/YELLOW/BLUE)
In DVB, use to operate different functions in TEXT screen
or other menus.

EN 11
SETUP Menu Setting
System Setup Page
Press SETUP button to get the setup menu. Use direction buttons
to select the preferred item. After finishing settings,
press SETUP again to normal display.
• System Setup
SYSTEM SETUP
TV SYSTEM
SCREEN SAVER
TV TYPE
PASSWORD
RATING
DEFAULT
ON
OFF
1 KID SAFE
2 G
3 PG
4 PG13
5 PG-R
6 R
7 NC-17
8 ADULT
NTSC
PAL
AUTO
4:3 PS
4:3 LB
16:9
RESTORE
• TV System
Select the colour system that corresponds to your TV when AV
output. This DVD Player is compatible with both NTSC and PAL.
PAL - Select this if the connected TV is PAL system.
It will change the video signal of a NTSC disc and output
in PAL format.
NTSC - Select this if the connected TV is NTSC system.
It will change the video signal of a PAL disc and output
in NTSC format.
Auto: Change the video signal output automatic according
to the playing disk format.
• Screen Saver
This function is used to turn the screen saver on or off.
• TV Type
Select the aspect ratio of the playback picture.
4:3 PS: if you have a normal TV and want both sides
of the picture to be trimmed or formatted to fit your TV screen.
4:3 LB: if you have a normal TV. In this case, a wide picture
with black bands on the upper and lower portions of the TV
screen will be displayed.
16:9: wide screen display.
• Password
Input user password. Default password is 0000.
• Rating
After input correct password, you can change parental level.
• Default
Restore the factory setting of setup menu.

12 EN
SETUP Menu Setting
Language Setup Page
• Language setup
--
OSD LANGUAGE ENGLISH
GERMAN
SPANISH
FRENCH
PROTUGUESE
ITALIAN
AUDIO LANGUAGE
SUBTITLE LANGUAGE
MENU LANGUAGE
LANGUAGE SETUP
ENGLISH
GERMAN
SPANISH
FRENCH
PROTUGUESE
ITALIAN
ENGLISH
GERMAN
SPANISH
FRENCH
PROTUGUESE
ITALIAN
ENGLISH
GERMAN
SPANISH
FRENCH
PROTUGUESE
ITALIAN
FONT SETUP
CENTRAL EU
CYRILLIC
WESTERN EU
GREEK
TURKISH
You can select OSD language, and select audio/subtitle/menu
language of DVD discs if available. Also you can select font type
for mpeg4 subtitle.
Video Setup Page
VIDEO SETUP
BRIGHTNESS
CONTRAST
HUE
SATURATION
12
10
8
6
4
2
0
You can change the video setting: brightness, contrast, hue,
saturation.
• Speaker Setup
SPEAKER SETUP
DOWNMIX
LT/RT
STEREO
• Downmix:
LT/RT: When playing a 5.1ch DVD disc, the LS/RS/Center
channel audio will output through both L and R channel.
STEREO: When playing a 5.1ch DVD disc, the LS channel audio
will output only through L channel, RS channel audio will output
only through R channel, Center channel audio will output through
both L and R channel.

EN 13
DVB Operation
DVB Setup Menu
Main Menu
Movie
MUSIC
PHOTO
Games
Database Empty
Digital TV
In Main Menu, press /key to choose Digital TV option
and then press OK button once to enter Digital TV menu.
Digital TV
Installation
Configuration
Software Upgrade
Version
Database Empty
Channel Manager
• Installation
There are three kinds of Installation mode as follow:
1. Area Search: searching programs by scan area
2. Manual Search
3. Auto Search.
Area Search
Area search is a kind of intelligent and convenient mode
of programs searching, which covers programs of all frequent
points of target countries or regions.
Manual Search
If you understand much about digital TV and know the
frequency of the program or if you want to scan the program
at any frequency required, you can select manual scanning,
which can save you much time.
Auto Search
You can search the programs of any channel.
1. You can move the cursor to „area search“ via press /key
under „installation menu“, then press „OK“ to enter into area
searching page.
2. Prior to auto searching, you need to configure relevant
parameters including:
1.Start Freq (kHz): the default frequency is 474000 kHz.
You can input relevant digitals to modify it.
2.End Freq (kHz): the default frequency is 474000 kHz.
You can input relevant digitals to modify it.
3.Band Width: the default value of bandwidth is 64MHz.
While you set it to 6 MHz, 7 MHz, 8 MHz.
3. Press „OK“ button after configuration of parameters to start
manual scan.
4. If any program is detected and the scanning process
is finished, system will exit the scanning page and save
the program, at the same time EXIT to full screen to play
the program.

14 EN
DVB Operation
• Channel Manager
System offers an efficient function of channel management
such as channel deleting, marking, moving, locking, sorting
and grouping. There are two independent pages for channel
management, TV and RADIO. You can enter the page via
„digital TV channel manager“.
Channel Manager
Channel Sorting
Channel Grouping
Channel Organizer
Edit Channel
Delete All
Channel Organizer
Channel organizer page includes favourite channels,
channel deleting, moving, locking and rename.
Channel Sorting
The channels shall be listed according to certain sequence
so that the user can easily find them.
Channel Grouping
Group channels according to Movies, Sport, Music, Kids,
Fashion etc.
Edit Channel
Have such operations as Add, Delete and Rename to channels.
Delete All
If you do not like one or some channels, you can delete it/them
in Channel Organizer menu, but if you do not like all TV or Radio,
you can enter Delete All menu to choose to delete all TV, RADIO.
• Configuration
Configuration provides individualized system setup function;
you can configure the system according to your own hobby
and demand.
Configuration
TV
System Setup
OSD
Time
Parental Look
OSD
Via OSD option setup, you can set the user interface
display mode according to your own demand. Via the menu
(MENU ->Digital TV ->Configuration ->OSD), you can enter
OSD menu.

EN 15
DVB Operation
OSD
Channel Name New Channel
OSD Trans 10%
OSD Language English
1st Audio Language English
2nd Audio Language English
Time on OSD Off
OSD Theme1 Theme1
All options are listed on the left of the OSD menu, when the cursor
moves on the option in OSD menu, the values corresponding to this
option on the right of the menu, press CH+/CH- key to move upward
and downward to choose the options in OSD menu.
There are following options in OSD menu:
1. OSD Option – sets system menu mode; currently, one mode
is supported.
2. Time on OSD Option – sets whether to display system time
in full-screen play channel. Move the cursor to time on OSD
option, press VOL+/VOL key to choose between On and Off,
the default is Off.
3. Trans option – sets menu transparency, press VOL+/VOL- key
to adjust between 0–60 %.
4. OSD Language option – The system has the user interface
supporting a couple of languages, you can set language
via OSD Language option:
(1) Move the cursor onto OSD Language option, Press VOL-
key to enter OSD Language List.
(2) Press CH+/CH- key choose language.
(3) Press OK key to confirm system interface language
selection, then the setting is effective, and then the
interface language turns into the currently chosen language,
the cursor can move onto OSD Language option on the left.
5. 1st Audio Language option – Press VOL- key to enter the
currently supported Audio Language list, in the Audio Language
list, press CH+/CH key to choose language, press OK key
to confirm.
6. 2nd Audio Language option – Press VOL- key to enter the
currently supported Audio Language list, in the Audio language
list, press CH+/CH key to choose language, press OK key
to confirm.
• TV
TV setup provides convenient TV input mode, you can via menu
(ENU ->Digital TV ->Configuration ->TV) enter TV set.
TV
Channel Name New Channel
Brightness 80%
Contrast 60%
HUE 0
Saturation 0
Aspect Ratio 4:3PanScan
Auto
PAL
NTSC
Display Mode Auto
All options are listed on the left of the menu, when the cursor
moves to the option on the left of the TV menu, the values
corresponding to this option can be displayed on the right
of the menu.
• Display Mode
TV mode can change the mode of the output video, you can
adjust TV mode according to the actual situation of you receiving
equipment.

16 EN
DVB Operation
Aspect Ratio
Video output mode can change the mode of video output,
you can adjust TV mode according to the actual situation
of you receiving equipment.
Brightness
Adjust the system brightness.
Contrast
Adjust the system contrast.
Hue
Adjust the system hue.
Saturation
Adjust the system saturation.
System Setup
System Setup menu can provide convenient system setup, you can
via menu (MENU ->Digital TV ->Configuration ->System Setup)
enter System Setup menu.
System Setup
Channel Name New Channel
LCD Brightness 10%
Area Taiwan
Surround OFF
Display OFF OFF
Standard
Classic
Jazz
POP
EQ Setup Standard
Rock
Time
Via menu (MENU ->Digital TV ->Configuration ->Time), enter time
set.
Time
Channel Name New Channel
GMT Offset 00:00
Summer Time Off
Date 01/29/2006
Time 14:47
Auto
Manual
Time Mode Auto
You can set Timer Mode in Time page: Timer Mode: set time
mode, Date: set date, Time: set time, GMT Offset: set GMT Offset,
Summer Time: set summer time.
Parental Lock
You can revise system Password, you can via menu (MENU ->Digital
TV ->Configuration ->Parental Lock) to enter Parental Lock menu.

EN 17
DVB Operation
Parental Lock
Enter Old Password
Enter New Password
Confirm New Password
Enter password
1. Press the 0–9 number buttons on the remote control to input old
password, the system defaults password as „0000“.
2. If the password is input correctly, the cursor can move onto input
new password option, press 0–9 number buttons on the remote
control to input new 4-digit password.
3. The cursor move confirm New Password option, press 0–9
number buttons press on the remote control to input new 4-digit
password; if it is confirmed the new password is different from
the new Password input, the system will hint to input new
password again, until they are consistent. After the password
is set successfully, the system will hint the success and save
the setting, and the new password will come into effect.
Software Upgrade
You can automatically update the software of the equipment.
The software of the new version can support more areas and more
functions or solve more problems. Via menu (MENU ->Digital TV
->Software Upgrade) enter Software Upgrade menu.
Software Upgrade
Download from USB Database Empty
Download from USB
Update software from USB device or card.
Media Play
The device integrates powerful function to support USB and you can
connect Ex-equipments via the USB. At present, system can support
usual USB media players and upgrade to system software.
This product supports the play of MP3, JPEG and MPEG-4 (AVI).
It can support only the files displaying in the list and the file format
this product plays.
1. Copy media documents to USB.
2. Plug in USB device.
3. Enter device in main menu.

18 EN
DVB Operation
Movie
1. In main menu, press /to choose USB Movie option,
Press OK key to confirm, enter USB main directory.
2. Press OK key to enter next directory, every directory displays
only movie file and folder name.
Press EXIT key to EXIT previous directory:
1. Press CH+/CH- key to choose movie file name.
2. Press OK key to play movies.
3. Press FF key to play movie quickly
(×2, ×4, ×8, ×20, ×1).
4. Press REV key to rewind movie
(×2, ×4, ×8, ×20, ×1).
5. Press SLOW +/- key to slow down movie (1/2, 1/4, 1).
6. Press key to play previous movie, key to play next movie.
7. Press LANGUAGE key to switch between the left and right
channel and stereo.
8. Press PAUSE/STEP key to pause or play.
9. All movies can be replayed after paused during playing.
10. Press EXIT key to exit movie play mode and EXIT
to the file directory.
Music
1. In main menu press CH+/CH- to choose USB Music option,
to choose OK key to confirm, enter USB main directory.
2. Press OK key to enter next directory, every directory can show
music file and folder name only.
3. CH+/CH- key to choose music file name.
4. Press OK key to play music file.
1. Press FF key to play quickly (×2, ×4, ×8, ×20, ×1).
2. Press REV key to rewind music (×2, ×4, ×8, ×20, ×1).
3. Press key to play previous music, press key to play
next music.
4. Press LANGUAGE key to switch between the left and right
channel and stereo.
5. Press PAUSE/STEP key to pause or play music.
6. Press EXIT key to exit the music play mode and EXIT
to the file directory.
Photo
1. In main menu press CH+/CH- to choose USB Photo option,
press OK key to confirm, enter USB main directory.
2. Press OK key to enter next directory, every directory can show
photo file and folder name. Press EXIT key to EXIT to the
previous directory.
3. CH+/CH- key to choose photo file name.
4. Press OK key to play Photo file.
5. Press key to play previous Photo, key to play next Photo.
6. In full-screen play state: Press VOL+/VOL- key to rotate
the photo clockwise/counter clockwise by 90 degrees.
7. Press EXIT key to exit play mode and EXIT to file directory.
Games
If you want to have a rest or to relieve yourself after hard working,
you can play some game attached in the system.
Other manuals for SPV 7766TD
1
Table of contents
Languages:
Other Sencor Portable DVD Player manuals

Sencor
Sencor SPV 7912T User manual

Sencor
Sencor SPV 7768TD User manual

Sencor
Sencor SPV 2918 User manual

Sencor
Sencor SPV 7722M4 User manual

Sencor
Sencor SPV 7707T User manual

Sencor
Sencor SPV 2718 User manual

Sencor
Sencor SPV 2720 User manual

Sencor
Sencor SPV 7910T User manual

Sencor
Sencor SPV 7767DUAL User manual

Sencor
Sencor SPV 8012M4 User manual